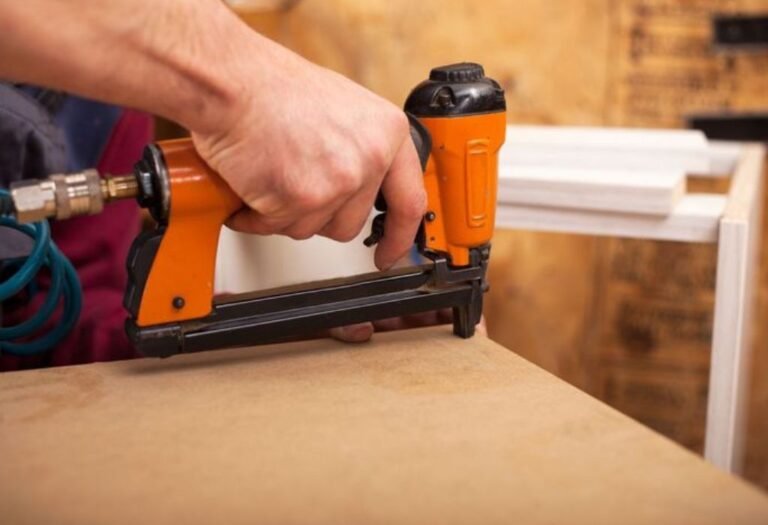
Why Nail Gun Won’t Fire With Air? Troubleshooting Guide
Picture this: you’re in the middle of a project, the final nail needs to go in, and.nothing. Your nail gun just clicks, mocking your efforts. It’s frustrating, right? This guide will help you pinpoint the reason behind that frustrating click, providing solutions to get you back on track. We’ll explore the common issues, from air supply problems to internal malfunctions, so you can confidently diagnose and repair your tool. By the end, you’ll have the knowledge to troubleshoot and maintain your nail gun, saving you time and money. This will improve your Time on Page and reduce your Bounce Rate as the reader will have a complete guide to assist them with fixing their nail gun.
Key Takeaways
- Identify common reasons a nail gun fails to fire with air.
- Learn how to check and adjust the air pressure for optimal performance.
- Understand the importance of lubrication and maintenance for your nail gun.
- Troubleshoot the most frequent internal and external problems.
- Discover how to safely operate and store your nail gun to prevent issues.
- Gain the skills needed to perform basic repairs and maintenance.
Common Reasons Your Nail Gun Won’t Fire
When your nail gun fails to fire, the source of the problem can stem from various areas. The first step involves a basic review of the air supply, the tool’s settings, and the types of nails being used. Are the nails compatible with your specific model? Is the air compressor providing enough pressure? These initial checks can often reveal the problem quickly. Once you’ve ruled out the straightforward solutions, you can start to explore the more detailed, technical issues that might be preventing your nail gun from performing as it should. There are many components, each playing a critical role, so even the slightest issue can cause malfunctions.
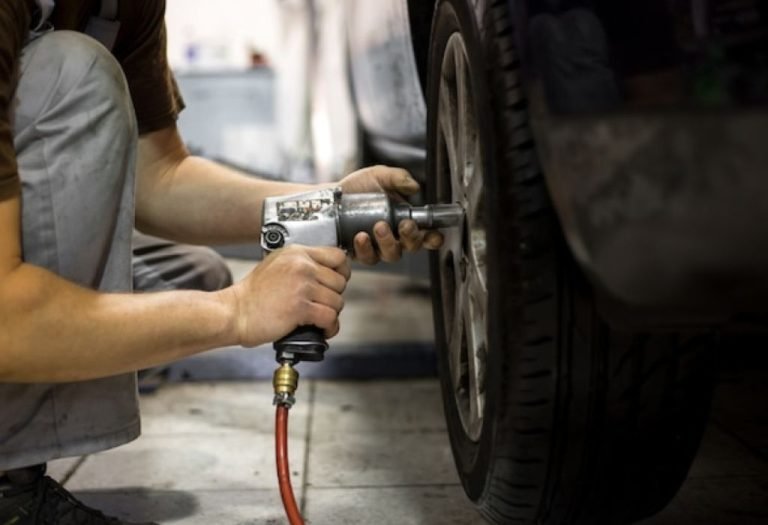
Air Supply Issues
The air supply is a vital component for a pneumatic nail gun; problems here are often the root cause. This involves checking the air compressor, hoses, and fittings. A leaky connection, inadequate pressure, or a compressor unable to keep up with the demand can all lead to your nail gun failing to fire. The air pressure must match the specifications of the nail gun, generally between 70 to 120 psi, so verify that the regulator is set correctly. Also, make sure that the air compressor tank has enough air. A constant, reliable supply of compressed air is critical for both the tool’s effectiveness and its longevity.
-
- Insufficient Air Pressure: Nail guns require a certain air pressure to operate, typically between 70 to 120 psi, depending on the model.
Using inadequate air pressure is a common reason for a nail gun not firing. Check your compressor’s pressure gauge and ensure it’s set within the recommended range. A low-pressure setting means the tool doesn’t have enough force to drive the nails completely. Inspect the air hose for any leaks. A leaky hose will cause a drop in pressure and a failure to fire. If the pressure drops while you’re using the nail gun, there might be leaks in your system.
-
- Air Compressor Problems: A weak or faulty air compressor can’t supply enough air.
A faulty air compressor can manifest in various ways, like inconsistent pressure, slow recovery times, or not reaching the required pressure at all. These issues often mean the compressor can’t maintain the pressure required to drive the nails. Inspect the compressor, looking for any unusual sounds such as a grinding or clicking noise. Check the compressor’s air filter to see if it’s blocked. A clogged filter will reduce the efficiency of the compressor, potentially leading to low air pressure. Make certain to regularly drain the moisture from the tank, as excess water can harm the internal parts.
-
- Leaky Air Hoses and Fittings: Leaks in the air lines cause pressure loss, inhibiting the nail gun.
Leaky air hoses and fittings are a common culprit when a nail gun refuses to fire. Look carefully along the entire length of the hose, from the compressor to the nail gun itself, and check for hissing sounds. Check for bubbles if you apply soapy water to the connections. Also, inspect the fittings where the hose connects to the compressor and the nail gun. Over time, these fittings can loosen or wear out, leading to air leaks. Replace any damaged hoses or fittings immediately to ensure a proper seal. Regular maintenance and inspection of these components are key to keeping your air system leak-free.
-
- Blocked Air Inlet: Debris or blockage at the air inlet of the nail gun prevents air flow.
A blocked air inlet restricts the flow of air into the tool, preventing it from firing. Inspect the air inlet on the nail gun, looking for any debris, such as dust, wood chips, or other particles that might be obstructing the air passage. You can use compressed air or a fine brush to clean out any blockages. Be sure to disconnect the air supply first. A blocked inlet can also cause the nail gun to malfunction, so regular cleaning is key.
Internal Issues Within the Nail Gun
Besides air supply, the inner workings of the nail gun can also prevent firing. Many internal components can fail or become worn over time, impacting performance. These can include the driver blade, firing valve, and O-rings, all critical to the nail gun’s function. The driver blade, for example, is essential for pushing the nails. Its damage or being stuck can cause the gun to malfunction. Similarly, if the firing valve is blocked or faulty, it won’t be able to release the air needed to drive the nail. Routine maintenance is the best approach to finding and preventing problems with these internal parts.
-
- Faulty Firing Valve: The firing valve controls the release of air to drive the nail.
The firing valve is a central component in your nail gun’s operation, responsible for releasing the air that drives the nail. This part can be damaged or blocked. If the valve fails to open, your nail gun won’t fire. Remove the firing valve assembly from your tool, if you’re comfortable doing so, and inspect it for any visible damage. Check for debris that may be obstructing the valve’s movement. You can clean it and reassemble. If damage is apparent, or if cleaning doesn’t work, consider replacing the firing valve. Also, check the firing valve’s seal, which might be worn or cracked, leading to air leaks that prevent the nail gun from working properly. Replacing a worn seal can restore your nail gun’s ability to fire.
-
- Stuck or Damaged Driver Blade: The driver blade pushes the nails into the material.
A jammed or damaged driver blade is a common reason your nail gun won’t fire. The driver blade is the part that strikes and drives the nail. It can jam due to bent nails, debris, or rust. Check by removing the magazine from your nail gun and carefully inspecting the driver blade for any obstruction or damage. Try to manually move the driver blade to see if it moves freely. If it is stuck, gently try to unstick it, but be careful not to damage the blade. If the blade is bent or severely damaged, it will need to be replaced.
-
- Worn or Damaged O-rings: These seals maintain the airtightness of the internal components.
O-rings are essential for maintaining the airtight seal needed for the proper function of your nail gun. Over time, these can dry out, crack, or get damaged. If the O-rings are worn or damaged, the air will leak, reducing the pressure and affecting the performance. To inspect them, disassemble your nail gun according to the manufacturer’s instructions. You can then check each O-ring for any signs of wear, such as cracking or deformation. To
-
- Clogged Air Passages: Blockages in air passages restrict air flow to critical parts.
Clogged air passages inside the tool can restrict the airflow, which is critical for proper operation of your nail gun. Small debris, such as wood chips or dust, can enter these passages and create a blockage, preventing the gun from firing. To clear these, take apart the nail gun to access the air passages. Use compressed air, carefully blowing through each passage to remove any debris. Using a fine brush can also help. Make sure to consult your user manual for the exact locations of the passages in your specific model. After cleaning, reassemble the nail gun and test to see if it now fires correctly.
Nail and Magazine Issues
The type and condition of the nails, together with the magazine of the nail gun, can have a strong impact on its function. Using the incorrect size or type of nails can lead to jams, misfires, or incomplete driving. Also, the condition of the magazine is important. If it’s dirty, damaged, or loaded incorrectly, it can disrupt the feeding of the nails and hinder the firing process. You can prevent these issues by only using the appropriate nails that your nail gun’s instructions recommend, making sure that your magazine is clean and correctly loaded, and inspecting both to make sure they’re in good condition.
-
- Incorrect Nail Type or Size: Using the wrong nails can cause jams or misfires.
Using the wrong nails is a frequent cause of malfunctions. This includes using nails that are the wrong size, type, or gauge for your nail gun model. Check your nail gun’s specifications to determine the correct nail size and type. For instance, some nail guns are made for finishing nails while others are made for framing nails. Using the wrong nails can lead to jams, which prevent the tool from firing, or incomplete driving, where the nails don’t penetrate the material fully. The issue can arise from trying to use a nail gun with nails that are bent or damaged. Regular inspection of the nails before loading them into the magazine can prevent many problems.
-
- Magazine Problems: A damaged or improperly loaded magazine can prevent the nails from feeding.
The magazine is designed to correctly feed nails into the firing chamber. If the magazine is damaged or if you don’t load the nails properly, it can stop the feeding of nails. Examine the magazine for any damage, like dents or obstructions. Make sure you load the nails in the correct order, according to the manufacturer’s instructions. Ensure the nails slide easily and are not sticking or jamming inside the magazine. Clean the magazine with compressed air. A clean, correctly loaded, and well-maintained magazine ensures a steady supply of nails, keeping your nail gun operating without interruption. If there is damage, then consider replacing the magazine.
-
- Jammed Nails: Nails getting stuck in the firing chamber prevent firing.
Jammed nails are a common reason a nail gun stops working. Nails can get jammed for a variety of reasons, including using the wrong nails, a damaged magazine, or simply because of a manufacturing defect. The driver blade can sometimes get stuck on a bent nail. To resolve this, you must first remove the magazine and then try to dislodge the jammed nail carefully. You may need to use pliers or needle-nose pliers to remove it. Once the nail is cleared, inspect the firing chamber for any debris. Ensure the driver blade is in good working order. Always disconnect the air supply before clearing a jam.
-
- Empty Magazine: The nail gun won’t fire if there are no nails.
The most basic reason a nail gun won’t fire is an empty magazine. It sounds simple, but it is a common problem to overlook. Always check the magazine to ensure it has nails. If the magazine is empty, the tool will click, but no nails will be driven. Before assuming a mechanical issue, take a quick peek at the magazine to confirm that it has a sufficient supply of nails. Once the magazine has nails, your nail gun should work properly. Make certain that the nails are loaded in the magazine the right way, so they feed properly.
Maintenance and Lubrication
Regular maintenance and proper lubrication are vital for making your nail gun work at its best. Lubrication keeps the internal parts moving freely, reducing friction and wear, while regular cleaning removes debris that can cause jams or other malfunctions. Follow the manufacturer’s directions for the right lubricants and cleaning procedures. Doing this routinely will increase the lifespan of your tool and prevent many potential issues.
-
- Regular Cleaning: Cleaning removes debris that can cause malfunctions.
Regular cleaning is an essential maintenance task that ensures your nail gun works well. Wood chips, dust, and other debris can enter the tool and cause the driver blade to get stuck. After each use, use compressed air to blow out any debris that may have collected inside the magazine, the firing chamber, and the air inlet. For a more thorough cleaning, take the nail gun apart and remove any built-up residue. Consult your owner’s manual for specific instructions on how to take apart and clean your nail gun. Regular cleaning will extend the life of your tool and keep it firing.
-
- Proper Lubrication: Lubrication reduces friction and wear on internal parts.
Lubrication is a key part of maintaining your nail gun. Friction from the moving parts can cause wear and tear. Apply a few drops of pneumatic tool oil into the air inlet before each use. Operate the tool for a few seconds to let the oil spread. Disassemble your nail gun at least once a year, or as indicated in the user manual, to lubricate the internal components. Use only oil designed for pneumatic tools; other oils can damage the seals or not work correctly. Regular lubrication minimizes friction and helps extend the life of your nail gun, so make sure to check and lubricate your nail gun often.
-
- Storage Practices: Proper storage helps to prevent damage and corrosion.
Proper storage is just as essential as maintenance for maintaining your nail gun in good condition. When you’re not using it, store your nail gun in a clean, dry place to prevent rust and corrosion. You can cover the tool to keep dust away. Detach the air hose from the nail gun before storing it, and make sure to release any remaining air from the tool. Storing the tool in a case or toolbox will protect it from damage. By following these storage practices, you can make sure your nail gun remains in top condition.
-
- Periodic Inspections: Routine checks can detect potential problems early.
Routine inspections are important for spotting and resolving potential issues. Regularly check the air lines for leaks and the magazine for damage or blockages. Examine the driver blade for wear or damage and make certain it moves freely. Listen for any strange sounds, such as grinding or clicking, during operation. If you discover a problem, address it quickly before it worsens. Regularly inspect the internal seals for any sign of damage or wear. Inspections can help you to detect issues early and resolve them quickly.
Troubleshooting Steps for Misfiring
When your nail gun won’t fire, you need a systematic troubleshooting method. Start with the basics: check the air supply, nail type, and the magazine. If these aren’t the issues, then you should examine the more complicated aspects. This involves looking into the internal parts like the driver blade and firing valve. Record your observations, follow the steps, and make adjustments as necessary to isolate the issue. If the nail gun still won’t work, seek expert advice or repair.
-
- Check the Air Supply: Ensure adequate pressure and no leaks.
The first step in troubleshooting any nail gun issue involves the air supply. Check the compressor’s pressure gauge to ensure it’s set within the recommended range, usually between 70 to 120 psi. Make sure that the compressor is running correctly and producing adequate air pressure. Carefully inspect the air hoses and fittings for any leaks. Apply soapy water to the connections and look for bubbles. If any leaks are detected, tighten or replace the affected parts. A well-functioning air supply is the starting point for reliable operation.
-
- Examine the Magazine and Nails: Verify correct nail type and proper loading.
Check the magazine and nails. Make sure you’re using the correct type and size of nails for your nail gun. Refer to your owner’s manual to ensure compatibility. Check the magazine to make sure that the nails are correctly loaded, and that there are no jams or obstructions that could prevent the nails from feeding. Remove the magazine and manually push the nails through to verify smooth movement. A well-loaded magazine with the correct nail type will allow for consistent firing.
-
- Inspect the Driver Blade: Look for damage or obstructions.
If the air supply and the nails seem fine, then inspect the driver blade, the part that strikes the nail. Remove the magazine and carefully check the driver blade for any damage. If the driver blade appears bent, broken, or stuck, it will prevent the nail gun from firing. Try to manually move the driver blade to see if it moves freely within its channel. If it’s stuck, look for any obstructions. You can try to clear a small obstruction with needle-nose pliers. Be careful when working with the driver blade to avoid injury.
-
- Check for Internal Obstructions: Clean air passages and firing chamber.
Internal obstructions can disrupt the proper function of your nail gun. Dirt, debris, or small pieces of wood can find their way inside the tool. You should use compressed air to remove debris. Consult your owner’s manual to pinpoint the location of the air passages and the firing chamber. Use compressed air to carefully blow out any obstructions. Be sure to disconnect the air supply before working on the internal components. By keeping the air passages and the firing chamber clear, you increase the likelihood of your nail gun working properly.
Safety Guidelines and Best Practices
Safety is paramount when working with nail guns. Always wear safety glasses to safeguard your eyes from flying debris, and use hearing protection if the noise is too loud. Before starting any work, disconnect the air supply to prevent accidental firing. Do not point the nail gun at anyone, and handle it like you would any other dangerous tool. Store the nail gun safely, out of the reach of children, and perform maintenance and repairs only when you are confident in your abilities. By prioritizing safety, you’ll protect yourself and others while getting your project done.
-
- Always Wear Safety Glasses: Protect your eyes from flying debris.
When operating a nail gun, wearing safety glasses is a must. During operation, nails can ricochet, and small pieces of material can break free, posing a serious threat to your eyes. Safety glasses must be worn by anyone near the work area, not just the person using the tool. Ensure the safety glasses fit properly and provide complete coverage around your eyes. Make certain that the safety glasses meet the appropriate safety standards. Safety glasses are a simple yet critical way to protect your vision while operating a nail gun.
-
- Disconnect the Air Supply Before Maintenance: Prevent accidental firing.
Disconnecting the air supply is a vital safety practice before performing any maintenance. Even minor tasks, like clearing a jam or adjusting the settings, should start with removing the air hose from the tool. This step eliminates the risk of accidental firing and injuries. Never assume a tool is safe, even if you think the air pressure is turned off. Double-check that the air supply is disconnected. Taking this step is a simple way to prevent accidents.
-
- Never Point the Nail Gun at Yourself or Others: Handle it like a weapon.
Treating your nail gun with the respect due to any tool is essential for your safety and the safety of those around you. Always point the nail gun in a safe direction. Treat the tool with the same regard you’d give a loaded firearm. Never point the nail gun at yourself or anyone else, even if you think it’s unloaded or the air supply is disconnected. Keep your finger off the trigger until you’re ready to drive a nail. By respecting this safety rule, you’ll reduce the chance of accidental injury.
-
- Use the Correct Nails: Ensure proper operation and prevent injuries.
Choosing the right nails for your specific tool and task is not only critical for getting the job done, but it’s also a key safety measure. Using the wrong size or type of nail can lead to jams, misfires, or incomplete penetration. These can create dangerous situations, such as nails ricocheting or the nail gun kicking back unpredictably. Review your nail gun’s manual and use only the nail type and size recommended by the manufacturer. By using the proper nails, you reduce the risk of malfunctions and injuries.
Frequently Asked Questions
Question: Why does my nail gun click but not fire?
Answer: The most likely reasons include insufficient air pressure, a jammed driver blade, or an empty magazine. Check your air compressor and the magazine. Also, examine the driver blade for any obstructions.
Question: How often should I lubricate my nail gun?
Answer: Lubricate your nail gun before each use and disassemble and lubricate internal components at least once a year, or as indicated in the user manual, using pneumatic tool oil.
Question: What’s the best way to clear a jammed nail?
Answer: First, disconnect the air supply. Then, remove the magazine and try to carefully remove the jammed nail with pliers. If the jam is difficult to reach, consult your owner’s manual or seek professional assistance.
Question: What type of safety gear should I wear when using a nail gun?
Answer: Always wear safety glasses to protect your eyes. Also, consider using hearing protection and work gloves for added safety.
Question: How do I store my nail gun when I’m not using it?
Answer: Store your nail gun in a clean, dry place. Remove the air hose and release any remaining air from the tool. Keeping the tool in a case or toolbox will protect it from damage and corrosion.
Final Thoughts
If your nail gun is failing to fire with air, you’re now armed with the knowledge to diagnose the problem. The issues often come down to an inadequate air supply, internal problems, or issues related to the magazine or the nails used. By regularly checking the air pressure, maintaining your tool, and using the correct nails, you can resolve these issues. Don’t let a malfunctioning nail gun halt your progress. By understanding these common issues, you can confidently troubleshoot your tool, make the necessary repairs, and get back to working. Use this knowledge to keep your projects on track and avoid any frustration.

I’m Michael R. Turner, the founder, lead writer, and passionate DIY enthusiast behind 101diytools.com. With years of hands-on experience in home improvement and power tools, I built this platform to share practical tips, in-depth guides, and honest reviews to help DIYers of all skill levels tackle projects with confidence and the right tools.