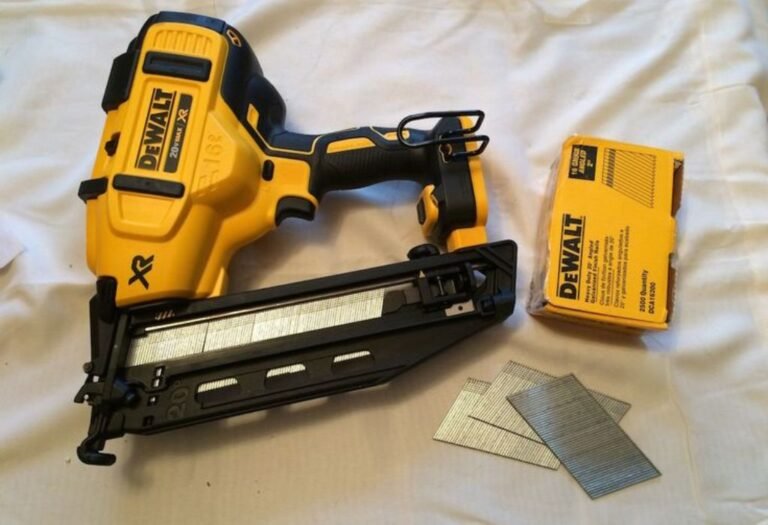
How to Fix Nails Stuck in Nail Gun and Prevent It
Picture this: You’re in the middle of a project, the wood is prepped, and you’re ready to go. You pull the trigger on your nail gun, but instead of a satisfying thwack, you get a frustrating click. Uh oh, the dreaded nails stuck in nail gun issue has struck. It’s a common problem, but thankfully, it’s usually fixable. This post will explore the causes and solutions to this frustrating issue, saving you time and money. You’ll learn how to get your nail gun back in action, preventing future jams. This will also help you identify the common causes and solutions, so you’re ready when it happens.
Key Takeaways
- You will learn the most common reasons why nails get jammed in nail guns.
- You’ll discover how to safely clear a jammed nail gun.
- You can find ways to keep your nail gun from jamming in the future.
- You’ll learn about the different types of nail guns and how their designs affect jamming.
- You can find advice on choosing the right nails for your specific nail gun.
- You will be able to perform regular nail gun maintenance to keep it working well.
Common Reasons for Nails Stuck in Nail Gun
The first step in fixing nails stuck in nail gun is to figure out why it happened in the first place. Several things can cause a jam. Identifying the root cause can prevent future problems. The issue might be the type of nail used, the condition of the tool, or how the tool is used. Let’s explore the most common culprits. This will allow you to determine the exact issue that has caused your nail gun to jam.
Incorrect Nail Size or Type
One of the most frequent reasons for nails stuck in nail gun is using the wrong size or type of nails. Every nail gun is made for specific nail sizes and types. Using nails that are too long, too short, or the wrong gauge can cause a jam. If the nail is too long, it may bend inside the gun. This obstructs the firing mechanism. Nails that are too short won’t reach the wood properly. Using the wrong type of nail, like those with an incompatible head or shank design, can cause a jam. It is essential to check your nail gun’s manual for the right specifications.
-
- Understanding Nail Gauge: Nail gauge refers to the thickness of the nail. Common gauges range from 15 to 23. A 15-gauge nail is thicker than a 23-gauge nail. Framing nail guns usually use larger gauges, like 8 to 10. Finish nail guns use smaller gauges, like 18. Each gauge is designed for a specific job.
Consider this scenario: You’re trying to attach trim with a framing nail gun. The nails are too thick for the trim and may split the wood or jam the gun. Always match the nail gauge to the job and the tool’s instructions.
-
- Nail Length Matters: The nail length must match the thickness of the wood you are fastening. If the nail is too long, it can bend inside the gun or protrude too far through the wood. If it’s too short, it won’t provide a secure hold.
For example, attaching 1/2-inch drywall requires nails that are long enough to penetrate the framing behind it. But they shouldn’t be so long that they damage wiring or other items.
-
- Selecting Nail Types: There are various types of nails, including framing, finishing, brad, and pin nails. Each is designed for a specific task. Framing nails are designed for structural work. Finish nails are designed for trim and moldings. Brads are small and used for delicate work. Using the correct nail type ensures the gun functions properly.
For instance, using framing nails on delicate trim work may split the wood. Choose the nail type that matches the job.
Nail Gun Problems and Mechanical Failures
Another common cause of nails stuck in nail gun involves the tool itself. The nail gun, like any tool, has parts that can wear out or break. Regular maintenance and inspection are vital to prevent jams caused by mechanical issues. These can range from a simple misfire to more complex malfunctions. Here are some of the most common issues.
-
- Damaged Magazine: The magazine holds the nails. It is a critical part of the nail gun. If the magazine is bent, cracked, or otherwise damaged, it might not feed nails properly. This results in jams. Check the magazine often for damage, especially if the nail gun has been dropped or had heavy use.
For example, a cracked magazine on a roofing nailer could cause nails to misfeed, halting the roof work and possibly causing injuries.
-
- Faulty Trigger Mechanism: The trigger mechanism controls the firing action of the nail gun. A damaged trigger can cause the gun to misfire or jam. This could be due to wear and tear. Problems with the trigger can be dangerous. It can lead to accidental firing or prevent the gun from working correctly.
A malfunctioning trigger on a finish nail gun used for baseboards could cause a nail to get stuck in the gun, halting progress. This could also lead to injury.
-
- Worn Piston or Driver Blade: The piston and driver blade are key parts of the firing mechanism. They are responsible for driving the nails. If these parts are worn or damaged, they may not function correctly. The nails may not be driven fully, or they may become jammed.
Consider a framing nail gun used for building a deck. A worn driver blade can cause nails to become stuck, slowing progress and requiring repeated troubleshooting.
Air Pressure and Power Issues
If you’re using a pneumatic nail gun, air pressure is vital for its operation. An insufficient air supply can cause jams, along with other problems. If you use a cordless nail gun, battery issues can affect its performance. This can lead to nails stuck in nail gun and other difficulties.
-
- Low Air Pressure: Pneumatic nail guns need a steady supply of air. If the air pressure is too low, the gun might not have enough power to drive the nails completely. Low air pressure can also cause the nails to jam.
If the air compressor is too small for the job, the pressure may drop. If you are using a framing nail gun, the nails may not be set deep enough. This can also lead to jams.
-
- Air Leakage: Air leaks in the hoses, fittings, or the nail gun itself can lower air pressure. This can lead to a reduction in power and misfires. If air is leaking, the nail gun may struggle to drive nails. It also might jam more often.
For example, a leaky hose on a roofing nailer could cause the gun to malfunction. This can cause frequent jams and slow the pace of the work.
-
- Battery Problems: Cordless nail guns run on batteries. A low or dying battery can lead to problems. The gun may not drive nails completely or at all.
Picture this: You are working on a project with a cordless nail gun. A nearly drained battery will cause the gun to jam repeatedly. This will slow you down and be frustrating.
Clearing Nails Stuck in Nail Gun: Safety First

When you’ve encountered a nails stuck in nail gun situation, safety must be your top priority. Clearing a jammed nail gun can be risky if not done carefully. Follow these steps to clear the jam.
Safety Guidelines Before You Begin
Before you start, safety is key. Improper handling can cause serious injury. Always follow these guidelines to ensure your safety. This is a very important part of the process, and following the rules will help you stay safe.
-
- Disconnect Power: For pneumatic nail guns, disconnect the air hose from the compressor. For cordless nail guns, remove the battery. This prevents accidental firing during the clearing process. This step is the most critical to prevent injury.
For example, if you are clearing a finish nail gun, disconnecting the power source ensures no accidental firing during the procedure.
-
- Wear Protective Gear: Put on safety glasses and gloves. Safety glasses will protect your eyes from flying debris or potential nail discharge. Gloves protect your hands.
Suppose you are working on a roofing project. Safety glasses are crucial when you work to shield the eyes from flying fragments.
-
- Point the Gun Away: Always aim the nail gun away from yourself and others. This is vital to prevent accidental injury if a nail is discharged during the process. If a nail does get discharged, it must not hit you or anyone else.
If you are clearing a nail gun, make sure you keep the nail gun pointed in a safe direction. This will prevent injury.
Steps for Clearing a Jammed Nail Gun
After you disconnect the power and put on your safety gear, you can begin to clear the jam. Here is how to safely clear a jammed nail gun. Following the correct steps will help you resolve the issue efficiently. It will also help prevent damage to the tool.
-
- Access the Jam: Locate the jam clearing mechanism. It is often on the front of the nail gun. The location varies by model. Read the owner’s manual for specific instructions.
For instance, the jam-clearing mechanism on a framing nail gun might be a latch. The latch is on the front of the magazine.
-
- Remove the Magazine: In some cases, you may need to remove the magazine. This will give you better access to the jammed nail. It is usually a matter of releasing a latch or sliding the magazine out.
If you are clearing a brad nailer, removing the magazine gives you clear access. You can see the jammed nail.
-
- Use the Jam-Clearing Tool: Most nail guns include a tool for clearing jams. This tool is usually a thin rod or probe. If a tool isn’t provided, you can use a small, non-marring tool. Insert the tool into the nail gun’s nose to dislodge the jammed nail. Do not use excessive force.
If a nail is stuck in your nail gun, use the tool. Gently push it from the nose of the gun. This will help remove the jammed nail.
-
- Reassemble and Test: Once you’ve cleared the jam, reassemble the nail gun according to the manufacturer’s instructions. Replace the magazine and reconnect the power source. Test the nail gun. Fire a few nails into scrap wood to ensure it is working correctly.
When you are done with a nail gun, make sure it works by testing it. This will help you know the gun is working before you resume your project.
What to Do If the Jam Persists
If the jam persists, don’t force it. Forcing the issue can cause more damage to the tool. Here are the next steps to take.
-
- Consult the Manual: The nail gun manual has specific instructions for clearing jams. It can provide helpful guidance.
Suppose you have trouble clearing a jam. You can refer to your nail gun manual. This guide will provide detailed instructions for clearing the jam.
-
- Inspect for Damage: Examine the nail gun for any damaged parts. A bent driver blade or broken magazine can cause persistent jams. If you see something broken, repair it or replace the part.
When clearing a nail gun jam, inspect the tool for broken parts. These can cause repeated jams and make it harder to clear the nail gun.
-
- Seek Professional Help: If you’re not comfortable with repairing the nail gun, take it to a professional. A qualified technician can diagnose and fix the issue. They can also ensure the nail gun is safe to use.
If the jam is a complex issue, it is a good idea to seek help from a professional. The professional can accurately diagnose the issue. This will prevent further damage.
Preventing Future Jams and Keeping Your Tool Ready
Preventing nails stuck in nail gun is usually about proper care. By taking proactive measures, you can reduce the chance of jams and extend the life of your tool. These include regular maintenance, using the right nails, and storing your nail gun correctly.
Proper Nail Selection and Usage
One of the best ways to prevent nails stuck in nail gun is to use the right nails. Nails that are too long, too short, or the wrong gauge can cause jams. Using the right nails can prevent many issues.
-
- Matching Nail Specifications: Always consult the nail gun’s manual to find the right nail size and type. These specifics will make sure the tool performs as intended.
If you are using a finish nail gun, always follow the specifications for nail type. This will ensure proper function.
-
- Nail Quality: Use high-quality nails. Nails that are bent or poorly made are more likely to cause jams. Good nails ensure smooth operation.
If you are building a deck, using nails of good quality can help prevent jams.
-
- Proper Nail Feeding: Load nails into the magazine correctly. Make sure the nails are aligned. This will allow them to feed smoothly.
When loading a finish nail gun, align the nails carefully. This will prevent jamming and ensure they feed properly.
Maintenance Routines
Regular maintenance will help your nail gun work well. Regular maintenance is a must for the tool’s performance. By cleaning and lubricating your nail gun, you can keep it working. It will also extend the tool’s lifespan.
-
- Regular Cleaning: Clean your nail gun after each use. Remove dust, debris, and any leftover nail fragments. Cleanliness is very important.
Clean your nail gun after any roofing project. This is a good way to maintain its condition.
-
- Lubrication: Lubricate the nail gun parts. Proper lubrication reduces friction. This makes sure the firing mechanism works correctly. Use the lubricant recommended by the manufacturer.
For a framing nail gun, lubricating the moving parts will keep it running smoothly.
-
- Check and Replace Worn Parts: Examine the nail gun for worn or damaged parts, such as the driver blade, piston, or seals. Replace them as needed to avoid potential jams.
For an older nail gun, check parts for wear and tear. Replacing the parts will keep the tool running properly.
Storage and Handling of Nail Guns
How you store and handle your nail gun also affects its performance. Incorrect storage and handling can lead to problems. Proper storage will keep your nail gun in working order.
-
- Storing Your Tool: Keep your nail gun in a clean, dry place. This protects it from the elements. This will also help prevent rust and corrosion.
Store your nail gun in your garage. This will keep the tool protected from moisture.
-
- Safe Handling: Always treat your nail gun with care. Do not drop it or throw it. This will prevent damage.
Handle your nail gun carefully. This will keep the tool running and prevent damage.
-
- Transporting Your Tool: When transporting a nail gun, make sure it is stored correctly. This will protect it from any damage.
When you are moving the nail gun, store it in its case. This will protect the tool.
Nail Gun Types and Jamming: Specific Considerations
Different types of nail guns are designed for different jobs. Each type has its own characteristics, including how they may jam. The design and mechanics vary among these types. Understanding these differences can help you prevent jams.
Framing Nail Guns
Framing nail guns are designed for structural work. These tools are powerful. They use larger nails for tasks like framing walls and building decks. The design and use of framing nail guns can lead to specific types of jamming.
-
- Magazine Design: Framing nail guns use angled or stick magazines. The angled magazines can make it easier to reach tight spaces.
If you are working on a deck project, the angled magazine allows you to reach the corners and edges more easily.
-
- Driving Force: These nail guns use a powerful driving force to penetrate thick wood. The force can cause the nails to bend. This increases the chance of jams.
If you are framing a wall, the force is crucial. This helps ensure the nails are completely driven into the wood.
-
- Jam-Clearing Mechanisms: Framing nail guns have jam-clearing mechanisms, like a latch or a nose piece that you can open. These help remove jammed nails.
If you are working on a building project, knowing the jam-clearing features can help you quickly resolve issues.
Finish Nail Guns
Finish nail guns are designed for fine woodworking projects. They use smaller nails. They also use a more controlled driving force. These nail guns are used for trim work. They are also used for detailed finishing. The smaller nails mean these guns are more prone to jamming.
-
- Nail Size and Type: Finish nail guns use finish nails, brad nails, or micro-pins. The smaller size of the nails makes the nail gun more likely to jam.
If you’re attaching baseboards with a finish nail gun, the smaller nails allow for a clean finish. They are more delicate and prone to jams.
-
- Magazine Design: Finish nail guns often have straight magazines. These magazines feed nails into the firing chamber. This design can affect the way nails jam.
When working on trim, the straight magazine design helps feed nails accurately.
-
- Delicate Operations: Finish nail guns are used for delicate work. The design is less robust than framing nail guns. This makes them more prone to damage.
If you are working on crown molding, remember that the finish nail gun is delicate. The gun should be used with care to prevent jams.
Brad Nail Guns
Brad nail guns are specialized tools designed for fine finishing work. These guns are often used to secure trim. They are designed for delicate tasks that require small nails. The design features affect how these tools might jam.
-
- Nail Size and Type: Brad nail guns use very small brad nails. These nails are very thin, making them prone to bending.
Attaching delicate trim with a brad nail gun means you have to use a very small nail. This makes the tool prone to jamming.
-
- Light Driving Force: The driving force is lighter than that of a framing or finish nail gun. This can result in jams if the nails do not fully penetrate.
When working on delicate projects, the light driving force is crucial. It keeps the nails from splitting the wood.
-
- Jam-Clearing: The jam-clearing mechanisms of brad nail guns are simpler. This may mean that jams are easier to clear.
Brad nail guns require a simple jam-clearing mechanism. It will help clear the tool when working on your projects.
Frequently Asked Questions
Question: What should I do if my nail gun won’t fire?
Answer: First, check the power source: the air compressor, battery, or electrical connection. Check the nail supply, and see if the magazine is empty or if the nails are jammed. Look for any obstructions in the nail gun’s nose or firing mechanism.
Question: How do I know if my nail gun is jammed?
Answer: Common signs of a jammed nail gun include the tool not firing, the nails not exiting, or the driver blade getting stuck in the down position. You may also hear a clicking sound or experience a lack of power when attempting to fire.
Question: What safety gear is required when working with a nail gun?
Answer: Always wear safety glasses or goggles to protect your eyes. Gloves will protect your hands from injury. Ear protection is also a good idea. Make sure to wear clothing that won’t get caught on the tool.
Question: How often should I clean and lubricate my nail gun?
Answer: Clean your nail gun after each use to remove dust and debris. Lubricate the moving parts regularly, following the manufacturer’s recommendations, typically after every few uses or as needed. This will help your tool last longer.
Question: What kind of nails should I use for my nail gun?
Answer: Only use the type and size of nails that are recommended in your nail gun’s manual. Using the wrong size or type of nail can lead to jamming and damage the tool. This is a crucial step.
Final Thoughts
Dealing with nails stuck in nail gun can disrupt your workflow. However, with the right knowledge and some simple steps, you can quickly get back on track. By identifying the common causes of jams, such as using the wrong nails or failing to maintain the tool, you can often prevent them from occurring in the first place. You can safely clear a jammed nail gun by following the right procedures. Proper nail gun maintenance and storage also play a vital role in preventing jams. Whether you are a professional or a DIY enthusiast, understanding the ins and outs of nail gun care ensures that your projects run smoothly. Now you have the insights. Go out there and tackle your projects with confidence.

I’m Michael R. Turner, the founder, lead writer, and passionate DIY enthusiast behind 101diytools.com. With years of hands-on experience in home improvement and power tools, I built this platform to share practical tips, in-depth guides, and honest reviews to help DIYers of all skill levels tackle projects with confidence and the right tools.