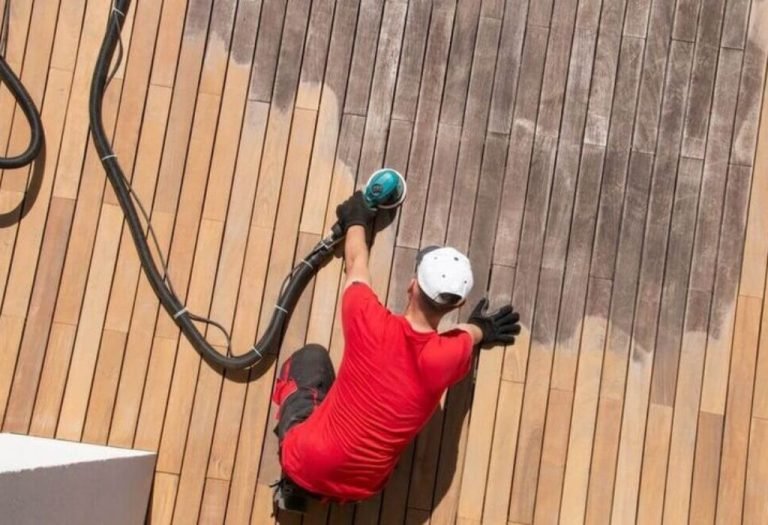
Nail Gun Recoil Explained: A Guide to Minimizing Kickback
Picture this: you’re working on a DIY project, framing a wall. You squeeze the trigger of your nail gun, and bam! – the gun jumps back, almost throwing you off balance. This sudden movement is nail gun recoil, and it can be frustrating, even a bit scary, if you’re not prepared. In this post, we’ll break down the science behind recoil, why it happens, and most importantly, what you can do to control it. You’ll learn how to work safer and more efficiently, saving yourself time and potential injury. Get ready to gain control of your tools and become a nailing pro!
Key Takeaways
- Learn the fundamental physics behind nail gun recoil.
- Identify the different types of recoil and how they affect your work.
- Discover practical techniques to minimize kickback and improve safety.
- Understand the relationship between nail gun type, pressure, and recoil.
- Gain confidence in operating nail guns with increased control.
- Explore the importance of proper stance and technique for recoil management.
Unveiling the Science Behind Nail Gun Recoil
Nail gun recoil is a direct result of Newton’s Third Law of Motion: For every action, there is an equal and opposite reaction. When a nail gun fires, it rapidly accelerates a nail into the wood. This action of driving the nail generates a reaction force, which manifests as recoil, pushing the gun back against the user. The speed and force with which the nail is driven, along with the weight of the gun and the resistance of the wood, influence the intensity of this recoil. Understanding these principles forms the foundation for effectively managing the tool. Many users are surprised to realize how closely this phenomenon relates to basic physics.
The Action-Reaction Principle at Work
As the nail gun fires, several events occur in rapid succession. First, the trigger is pulled, activating a mechanism that allows compressed air or the impact from a combustion engine to strike the nail. This action, pushing the nail into the wood, is the initial force. The equal and opposite reaction is the gun’s kickback. This is because the force used to drive the nail must be countered by an equal force in the opposite direction. It’s a physical law. This process happens in a fraction of a second, which is why the recoil feels so sudden and powerful. The faster the nail is driven, and the harder the wood, the greater the recoil will be.
- Impact Force: The force used to drive the nail.
- Reaction Force: The recoil experienced by the user.
- Momentum: The relationship between the mass of the nail and the speed it travels.
- Wood Resistance: The opposing force encountered from the material.
The amount of recoil you experience is not just about the size of the nail. The type of wood you’re working with plays a big part. Harder woods like oak will resist the nail more, leading to a greater recoil than softer woods like pine. The power source of the nail gun (compressed air, combustion, or battery) and the design of the internal mechanism also affect recoil. Even the size and weight of the nail gun itself have an impact. Consider these factors whenever you’re choosing the right tool for the job.
Factors Influencing Recoil Intensity
Several factors combine to determine how intense the recoil will be. The weight of the nail gun itself is a significant element. A heavier gun will typically exhibit less recoil because of its inertia. Air pressure or the power source setting of the tool also significantly impacts the kickback. Higher pressure generally results in more powerful drives but also more recoil. The type of wood and the length of the nail being used are equally important. Harder woods resist more, increasing recoil, while longer nails need more force.
- Gun Weight: Heavier guns absorb more recoil.
- Air Pressure: Higher pressure means more recoil.
- Nail Length: Longer nails require more force.
- Wood Type: Hardwoods increase recoil.
- Internal Mechanism: Design affects how force is applied.
Consider the example of framing a wall. Using a pneumatic nail gun, you set the air pressure at 90 psi. This provides enough power to drive the nails deep into the wood quickly. As you fire the gun, you feel a strong kickback. Next, you lower the pressure to 70 psi. The recoil is noticeably less, but the nails may not be driven completely flush. Finding the right balance between power and recoil is key for efficiency and safety.
Types of Nail Gun Recoil and Their Effects
Nail gun recoil isn’t just a simple backward push. It can manifest in different ways, each influencing the user’s experience and potentially affecting the quality of work. Recognizing these types of recoil allows you to anticipate the movement and take steps to counteract it. Different designs, like framing nailers and finish nailers, experience and respond to recoil differently. The user must be prepared.
Linear Recoil
This is the most common type of recoil and is a straight backward movement of the gun. This happens when the gun is fired straight into the wood. The force from the nail being driven straight into the wood creates an equal and opposite force pushing the gun directly backward toward the user. Proper stance and firm grip are crucial to manage linear recoil. It often feels like the gun is simply being pushed backward towards you. The severity of linear recoil depends largely on the power of the gun and the resistance of the material being nailed.
- Description: Straight backward movement.
- Cause: Force applied directly backward from the nail.
- Control: Firm grip, proper stance.
- Effect: Potential loss of balance, inaccurate nailing.
For example, if you’re using a framing nailer to attach studs to a bottom plate, the linear recoil will be most apparent. With each shot, the gun will attempt to slide back against your body. This makes a firm grip vital to keep the gun aligned for accurate nail placement. Practice keeping a stable footing and positioning your body to absorb some of the impact. The way you hold the gun affects the direction of the kickback.
Rotational Recoil
Rotational recoil occurs when the gun rotates slightly around a point. It usually happens when the nail encounters resistance, causing the gun to twist. This twisting motion can be subtle, but it can misalign the gun, leading to nails being driven at an angle or missing the intended spot. It is caused by the off-center application of force or variations in the wood’s density. This can be more challenging to control. Consistent grip and paying close attention to the surface being nailed can mitigate the effects of rotational recoil.
- Description: Twisting or rotating of the gun.
- Cause: Uneven resistance, off-center nail driving.
- Control: Strong grip, anticipate rotation, steady the gun with your other hand.
- Effect: Inaccurate nailing, angled nails.
Consider working on a deck where the wood has knots. When the nail hits a knot, it will deflect the nail’s trajectory. This deflection will cause the gun to twist in your hand. This is a clear case of rotational recoil. It’s often necessary to readjust your grip or re-aim the gun after each shot. Remember to keep the gun firmly in place and re-assess your grip between nails. The knot affects the nails. Always be ready to react, keep a good grip, and be prepared to take the hit.
Recoil in Combination
In many real-world scenarios, both linear and rotational recoil occur simultaneously. The nail gun might kick back while also twisting slightly. This combined effect can be more difficult to manage because it requires you to stabilize the gun in multiple axes at the same time. The best approach is to prepare for the worst. Using a firm grip and proper stance will give you a better chance of absorbing and redirecting any movement. Experience is your best teacher. With time, you’ll naturally adjust and learn how to anticipate and control the recoil, ensuring accuracy and safety.
- Description: Combination of linear and rotational movements.
- Cause: Multiple forces acting upon the gun.
- Control: Requires awareness and skillful handling.
- Effect: Complex, makes accurate nailing more difficult.
When assembling furniture, for instance, you might be driving nails into a corner joint. As you fire, the gun may kick back (linear recoil) while also twisting slightly (rotational recoil), especially if the wood is harder or the joint is not perfectly aligned. It becomes crucial to brace the gun firmly, anticipate the recoil, and adjust your stance as needed to maintain control. This highlights how complex the management of nail gun recoil can be.
Techniques to Minimize and Manage Nail Gun Recoil

Controlling nail gun recoil is not a matter of pure strength. It’s about using the correct techniques and approaches. Mastering these techniques will lead to greater precision and reduce fatigue. It will also help you to keep working safely and to avoid common injuries associated with the use of these tools. Practice these methods to become more efficient.
Proper Stance and Grip
Your stance is fundamental to managing recoil. Stand with your feet shoulder-width apart, one foot slightly ahead of the other. This position provides a stable base and allows you to absorb the force of the recoil. Your grip should be firm and consistent. Wrap your hand securely around the handle, and maintain control of the gun without excessive tension. Avoid gripping too tightly, as this can tire your hand and make it more difficult to react to unexpected movements. Your body position plays a big part in recoil control.
- Stance: Shoulder-width apart, one foot forward.
- Grip: Firm but not too tight.
- Arm Position: Keep arm relaxed.
- Body Alignment: Position yourself to receive the kickback.
An example of effective stance and grip: When building a fence, stand with one foot a bit forward and brace yourself against the post with your non-dominant hand. Your dominant hand, holding the nail gun, should have a firm but relaxed grip. As you drive each nail, the staggered stance will help absorb the recoil, while your grip maintains control of the gun. Remember to adjust your stance as needed, depending on the angle and position of the work.
Pressure and Angle Adjustments
Adjusting the air pressure or power setting of your nail gun can significantly impact recoil. Generally, using the lowest pressure that still allows the nails to be driven flush is best. This strategy reduces kickback without sacrificing the quality of the finish. The angle at which you hold the gun is just as critical. Holding the gun perpendicular to the surface minimizes the force that the gun has to handle. This also helps reduce the impact of recoil. Slight changes in these factors can make a big difference.
- Pressure Settings: Use the lowest setting possible.
- Angle of Approach: Perpendicular to the surface.
- Nail Selection: Choose the right nail size.
- Surface Contact: Make sure the gun is flat against the surface.
To illustrate: When installing crown molding, you can start by setting the nail gun’s pressure at the minimum recommended level for the nail length you’re using. Hold the gun at a 90-degree angle to the molding and apply firm pressure against the surface. If the nails don’t drive flush, increase the pressure gradually until they do. This method ensures both a secure attachment and the least amount of recoil.
Using Proper Tool Maintenance
Keeping your nail gun in good shape is essential for minimizing recoil and ensuring safe operation. Clean and lubricate your gun regularly. A well-maintained tool runs more smoothly, reducing the friction that can contribute to excessive kickback. Examine your gun for any worn or damaged parts. Replace any components that appear damaged or that are affecting the performance of the gun. Neglecting maintenance can worsen recoil and create safety concerns.
- Cleaning: Clean your nail gun after use.
- Lubrication: Keep moving parts well lubricated.
- Inspection: Check for worn parts.
- Repair: Replace damaged components.
Imagine working on a siding project. You begin to notice increased recoil. After checking, you discover the gun is not well-lubricated and there is a lot of buildup. Taking it apart to clean and lubricate the tool, while also replacing worn seals, can have a noticeable impact. After this maintenance, the gun will drive nails more smoothly, reducing the recoil you experience. It is important to know your tools.
Choosing the Right Nail Gun: Impact on Recoil
Not all nail guns are created equal, and the type you choose significantly affects the amount of recoil you will experience. Different guns are designed for different tasks, and their internal mechanisms, power sources, and sizes all play a role in kickback. Consider these elements when deciding which nail gun is right for the job and what safety precautions you need to take. The right tool will have a major impact.
Types of Nail Guns and Their Recoil Characteristics
Framing nailers are generally the most powerful, built to drive large nails into tough materials quickly. This power comes with increased recoil. Finish nailers are lighter and designed for more delicate work, so they generally have less recoil than framing nailers. Brad nailers use very small nails and typically have minimal recoil. Each type of gun is designed for a particular function, and each experiences recoil in a distinct way. Consider the type of projects you typically perform. Your typical projects should influence your choice of tool.
| Nail Gun Type | Typical Use | Recoil Level | Notable Features |
|---|---|---|---|
| Framing Nailer | Framing walls, building decks | High | High power, drives large nails. |
| Finish Nailer | Installing trim, baseboards | Moderate | More precision, smaller nails. |
| Brad Nailer | Light trim work, delicate tasks | Low | Smallest nails, minimal recoil. |
For example, if you’re building a deck, a framing nailer is the appropriate choice for the framework. However, expect significant recoil. Conversely, when installing baseboards, a finish nailer is more suitable, as the nails are smaller, and the recoil will be less. This choice will give you the right balance between power and control.
Power Sources and Their Influence
Nail guns are powered by various means, including compressed air (pneumatic), battery (cordless), and combustion (fuel-powered). Pneumatic nail guns are the most common. They are known for their consistent power, but require a compressor. Battery-powered guns offer convenience but may have slightly less consistent power. Fuel-powered nail guns can be very powerful but tend to produce the most recoil. Each type of power source impacts the balance of power and the amount of kickback. Each has advantages and disadvantages.
- Pneumatic: Requires a compressor, consistent power.
- Battery-Powered: Cordless, less consistent, less recoil.
- Fuel-Powered: Most powerful, highest recoil.
- Power Settings: Adjustable power settings on some models.
Consider a professional carpenter who regularly works in various locations. A pneumatic nail gun provides the power needed for framing and sheathing. But, the need for an air compressor can limit their mobility. Battery-powered guns are more portable, offering convenience without the cord. Finally, a fuel-powered nail gun can be advantageous for heavy-duty work in areas without electricity. Consider your needs and priorities.
Gun Features to Consider for Recoil Control
Some nail guns are made with design elements that help control recoil. Look for models with an adjustable depth of drive, which enables you to set the nail depth. This can help you to reduce the force required and therefore, kickback. Some guns have anti-vibration features that absorb some of the impact. The weight and the ergonomic design of the handle can also impact control. Consider the features of the tool, to find one that supports your preferred methods of operation.
- Anti-Vibration Design: Absorbs some kickback.
- Adjustable Depth: Controls nail depth and force.
- Ergonomic Grip: Improves comfort and control.
- Weight: Heavier guns tend to have less recoil.
When shopping for a nail gun to frame a shed, seek out models with adjustable depth and anti-vibration features. The adjustable depth lets you reduce the power. The anti-vibration feature will further reduce the effect of the tool’s recoil. Always read reviews and compare models before making a purchase. The right tool and correct use are important.
Best Practices: Safety First
Safety should always be the top priority when working with nail guns. Understanding the potential dangers of kickback and taking the right precautions can prevent injuries and help you work more safely. Proper protective gear, combined with mindful practices, allows you to enjoy the benefits of nail guns while minimizing the risks. Safety must always come first.
Safety Gear to Use
Always wear safety glasses to protect your eyes from flying debris. Wear ear protection to reduce the noise from the gun. Gloves offer a better grip, reducing the risk of the gun slipping. Sturdy footwear helps keep your footing. Clothing should be fitted so that it does not become caught in the moving parts of the tool. Every piece of protective equipment contributes to a safer working environment, and the user’s focus on the job at hand.
- Eye Protection: Essential to prevent eye injuries.
- Hearing Protection: Protects against noise exposure.
- Gloves: Improve grip and hand protection.
- Appropriate Clothing: Prevents snagging.
Consider: When installing siding, wear safety glasses, hearing protection, gloves, and sturdy work boots. This will shield your eyes from debris, guard your hearing from loud noises, improve your grip, and provide a stable base, minimizing the chances of injury. Be sure to check your equipment.
Common Risks and How to Prevent Them
A common risk is accidental firing. Never point the nail gun at yourself or another person. Always remove the battery or disconnect the air hose before performing maintenance or when the gun is not in use. Another common risk is recoil-related injuries, like a wrist or arm strain. Manage recoil using the methods we’ve already covered. Always be aware of your surroundings, and don’t operate the gun when tired or distracted. The focus should be on the task.
- Accidental Firing: Never point the gun at yourself or others.
- Recoil Injuries: Use correct stance and grip.
- Unforeseen Obstacles: Examine the work surface before nailing.
- Fatigue: Take breaks to maintain focus and prevent errors.
For example, when framing a wall, make sure to inspect the wood for hidden objects, such as metal studs or electrical wiring. Also, take breaks. This helps avoid potential injuries from recoil and ensure accuracy and efficiency. Being careful is very important.
Training and Best Practices
Before using a nail gun, read the manufacturer’s instructions. Practice on scrap wood before starting a project. Take a class if you can. Develop a standard procedure for using the nail gun to promote safety and efficiency. This includes regularly checking the tool for wear and tear, and developing a process for dealing with jams. It’s best to always proceed with caution. This makes for safer and more productive work.
- Read the Manual: Understand the tool’s specifications and safety precautions.
- Practice: Develop your skills on scrap wood.
- Maintenance: Keep the tool in good working condition.
- Awareness: Be alert to your surroundings and any potential hazards.
If you’re new to using a nail gun, take a class. This will give you hands-on experience and will show you some of the methods we’ve already discussed. Always practice using scrap wood. This will increase your confidence and develop your skills before starting any major project. This will keep you safe.
Frequently Asked Questions
Question: Why does a nail gun have recoil?
Answer: Nail gun recoil is a result of Newton’s Third Law of Motion. When the gun fires a nail, the force that drives the nail into the wood causes an equal and opposite reaction, which is the kickback experienced by the user.
Question: What’s the difference between linear and rotational recoil?
Answer: Linear recoil is a straight backward movement of the gun. Rotational recoil involves the gun twisting or rotating, typically caused by the nail hitting an object or an inconsistent wood surface.
Question: How can I minimize nail gun recoil?
Answer: You can minimize recoil by using a firm grip, maintaining a stable stance with your feet shoulder-width apart, using the lowest pressure setting that gets the job done, and keeping your nail gun in good working condition.
Question: What safety gear should I use when operating a nail gun?
Answer: Always use safety glasses to protect your eyes, hearing protection, gloves for better grip, and appropriate clothing to prevent entanglement.
Question: How does the type of nail gun affect recoil?
Answer: Framing nailers generally produce more recoil because they use high power, while finish and brad nailers have less recoil due to using smaller nails and less force.
Final Thoughts
Mastering nail gun recoil is all about understanding the physics involved and adapting your technique. We’ve explored the various types of kickback, the factors that influence them, and the steps you can take to manage them. By understanding the principles and the available techniques, you can work more safely and efficiently. Remember, a good stance, a firm grip, and appropriate settings are your best weapons against kickback. Proper maintenance will help keep your tools functioning at their best and reduce recoil. Go ahead and start practicing these methods to make every nailing project a success and increase your confidence when you are nailing!

I’m Michael R. Turner, the founder, lead writer, and passionate DIY enthusiast behind 101diytools.com. With years of hands-on experience in home improvement and power tools, I built this platform to share practical tips, in-depth guides, and honest reviews to help DIYers of all skill levels tackle projects with confidence and the right tools.