Top Nail Gun Maintenance Tips You Need to Know Now
Proactive and consistent maintenance is paramount for ensuring your nail gun’s optimal performance, longevity, and safety. This involves regularly cleaning internal components to prevent jams, properly lubricating moving parts, and frequently inspecting for wear, damage, or air leaks. Adhering to these simple, vital tips will significantly extend your tool’s lifespan and prevent costly repairs, keeping you working efficiently.
Hey there, fellow DIY enthusiast and professional alike! Let’s talk about something that often gets overlooked until it’s too late: nail gun maintenance tips. Remember that sinking feeling when your trusty nail gun suddenly jams, misfires, or worse, stops working mid-project? It’s not just frustrating; it can throw off your entire schedule and even cost you a hefty repair bill.
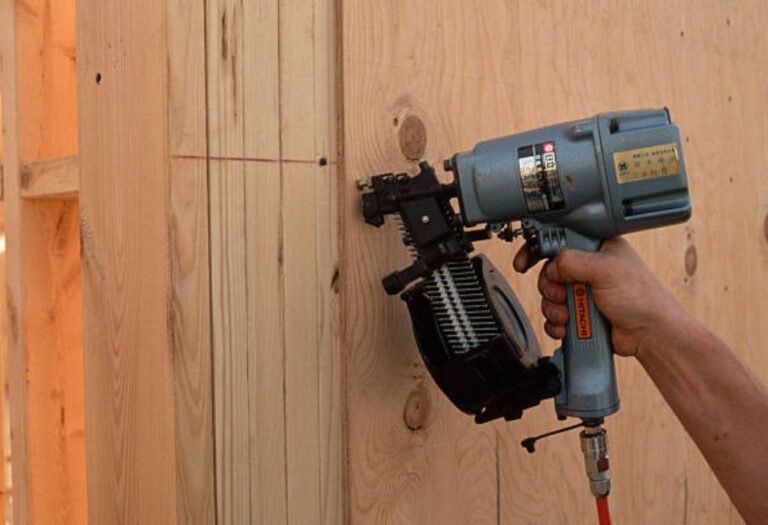
I’ve been there. I once neglected my go-to framing nailer, thinking it was built like a tank and would just keep going. One dusty, damp week in the workshop later, it started acting up – sluggish, spitting nails, and eventually, a full-blown internal leak. That experience taught me a valuable lesson: a little preventative care goes a long, long way. Just like a car needs an oil change, your nail gun, whether it’s a pneumatic workhorse or a cordless marvel, thrives on proper attention.
Taking care of your nail gun isn’t just about extending its lifespan, although that’s a huge benefit. It’s also about ensuring consistent performance, boosting your efficiency, and most importantly, maintaining safety. A well-maintained nail gun is a predictable and reliable tool. So, let’s dive into the top nail gun maintenance tips you need to know now to keep your tool firing perfectly every time.
Key Takeaways
- Clean regularly: Clear debris from the nose, magazine, and air inlet.
- Lubricate daily: Add pneumatic tool oil to the air inlet before each use.
- Maintain air supply: Ensure dry, clean air by regularly draining your compressor.
- Inspect for wear: Routinely check O-rings, seals, and driver blades for damage.
- Use quality fasteners: Prevent jams and reduce wear with correct, clean nails.
- Store correctly: Protect your tool from moisture and dust in a safe place.
📑 Table of Contents
The Daily Ritual: Basic Checks Before and After Use
Think of this as your nail gun’s warm-up and cool-down routine. These simple steps take minutes but can prevent hours of frustration later on. It’s one of the most fundamental nail gun maintenance tips you’ll ever get.
Inspect for Wear and Tear
Before you even load a strip of nails, take a good look at your nail gun. Are there any visible cracks in the housing? Is the trigger moving freely? Check the nosepiece for excessive wear or damage, as this can affect nail placement. For pneumatic models, examine the air hose and fittings for any nicks, cuts, or loose connections. A damaged hose can lead to air leaks, reducing power and potentially posing a safety hazard.
Keep it Clean (Exterior)
After a day of work, especially if you’re in a dusty environment, wipe down your nail gun. Dust, sawdust, and debris can accumulate on the exterior and eventually work their way into internal components. A quick wipe with a clean, dry cloth is usually sufficient. Pay attention to vents and crevices where dust loves to hide.
Check Air Fittings and Hoses
For pneumatic nail guns, the air system is its lifeblood. Ensure all quick-connect fittings are secure and free of leaks. A leaky fitting isn’t just inefficient; it can also make your compressor work harder and wear out faster. Periodically check the hose for any soft spots or bulges, which could indicate a weakness.
Lubrication is Key: Oiling Your Pneumatic Nail Gun

This tip is specifically for pneumatic nail guns, and it’s arguably one of the most critical nail gun maintenance tips for these models. Just like your car’s engine needs oil, your nail gun’s internal mechanisms need lubrication to operate smoothly and prevent friction-induced wear.
Why Oiling Matters
The compressed air that powers your nail gun also carries moisture. Over time, this moisture can lead to rust and corrosion of internal metal parts. Oil creates a protective barrier, preventing rust and ensuring that pistons and O-rings move freely. Without proper lubrication, these parts can seize up, leading to misfires, reduced power, and eventually, tool failure.
The Right Oil, The Right Amount
Always use pneumatic tool oil. This isn’t just any oil; it’s specifically formulated for air tools. Avoid using motor oil, WD-40, or other lubricants, as they can damage the internal seals and components. As for the amount, typically 2-3 drops are sufficient before each use. More isn’t always better; too much oil can lead to sludge buildup.
How and When to Oil
The best time to oil your pneumatic nail gun is right before you connect it to the air compressor at the start of your workday. Disconnect the air hose, add 2-3 drops of pneumatic tool oil directly into the air inlet (where the air hose connects), then reconnect the hose and fire a few nails into a scrap piece of wood. This distributes the oil throughout the tool’s internal components. If you’re working for extended periods, especially in dry conditions, a few more drops mid-day can be beneficial.
Keeping it Clean: Beyond the Surface
While external cleaning is good, sometimes your nail gun needs a deeper dive to stay in top shape. This aspect of nail gun maintenance tips focuses on internal cleanliness.
Clearing Jams Safely
Jams happen, even to the best of us. The most important rule here is safety. Always disconnect your nail gun from its power source (air hose for pneumatic, battery for cordless) before attempting to clear a jam. Follow your manufacturer’s instructions for clearing jams, which usually involves opening the nosepiece latch. Use a pair of pliers or a screwdriver if necessary, but avoid excessive force that could damage components. Never try to force a nail out by firing the gun again.
Debris Removal from Magazine and Nose
Dust, wood chips, and small pieces of nail strips can accumulate inside the magazine and around the driver blade. This buildup can impede the smooth feeding of nails and affect the firing mechanism. With the power source disconnected, regularly inspect and clean these areas. You can use a soft brush, compressed air (cautiously, and wear eye protection!), or even a vacuum cleaner to remove loose debris.
Air Filter Maintenance (Compressor)
While not directly part of the nail gun, your air compressor’s air filter plays a crucial role in preventing debris from entering your pneumatic tools. A dirty air filter reduces airflow and can allow contaminants into your nail gun. Check and clean or replace your compressor’s air filter regularly according to its manual. A clean air filter means cleaner air reaching your nail gun, reducing internal wear.
Storage and Environmental Factors
How you store your nail gun significantly impacts its longevity and performance. Don’t underestimate these nail gun maintenance tips related to its downtime.
The Right Storage Spot
Always store your nail gun in a clean, dry place. Its original carrying case is often the best option, as it’s designed to protect the tool from impacts and environmental elements. Avoid leaving it exposed to the elements or in areas prone to humidity and temperature fluctuations.
Protecting Against Moisture and Rust
Moisture is the enemy of metal. If you’ve been working in a damp environment, ensure your nail gun is completely dry before storing it. For pneumatic tools, running a few drops of pneumatic oil through it after a damp job can help prevent internal rust. Consider using desiccant packs in your tool case if you live in a particularly humid climate.
Dealing with Extreme Temperatures
Extreme cold can make rubber seals brittle and cause issues with O-rings, leading to air leaks or reduced performance. Extreme heat can also degrade seals and lubricants. Try to store your nail gun in a temperature-controlled environment, avoiding unheated garages in winter or direct sunlight in summer for extended periods.
Regular Deep Dives: Scheduled Inspections and Component Checks
Beyond the daily routine, your nail gun needs periodic, more thorough inspections. These advanced nail gun maintenance tips help catch problems before they become major.
Fastener Guide and Driver Blade
The fastener guide (the part that directs the nail) and the driver blade (the part that pushes the nail) endure a lot of stress. Over time, they can become worn, bent, or chipped, leading to inconsistent nail depth or misfires. Disconnect power, visually inspect them for damage. If they show significant wear, they may need to be replaced. Check your user manual for instructions on how to access and inspect these parts.
O-Rings and Seals
For pneumatic nail guns, O-rings and seals are critical for maintaining air pressure. If you notice a drop in power, sluggish operation, or air leaking from unexpected places, worn O-rings are often the culprit. Replacing these requires a bit more mechanical aptitude, but kits are available. If you’re unsure, a professional service is always a good idea.
Trigger and Safety Mechanisms
Always test your nail gun’s safety mechanisms. The contact trip (the part that depresses against the workpiece before firing) should move freely and activate correctly. The trigger should have a clear engagement and disengagement. Any stickiness or malfunction here is a serious safety concern and should be addressed immediately. Never use a nail gun with a compromised safety feature.
Nail Gun Maintenance Checklist & Schedule
To help you keep track of these essential nail gun maintenance tips, here’s a simple schedule:
- Before Each Use:
- Inspect for external damage (housing, hose, fittings).
- Wipe down exterior.
- Add 2-3 drops of pneumatic tool oil (for air tools only).
- After Each Use:
- Wipe down and clean exterior.
- Clear any debris from magazine and nosepiece.
- Store properly in a clean, dry place.
- Monthly or Bi-Annually (depending on usage):
- Deep clean magazine and nosepiece.
- Inspect fastener guide and driver blade for wear.
- Check O-rings and seals for pneumatic tools (look for cracks, dryness).
- Test all safety mechanisms.
- Clean/replace compressor air filter (if applicable).
- Drain air compressor tank.
- Annually:
- Consider professional service, especially if you notice persistent issues.
- Replace significantly worn parts.
So there you have it – a comprehensive guide to keeping your nail gun in peak condition. Implementing these nail gun maintenance tips isn’t just about preserving your tool; it’s about investing in your productivity, your safety, and the satisfaction of a job well done. A little effort upfront saves a lot of headaches (and money!) down the line. Treat your nail gun right, and it will be your reliable partner for years to come.
Frequently Asked Questions
How often should I perform general nail gun maintenance?
For regular users, a quick clean and lubrication after every few uses or at least once a week is recommended. If you use your nail gun infrequently, a thorough check before and after each project is sufficient to ensure it operates reliably.
What type of oil should I use for my nail gun and where do I apply it?
Always use a non-detergent pneumatic tool oil specifically designed for air tools. Apply 5-10 drops directly into the air inlet before each use if it’s a pneumatic nail gun, allowing it to lubricate internal O-rings and moving parts.
How can I prevent common nail gun jams and misfires?
To minimize jams, ensure you’re using the correct nails for your specific nail gun and that they are free from damage or rust. Regularly clean the magazine and nosepiece of debris, and check that the air pressure is set correctly for optimal performance.
What are the signs that my nail gun needs professional servicing or more intensive maintenance?
Look out for signs like a significant drop in power, inconsistent firing, air leaks from seals or connections, or nails failing to set properly. These symptoms often indicate worn internal components that require more advanced repair beyond routine nail gun maintenance.
What’s the best way to store my nail gun to ensure its longevity?
Always store your nail gun in its original case or a protective toolbox in a clean, dry environment away from extreme temperatures. For pneumatic models, disconnect the air hose and release any residual air pressure before storage to prevent wear on seals.
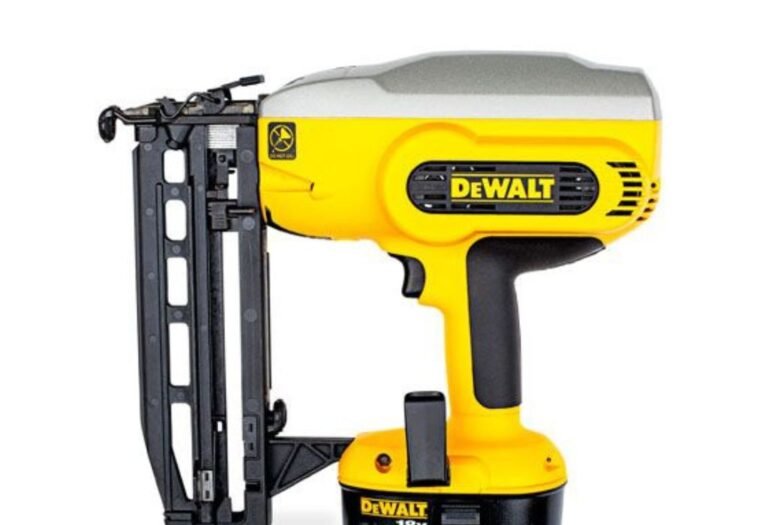
Are there specific maintenance tips for cordless nail guns, especially regarding batteries?
For cordless nail guns, always keep battery contacts clean and store batteries in a cool, dry place, partially charged for best longevity if not used frequently. Avoid fully discharging lithium-ion batteries and follow manufacturer guidelines for charging cycles.

I’m Michael R. Turner, the founder, lead writer, and passionate DIY enthusiast behind 101diytools.com. With years of hands-on experience in home improvement and power tools, I built this platform to share practical tips, in-depth guides, and honest reviews to help DIYers of all skill levels tackle projects with confidence and the right tools.