How to Use a Power Sander for Smooth Wood Finishes
Sanding wood by hand can be one of the most tiring and time-consuming parts of any project. The aching arms, uneven results, and endless dust often turn a simple task into a frustrating experience.
Many DIYers and professionals face the same problem — how to achieve a perfectly smooth surface without spending hours struggling for consistency.
This is where a power sander changes everything. Designed for precision and speed, it replaces manual labor with controlled power, producing flawless surfaces in a fraction of the time.
Whether preparing furniture for painting or refinishing a hardwood tabletop, the difference in quality is instantly visible.
According to Pro Tool Reviews, a random orbit sander can cut surface preparation time by up to 70% compared to hand sanding.
Another study from Wood Magazine highlights that using a proper grit sequence with a power sander results in a 40% smoother finish and fewer visible scratches.
These numbers prove that understanding how to use this tool properly isn’t just about convenience — it’s about achieving professional-grade craftsmanship.
But learning how to use a power sander goes beyond turning it on and moving it around. Each motion, grit level, and sanding technique affects the final result, from the smoothness of the surface to how well paint or stain adheres.
Even the choice of tool type — belt, orbital, or detail — can make a big difference in efficiency and finish quality.
What Is a Power Sander and Why It Improves Finish Quality
A power sander is an electrically powered tool designed to smooth, polish, or remove material from a surface using an abrasive pad or belt.
It operates by moving sandpaper at high speeds, allowing consistent pressure and motion that hand sanding can never achieve. The result is a flawless, even surface that’s ready for painting, staining, or sealing in far less time.
In woodworking, metal fabrication, and home improvement projects, a power sander is valued for both its speed and precision.
By maintaining uniform motion and removing imperfections quickly, it saves energy while delivering a level of smoothness that defines professional craftsmanship.
Motions, Abrasives, and Dust Control
Different sanders use unique motions to achieve specific results. Belt sanders rely on continuous rotation for heavy material removal, while random orbit sanders combine circular and elliptical movements to prevent swirl marks. Detail or sheet sanders use vibration to refine tight corners or intricate surfaces.
What motions do power sanders use?
They use circular, orbital, or belt-driven motion depending on the tool type and desired finish.
Why does grit progression matter?
Starting with coarse grit removes imperfections, while finer grits refine the texture for a silky-smooth surface.
How does dust collection improve results?
Effective dust extraction keeps the surface visible, prevents clogging, and reduces airborne particles for a cleaner finish.
Can pressing harder speed up sanding?
No. Excessive pressure creates heat, burns the wood, and causes swirl marks — letting the tool do the work is key.
What materials can a power sander handle?
It’s ideal for wood, but with proper abrasives, it can also smooth metal, plastic, or painted surfaces.
Types of Power Sanders and When to Use Each
Power sanders come in several types, each built for a specific purpose. Choosing the right one depends on the material, surface size, and desired finish. Using the wrong type can leave deep scratches or uneven marks, while the right one delivers a perfectly smooth, professional result.
The most common types include belt sanders, random orbit sanders, and sheet or detail sanders. Understanding their unique strengths helps you match the tool to your project and avoid costly surface mistakes.
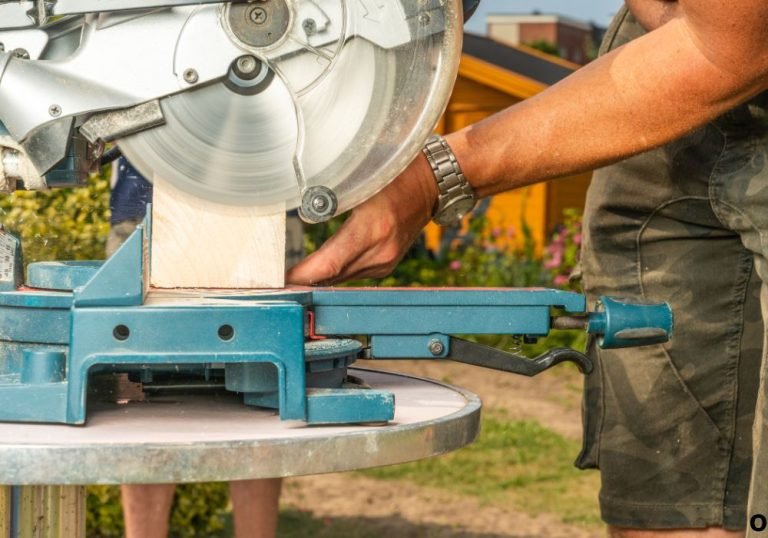
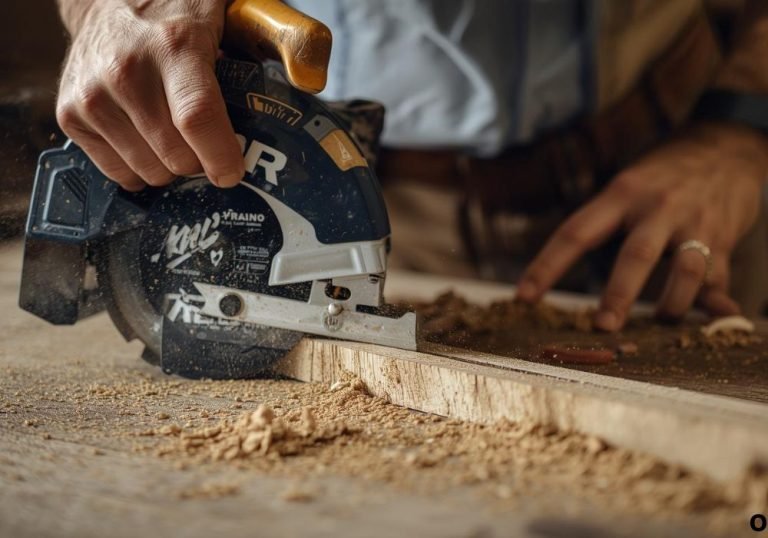
Belt Sanders — For Heavy Material Removal
Belt sanders are powerful tools designed for quick and aggressive sanding. They use a looped abrasive belt that moves continuously over two drums, removing large amounts of material in seconds.
When should a belt sander be used?
It’s best for flattening boards, removing old finishes, or leveling uneven wood surfaces.
Can it be used for fine finishing?
No. It’s too aggressive for delicate work and may gouge soft wood if not handled carefully.
What grit should you start with?
Use 60–80 grit for stripping, then progress to 120 grit before switching to a finer sander.
How do you prevent surface damage?
Keep the sander moving steadily along the grain and avoid staying in one spot.
Is a belt sander suitable for beginners?
Yes, but practice on scrap wood first to learn proper pressure and control.
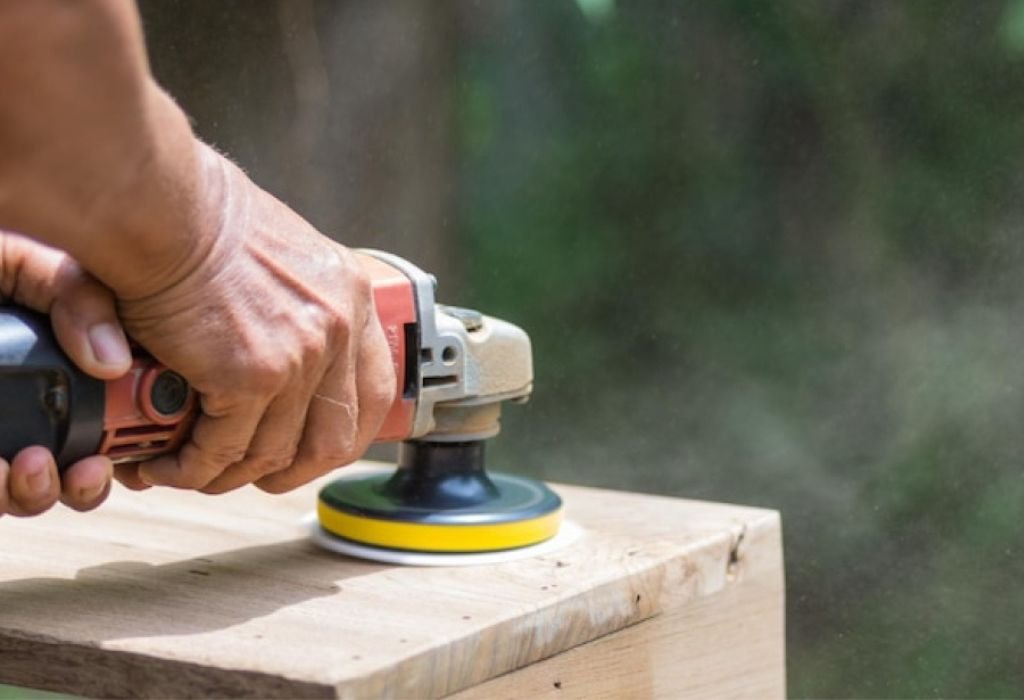
Random Orbit Sanders — For Smooth, Versatile Finishes
Random orbit sanders are the go-to tools for most finishing jobs. Their dual spinning and oscillating motion reduces swirl marks and produces consistent results across flat or curved surfaces.
What is a random orbit sander best used for?
It’s ideal for furniture refinishing, smoothing tabletops, or preparing wood for paint and stain.
Why is it better for finishing?
Its random motion blends sanding patterns seamlessly, preventing visible scratches.
What materials can it handle?
It works well on wood, metal, and plastic, as long as the proper grit and pad are used.
What speed should you use?
Low speed for delicate surfaces and high speed for faster material removal.
Are dust collection systems important?
Yes. Good extraction keeps air cleaner and improves the quality of your finish.
Sheet and Detail Sanders — For Precision Work
Sheet and detail sanders are lightweight, precise tools designed for tight areas, corners, and finishing touches. They use rectangular or triangular sanding pads that vibrate rapidly, allowing controlled surface refinement.
When should these be used?
They’re perfect for fine woodworking, trimming, or sanding intricate patterns and edges.
Are they powerful enough for large jobs?
Not usually. They’re best suited for detail work rather than heavy material removal.
What grit works best?
Use medium to fine grit, such as 150–220, for final smoothing or between coats of finish.
Can they remove old paint?
Yes, but slowly. Use coarse grit and patience for best results.
Why are they popular among furniture makers?
They deliver smooth, precise results in areas where larger sanders can’t reach.
How to Prepare Before Using a Power Sander
Preparation is one of the most important steps when learning how to use a power sander effectively.
A well-prepared workspace, the right setup, and proper safety measures can significantly improve sanding quality and tool performance. Skipping this step often leads to uneven finishes, damaged wood, or even safety hazards.
Before starting, make sure your area is well-lit, clean, and properly ventilated. Always wear personal protective equipment such as safety glasses, a dust mask, and ear protection to safeguard against noise and airborne dust.
Choose and Mount the Right Sandpaper
Selecting the correct abrasive material determines how smooth or aggressive your sanding will be. Using the wrong grit or paper type can scratch or burn the surface.
How do you select the right sandpaper grit?
Start with coarse grit (60–80) for heavy removal, move to medium (120–150) for leveling, and finish with fine (180–220) for polishing.
Why does grit progression matter?
It prevents deep scratches and ensures each sanding stage refines the previous one.
How do you attach sandpaper correctly?
Align the paper with the pad holes for proper dust collection, and secure it using hook-and-loop or clamps, depending on the model.
What happens if sandpaper is loose or misaligned?
It reduces efficiency, increases vibration, and can leave swirl marks on the wood.
When should sandpaper be replaced?
Change it once it feels dull, clogs with dust, or burns the surface instead of cutting it cleanly.
Inspect and Test the Tool
A quick inspection ensures the tool is functioning properly before it touches your project. Loose pads, damaged cords, or incorrect speed settings can ruin your workpiece instantly.
What should you check before starting?
Inspect the pad, cord, and dust port; tighten any loose parts and confirm that the switch and speed control work smoothly.
Should the tool run before touching the surface?
Yes. Always start the sander in the air to ensure it spins evenly before applying it to the material.
How important is speed control?
Very. Lower speeds are safer for delicate finishes, while higher speeds help with heavy stock removal.
Do you need to connect dust extraction?
Yes. It keeps your workspace cleaner and ensures the sandpaper cuts efficiently.
What should the work surface look like before sanding?
Remove nails, staples, or old debris, and secure the workpiece firmly to prevent movement.
How to Use a Power Sander for Smooth Wood Finishes
Learning how to use a power sander correctly is the key to achieving smooth, professional-level results. Even the best sander can cause swirl marks, gouges, or uneven finishes if not handled properly.
The right technique combines steady control, proper grit sequence, and a good understanding of how the tool interacts with the wood surface.
Before starting, make sure your sander is clean, your sandpaper is properly attached, and your workspace is dust-free.
Begin with a coarse grit to remove imperfections and gradually move toward finer grits for a flawless texture. Always let the tool’s weight do the work instead of applying extra pressure.
The Right Technique for Perfect Passes
Smooth sanding requires a consistent pace and direction. Moving too quickly won’t remove enough material, while lingering in one spot can dig into the surface.
What’s the correct motion for a power sander?
Move the sander slowly and evenly across the surface, overlapping each pass by about 30% for consistent coverage.
Should you sand with or against the grain?
Always sand with the grain when using belt or sheet sanders; random orbit sanders can move in any direction without visible marks.
How do you avoid swirl marks?
Clean your sanding pad often, keep the tool moving, and avoid pressing down too hard.
When should you change grits?
Move to the next grit only after all visible scratches from the previous one are removed.
How fast should the sander move?
Keep a slow, steady pace — roughly one inch per second — to maintain even sanding pressure.
Grit Progression for Flawless Results
Proper grit progression is essential to achieving a professional finish. Skipping grits can leave deep scratches that reappear under paint or stain.
What is the ideal grit sequence for wood?
Start with 80 for leveling, move to 120 for smoothing, and finish with 180 or 220 for fine polishing.
How can you check your progress?
Wipe away dust and inspect the surface under angled light to spot any remaining scratches.
Can over-sanding cause problems?
Yes. Excessive sanding can close wood pores, preventing stains or finishes from absorbing properly.
Is it necessary to sand between coats of finish?
Yes. Light sanding with 220-grit paper between coats removes small imperfections and helps the next layer adhere better.
What about sanding curved or detailed areas?
Use a detail sander or wrap sandpaper around a soft pad to follow the contour without damaging the shape.
Safety and Maintenance While Using a Power Sander
Knowing how to use a power sander safely is just as important as learning the technique. Sanding tools generate dust, vibration, and high-speed motion that can be hazardous without proper precautions.
Following basic safety steps not only protects the user but also ensures consistent, professional results on every project.
Before sanding, check that the area is clean and free from flammable materials. Always wear protective gear, including safety goggles, a dust mask, and ear protection. Good lighting and ventilation also help maintain visibility and reduce airborne particles in enclosed spaces.
Safety Tips for Every Sanding Session
Proper handling prevents injuries and surface damage. A small mistake, like setting the sander down before it stops spinning, can leave deep marks or even break the pad.
Should the sander be running before touching the surface?
Yes. Start it slightly above the surface, then lower it gently to prevent gouging.
Can a power sander cause injury?
Yes. Moving parts can pinch or cut fingers, so keep hands away from the pad and never wear loose clothing.
Is dust control just for cleanliness?
No. Fine wood dust can irritate lungs and eyes — using dust extraction or a shop vacuum is vital for safety and better finishes.
How can you prevent overheating?
Avoid pressing too hard and empty the dust bag frequently to maintain airflow and motor cooling.
What’s the safest way to stop sanding?
Lift the tool off the surface first, then turn it off and wait for it to stop spinning before setting it down.
Maintenance and Long-Term Care
Regular maintenance keeps your sander performing like new. Clean the tool after each use to remove dust buildup that can affect balance and performance.
How often should sandpaper and pads be replaced?
Change sandpaper when it looks glazed or loses grip. Replace the pad if its foam becomes cracked or the hook-and-loop loses hold.
Do cords and batteries require care?
Yes. Store cords neatly to avoid fraying, and charge batteries properly to extend their life.
Why is lubrication or cleaning important?
Dust can clog vents and moving parts; blowing compressed air through them prevents motor wear.
Should the sander be stored in a case?
Yes. A clean, dry storage case protects it from moisture and accidental damage.
Is warranty registration worth doing?
Absolutely. It ensures quick repairs or replacements for pads, motors, or switches under manufacturer coverage.
Common Sanding Mistakes and How to Fix Them

Even skilled users can make errors when learning how to use a power sander. Small mistakes like pressing too hard or skipping grits can lead to visible imperfections that only appear after staining or painting.
Recognizing these issues early — and knowing how to correct them — can save both time and material.
Proper sanding is about control and consistency. The goal is to let the tool’s motion and abrasive surface do the work while maintaining an even rhythm. Missteps often come from rushing the process or applying excessive pressure in an attempt to work faster.
Gouges, Dips, and Uneven Surfaces
These are among the most common sanding problems, especially when using belt sanders. They occur when the tool stays in one spot too long or is tilted at an angle.
Why do gouges appear on the surface?
Tilting the sander or pausing mid-pass removes too much material in one area.
How can this be fixed?
Switch to a finer grit and re-sand the area evenly, keeping the tool flat and moving continuously.
What’s the best prevention method?
Start and finish each pass with steady, even motion and keep both hands firmly on the tool.
Can gouges be repaired after staining?
Minor ones can be spot-sanded and re-stained, but deep gouges may require refinishing.
Does tool weight matter here?
Yes. Heavy sanders are more likely to dig in if not guided evenly.
Swirl Marks and Scratches
Swirl marks often appear under light after staining or painting. They result from dirty sandpaper, uneven pressure, or skipping grit levels.
Why do swirl marks appear?
Using a dirty or worn pad grinds dust into the surface, creating circular scratches.
How do you remove them?
Go back one grit level, re-sand the area lightly, and wipe away all dust between passes.
Does sanding direction matter?
Yes. Always follow the grain with belt or sheet sanders to reduce visible lines.
Are random orbit sanders immune to swirl marks?
No. While they minimize swirls, improper pressure or skipping grits can still cause them.
Can swirl marks show up after finishing?
Yes. They often become visible only after applying stain or varnish, highlighting the need for consistent grit progression.
Over-Sanding and Burnishing
Over-sanding closes the wood’s pores, making it difficult for finishes to adhere properly. Burnishing, or polishing the wood surface with too fine a grit, can also cause uneven color absorption.
What causes over-sanding?
Staying too long in one area or jumping straight to very fine grits.
How can you fix a burnished surface?
Lightly sand with medium grit (around 150) to reopen the pores before applying finish.
Does speed affect burnishing?
Yes. High-speed sanding generates heat, polishing instead of cutting the wood fibers.
Can this affect stain color?
Absolutely. Over-sanded areas often appear lighter because they absorb less pigment.
How can it be prevented?
Use proper grit sequencing and avoid sanding more than necessary for a smooth finish.
Future Trends and Innovations in Power Sanders
The world of power sanding is rapidly evolving, bringing smarter, safer, and more efficient tools to both professionals and hobbyists.
Modern technology has transformed how we think about sanding — no longer just a dusty, noisy task, but a precise, high-performance process. Understanding these innovations helps users stay ahead and use their tools to their full potential.
One of the biggest advancements in recent years is the rise of cordless power sanders. Thanks to improved lithium-ion batteries and brushless motors, these sanders now deliver the same power and runtime as corded models while offering unmatched mobility.
Are cordless sanders reliable for long projects?
Yes. Modern brushless motors and high-capacity batteries allow continuous operation with minimal downtime.
Do cordless models compromise power?
Not anymore. Many top brands now offer cordless sanders with power equal to their corded counterparts.
How do brushless motors improve sanding?
They run cooler, last longer, and maintain consistent speed even under load, ensuring smoother finishes.
Smarter Dust Control and Cleaner Workspaces
Dust management is another area of major innovation. Manufacturers are integrating HEPA filters, vacuum-ready ports, and sealed systems that remove up to 90% of airborne dust.
Why is dust collection more important than ever?
Fine dust affects both air quality and surface finish, so efficient extraction keeps the workspace cleaner and healthier.
What are HEPA-compatible systems?
They trap even the smallest dust particles, making them ideal for indoor or commercial environments.
Can dust-free sanding improve results?
Yes. Cleaner surfaces allow more consistent abrasion and smoother finishes with fewer swirl marks.
Ergonomics and Smart Design
Newer sanders are being designed with the user’s comfort and precision in mind. Features like vibration reduction, soft-grip handles, and balanced weight distribution make long sanding sessions easier and more controlled.
Are vibration control systems effective?
Yes. Reduced vibration lowers fatigue and increases accuracy during extended use.
What is electronic feedback control?
Some models use sensors to maintain constant pad speed even under pressure, preventing uneven sanding.
Are smart sanders becoming common?
They’re emerging. A few brands now integrate Bluetooth tracking and maintenance alerts for real-time tool monitoring.
Will automation affect sanding tools?
Possibly. Early prototypes show robotic sanding arms designed for precision finishing in industrial environments.
Conclusion
Mastering how to use a power sander is the key to achieving smooth, professional-quality finishes in any woodworking or renovation project. It’s not just about sanding faster — it’s about working smarter, with control, precision, and a deep understanding of your tool.
A power sander simplifies what used to be a time-consuming task. From leveling rough boards to polishing fine surfaces, it ensures every piece of wood receives the same attention and consistency.
When paired with proper grit progression, dust collection, and steady technique, even beginners can produce results that rival professional workshops.
Different sander types serve different purposes: belt sanders for heavy removal, random orbit sanders for versatile finishing, and detail sanders for corners and edges.
Choosing the right one — and learning how to handle it correctly — can make the difference between a flawless surface and one filled with swirl marks or gouges.
Safety and maintenance play just as big a role. Wearing protective gear, keeping dust under control, and maintaining clean pads and filters ensure both your health and the longevity of the tool. Every step, from setup to cleanup, contributes to the quality of your final finish.
As technology advances, power sanders are becoming quieter, more ergonomic, and dust-free, giving users greater comfort and control than ever before.

I’m Michael R. Turner, the founder, lead writer, and passionate DIY enthusiast behind 101diytools.com. With years of hands-on experience in home improvement and power tools, I built this platform to share practical tips, in-depth guides, and honest reviews to help DIYers of all skill levels tackle projects with confidence and the right tools.