Master How to Use Nail Gun for Framing Like a Pro Builder
Mastering a nail gun for framing begins with prioritizing safety protocols and understanding correct tool operation for efficient, precise work. Learn to select the appropriate nail gun and fasteners, then practice proper techniques like steady gripping and accurate firing to create strong, professional-grade framing connections. This guide empowers you to frame confidently and effectively, just like a seasoned expert.
Master How to Use Nail Gun for Framing Like a Pro Builder
Hey there, fellow DIY enthusiast! Remember those days of swinging a hammer, missing the nail head, and maybe even smashing a thumb? Good times, right? Well, imagine a world where framing walls, putting up headers, or even building a deck could be done in a fraction of the time, with pinpoint accuracy, and a lot less effort. That world exists, and it’s powered by the humble, yet mighty, nail gun.
Learning how to use a nail gun for framing isn’t just about speed; it’s about consistency, professional results, and frankly, saving your arms and hands from a lot of strain. It might seem a bit intimidating at first, what with the power, the air hoses, or the battery packs, but trust me, it’s a skill that’s incredibly rewarding to master. It transforms framing projects from a slog into something genuinely enjoyable.
In this friendly guide, we’re going to walk through everything you need to know about how to use a nail gun for framing, from choosing the right tool to nailing like a seasoned pro. We’ll cover safety, setup, and practical techniques that will have you confidently tackling your next framing project. So, let’s dive in and get you nailing like a builder!
Key Takeaways
- Prioritize Safety: Always wear PPE and inspect your nail gun before every use.
- Master Nail Depth: Adjust pressure for flush fasteners, preventing proud nails or blowouts.
- Employ Proper Technique: Brace material firmly, position accurately, and shoot squarely for strong joints.
- Understand Framing Patterns: Apply correct nailing schedules (toenailing, end-nailing) for structural integrity.
- Practice Precision: Begin with scrap wood to build accuracy and develop essential muscle memory.
- Maintain Your Tool: Regular cleaning and air pressure checks ensure consistent, reliable performance.
- Verify Connections: Always inspect fastened joints for strength and proper nail penetration.
📑 Table of Contents
- Gearing Up: Choosing Your Nail Gun and Nails for Framing
- Safety First: Essential Practices Before You Start Nailing
- Setting Up for Success: Preparing Your Workpiece and Nail Gun
- Mastering the Technique: How to Use Nail Gun for Framing Projects
- Troubleshooting and Maintenance Tips for Your Framing Nailer
Gearing Up: Choosing Your Nail Gun and Nails for Framing
Before you even think about firing a nail, you need the right tools for the job. Choosing the correct nail gun and nails is crucial for any framing project.
Picking the Right Framing Nailer
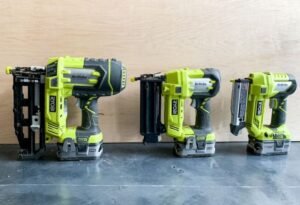
- Pneumatic vs. Cordless: Pneumatic (air-powered) nail guns are the workhorses of framing. They’re powerful, consistent, and generally lighter than battery-powered cordless models. The downside? You need an air compressor and an air hose, which can limit mobility. Cordless nail guns offer incredible freedom – no hoses to trip over! They’re fantastic for smaller jobs, remote locations, or where an air compressor isn’t practical. However, they can be heavier, and batteries need charging. For heavy-duty, continuous framing, pneumatic often wins.
- Nail Collation: Framing nailers typically use either strip or coil nails. Strip nailers use long strips of nails, usually held together with paper or plastic. Coil nailers hold a drum of nails, offering a higher capacity, which means fewer reloads. For most general framing tasks, a strip nailer is perfectly sufficient and often more compact.
- Angle Matters: Framing nailers come in different angles (e.g., 21, 28, 30/34 degree). This refers to the angle of the nail magazine. A 21-degree nailer uses plastic-collated nails, while 30/34-degree nailers typically use paper-collated nails. The angle affects how easily the nailer can fit into tight spaces, like between studs or joists. For versatile framing, a 28 or 30/34-degree nailer is often a good choice, as they offer better maneuverability in corners.
Selecting the Best Nails for Framing
The nails you use are just as important as the gun itself. For framing, you’ll mostly be working with “common” or “full round head” nails.
- Gauge and Length: For standard framing lumber (like 2x4s or 2x6s), you’ll typically use 2 to 3.5-inch nails, usually 8 to 12 gauge. The general rule of thumb is that the nail should penetrate the second piece of wood by at least two-thirds of its length. For example, joining two 2x4s (which are actually 1.5 inches thick), a 3.5-inch nail will provide excellent holding power.
- Coating: “Bright” nails are uncoated and best for interior, dry applications. For exterior framing or any situation exposed to moisture, always opt for galvanized or stainless steel nails to prevent rust and staining. Ring shank nails offer superior holding power due to their annular rings, great for subfloors or siding.
- Building Codes: Always check local building codes for specific nail size, type, and spacing requirements. This is crucial for structural integrity.
Here’s a quick look at common nail sizes for framing applications:
| Nail Length | Typical Gauge | Common Framing Use |
|---|---|---|
| 2 inches | 10-12 | Toe-nailing 2x lumber, attaching blocking |
| 2.5 inches | 9-10 | Attaching wall sheathing, general purpose |
| 3.0 – 3.5 inches | 8-9 | Framing 2x4s and 2x6s, critical structural connections |
Safety First: Essential Practices Before You Start Nailing
Power tools are awesome, but they demand respect. When you’re learning how to use a nail gun for framing, safety is non-negotiable. Please take these steps seriously.
Personal Protective Equipment (PPE)
- Safety Glasses: This is number one. Nails can ricochet, wood can splinter, and debris can fly. Always wear approved safety glasses.
- Hearing Protection: Nail guns are loud, especially pneumatic ones. Earplugs or earmuffs are essential to protect your hearing.
- Gloves: Protect your hands from splinters, sharp edges, and provide a better grip.
- Work Boots: Sturdy, closed-toe shoes with good grip are important on any job site.
Pre-Operation Checks
- Read the Manual: Seriously, every nail gun is slightly different. The manual will tell you specific safety features and operating instructions.
- Inspect Your Gear: Check air hoses for leaks or damage, ensure battery packs are charged and secure, and inspect the nail magazine.
- Clear Your Workspace: Tripping hazards, distractions, and other people in the immediate firing zone are a no-go. Keep pets and children far away.
- Never Bypass Safety Features: That contact tip on the nose of the gun? It’s there for a reason. Don’t ever tape it down or alter it.
Understanding Firing Modes
Most framing nail guns have two firing modes:
- Sequential Firing (Single Shot): You must press the contact tip against the workpiece *and then* pull the trigger to fire one nail. For the next nail, you repeat the process. This is the safest mode, offering precise placement. It’s highly recommended when you’re first learning how to use a nail gun for framing and for critical joints.
- Contact Firing (Bump Fire): You hold the trigger down, and a nail fires every time the contact tip bumps against the workpiece. This is much faster for repetitive nailing over long runs (like subflooring or sheathing) but carries a higher risk of accidental firing.
Tip: Always start with sequential mode. Get comfortable with it before even considering contact mode for specific applications. It’s safer and builds better muscle memory.
Setting Up for Success: Preparing Your Workpiece and Nail Gun
A little preparation goes a long way. Proper setup ensures smooth operation and consistent results when you’re ready to master how to use a nail gun for framing.
Compressor and Air Pressure (for pneumatic nailers)
Your air compressor is the heart of your pneumatic system. Ensure it’s capable of supplying enough CFM (cubic feet per minute) for your nail gun. For framing, you’ll typically want to set your compressor’s regulator between 90-120 PSI (pounds per square inch). Too little pressure, and nails won’t sink fully; too much, and they might overdrive, weakening the connection or damaging the wood.
Loading Your Framing Nailer
Loading nails might seem obvious, but doing it correctly prevents jams and misfires. Ensure the nails are oriented correctly in the magazine (check your manual for the specific model). Slide them in until they lock into place, often with an audible click. Never force nails into the magazine.
Adjusting Depth of Drive
This is a critical adjustment. Your nail gun usually has a depth adjustment dial or lever near the nose. This controls how far the nail head sinks into the wood:
- Flush: The nail head is perfectly even with the wood surface. Ideal for most framing.
- Proud: The nail head sticks out slightly. Usually, you want to avoid this, as it reduces holding power and can snag.
- Sunken: The nail head is below the surface, creating a small divot. This can weaken the wood if too deep.
Practical Example: Grab a scrap piece of wood that matches your framing material. Fire a few nails, adjusting the depth until they sit perfectly flush. This test prevents overdriving or underdriving on your actual project.
Mastering the Technique: How to Use Nail Gun for Framing Projects
Now for the fun part! With safety protocols in place and your gear ready, let’s talk about the actual nailing technique. This is where you really learn how to use a nail gun for framing with confidence.
The Stance and Grip
- Balanced Stance: Stand with your feet shoulder-width apart, slightly offset, providing a stable base.
- Firm Two-Hand Grip: Hold the nail gun firmly with both hands – one on the handle, the other supporting the body of the gun or guiding the contact tip. This gives you control and helps absorb recoil.
- Keep Fingers Clear: Always be aware of where your non-trigger hand is. Never place it in the path of the nail exit.
Proper Nailing Patterns for Framing
When you’re attaching two pieces of lumber, the pattern and number of nails matter for strength and stability.
- “Face-Nailing”: This is when you drive a nail straight through one piece of wood into the face of another. It’s the most common and strongest method. Space nails evenly, usually 2-3 inches from the ends and then every 12-16 inches along the length for typical framing.
- “Toe-Nailing”: This involves driving nails at an angle through the side of one piece of lumber into another. It’s perfect for securing a stud to a top or bottom plate when face-nailing isn’t possible. Angle the nail gun at about 45-60 degrees. Use 2-3 nails per joint, alternating the angle slightly for maximum hold.
- Avoiding Splitting Wood: Always aim for the center of the wood when possible. Nailing too close to the edge can split the lumber. If you must nail close to an edge, consider pre-drilling a pilot hole (though this usually defeats the speed advantage of a nail gun).
Nailing Common Framing Joints
Here’s how you’ll apply your skills:
- Wall Plates to Studs: When building a wall, face-nail the studs to the top and bottom plates. Typically, two 3.5-inch nails per stud end are sufficient, driven through the plate into the stud.
- Headers: Headers (beams above openings like doors/windows) are usually made of two pieces of lumber sandwiching a spacer. Nail these together securely before installation. Then, toe-nail them into the king studs and face-nail trimmers to support them.
- Trimmers and Cripples: Trimmer studs support the header, and cripple studs fill the space between the header and top plate or between the rough sill and bottom plate. Face-nail these securely.
- Blocking: Blocking adds rigidity to walls and floors. You’ll often toe-nail blocking between joists or studs.
Relatable Anecdote: There’s a distinct satisfaction that comes with assembling a perfectly square wall section using your nail gun. The “thwack-thwack” of the nailer, the speed, and the solid feel of the structure coming together is a real moment of accomplishment!
Troubleshooting and Maintenance Tips for Your Framing Nailer
Even the best tools can have a bad day. Knowing how to handle common issues and keep your nail gun in top shape will save you headaches.
Common Issues and Quick Fixes
- Jams: The most common issue. First, disconnect air/remove battery! Then, follow your manual’s instructions for clearing a jam. Most nailers have a quick-release lever or screws to open the nosepiece. Use pliers to carefully remove bent or stuck nails.
- Nails Not Sinking Fully: This often indicates low air pressure (for pneumatic), incorrect depth adjustment, or an issue with the nailer’s driver blade. Check your PSI first, then adjust the depth. If problems persist, it might need lubrication or a professional check-up.
- Misfires: Could be due to an empty magazine, incorrect nails, or a problem with the firing pin or O-rings. Ensure you have enough nails and they’re the correct type.
Regular Maintenance for Longevity
- Lubrication (Pneumatic): Add a few drops of pneumatic tool oil into the air inlet before each use. This keeps the internal O-rings and moving parts lubricated. Do not over-oil!
- Cleaning: Regularly clean the nail gun, especially the nosepiece and magazine, to remove sawdust, dirt, and debris that can cause jams. A blast of compressed air can help.
- Storing Properly: Store your nail gun in a clean, dry place, preferably in its original case. Disconnect air hoses and remove batteries when not in use.
- Checking for Wear and Tear: Periodically inspect hoses, connectors, and the nailer’s body for any cracks, loose screws, or damage. Address small issues before they become big problems.
Learning how to use a nail gun for framing is a game-changer for any serious DIYer or budding contractor. It takes practice, patience, and a strong commitment to safety, but the rewards are immense. You’ll build faster, stronger, and with less fatigue, opening up a whole new world of construction possibilities. So, gear up, practice those techniques, and get ready to build something amazing!
Frequently Asked Questions
What are the essential safety precautions when using a nail gun for framing?
Always wear appropriate personal protective equipment (PPE), including safety glasses, hearing protection, and work gloves. Before operating, inspect the nail gun for any damage and ensure you understand its specific safety features and operating instructions.
Which type of nail gun is best suited for framing projects?
For framing, a full-head pneumatic or cordless framing nail gun is generally recommended, often using 21 or 30-degree nails. These robust tools are designed to drive larger nails required for structural lumber efficiently and reliably.
What kind of nails should I use when framing lumber?
You should use common framing nails, typically 3 to 3-1/4 inches long with a diameter around .131 inches, to meet most building codes for structural connections. Ensure the nail collation angle matches your specific nail gun for proper feeding and operation.
How do I properly hold and operate a nail gun for framing to ensure secure connections?
Hold the nail gun firmly with both hands, ensuring the nosepiece is flat and perpendicular to the wood surface before firing. Depending on your trigger type, either press the nose and then pull the trigger (sequential) or pull the trigger and then press the nose (contact) to drive the nail accurately.
How do I adjust the depth setting on my nail gun for consistent framing results?
Most nail guns feature a depth adjustment dial or lever near the nosepiece, allowing you to control how deep the nail is driven into the wood. Always test the depth setting on a scrap piece of similar material to ensure the nail head is flush or slightly countersunk without overdriving.
What are some tips for efficient and accurate framing using a nail gun?
Prioritize pre-assembling smaller wall sections on a flat surface before standing them up to ensure squareness and save time. Use temporary bracing to stabilize walls during assembly and always double-check measurements and plumb before making permanent nail connections.

I’m Michael R. Turner, the founder, lead writer, and passionate DIY enthusiast behind 101diytools.com. With years of hands-on experience in home improvement and power tools, I built this platform to share practical tips, in-depth guides, and honest reviews to help DIYers of all skill levels tackle projects with confidence and the right tools.