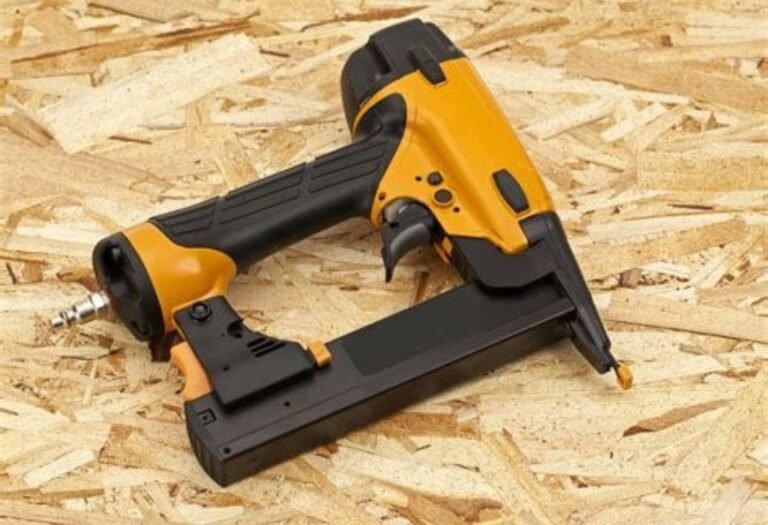
How to Use a Nail Gun for Cabinets Safely and Easily
Mastering your nail gun for cabinet projects begins with absolute safety. Learn to confidently operate this powerful tool by understanding its features, selecting the right nails, and applying proper techniques for secure, professional-looking cabinet construction. This guide ensures you build cabinets both efficiently and flawlessly.
Building or renovating cabinets can feel like a monumental task, right? You’re envisioning those sleek, sturdy lines, but the thought of painstakingly nailing every joint by hand can be daunting. You know that feeling – the sore thumb, the crooked nails, the endless hours? Well, what if I told you there’s a tool that can transform this often-frustrating process into a smooth, even enjoyable, experience? Enter the humble yet mighty nail gun.
For anyone tackling cabinet projects, whether it’s building from scratch, installing new ones, or just adding trim, a nail gun isn’t just a convenience; it’s a game-changer. It elevates your work, making it faster, more precise, and ultimately, giving you that professional finish we all strive for. But perhaps you’re a bit intimidated? Maybe you’ve never used one before, or you’re unsure which type to pick or how to handle it safely.
Don’t worry, you’re in the right place! Think of me as your friendly guide, walking you through everything you need to know. In this post, we’ll demystify using a nail gun for cabinets, ensuring you can tackle your projects with confidence, achieving fantastic results safely and easily. Let’s dive in!
Key Takeaways
- Prioritize Safety: Always wear eye and ear protection.
- Select Correct Tools: Match nail gun and nails to cabinet material.
- Master Proper Technique: Hold gun firmly, perpendicular to surface.
- Test on Scrap Wood: Adjust depth and pressure before cabinet use.
- Secure Workpiece: Clamp cabinet pieces firmly to prevent movement.
- Check Nail Depth: Ensure nails are flush or slightly countersunk.
- Maintain Clear Workspace: Remove clutter for safe, efficient operation.
📑 Table of Contents
Why a Nail Gun is Your Cabinet-Making Best Friend
When you’re working on cabinetry, precision and efficiency are key. Traditional hammer-and-nail methods can be slow, noisy, and prone to error, especially when dealing with delicate wood or awkward angles. This is where a nail gun for cabinets truly shines.
Speed and Efficiency
Imagine fastening a cabinet back in seconds rather than minutes. A nail gun allows you to drive nails rapidly and consistently, dramatically cutting down project time. This speed is invaluable when you’re trying to hold pieces together or when you have many fasteners to install, like when attaching decorative trim.
Precision and Professional Finish
One of the biggest advantages of using a nail gun for cabinets is the consistent depth and straightness of the nails. This means fewer bent nails, less wood splitting, and a much cleaner, more professional look for your finished product. Plus, many nail guns have a depth adjustment feature, allowing you to countersink nails perfectly, ready for filling and painting.
Reduced Fatigue
Let’s be honest, swinging a hammer for hours is tiring. A nail gun does the hard work for you, reducing physical strain and fatigue. This allows you to maintain focus and accuracy throughout your project, leading to better overall results. Using a nail gun for cabinets means less stress on your body and more energy to enjoy your beautiful new space.
Choosing the Right Nail Gun for Cabinets and Nails

Selecting the correct tool is half the battle. When it comes to using a nail gun for cabinets, you’ll primarily be looking at two types: brad nailers and finish nailers.
Brad Nailers vs. Finish Nailers
- Brad Nailers: These use 18-gauge nails, which are quite thin. They create very small holes, making them perfect for delicate work like attaching cabinet backs, thin trim pieces, small decorative moldings, or holding parts temporarily while glue dries. The small holes are easy to fill and virtually disappear.
- Finish Nailers: These use thicker 16-gauge or 15-gauge nails. They provide a stronger hold and are ideal for more substantial cabinet components like face frames, door and drawer fronts, larger trim, and crown molding where you need extra holding power. The holes are slightly larger but still manageable to fill.
For most cabinet projects, having both a brad nailer and a finish nailer will give you the versatility you need. If you have to choose just one to start, a 16-gauge finish nailer is often a good all-around option for general cabinet assembly, as its nails offer a good balance of holding power and minimal hole size.
Nail Types and Sizes
Nails come in various lengths and materials. For cabinets, you’ll generally use galvanized or coated nails to prevent rust, especially if there’s any moisture exposure. The length of the nail is crucial: it should be long enough to penetrate both pieces of wood you’re joining, ideally by at least two-thirds into the second piece, but not so long that it pokes through the other side!
Here’s a quick guide to common nail sizes you might use when working with a nail gun for cabinets:
| Cabinet Task | Recommended Nail Gun Type | Recommended Nail Gauge | Recommended Nail Length |
|---|---|---|---|
| Attaching Cabinet Backs (thin plywood) | Brad Nailer | 18 Gauge | 1″ – 1 1/4″ |
| Small Trim & Molding | Brad Nailer | 18 Gauge | 1″ – 1 1/2″ |
| Cabinet Face Frames | Finish Nailer | 16 Gauge | 1 1/2″ – 2″ |
| Large Trim & Crown Molding | Finish Nailer | 16 Gauge | 1 1/2″ – 2 1/2″ |
| Temporary Holding During Gluing | Brad Nailer | 18 Gauge | 1″ – 1 1/4″ |
Always test your nail length on scrap wood first to ensure it provides adequate hold without over-penetrating.
Prioritizing Safety: Gear Up Before You Nail Down
This is probably the most important section, my friend. A nail gun is an incredibly useful tool, but it’s also powerful and, if misused, can cause serious injury. Safety first, always!
Essential Safety Equipment
Think of this as your protective uniform. Never, ever skip these:
- Safety Glasses: Flying debris, ricocheting nails, or even errant wood splinters are real hazards. ANSI-approved safety glasses are non-negotiable.
- Hearing Protection: Nail guns can be loud, especially pneumatic ones. Earplugs or earmuffs will protect your hearing over extended use.
- Gloves: Protect your hands from splinters, pinched fingers, and general wear and tear.
Understanding Your Nail Gun’s Safety Features
Most modern nail guns come with built-in safety features. Get to know them:
- Contact Trip (Sequential Trip): Many nail guns require you to press the tip against the workpiece before you can pull the trigger. Some models have a “sequential” mode where you must press the tip, then pull the trigger, and then release both before the next nail. This prevents accidental firing. Always use the most restrictive firing mode available for cabinet work.
- Depth Adjustment: This feature, usually a dial or lever near the tip, allows you to control how deep the nail goes. Set it to countersink the nail head slightly below the surface, but not so deep that it blows through the wood.
- Jam Clearing Mechanism: Know how to safely clear a jammed nail. Always disconnect power (unplug pneumatic, remove battery from cordless) before attempting to clear a jam.
Pre-Operation Checks
Before you even think about driving a nail:
- Read the Manual: Seriously! Every nail gun is slightly different.
- Inspect the Tool: Check for any damage, loose parts, or frayed cords/hoses.
- Air Pressure (Pneumatic): Ensure your compressor is set to the recommended PSI for your nail gun. Too much pressure can cause blow-throughs, too little can leave nails proud.
- Battery Charge (Cordless): Make sure your battery is fully charged for consistent power.
- Load Nails Correctly: Follow your specific nail gun’s instructions for loading the nail strips.
Mastering the Technique: Nailing Cabinets Like a Pro
Alright, safety gear on, nail gun loaded, let’s talk technique for using your nail gun for cabinets.
Setting Up Your Workspace
A clean, well-lit, and stable workspace is crucial. Use clamps to hold cabinet parts securely together before nailing. This ensures alignment and frees up your hands for precise nail gun operation. Trust me, trying to hold a heavy cabinet side and nail it at the same time is a recipe for frustration and potential mistakes.
Proper Grip and Stance
Hold the nail gun firmly with both hands if comfortable, or one hand with a stable grip. Maintain a balanced stance, ensuring you’re not overreaching or off-balance. Always keep your non-dominant hand away from the firing line of the nail gun.
The Nailing Process: Step-by-Step
- Position the Tip: Press the nose of the nail gun firmly and squarely against the workpiece where you want the nail to go. Apply enough pressure to engage the contact trip safety.
- Aim Carefully: Aim for the center of the wood, avoiding edges where splitting is more likely.
- Fire: Pull the trigger smoothly. Don’t jerk it.
- Check Depth: After the first few nails, check the depth. If the nail head is proud, increase the depth setting slightly. If it’s blowing through, decrease it. Adjust until the nail head is perfectly countersunk.
- Use Clamps: When joining two pieces, especially face frames or box corners, use clamps to hold them tightly together before nailing. This prevents gaps and ensures a strong joint.
Pro Tip: When nailing into end grain (e.g., attaching a cabinet side to a bottom piece), apply a small amount of wood glue first for extra strength. The nails will act as clamps while the glue dries.
Dealing with Different Cabinet Components
- Face Frames: Use a finish nailer (16-gauge) for strong, invisible joints. Work from the inside out, making sure your clamps are holding the pieces flush.
- Cabinet Backs: If using thin plywood for the back, an 18-gauge brad nailer is perfect. Space nails every 4-6 inches along the perimeter.
- Trim and Molding: For delicate trim, the 18-gauge brad nailer is your go-to. For larger crown molding, switch to a 16-gauge finish nailer. Always angle your nails slightly to get a better bite into the wood.
Common Mistakes and How to Avoid Them
Even with the best intentions, it’s easy to make small errors. Knowing what to watch out for can save you time and frustration when using your nail gun for cabinets.
Incorrect Nail Gun Selection
Using a heavy framing nailer for delicate trim will destroy your cabinet. Conversely, using a brad nailer for structural components like face frames won’t provide enough holding power. Always match the tool to the task.
Improper Depth Setting
Nails that stick out need hammering in, which can mar the wood. Nails that go too deep can weaken the joint or even shoot through the other side. Always do test shots on scrap wood and adjust your depth setting until it’s just right.
Rushing the Job
Impatience leads to mistakes. Take your time, ensure pieces are clamped securely, and double-check your alignment before firing. The speed of the nail gun should be used for efficiency, not recklessness.
Neglecting Test Shots
Before putting a nail into your actual cabinet, fire a few into a scrap piece of wood of similar thickness and material. This allows you to check the depth setting and ensure the nail gun is functioning correctly.
Overlooking Safety
It’s easy to get complacent, especially as you become more comfortable. But a moment of inattention can lead to injury. Always wear your PPE, keep your fingers clear, and treat the tool with respect.
Conclusion
There you have it! Using a nail gun for cabinets doesn’t have to be intimidating. With the right knowledge, proper safety precautions, and a bit of practice, you’ll be zipping through your cabinet projects with confidence and achieving results that look truly professional. It’s about empowering yourself to create beautiful, functional spaces, and a nail gun is a fantastic tool to help you do just that.
So, go ahead, grab your safety gear, pick out the right nails, and get ready to transform your cabinet-making experience. You’ll wonder how you ever lived without one! Happy building!
Frequently Asked Questions
What type of nail gun is best for cabinet making?
For most cabinet work, a brad nailer (18-gauge) or a finish nailer (16-gauge) is recommended. Brad nailers are excellent for delicate trim and thinner materials, while finish nailers offer a stronger hold for assembling face frames and cabinet boxes. Choose based on the specific task to minimize wood splitting and create neat, small holes.
What size nails should I use when building cabinets?
The appropriate nail length for cabinets typically ranges from 1 to 2 inches, depending on the thickness of the materials being joined. For face frames, backs, and general assembly, 1.25 to 1.75-inch nails are common, ensuring enough penetration for a secure hold without protruding. Always consider the combined thickness of your cabinet components.
How can I safely operate a nail gun for cabinet construction?
Always wear appropriate personal protective equipment, including safety glasses and hearing protection, when using a nail gun. Keep your non-dominant hand well clear of the firing path, and ensure the workpiece is stable and clamped if possible. Always disconnect the air or battery before clearing jams or making adjustments to ensure maximum safety.
How do I achieve clean, professional-looking joints using a nail gun on cabinets?
To get neat joints in your cabinet projects, always clamp your pieces securely together before firing the nail gun. Set the depth adjustment correctly so the nail head is flush or slightly countersunk without over-penetrating the wood. Practice on scrap pieces first to perfect your technique and ensure consistent results.
Can I use a nail gun for attaching all parts of a cabinet, such as face frames, backs, and trim?
Yes, a nail gun is incredibly versatile for various cabinet components. A finish nailer is great for securing face frames and cabinet boxes, offering strong joints, while a brad nailer is ideal for attaching thin cabinet backs, molding, and delicate trim work due to its smaller nail size.
How do I adjust the depth on my nail gun for precise cabinet work?
Most modern nail guns feature an external depth adjustment dial or lever, allowing you to easily control how deep the nail penetrates your cabinet material. Test the depth setting on a scrap piece of wood identical to your cabinet material until the nail head sits perfectly flush or slightly below the surface. This prevents over-penetration or nails standing proud.

I’m Michael R. Turner, the founder, lead writer, and passionate DIY enthusiast behind 101diytools.com. With years of hands-on experience in home improvement and power tools, I built this platform to share practical tips, in-depth guides, and honest reviews to help DIYers of all skill levels tackle projects with confidence and the right tools.