Learn How to Use a Finish Nailer for Baseboards Like a Pro
To use a finish nailer for baseboards like a pro, mastering proper technique and safety is paramount. Learn to select the right nails, set air pressure correctly, and consistently drive nails into secure framing for a strong, flush, and professional installation that minimizes touch-ups and ensures lasting results.
Ever walked into a freshly renovated room and wondered how they achieved those perfectly smooth, seamlessly installed baseboards? Or perhaps you’ve struggled with a hammer and nails yourself, leaving behind dented wood and crooked fasteners? You’re not alone. Installing baseboards used to be a tedious, time-consuming task that often left even experienced DIYers with a bit of a headache. But what if I told you there’s a tool that transforms this challenging chore into a satisfying, professional-looking finish?
Enter the finish nailer – your new best friend for all things trim, especially when it comes to baseboards. This powerful yet precise tool allows you to secure trim quickly, accurately, and with minimal fuss, leaving behind tiny, easily concealed nail holes. It’s the secret weapon that elevates your home improvement projects from amateur attempts to professional triumphs.
In this guide, we’re going to demystify the process and show you exactly how to use a finish nailer for baseboards like a seasoned pro. We’ll cover everything from safety essentials and choosing the right gear to mastering the nailing technique and putting on those crucial finishing touches. Get ready to tackle your next baseboard project with confidence and achieve results you’ll be proud to show off!
Key Takeaways
- Prioritize Safety: Always wear eye and hearing protection when operating the nailer.
- Locate Studs First: Mark stud locations accurately for secure baseboard attachment.
- Choose Proper Nails: Select nail length penetrating at least 1 inch into framing.
- Adjust Air Pressure: Set compressor pressure appropriately to countersink nails perfectly.
- Maintain Firm Grip: Hold the nailer perpendicular and press firmly for consistent shots.
- Vary Nail Height: Stagger nail placement to prevent splitting and enhance hold.
- Test on Scrap: Practice depth and angle on scrap wood before final installation.
📑 Table of Contents
Why a Finish Nailer is Your Best Friend for Baseboards
Using a traditional hammer and nails for baseboard installation can be frustrating. You risk splitting the wood, bending nails, or simply not getting a tight, flush fit. A finish nailer changes all that, making the job faster, cleaner, and far more enjoyable.
Speed and Efficiency
Imagine securing a 12-foot section of baseboard in mere seconds, rather than minutes of careful hammering. A finish nailer fires nails with pneumatic or battery power, sinking them perfectly every time. This speed means you can move through a room or even an entire house much faster, significantly cutting down on project time.
Professional Finish
The nails used by a finish nailer are typically smaller gauge (thinner) than common framing nails, leaving tiny holes that are easily filled and painted over. This results in a nearly invisible fastening method, giving your baseboards a truly polished, custom-installed appearance. No more unsightly hammer dents or exposed nail heads!
Ergonomics and Ease of Use
Say goodbye to swinging a hammer repeatedly and the associated arm fatigue. A finish nailer is designed for comfortable, one-handed operation. You simply place the tool, pull the trigger, and the nail is driven. This ease of use makes it accessible even for those new to DIY, helping you to achieve excellent results on your baseboards without excessive strain.
Safety First: Gear Up Before You Nail It
Before you even think about loading nails into your tool, it’s crucial to prioritize safety. While a finish nailer for baseboards is designed for ease of use, it’s still a powerful tool that demands respect.
Essential Personal Protective Equipment (PPE)
- Safety Glasses: This is non-negotiable. Nails can ricochet, or wood splinters can fly. Always wear ANSI-approved safety glasses to protect your eyes.
- Hearing Protection: If you’re using a pneumatic nailer with an air compressor, the noise can be significant. Earmuffs or earplugs are highly recommended to prevent hearing damage.
- Gloves: While not strictly necessary for every operation, gloves can protect your hands from splinters, pinched fingers, and provide a better grip.
Understanding Your Nailer’s Safety Features
Most modern finish nailers come with important safety mechanisms. Familiarize yourself with them:
- Nose Safety/Contact Trip: The nose of the nailer must be pressed against the work surface before it will fire a nail. This prevents accidental firing into the air or yourself. Always ensure this mechanism is working correctly.
- Trigger Types: Many finish nailers have a “sequential” or “full sequential” trigger, meaning you must first depress the nose safety AND then pull the trigger to fire each nail. This is generally considered the safest option for precision work like baseboards, reducing the risk of accidental double-firing.
Choosing the Right Tools and Materials for the Job
Having the right equipment is key to successful baseboard installation. Let’s break down what you’ll need.
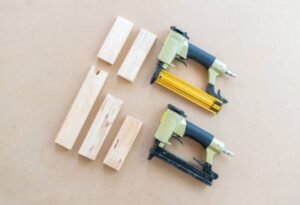
Selecting Your Finish Nailer
There are two primary types of finish nailers:
- Pneumatic Finish Nailers: These run on compressed air and are often lighter and more powerful. They require an air compressor and hose, which adds to the initial setup but offers consistent power.
- Cordless/Battery-Powered Finish Nailers: Offering ultimate portability and no need for an air compressor, these are incredibly convenient. They tend to be heavier and might have a slightly slower firing rate, but their ease of use makes them popular for DIY projects. For baseboards, either option works wonderfully, so choose based on your budget and preference for portability versus power.
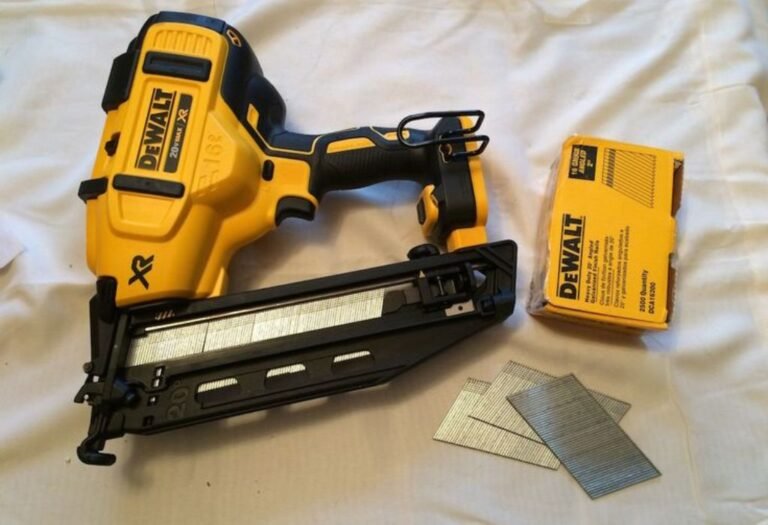
The Right Nails Make All the Difference
For baseboards, you’ll typically want 15-gauge or 16-gauge finish nails. The “gauge” refers to the thickness of the nail; a higher number means a thinner nail (e.g., 16-gauge is thinner than 15-gauge). Thinner nails leave smaller holes but 15-gauge offers a bit more holding power. For nail length, aim for nails that are long enough to penetrate the baseboard and then go at least an inch into the wall stud – usually 1.5 to 2 inches is sufficient for most baseboard thicknesses.
Essential Supporting Tools
- Air Compressor and Hose: If you opt for a pneumatic nailer.
- Stud Finder: Crucial for locating studs behind drywall.
- Miter Saw: For precise, angled cuts on your baseboards.
- Measuring Tape and Pencil: For accurate measurements and markings.
- Wood Filler/Putty: To fill nail holes.
- Caulk Gun and Paintable Caulk: For sealing gaps between baseboards and walls.
- Utility Knife: For scoring and trimming caulk.
- Sandpaper: Fine-grit for smoothing filler.
Preparing Your Baseboards and Workspace
Preparation is half the battle. A little extra time spent here will save you headaches later and ensure a professional result for your baseboards.
Measuring and Cutting Baseboards Accurately
Accuracy is paramount when cutting baseboards. Always measure twice, cut once! For inside corners, you’ll typically cut two 45-degree angles meeting to form a 90-degree corner. For outside corners, you’ll cut opposite 45-degree angles. Use your miter saw for clean, precise cuts. It’s often helpful to cut the baseboards slightly long and then trim them down for a snug fit.
Locating Studs for Secure Fastening
The strongest way to secure your baseboards is by nailing them into the wall studs. Use a stud finder to locate these vertical framing members, typically spaced 16 or 24 inches on center. Mark the stud locations with a pencil on the wall just above where your baseboard will sit. This ensures maximum holding power and prevents your baseboards from warping or detaching over time.
Dry-Fitting for a Flawless Finish
Before you commit to nailing, always dry-fit your baseboard pieces. Place them against the wall and check for any gaps at corners or along the wall. This is your chance to make any necessary adjustments to cuts or to note where shims might be needed behind the baseboard to flatten it against an uneven wall. A snug dry fit means a beautiful final installation.
Mastering the Finish Nailer Technique for Baseboards
Now for the fun part: firing those nails! With proper technique, your baseboards will look fantastic.
Loading Your Nailer and Setting Air Pressure
First, ensure your finish nailer is disconnected from its power source (air hose or battery removed). Follow the manufacturer’s instructions for loading the nails into the magazine. Once loaded, if using a pneumatic nailer, connect the air hose and set the air pressure. A good starting point for baseboards is typically between 70-90 PSI (pounds per square inch). Test on a scrap piece of wood to ensure nails are driven flush or slightly below the surface without over-penetrating.
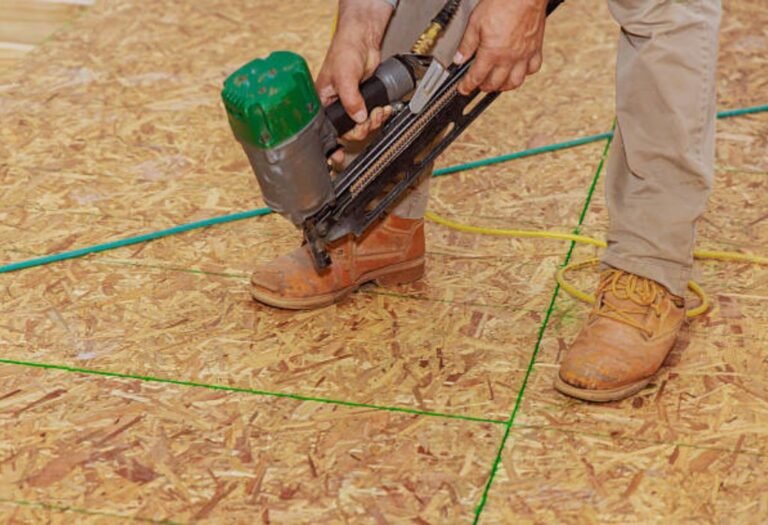
The Perfect Shot: Angle and Placement
When nailing baseboards, aim to drive nails into the studs you marked earlier. For standard 3/4-inch thick baseboards, place one nail about 1/3 of the way down from the top edge and another 1/3 up from the bottom edge. This provides excellent holding power and prevents the board from bowing. When nailing into a stud, hold the nailer perpendicular to the baseboard. If you can’t hit a stud, you can “toe-nail” by angling the nailer slightly upwards or downwards (about 15-20 degrees) to drive the nail into the wall plate or sole plate for extra grip, though hitting studs is always preferred.
Dealing with Inside and Outside Corners
For corners, once the two mitered pieces are fitted snugly, you’ll want to secure them well. For inside corners, nail both pieces into the closest stud on either side of the corner, and consider adding a nail at an angle into the corner itself to help draw the joint together. For outside corners, you definitely want to hit studs near the corner on both sides. You can also drive a few nails at opposing angles through one piece of baseboard into the other to reinforce the mitered joint, creating a super strong, invisible connection.
The Finishing Touches: Concealing and Perfecting
Once your baseboards are securely in place, it’s time to make those small signs of installation disappear, leaving behind a flawless finish.
Filling Nail Holes Like a Pro
Even though finish nails leave small holes, you’ll want to fill them for a perfectly smooth surface. Use a good quality wood filler or spackle. Apply a small dab over each nail hole with your finger or a putty knife, ensuring the hole is completely filled and the surface is flush. Allow it to dry completely, then lightly sand any excess with fine-grit sandpaper until smooth. For pre-finished baseboards, you can use color-matched putty sticks.
Caulking Gaps for a Seamless Look
No wall is perfectly straight, and even the most precise cuts can leave tiny gaps where the baseboard meets the wall or where two baseboard pieces meet along a straight run. Use a paintable acrylic latex caulk to fill these gaps. Apply a thin, consistent bead along the top edge where the baseboard meets the wall and any vertical seams between baseboard sections. Smooth the caulk with a wet finger or a caulk tool for a clean, professional line. This step makes a huge difference in the final appearance.
Painting or Staining for the Final Reveal
After the wood filler and caulk have fully dried (check product instructions for drying times), your baseboards are ready for their final coat of paint or stain. Tape off the floor if necessary to protect it from drips. Apply paint or stain evenly, taking care to cover all filled holes and caulked seams. Once dry, step back and admire your beautifully installed baseboards!
You’ve now got the knowledge to confidently grab your finish nailer and tackle your baseboard project. It’s a tool that genuinely empowers DIYers, transforming a potentially daunting task into a rewarding one. With a bit of practice and attention to detail, you’ll be installing baseboards with a professional touch, creating a polished look for any room in your home. Go on, give it a shot – you’ll be amazed at what you can achieve!
Frequently Asked Questions
What’s the best type of finish nailer to use for baseboards, and what nails should I choose?
For securing baseboards firmly, a 15- or 16-gauge finish nailer is generally recommended. You’ll typically want 2-inch to 2.5-inch nails to ensure they penetrate through the baseboard material and into the wall studs or sole plate.
How do I properly hold and operate the finish nailer when installing baseboards?
Hold the nailer firmly and perpendicular to the baseboard surface, applying gentle pressure to engage the safety trigger. For optimal results and a strong hold, angle the nailer slightly downwards to drive the nail into the framing members.
Where should I aim the finish nailer to secure baseboards effectively?
Aim for the top and bottom third of the baseboard, ensuring the nails hit wall studs and the sole plate for maximum hold. Use a stud finder to locate framing members accurately before you begin nailing.
What air pressure (PSI) should I set my finish nailer to for baseboards?
A good starting point for air-powered finish nailers is typically between 80-100 PSI, but this can vary depending on your specific tool and the density of your baseboard material. Always test on a scrap piece first to ensure nails set flush without over-driving or under-driving.
What if the nails from my finish nailer aren’t setting flush in the baseboards?
This common issue could be due to insufficient air pressure, a worn driver blade, or an incorrect depth adjustment on your nailer. Try increasing your PSI incrementally or adjusting the depth setting on the tool until the nails consistently set properly.
Are there any essential safety tips I should follow when using a finish nailer for baseboards?
Always wear safety glasses and hearing protection to shield yourself from flying debris and the noise of the tool. Remember to disconnect the air supply or remove the battery when clearing jams, loading nails, or making any adjustments to prevent accidental firing.

I’m Michael R. Turner, the founder, lead writer, and passionate DIY enthusiast behind 101diytools.com. With years of hands-on experience in home improvement and power tools, I built this platform to share practical tips, in-depth guides, and honest reviews to help DIYers of all skill levels tackle projects with confidence and the right tools.