How to Turn a Circular Saw into a Table Saw Safely
Learn how to turn a circular saw into a table saw safely at home. Follow step-by-step instructions, tools needed, and setup tips for accurate cutting.
It starts with a simple weekend plan — you’re working on a new woodworking project, excited to make long, clean cuts. You pick up your circular saw, measure your board, and start cutting. But halfway through, the line wanders off, the blade drifts, and the finish looks rough. You sigh, realizing that hand-guided cuts aren’t giving you the straight precision you need.
That’s when the idea hits: what if you could turn your circular saw into a table saw? Instead of spending hundreds on a new tool, you could mount your existing saw upside down, creating a stationary cutting surface for perfect, repeatable cuts. Many DIYers have done this successfully, saving money while achieving professional results.
According to woodworking forums and tool surveys, over 40% of hobbyists prefer building their own cutting table before buying a full-sized table saw. It’s cost-effective, compact, and ideal for smaller workshops. However, safety is critical. With the right materials, proper alignment, and smart precautions, you can safely convert a circular saw into a functional table saw that handles most light to medium projects.
In this detailed guide, you’ll learn every step of the process — from building the frame and mounting the saw to aligning the blade and adding safety features. By the end, you’ll have a homemade table saw that cuts clean, straight, and accurate every time.
Understanding the Concept of a Circular Saw Table Setup
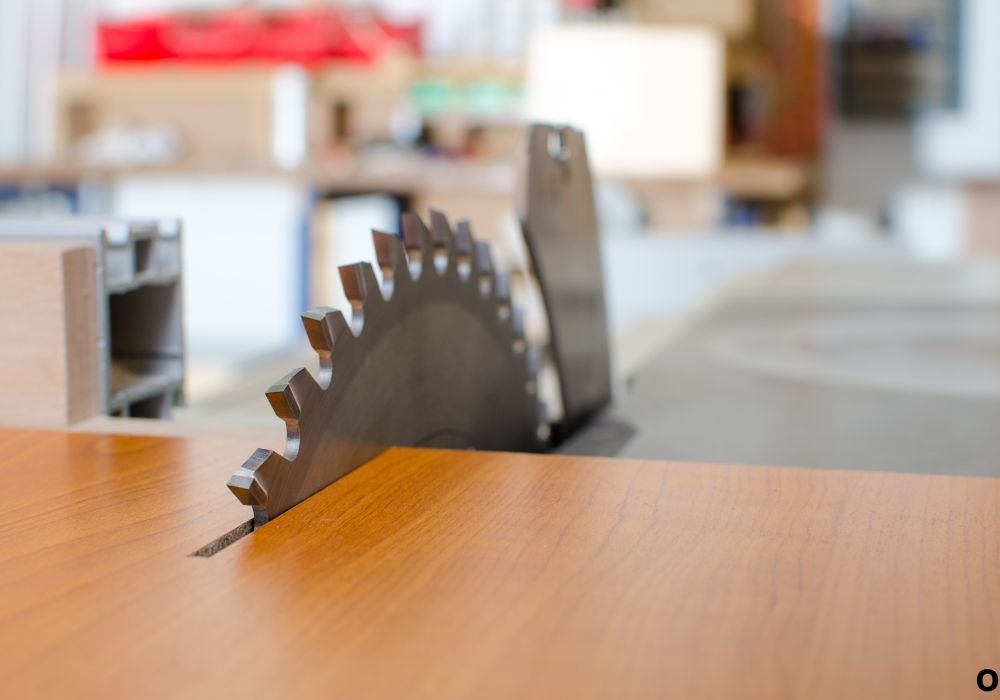
Turning a circular saw into a table saw simply means inverting it so the blade faces upward through a tabletop surface. The saw becomes fixed while the wood moves, allowing for controlled, straight cuts similar to a real table saw.
The concept works because circular saws and table saws share the same core function: a rotating blade cutting through wood. The difference lies in how the wood is guided. A table saw keeps the blade stationary and uses fences or guides for precision.
Before you begin, it’s essential to understand that this setup is meant for light to moderate woodworking. It’s not designed to replace a commercial-grade table saw used for continuous heavy cuts.
Always plan your design before starting. Sketch a layout of your table, showing where the saw will mount, how the fence will align, and where switches or power cords will go. Preparation minimizes mistakes and improves safety.
Finally, understand that every circular saw model is slightly different. Mounting points, base shape, and switch position vary, so you’ll need to customize the setup to fit your specific saw.
This DIY project requires attention to detail, accurate measurements, and patience. When done properly, it offers incredible control and turns your portable saw into a permanent cutting workstation.
Tools and Materials You’ll Need for the Conversion
To build your DIY table saw, gather the following tools and materials before you start. Having everything on hand ensures a smoother process and prevents mid-project delays.
You’ll need a sturdy piece of plywood or MDF board for the tabletop. A thickness of ¾ inch works well for strength and stability. For the frame, use 2×4 lumber or metal angles depending on your preference. Wood is easier to work with, while metal provides more durability.
You’ll also need bolts, washers, nuts, and a drill with wood bits. Screws and clamps are essential for temporary holds while you test the setup. A jigsaw or router will help cut the opening for the saw blade.
Include measuring tools like a square, ruler, and level to keep everything aligned. Accurate measurement ensures smooth operation and prevents blade wobble or uneven cuts.
For safety, use goggles, gloves, and ear protection. A dust mask or respirator keeps sawdust out of your lungs.
Optional but useful items include a toggle switch or foot pedal for power control, rubber pads for vibration reduction, and a straight aluminum bar for the fence.
Having these materials ready lets you build efficiently and safely without compromising on quality or precision.
Building the Table Frame for Your Circular Saw
The frame is the foundation of your DIY table saw, so build it strong and level. Start by cutting four legs from 2×4 lumber, each around 30 inches long for comfortable working height.
Connect the legs with horizontal supports, forming a rectangular frame. Use wood screws and carpenter’s glue to secure the joints. Check that each corner is square with a carpenter’s square to avoid wobbling.
Once the frame is complete, attach cross braces for added stability. These braces prevent the table from shaking when the saw operates. A steady base is essential for accurate cuts and safety.
Next, prepare the tabletop. Measure and cut your plywood sheet to match the frame dimensions, usually around 24×36 inches. Mark the center where the saw blade will pass through.
Use your jigsaw to cut a rectangular slot in the middle of the tabletop wide enough for the saw blade and guard. Keep the opening smooth and even to avoid friction with the wood pieces you’ll cut later.
Finally, attach the tabletop to the frame using screws or bolts. Double-check that it sits level on all sides. A level tabletop ensures smooth feeding of wood pieces during operation.
This sturdy frame will now serve as the base for mounting your circular saw securely underneath.
Mounting the Circular Saw Under the Table
Flip the circular saw upside down and position it beneath the tabletop so the blade extends through the slot. Make sure the blade is centered and aligned parallel with the table’s edge.
Mark the positions of the saw’s base plate holes onto the underside of the table. Drill matching holes and use bolts with washers and nuts to secure the saw firmly in place. Tighten all connections to prevent vibration or movement.
Ensure the saw’s switch and power cord remain accessible. If the switch is hard to reach, you can later install a secondary toggle switch on the table for easier control.
After mounting, check blade clearance by rotating it manually. It should spin freely without touching the table edges. If it scrapes or sticks, widen the slot slightly until it runs smoothly.
Mounting accuracy determines how precise your future cuts will be. Take your time aligning and testing before moving on to the next step.
Creating a Straight Fence for Accurate Cuts
A fence is the guiding edge that keeps your cuts straight. Without it, even a well-mounted saw will produce uneven results.
To build a simple fence, cut a straight piece of hardwood or aluminum bar slightly longer than your tabletop. Secure it with clamps for adjustable positioning. For a permanent setup, mount it with bolts and a sliding track for easy adjustment.
Use a carpenter’s square to ensure the fence runs perfectly parallel to the blade. Even a small angle can cause inaccurate cuts or kickback.
If you want more precision, attach measuring tape along the fence track to set consistent widths. Some DIYers also add locking knobs for quick adjustments.
A smooth, straight fence is key to professional-quality cuts and overall safety during operation.
Adding Power and Safety Switch Controls
A dedicated power switch gives you control without reaching under the table. Mount a simple on-off toggle or a foot pedal near the front leg of the table. This setup lets you start and stop the saw safely while keeping your hands free.
Wire the switch to the saw’s power cord using proper connectors and insulation. If you’re not experienced with electrical wiring, seek help from someone knowledgeable to avoid hazards.
Always ground the saw and use a surge-protected outlet. Never bypass safety features or exposed wiring. Once everything is in place, test the switch to confirm smooth power control.
This addition improves both convenience and safety, allowing quick shutdowns in emergencies.
Testing and Calibrating the DIY Table Saw
Before using your new setup, perform several checks. Start with alignment by placing a straight edge along the blade and fence. Adjust until they’re perfectly parallel.
Plug in the saw and power it briefly to ensure the blade spins smoothly. Listen for unusual noises that might indicate loose bolts or imbalance.
Use a scrap piece of wood to make a few test cuts. Check for clean edges and verify that the cut follows your marked line. If it drifts, realign the fence or recheck the blade’s position.
Measure the cut’s depth and width to confirm the blade height matches your settings. Small adjustments can significantly improve performance.
Testing and calibration might take time, but it ensures safety and accuracy before you start actual work.
Safety Tips When Using a Converted Table Saw
Always wear safety goggles, gloves, and ear protection before operating the saw. Secure loose clothing and tie back long hair to avoid accidents.
Use a push stick when cutting narrow pieces to keep your hands away from the blade. Maintain firm control of the wood, pushing steadily instead of forcing it through.
Keep the area clean and free from debris. Sawdust buildup can affect stability and visibility.
Never cut materials that exceed the blade’s capacity or thickness. Doing so can strain the motor and cause kickback.
Regularly inspect bolts, mounts, and the fence for looseness. A small movement can turn into a dangerous hazard during operation.
Finally, never leave the saw running unattended, and always unplug it when changing blades or performing maintenance.
Advantages and Limitations of a Homemade Table Saw
One of the biggest advantages of this setup is cost savings. Instead of spending several hundred dollars on a table saw, you can repurpose your existing circular saw for a fraction of the price.
It’s also space-efficient. DIY table setups take less room and can be folded or disassembled when not in use, perfect for small workshops or garages.
Another benefit is learning hands-on skills. Building your own equipment deepens your understanding of how saws work, improving your craftsmanship overall.
However, limitations do exist. Homemade versions may lack advanced safety systems like riving knives or automatic brakes found in professional saws.
They may also have lower power capacity, making them less ideal for cutting very thick hardwood or long continuous cuts.
Understanding these trade-offs helps you use your DIY table saw responsibly and appreciate its strengths within safe limits.
FAQ – Common Questions About Turning a Circular Saw into a Table Saw
Is it safe to mount a circular saw under a table?
Yes, but only if it’s securely mounted, properly aligned, and used with all safety precautions in place.
Can I cut hardwood using a DIY table saw?
Yes, light to medium hardwoods are fine, but avoid thick or dense pieces that strain the motor.
What table size is ideal for this setup?
A 24×36-inch table works well for most home projects, offering enough stability and surface area.
How do I prevent blade wobble?
Ensure all bolts are tightened, and the blade is sharp and properly balanced before each use.
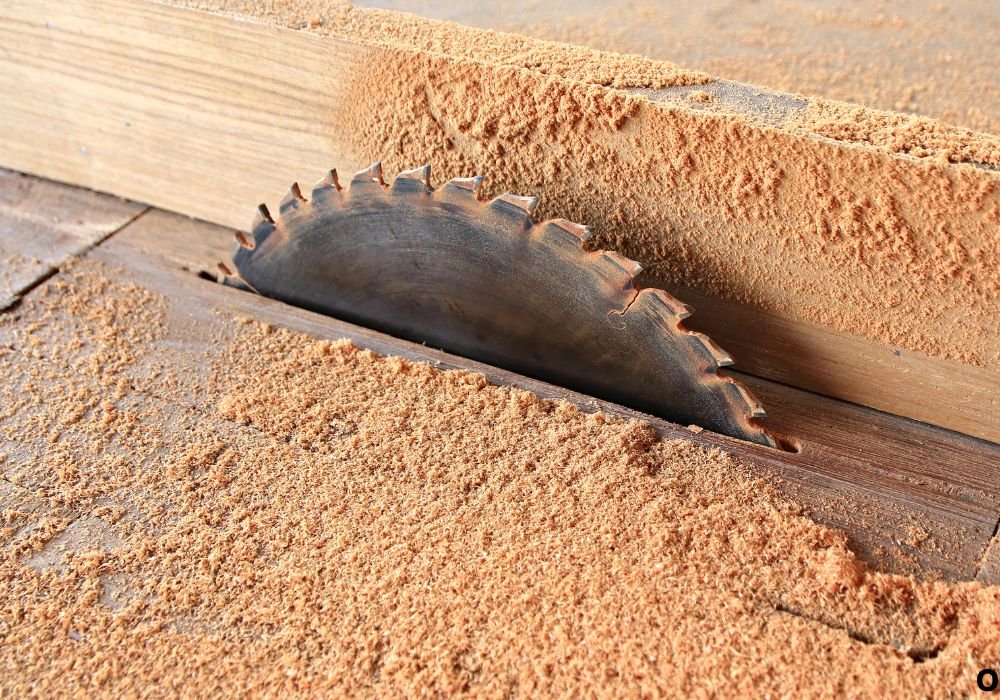
Should I use a special blade for this setup?
A fine-tooth carbide-tipped blade provides cleaner cuts and reduces splintering on most materials.
Can I adjust blade height easily?
Yes, by repositioning the saw’s depth adjustment lever before locking it under the table.
Is dust collection necessary?
While optional, attaching a vacuum hose keeps your workspace cleaner and improves visibility.
How do I add a miter guide?
You can cut a groove in the tabletop and use a small sliding rail to create a DIY miter track.
Can I use this setup for metal cutting?
Only with the correct blade and protective equipment, though wood applications are safer and more common.
What’s the best way to power the saw?
Use a grounded extension cord rated for the saw’s amperage and avoid overloading household circuits.
Conclusion
Transforming a circular saw into a table saw is one of the most practical DIY projects for woodworkers seeking precision without breaking the bank. With a solid table, correct alignment, and safety controls, your portable saw becomes a stable cutting station capable of handling most projects with ease.
While it may not replace a professional machine entirely, this homemade solution teaches valuable skills, enhances accuracy, and opens doors to more creative builds.
Take your time, measure twice, and follow every safety step carefully. With patience and precision, your DIY table saw will reward you with clean, accurate cuts and the satisfaction of building something powerful with your own hands.

I’m Michael R. Turner, the founder, lead writer, and passionate DIY enthusiast behind 101diytools.com. With years of hands-on experience in home improvement and power tools, I built this platform to share practical tips, in-depth guides, and honest reviews to help DIYers of all skill levels tackle projects with confidence and the right tools.