How to Replace Sandpaper on a Power Sander Easily
The whirring sound of a power sander can turn rough wood into a perfectly smooth surface until one day, it starts leaving swirl marks or stops sanding evenly. Most DIYers think the tool is failing, but often the real culprit is simple: worn sandpaper that needs replacing.
When sandpaper loses its grit or detaches from the pad, the sander can’t cut efficiently, causing uneven surfaces and wasted effort. Replacing the sandpaper properly is the quickest way to restore performance and achieve a professional finish again.
Yet many people struggle with this simple task. Some force a sheet that doesn’t fit, others ignore the dust-collection holes, and a few forget to secure the paper tightly. Small mistakes like these can shorten the tool’s life and ruin your project’s surface quality.
Worn or clogged abrasives can reduce sanding efficiency by up to 25 percent. Changing grits or paper at the right time improves finishing speed by nearly 30 percent.
Learning how to replace paper on a power sander correctly saves time, improves the smoothness of every surface, and protects the tool’s pad and motor. This guide walks through the process step-by-step, explains different attachment systems, and reveals how to avoid common mistakes that damage sanders or waste abrasives.
By the end, readers will know not just how to change sandpaper but how to keep a power sander performing at its best for years to come.
What Is a Power Sander and Why the Sandpaper Needs Replacing
A power sander is a handheld or stationary tool that uses a motor-driven pad to smooth, shape, or finish surfaces. It can remove paint, prepare wood for staining, or level imperfections in just seconds compared to manual sanding.
Different sanders serve different tasks. Orbital sanders handle finishing, belt sanders remove material quickly, and detail sanders reach tight corners. Each model requires its sandpaper type, attachment system, and grit selection.
Over time, abrasive particles on the sandpaper wear down and clog with debris, drastically reducing efficiency. Worn paper can increase sanding time by up to 40 percent and cause uneven marks on the surface.
Replacing the sandpaper at the right interval keeps your tool running smoothly and ensures every project gets a consistent finish. Knowing how to replace paper on a power sander correctly also prevents unnecessary strain on the motor and extends pad life.
What are the main types of power sanders?
The most common types are orbital, random-orbit, belt, and detail sanders. Each uses a specific pad shape and sandpaper attachment method.
Why does sandpaper wear out so quickly?
Heat, friction, and dust buildup erode the abrasive surface, making it less effective with every use.
How can you tell when to replace the sandpaper?
Replace it when sanding slows, the paper looks glossy or clogged, or you notice streaks or burn marks on the work surface.
Does using worn sandpaper damage the tool?
Yes, it forces the motor to work harder and can overheat the pad, causing premature wear or slippage.
Why is it important to match the sandpaper type to the sander?
Different sanders require clamp-style, adhesive, or hook-and-loop sheets; mismatching them reduces grip and leads to poor sanding results.
Preparing to Replace Sandpaper on a Power Sander
Before learning how to replace paper on a power sander, proper preparation ensures safety and efficiency. Always start by unplugging the tool or removing the battery to prevent accidental activation.
Check the work surface for dust, moisture, or clutter that could affect grip and stability. A clean environment also prevents debris from sticking under the sandpaper during installation.
Gather all essential tools — new sandpaper of the correct size and grit, a cleaning cloth, and a small brush for pad cleaning. If your model uses adhesive discs, keep a mild solvent nearby to remove old glue residue.
Inspect the sander pad for cracks, uneven wear, or missing Velcro hooks. A damaged pad will prevent proper adhesion and reduce sanding performance, even with new paper installed.
What safety steps should be taken?
Always disconnect power, wear eye protection, and ensure the pad has completely stopped before touching it.
What materials are needed before starting?
New sandpaper sheets or discs, a soft cloth, cleaning brush, and matching grit selection for your task.
How do you choose the correct grit?
Use coarse (60–80) for heavy removal, medium (100–150) for smoothing, and fine (180–220) for finishing.
Should you clean the pad before adding new paper?
Yes, leftover dust or adhesive residue reduces grip and causes the new sandpaper to slip during use.
What lighting and workspace setup is ideal?
Work in a well-lit, ventilated area with minimal dust and stable support for both hands to work safely.
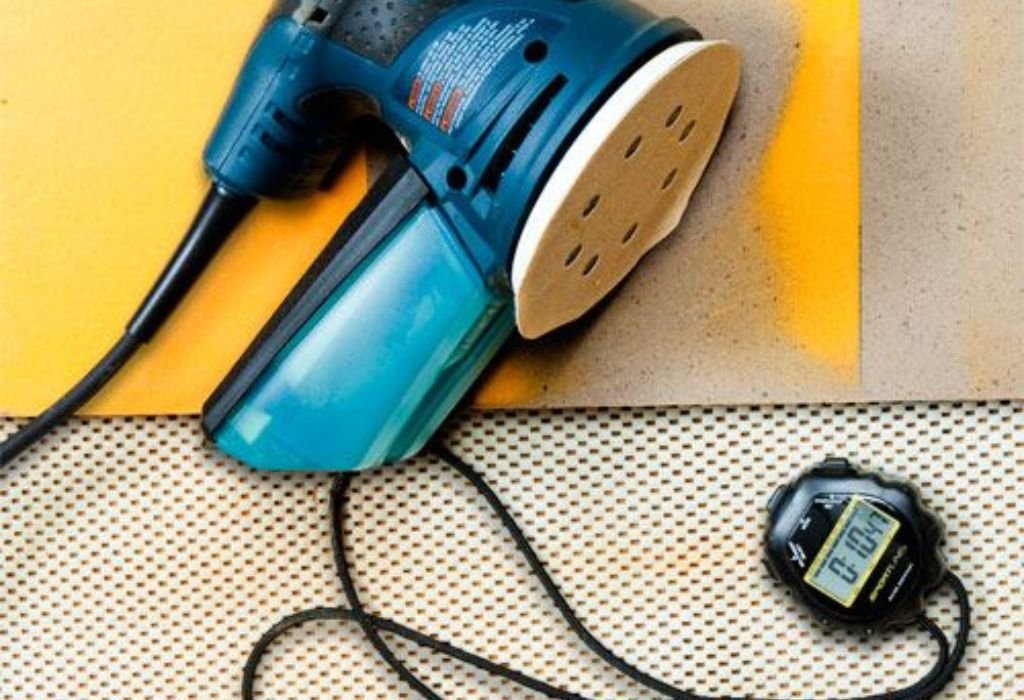
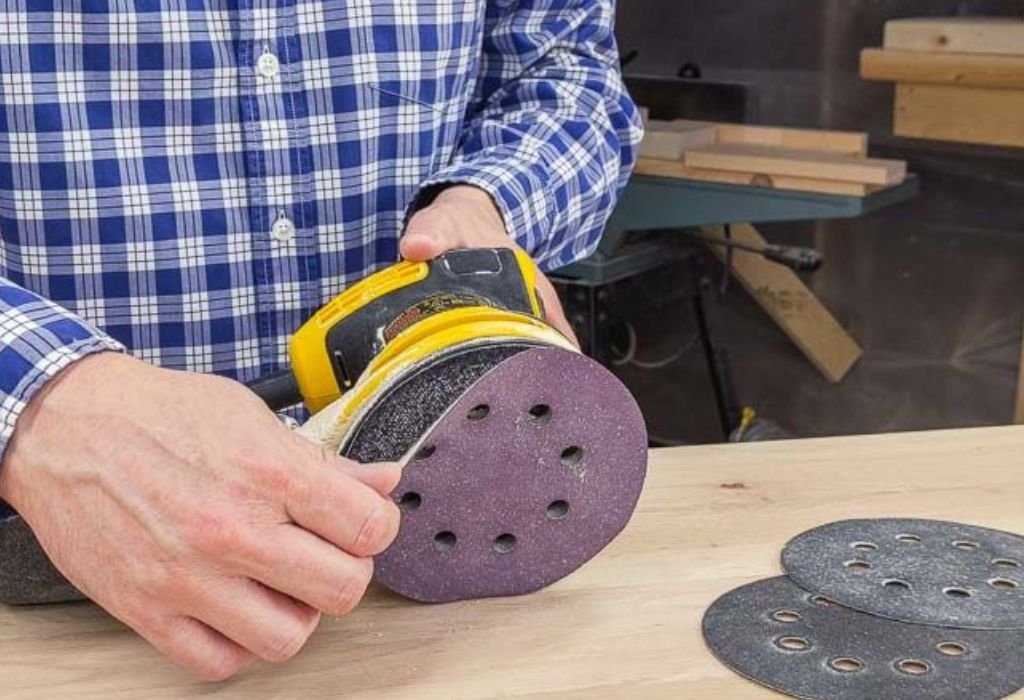
Step-by-Step: How to Replace Sandpaper on a Power Sander
Changing sandpaper varies slightly depending on the attachment system, but the basic method remains consistent. Always verify the paper size matches your pad to ensure proper alignment and suction through the dust holes.
For hook-and-loop models, gently peel off the old sheet from one edge, cleaning off leftover dust before pressing on the new disc firmly. For clamp-style sanders, lift the metal clips, insert the new sheet evenly, pull it tight, and lock both sides.
For adhesive-backed discs, peel away the worn one carefully, apply a new pad using even pressure, and avoid trapping air bubbles underneath. Proper alignment prevents wobble and uneven wear during operation.
Run the sander for a few seconds at low speed before use to confirm the sandpaper sits flat and secure. If you hear vibration or notice movement, stop and recheck alignment.
How do you remove the old sandpaper?
Release clamps or peel off hook-and-loop or adhesive backing, then clean the pad thoroughly.
How do you attach the new sandpaper?
Align edges carefully, attach one side first, pull tight, and press or clamp securely.
Are there differences between attachment systems?
Yes, hook-and-loop offers fast replacement, clamp systems require tension, and adhesive models need clean contact.
Why must the dust holes align perfectly?
Improper alignment blocks suction, reducing dust removal and increasing heat buildup during sanding.
How do you test if the paper is secure?
Run the tool briefly at no load; if the paper stays flat and centered, it’s ready for sanding.
Common Mistakes and How to Avoid Them
Many sanding problems come from improper paper installation rather than tool defects. Misalignment, wrong grit selection, or dirty pads can all lead to poor performance.
Attaching the paper loosely causes it to slip or tear mid-use, while overtightening clamps can wrinkle it and leave scratch marks. Always ensure the sheet is tight, smooth, and fully seated.
Ignoring pad maintenance shortens tool life and reduces efficiency. A worn pad can’t hold sandpaper securely and often creates uneven finishes.
What happens if the paper is misaligned?
It can cause uneven sanding, vibration, or premature tearing.
What if the backing pad is damaged?
It won’t hold the sandpaper evenly, leading to chatter marks and wasted sheets.
Can using the wrong grit affect results?
Yes, coarse grit leaves deep scratches, while overly fine grit clogs quickly and slows progress.
Why should dust holes never be blocked?
Blocked holes increase friction, overheat the surface, and clog the sandpaper faster.
Does skipping pad cleaning matter?
Yes, debris under the paper creates bumps and reduces full contact, making sanding inconsistent.
Maintenance Tips to Extend Adhesion and Sandpaper Life
Proper maintenance keeps your sandpaper gripping securely and improves finish quality over time. Clean your pad after every few uses using compressed air or a brush to remove fine dust.
Inspect the hook-and-loop or clamp mechanism for wear and replace if the paper starts slipping frequently. A well-maintained sander can last years longer and deliver smoother performance.
Store unused sandpaper in a dry, sealed container away from humidity or heat to prevent curling or adhesive weakening. Maintaining sanding pads and cleaning hooks can extend sandpaper life by up to 35 percent.
How often should you inspect the pad?
After every few hours of sanding or whenever the paper fails to stay flat on the surface.
How to maintain the dust-collection system?
Empty the dust bag or vacuum port regularly and clear any blockages in vent holes.
Why remove sandpaper after long breaks?
Leaving it attached compresses hooks and weakens adhesion over time.
How to store sanding sheets properly?
Keep them flat, dry, and in original packaging to maintain shape and grit quality.
Does using grit progression matter?
Yes, moving from coarse to fine grit reduces tool strain and extends abrasive lifespan.
When to Replace the Entire Sander or Upgrade Attachments
Sometimes poor sanding performance persists even after installing new sandpaper. In these cases, the issue often lies in the sander itself or the worn backing pad.
If you notice heavy vibration, weak suction, or the pad detaching during work, it may be time to upgrade or service the tool.
Modern sanders with advanced hook-and-loop systems, quick-release clamps, and superior dust collection make changing paper faster and cleaner.
Upgrading also helps when older models no longer match available sandpaper sizes or lack standard hole alignment patterns.
What are the signs of a worn-out sander?
Reduced power, loud vibration, poor suction, or pads that no longer hold sandpaper securely.
Can backing pads be replaced instead of buying a new tool?
Yes, most manufacturers sell replacement pads that restore grip and balance.
Are new sanding systems more efficient?
Modern designs improve airflow and reduce clogging, leading to smoother finishes with less effort.
Should you buy premium sandpaper brands?
Higher-quality abrasives cut cleaner, last longer, and resist clogging better than low-cost sheets.
Can old sanders be refurbished?
Yes, by changing the pad, bearings, or motor brushes you can restore performance without full replacement.
Conclusion
Knowing how to replace paper on a power sander is one of the simplest ways to keep your projects looking professional. A properly fitted sheet ensures consistent sanding pressure, reduces vibration, and protects the motor from strain.
Regular cleaning, pad inspection, and choosing the right grit extend both the tool’s life and sanding efficiency. Avoiding small mistakes during replacement saves money on consumables and prevents frustration mid-project.
Before starting your next sanding job, take a minute to check your tool’s pad, replace the worn paper, and confirm alignment. It’s a small habit that leads to big improvements in quality and performance.
Treat your sandpaper and sander as a team — keep both clean, secure, and properly matched, and they’ll deliver flawless results for every surface you finish.

I’m Michael R. Turner, the founder, lead writer, and passionate DIY enthusiast behind 101diytools.com. With years of hands-on experience in home improvement and power tools, I built this platform to share practical tips, in-depth guides, and honest reviews to help DIYers of all skill levels tackle projects with confidence and the right tools.