How to Power Sand a Wood Deck Step by Step
Over time, even the strongest wood deck loses its charm. Sunlight, rain, and foot traffic slowly erode the finish, leaving the surface faded, splintered, and unsafe.
Many homeowners believe staining alone can revive an old deck. In reality, without sanding first, new stain struggles to bond and begins peeling within months. This overlooked step determines whether your refinishing project lasts a season or a decade.
Sanding and refinishing can extend a deck’s life by up to 50 percent when done properly. Decks maintained through regular sanding also retain much of their original strength after ten years.
Yet the process still feels intimidating to many. Questions arise—what type of sander to use, how coarse the grit should be, or how to avoid uneven marks. Missteps like sanding wet wood or skipping safety gear can ruin hours of work.
Learning how to power sand a wood deck transforms this chore into a smart restoration project. With the right tools, timing, and technique, the surface can look freshly installed again. The key lies in preparation, careful sanding, and immediate sealing afterward.
This guide walks through every stage step by step. From assessing your deck’s condition to choosing the correct sander and preventing common mistakes, you’ll learn exactly how to bring back the smooth texture and rich color your outdoor space deserves.
What Does It Mean to Power Sand a Wood Deck?
Power sanding means using an electric or mechanical sander to remove old finishes, splinters, and raised grain. It smooths the boards and prepares them for a new protective coating.
Without this step, stain or paint will not adhere properly, leading to uneven color and premature peeling. Sanding evens out surface imperfections and restores the wood’s natural beauty.
Power sanding is faster and more efficient than hand sanding. It allows large surfaces to be smoothed evenly while saving hours of manual work.
However, precision is critical. The wrong tool or excessive pressure can scar the boards. Correct technique ensures longevity, safety, and visual appeal.
What is the difference between hand sanding and power sanding a deck?
Hand sanding uses manual blocks or sponges, while power sanding employs electric tools that remove material quickly and evenly.
Can you skip sanding when refinishing a deck?
Skipping sanding causes poor adhesion and uneven results, making the finish fail prematurely.
Which types of wood decks require power sanding the most?
Softwoods like pine and cedar, or decks with heavy weathering, benefit most from power sanding.
Can power sanding damage the surface?
Yes, using coarse grit or lingering in one spot can gouge or burn the wood.
How does sanding improve stain adhesion?
It opens the pores, removes residue, and allows the stain or sealant to penetrate evenly for stronger, longer protection.
Signs It’s Time to Power Sand Your Wood Deck
A healthy deck surface should feel smooth and uniform. When splinters appear or the color fades to grey, sanding is due.
Look for peeling paint, raised fibers after cleaning, or uneven stain absorption. These are indicators that your old finish is no longer protecting the wood.
If water soaks into the boards instead of beading up, the protective seal is gone. Waiting too long leads to deeper damage and more costly repairs later.
Routine inspection after each winter helps detect early signs. Acting quickly saves effort and prevents structural deterioration.
How do you test whether sanding is needed?
Pour a small amount of water—if it absorbs instantly, sanding and sealing are required.
Does cleaning alone restore the deck?
No, washing removes dirt but not old coatings or roughness. Sanding is essential before refinishing.
Can you sand only certain boards?
Yes, but spot sanding may create color inconsistencies. Full-deck sanding ensures even tone and texture.
What happens if sanding is delayed?
The wood may crack, fasteners loosen, and rot develop, increasing repair costs.
Does the season affect sanding time?
Absolutely. Choose a dry, mild period so the wood stays stable and the finish cures properly.
Tools and Materials Required for Power Sanding
Preparation begins with the right equipment. Using the proper tools ensures efficiency and avoids surface damage.
Essential tools include a random-orbit or detail sander, sandpaper of various grits, extension cords, a vacuum, and safety gear such as goggles and a dust mask.
Recommended grit progression starts with 60–80 for rough boards, then 100–120 for finishing. This smooths the wood while leaving enough texture for the stain to adhere.
A detail sander or sanding sponge helps reach corners and railings. Always sand with the grain to prevent scratches.
Which type of power sander works best?
A random-orbit sander is ideal—it minimizes swirl marks and handles both large and small areas effectively.
What grit should you start with?
Use 60–80 grit for damaged surfaces, then move to 100–120 grit for finishing.
Is dust collection necessary?
Yes. Dust clogs the stain and creates uneven coverage. Always vacuum between passes.
Should deck repairs come before sanding?
Yes, secure loose nails and replace damaged boards to prevent sander snags.
What safety items are required?
Wear a respirator, safety glasses, gloves, and ear protection—wood dust is hazardous to breathe.
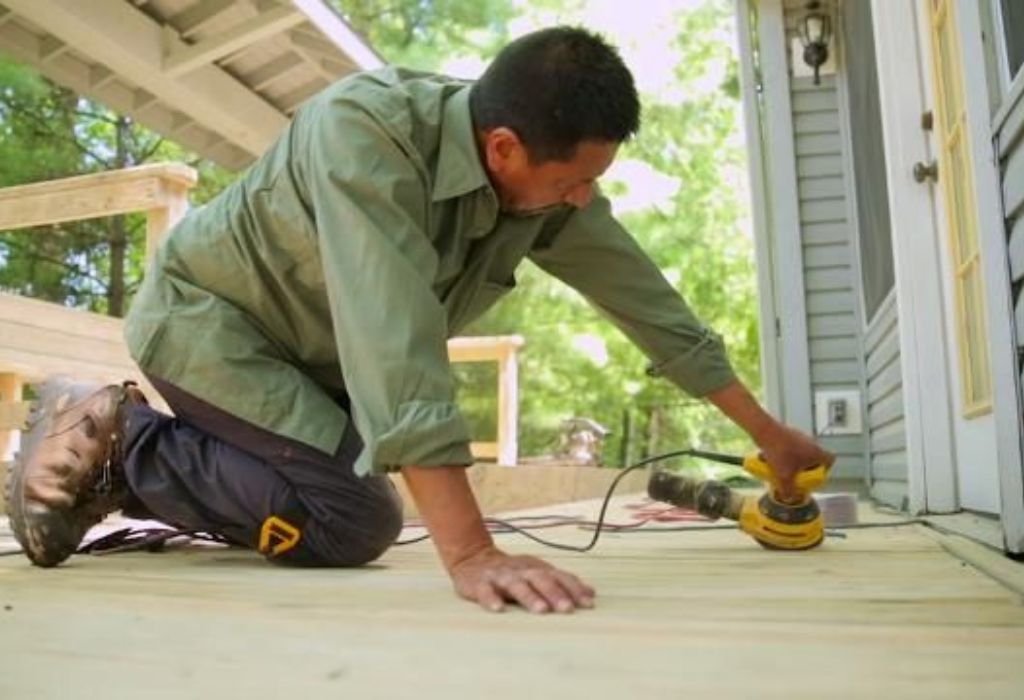
Step-by-Step Process to Power Sand a Wood Deck
1. Clear and Clean the Deck
Remove furniture, planters, and debris. Sweep thoroughly to expose the wood surface.
Wash the deck with a deck cleaner or a mild detergent and rinse well. Allow at least 24–48 hours to dry.
2. Inspect and Repair the Boards
Tighten screws, hammer down nails, and replace warped or rotten boards. Fill cracks with exterior wood filler if necessary.
3. Ensure the Deck Is Completely Dry
Moisture ruins sanding efficiency and clogs the sandpaper. Use a moisture meter if possible before starting.
4. Start Sanding with Coarse Grit
Begin with 60–80 grit sandpaper. Move the sander slowly along the wood grain and overlap each pass.
5. Progress to Finer Grits
Switch to 100–120 grit for a smooth finish. Avoid going too fine or the stain may not penetrate deeply.
6. Detail Edges and Railings
Use a smaller sander or sanding sponge for tight corners, steps, and railings.
7. Vacuum and Clean Thoroughly
After sanding, remove every trace of dust using a shop vacuum or tack cloth.
8. Apply Stain or Sealant Immediately
Once the deck is clean, apply your chosen finish within a few hours to prevent moisture absorption.
9. Allow Proper Drying Time
Follow the product’s instructions for curing. Avoid foot traffic until fully dry.
10. Maintain Regularly
Clean annually and reapply finish every 2–3 years based on climate.
How long does deck sanding take?
Typically 3–8 hours depending on deck size and condition.
Can you use a belt sander?
Not recommended—belt sanders can gouge softwood decks.
Should sanding be done after power washing?
Yes, but only once the deck is completely dry to avoid clogged sandpaper.
What grit should you end with before staining?
100–120 grit provides the right balance between smoothness and stain absorption.
What is the best cleaning method before sanding?
Gentle power washing or scrubbing with deck cleaner works best—avoid extreme pressure.
Common Mistakes to Avoid When Power Sanding

Even experienced DIYers can make errors that damage the deck or shorten its lifespan. Awareness prevents costly redo work.
The most common mistake is using the wrong tool. Belt sanders or aggressive grits can chew through softwood quickly.
Sanding against the grain creates deep scratches that remain visible after staining. Keep consistent pressure and motion.
Failing to tighten loose nails or screws before sanding can tear sanding pads or injure the operator.
Neglecting dust removal is another critical error. Fine dust left on boards prevents stain from bonding.
Finally, sanding while the wood is still damp or leaving too much time before finishing causes poor adhesion.
What happens if you over-sand?
Over-sanding thins boards, creates dips, and reduces strength.
How to prevent swirl marks?
Use a random-orbit sander, keep the pad flat, and move steadily with the grain.
Why is dust removal crucial?
Dust blocks stain penetration and causes uneven sheen.
Can power washing replace sanding?
No. Power washing cleans but cannot remove old finish or smooth rough grain.
What happens if you sand wet wood?
Wet wood clogs sandpaper and raises fibers again when it dries, leaving the surface rough.
After Sanding – Maintaining a Smooth, Protected Deck
Once sanding is complete, apply a high-quality stain or sealant while the wood is still fresh. This locks out moisture and UV damage.
Choose oil-based or hybrid finishes designed for exterior use. They penetrate deeply and resist weathering longer.
Routine maintenance includes sweeping debris, cleaning annually, and checking for wear in high-traffic zones.
Plan light touch-ups every two to three years depending on sun and rain exposure. Regular care extends the time before full sanding is needed again.
How often should you refinish a deck?
Every 2–5 years, depending on climate and usage.
Can you spot-sand between full refinishings?
Yes, lightly sand and reseal worn boards to extend overall life.
What regular habits protect the finish?
Keep surfaces clean, prevent standing water, and use protective mats under furniture.
When is full sanding necessary again?
When the color fades, the surface feels rough, or stain absorbs unevenly.
Does climate affect maintenance frequency?
Yes—sunny, humid, or coastal climates require more frequent care.
Conclusion
Mastering how to power sand a wood deck is the key to long-lasting outdoor beauty. Proper sanding eliminates damage, restores color, and ensures your finish adheres perfectly.
With the correct tools, grit sequence, and patience, even an old deck can look brand new again. Always sand with the grain, keep safety first, and seal immediately afterward.
A well-sanded deck isn’t just visually appealing—it’s safer to walk on, more weather-resistant, and easier to maintain. Choose a dry weekend, follow each step carefully, and your deck will stay strong and stunning for years.

I’m Michael R. Turner, the founder, lead writer, and passionate DIY enthusiast behind 101diytools.com. With years of hands-on experience in home improvement and power tools, I built this platform to share practical tips, in-depth guides, and honest reviews to help DIYers of all skill levels tackle projects with confidence and the right tools.