How to Measure a Circular Saw Blade Accurately at Home
You finish a project and realize your saw blade feels dull. You go to buy a new one, but suddenly the store asks — “What size blade do you need?”
You stare at the worn circular saw blade in your hand, unsure whether it’s 6½ or 7¼ inches. The faded label gives no clue, and you start wondering how professionals always seem to know.
Measuring a circular saw blade isn’t guesswork — it’s a simple process once you know what to look for. Blade diameter, arbor size, kerf width, and tooth count all play a part.
Choosing the wrong size can damage your saw or result in unsafe cuts. That’s why measuring correctly before buying a replacement is so important.
Imagine cutting through wood only to find the blade rubbing against the guard. A blade that’s too large can jam, while a smaller one wastes power and cutting depth.
Every circular saw model is designed for a specific blade diameter and arbor hole size. Matching them ensures safety, precision, and smooth performance.
In this guide, you’ll learn exactly how to measure your circular saw blade step by step. From diameter to thickness, you’ll be able to identify every specification confidently.
By the end, you’ll never second-guess which blade fits your saw — you’ll measure, choose, and cut like a pro.
Why Measuring a Circular Saw Blade Is Important

Using the wrong-sized blade can lead to uneven cuts and potential safety hazards. Proper measurement ensures your saw operates efficiently and safely.
Every circular saw has a maximum blade size it can handle. Installing a larger blade may cause it to hit the guard or base plate during rotation.
Even a small difference in diameter affects cutting depth and accuracy. Measuring helps you maintain consistency between projects.
Arbor hole size also matters — if it’s too loose, the blade can wobble, creating rough cuts or even dangerous kickback.
Blades wear down over time, and their original dimensions may fade from markings. Measuring restores that lost information quickly.
When replacing an old blade, comparing the measurements helps you pick the same specifications. That keeps your saw’s performance consistent.
If you use multiple saws, each may require different blade sizes. Measuring ensures you don’t mix them up accidentally.
Accurate sizing also helps you choose the right tooth count for your material — fine-tooth blades for plywood, coarse ones for framing.
Ultimately, knowing how to measure your circular saw blade protects both your tools and your safety.
Understanding the Basic Parts of a Circular Saw Blade
Before measuring, it’s important to understand the blade’s structure. Each part plays a role in cutting performance and measurement.
The diameter is the distance from one tooth tip to the opposite tip through the center. It determines cutting depth.
The arbor hole is the round center opening where the blade mounts to your saw. It must match your saw’s spindle perfectly.
Teeth are the sharp points around the edge that do the actual cutting. The number and shape of these teeth affect speed and finish quality.
Gullets are the curved spaces between teeth that carry away sawdust during cutting. Larger gullets remove more material quickly.
Kerf refers to the thickness of the cut a blade makes. It’s slightly wider than the blade body because of tooth set or grind angle.
Plate thickness or blade body thickness refers to the metal portion excluding the teeth. It determines rigidity.
Understanding these terms makes it easier to measure correctly and read manufacturer specifications.
Once you know what each part does, the measuring process becomes simple and consistent.
Now, let’s move to the tools you’ll need for precise measurement.
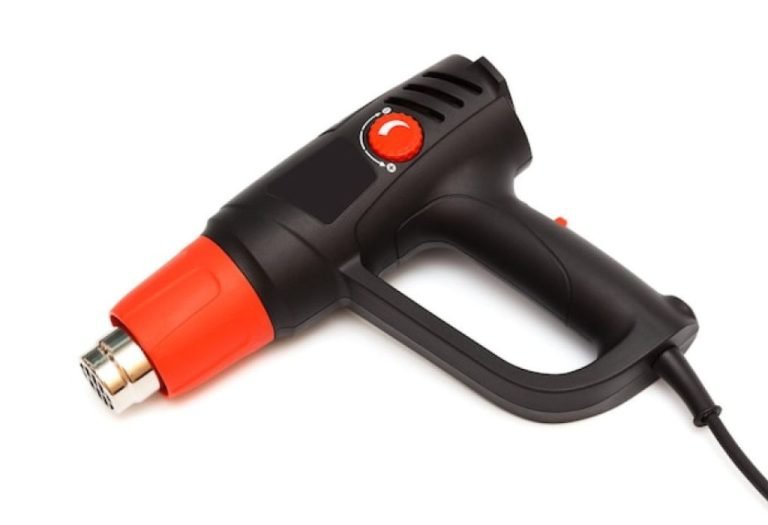
Tools You Need to Measure a Saw Blade
Measuring a circular saw blade doesn’t require fancy equipment. A few common tools will do the job accurately.
A measuring tape or ruler works well for measuring the overall diameter. Make sure it’s long enough to span the entire blade.
A digital caliper gives the most accurate reading for arbor holes and kerf thickness. Calipers can measure to fractions of a millimeter.
A protractor helps you check hook angles or rake angles if you’re analyzing cutting behavior.
Use marker pens to note measurements directly on the blade surface or packaging. This saves time later when replacing it.
If the blade is rusty or dirty, keep a cleaning brush or cloth handy. Dirt can interfere with accurate readings.
A flat surface is helpful to keep the blade steady while measuring. Avoid measuring while it’s mounted on the saw.
You may also need safety gloves to avoid cuts from sharp teeth. Even dull blades can be dangerous when handled carelessly.
Once your tools are ready, start by measuring the most important aspect — the diameter.
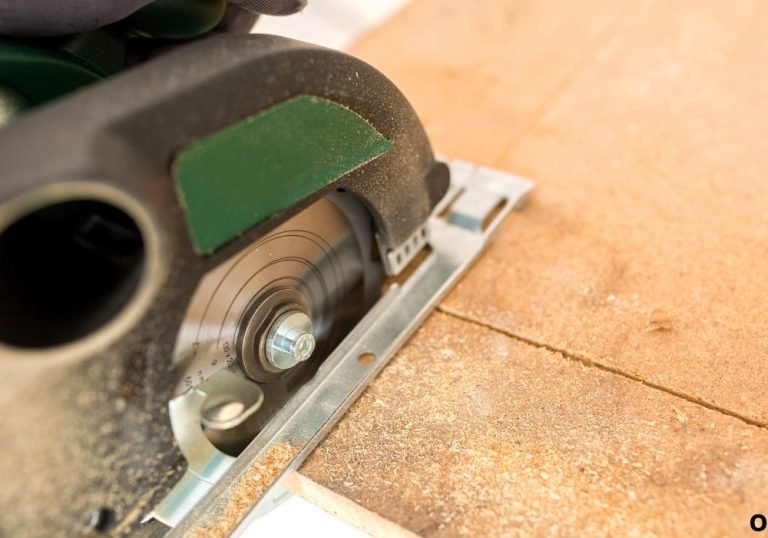
How to Measure the Diameter of a Circular Saw Blade
The blade’s diameter determines how deep it can cut into material. Most circular saw blades range between 6½ and 10 inches.
Lay the blade flat on a table and stretch your measuring tape from the tip of one tooth directly across to the opposite tip.
Ensure the tape passes through the exact center of the arbor hole. Any offset gives inaccurate readings.
If you don’t have a clear center mark, measure across several points and average the result.
Common circular saws use 7¼-inch blades, while smaller trim saws use 6½-inch versions.
Large table saws or miter saws may take 10- or 12-inch blades for deeper cuts.
Knowing the diameter ensures you pick a blade that fits inside your saw’s guard without interference.
Using a larger diameter than recommended can overheat the motor or cause guard friction.
A smaller diameter blade will fit but cut shallower than expected.
Write down the diameter clearly — it’s the first number you’ll need when buying a new blade.
Measuring the Arbor Hole Size Correctly
The arbor hole connects the blade to the saw’s spindle. Measuring it ensures a tight, safe fit.
Use a caliper or ruler to measure the diameter of the center hole precisely.
The most common arbor size for handheld circular saws is 5/8 inch. Some European models use 20mm.
Larger stationary saws might have 1-inch arbor holes.
Never try to fit a blade with a larger arbor hole using spacers or washers. It compromises safety.
Some blades include reducing rings to match different arbor sizes safely. Use only those designed by the manufacturer.
If your caliper measures in millimeters, convert it using a chart — 5/8 inch equals roughly 15.88 mm.
Check that the hole edges are round and clean. Warped or damaged centers can make the blade wobble during rotation.
Record this arbor size with your diameter measurement for easy reference later.
Correct arbor fit ensures smooth, balanced rotation and prevents dangerous vibrations.
How to Identify the Kerf and Blade Thickness
Kerf refers to the width of the cut that a blade makes. It’s slightly wider than the blade body itself.
To measure kerf, use digital calipers to check the distance between the outermost edges of two opposite teeth.
Typical kerf sizes range from 1.5mm (thin) to 2.6mm (full) depending on blade design.
Thin-kerf blades require less power and are ideal for cordless saws.
Full-kerf blades offer greater rigidity and are used in heavy-duty cutting.
Blade thickness, on the other hand, is measured on the flat metal part of the blade between teeth.
Measure this thickness at the midsection, away from the sharpened edges.
The blade body is usually about 0.2–0.3 mm thinner than the kerf.
Understanding this difference helps you choose a blade that matches your saw’s power capacity.
If your saw struggles with thicker blades, switching to a thin-kerf type improves performance and reduces strain.
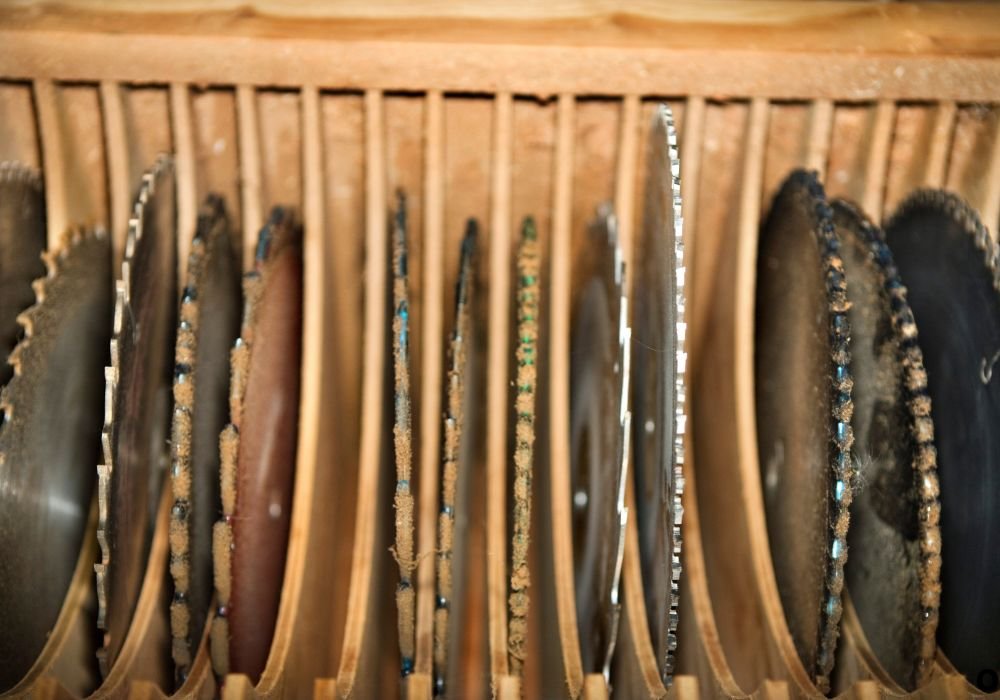
Counting Teeth and Understanding Tooth Design
Teeth count affects cutting speed, smoothness, and material compatibility. More teeth equal smoother cuts but slower progress.
Lay the blade flat and slowly rotate it while counting each tooth one by one.
Common circular saw blades have 24, 40, 60, or 80 teeth depending on purpose.
A 24-tooth blade is great for rough framing cuts. It removes material quickly but leaves a rough edge.
A 60- or 80-tooth blade is ideal for fine woodworking, trim, or melamine cutting.
The tooth pattern or grind type also influences performance.
ATB (Alternate Top Bevel) teeth cut cleaner across wood grain.
FTG (Flat Top Grind) teeth are best for ripping lumber along the grain.
TCG (Triple Chip Grind) blades handle laminate, MDF, and plastics efficiently.
Knowing the tooth design helps you choose the perfect replacement blade for your specific projects.
Measuring Blade Plate and Hook Angle
The plate thickness affects blade stability and noise level during operation. Use calipers to measure this thickness near the center of the blade body.
Thicker plates stay rigid but require more power. Thinner ones reduce load but can flex under heavy pressure.
The hook angle, or rake angle, defines how aggressively the blade bites into the material.
Use a small protractor to measure the angle between a tooth’s face and a line perpendicular to the blade.
Positive hook angles (10–20°) cut faster and are suited for softwood or framing.
Negative hook angles (–5° to 0°) provide smoother, safer cuts in materials like metal or laminate.
Measure several teeth to confirm consistency — some specialty blades vary slightly across segments.
Documenting these angles helps when comparing professional-grade blades with general-purpose ones.
It’s one more step toward selecting the perfect saw blade for each task.
Checking Blade Compatibility with Your Circular Saw
Every circular saw has a maximum supported blade diameter printed on its housing. Exceeding this size is unsafe.
Check your saw’s user manual or the sticker near the guard for blade specifications.
Match your measurements with the listed diameter and arbor size exactly.
If your blade fits loosely or requires pressure to mount, it’s not the right match.
Blades should slide snugly onto the arbor and sit flat against the flange washer.
Ensure the teeth rotate in the same direction as the arrow on your saw guard.
Verify that the saw’s base plate and guard can move freely without contacting the blade.
Using a mismatched blade not only damages the saw but can also cause accidents.
Measure twice before installing a new blade — precision ensures safety.
Once verified, your saw will run smoothly with minimal vibration or noise.
Common Mistakes When Measuring Saw Blades
Many beginners measure across teeth tips without aligning the center. This gives a smaller or incorrect diameter.
Others confuse kerf width with blade thickness, leading to poor blade selection.
Ignoring arbor size is another common error. Even a slight mismatch can make a blade unsafe.
Never measure blades while mounted on the saw — angles and guards interfere with accuracy.
Some people read the wrong scale on measuring tapes (metric vs inch). Always double-check units.
Dull or damaged blades can have uneven teeth; measure multiple points for accuracy.
Don’t guess the size based on old packaging — manufacturers may change specifications.
Avoid rounding measurements unless converting between units. Precision matters.
Worn teeth may slightly reduce diameter, so measure from healthy sections of the blade.
Avoiding these mistakes ensures you always get the correct and compatible blade.
Tips for Maintaining and Storing Your Blades
Clean blades last longer and cut smoother. Wipe each blade after use with a soft cloth and mild cleaner.
Store blades flat or hang them individually to prevent warping.
Avoid stacking blades directly — use cardboard or plastic spacers between them.
Label each blade with its size, tooth count, and material type. This saves time during future projects.
Apply a light coat of rust-preventive oil if you store blades in humid environments.
Check for missing teeth or cracks before reuse. Damaged blades should be replaced immediately.
Always loosen the saw’s arbor nut before storage to avoid long-term tension.
Organize blades by size to prevent confusion. A simple pegboard works great for quick access.
Measure and record new blades as soon as you buy them — the markings may fade over time.
Proper care ensures each blade performs safely and efficiently for years.
Frequently Asked Questions
How do I know what size circular saw blade I need?
Measure from the tip of one tooth to the opposite tip through the center. Match it with your saw’s manual specifications.
What is the standard circular saw blade size?
Most handheld circular saws use 7¼-inch blades, but smaller saws use 6½-inch versions.
How do I measure the arbor hole?
Use a caliper to measure the center hole diameter accurately — usually 5/8 inch for most saws.
What is the kerf of a saw blade?
Kerf is the width of the cut a blade makes, typically 1.5–2.6mm depending on type.
Does kerf width matter?
Yes, thin-kerf blades cut faster with less power, while full-kerf blades give stronger, straighter cuts.
How can I count the teeth correctly?
Rotate the blade slowly and count each tooth once around the edge.
What is a hook angle on a saw blade?
It’s the forward or backward tilt of each tooth that affects cutting aggressiveness.
Can I use a blade with a bigger arbor hole?
No, only use blades that match your saw’s arbor diameter to prevent vibration and unsafe operation.
How do I measure the blade thickness?
Use digital calipers across the blade’s flat surface between teeth.
Why is accurate measurement important?
It ensures blade compatibility, cutting efficiency, and operator safety during every project.
Conclusion
Knowing how to measure your circular saw blade saves time, money, and frustration. Each measurement — diameter, arbor, kerf, and teeth — plays a vital role in cutting performance.
With a few simple tools and careful steps, you can identify every dimension accurately. Measuring before buying ensures you always get the perfect replacement.
From smoother cuts to safer operation, precision measurement makes a noticeable difference.
Avoiding guesswork also prevents motor strain and poor-quality finishes. Professionals and DIYers alike rely on accurate blade measurements before every project.
By following this guide, you’ll understand your circular saw better than ever. The next time you shop for blades, you’ll know exactly what numbers matter.
Your projects will not only look cleaner but also run safer and smoother. Accurate measurement is the foundation of every great cut — and now you have mastered it.

I’m Michael R. Turner, the founder, lead writer, and passionate DIY enthusiast behind 101diytools.com. With years of hands-on experience in home improvement and power tools, I built this platform to share practical tips, in-depth guides, and honest reviews to help DIYers of all skill levels tackle projects with confidence and the right tools.