How to Load Staples Into a Staple Gun: A Simple Guide
Ever been in the middle of a DIY project, ready to tackle that masterpiece, only to be stopped cold by an empty staple gun? It’s a frustrating experience! This guide will take you from zero to hero in the world of stapling, ensuring you’re always ready to get your projects done. We’ll walk through the process, making sure you can confidently reload your staple gun in no time. You’ll learn the essential steps to keep your stapler functioning at its best, which improves your Time on Page and reduces your Bounce Rate.
Key Takeaways
- Learn the fundamental steps required to load various types of staple guns.
- Understand how to identify the correct staple size for your specific tool.
- Discover methods to safely and effectively insert staples into your stapler.
- Troubleshoot common issues that arise when loading staples.
- Gain tips on how to keep your staple gun in excellent condition for years to come.
- Become confident in handling staple guns for projects of any size.
Getting Started with Staple Guns
Staple guns are incredible tools, designed for a variety of tasks from upholstery work to fastening papers. However, like any tool, the key to optimal performance lies in knowing how to use it. This is why knowing how to load staples into a staple gun is your first step. Before diving into the specifics of loading, it’s helpful to understand the different types of staple guns available and their common uses. This background sets the stage for success and offers a more complete project experience.
Types of Staple Guns and Their Uses
There’s a staple gun for nearly every project. Understanding the different types helps you choose the right tool and staples. Pneumatic staple guns, powered by compressed air, are often used for high-volume tasks like construction or manufacturing. Manual staple guns are ideal for smaller home projects. Electric staple guns offer a mid-range solution, combining ease of use with moderate power. Each type is different, making knowing your tool a primary part of the procedure.
- Manual Staple Guns: These are hand-powered and excellent for light tasks. Ideal for crafts, basic home repairs, and fastening fabrics. They’re easy to use, making them a good option for beginners. These guns use spring mechanisms to drive the staples. They often feature an adjustable power setting.
- Electric Staple Guns: Powered by electricity, these offer a step up in power and speed compared to manual versions. They’re good for projects like upholstery, installing insulation, and more demanding tasks. They usually have a trigger for firing the staples. They provide a balance between power and portability.
- Pneumatic Staple Guns: These are air-powered and are the most robust. They’re used in industrial settings. They require an air compressor to operate. These guns are suited for heavy-duty construction and high-volume stapling. They offer the greatest power and speed of all the types.
Identifying the Right Staples
Using the wrong staples can lead to jams, damage your tool, and frustrate your project. Staple size, including length and width, should match your stapler’s specifications. Consult your stapler’s manual or look for markings on the gun itself that indicate the staple type. The thickness or gauge of the staple is also important; it helps to determine how well the staple penetrates the materials you’re working with. Using the right type is critical.
- Staple Length: The length of the staple should be proportional to the thickness of the material you’re fastening. For example, when working with thin materials like fabric, shorter staples are better. Longer staples may be necessary for securing thicker materials like wood or insulation.
- Staple Width (Crown): Staple width refers to the distance across the top of the staple. The correct width depends on the tool type and the material being stapled. The crown width often affects the holding power of the staple. Different crown widths are needed for different projects.
- Staple Gauge: Gauge refers to the thickness of the wire. A lower gauge means a thicker wire and a more durable staple. Use the correct gauge to match the strength needed for your job. For example, a heavy-duty job may need a lower gauge.
Safety First: Preparing for Stapling
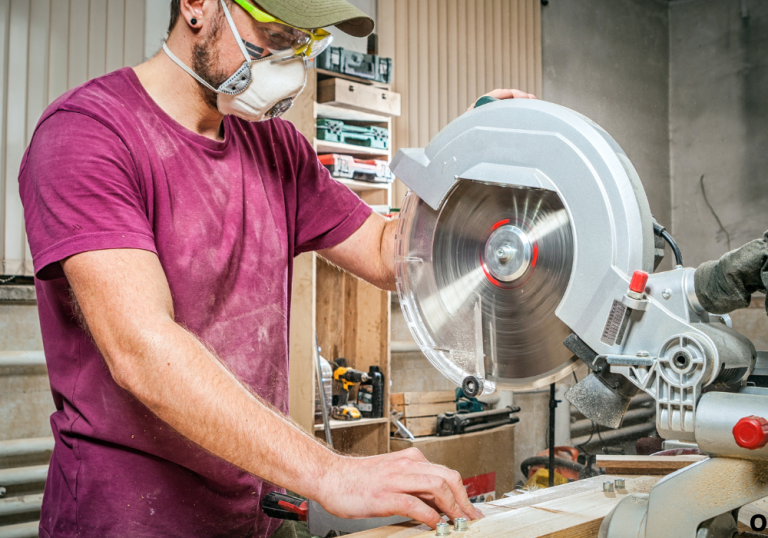
Staple guns are powerful tools and therefore require safety considerations. Always wear safety glasses to protect your eyes from flying debris. Make sure to keep your hands and fingers clear of the stapling area to prevent injuries. Unplug electric staple guns or disconnect the air supply from pneumatic guns when not in use. Be aware of your surroundings, and don’t point the gun at anyone, even as a joke. By taking these precautions, you create a safer working environment. Always make safety your primary priority.
- Eye Protection: Safety glasses shield your eyes from debris, such as staple fragments or splinters. They should be worn at all times while stapling. Choose glasses that fit well and don’t obstruct your vision. Protecting your eyes is an absolute must when using a staple gun.
- Hand Placement: Be aware of where your hands are while stapling. Keep your fingers away from the stapling area. Position the material and the staple gun so that your fingers are out of the line of fire. Be sure your fingers are not in the path of the staple.
- Proper Ventilation: If you’re using your staple gun with materials that might release fumes or dust, work in a well-ventilated area. Opening a window or working outdoors can often resolve this issue. Good ventilation protects your respiratory system.
Steps to Load Staples into a Staple Gun
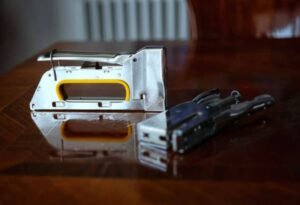
Now that you’re prepared, let’s explore how to load staples into a staple gun. The actual process will vary slightly depending on the model, but the core steps remain the same. These steps will assist you in loading both standard and specialized staple guns. Remember that the procedures may be slightly different between various brands and types.
Step-by-Step Guide for Manual Staple Guns
Manual staple guns are the most common type for home projects. The steps below detail how to load them quickly and easily. Knowing these steps ensures you can work with your projects at the moment’s notice. Always consult the specific instructions that came with your tool for the most accurate guidance.
- Release the Magazine: Locate the magazine release on the bottom or front of the staple gun. This is usually a button or a lever. Press or pull the release to open the magazine. Some models have a sliding magazine. The lever or button may vary by manufacturer.
- Insert the Staples: Insert a strip of staples into the magazine. Make sure the points of the staples face down, toward the stapling surface. The staples must slide easily into place. Proper alignment is key to avoid jams.
- Close and Secure the Magazine: Once the staples are in the magazine, close the magazine door or slide the magazine back into place. Ensure it clicks or locks securely. If the magazine doesn’t close correctly, recheck that the staples are aligned properly.
- Test the Staple Gun: Before starting your project, test the stapler on a piece of scrap material. Make sure the staples are firing correctly and fully penetrating the material. This ensures your stapler is loaded and operating properly.
Loading Electric and Pneumatic Staple Guns
Electric and pneumatic models often have a similar loading process to manual guns. The difference is the source of power. Here’s a quick overview of how to load staples in these types of tools. The fundamental process remains nearly identical.
- Electric Staple Guns: Similar to manual guns, electric models often have a magazine release. Follow the same steps as manual guns to open the magazine. Insert the staples and close the magazine, making sure it locks. Always unplug the gun before loading.
- Pneumatic Staple Guns: These use compressed air. Disconnect the air supply before loading. Pneumatic staplers also use a magazine release. Insert the staple strips, close the magazine, and reconnect the air supply. Always make sure the pressure is correct.
Troubleshooting Common Loading Issues
Staple guns can sometimes present problems during the loading process. Knowing how to solve these issues is crucial. These may include the staple not loading correctly, jams, and magazine problems. These tips will help you quickly resolve issues and continue your work. Quick troubleshooting helps to minimize project delays and keeps the job moving.
- Staples Jamming: If staples jam, remove the magazine and clear out any staples that are stuck. Use pliers or the tool provided with the stapler. This is often caused by misaligned staples or using the wrong type of staple.
- Magazine Problems: If the magazine won’t close, check that the staples are properly aligned and that nothing is obstructing the closure. Check for any damage or debris. Sometimes a magazine may be stuck.
- Staples Not Firing: Ensure the magazine is securely closed and that the power supply (if applicable) is connected. Check for any blockages in the firing mechanism. Confirm the staples are the correct type.
Maintenance and Care
Proper maintenance of your staple gun ensures that it will function for years. Regular maintenance includes cleaning, lubrication, and storage. Taking good care of your tool keeps it in good working condition. These tips can help you avoid problems while extending the life of your staple gun. A well-maintained stapler will provide smooth and consistent stapling.
Cleaning and Lubrication
Cleaning and lubricating your staple gun is essential for its operation. Cleaning removes dirt, dust, and any debris that may interfere with the stapling mechanism. Lubrication reduces friction, thus helping prevent jams and reduce wear on moving parts. Regularly performing these maintenance tasks helps keep your staple gun in excellent working order. Proper maintenance is also important for the safety of users.
- Cleaning: Use a brush or compressed air to remove any debris from the magazine and the firing mechanism. Remove any stuck staples carefully. If cleaning is regular, then you may never need to perform a deeper cleaning.
- Lubrication: Apply a small amount of lubricant (such as gun oil) to the moving parts. This includes the firing pin and any areas where metal parts come into contact. Follow the manufacturer’s recommendations for the type and amount of lubricant.
Proper Storage
Proper storage is just as vital as cleaning and lubricating. Storing your staple gun correctly protects it from the elements. This protects the tool from damage or wear. Keep it in a dry location, away from extreme temperatures and moisture. Following these simple steps will help to ensure your staple gun is ready for use when you need it.
- Store in a Dry Place: Moisture can cause rust and damage the internal components. A dry toolbox, storage cabinet, or a designated area will help keep your tool in good shape. Humidity is the enemy of all tools.
- Avoid Extreme Temperatures: Extreme heat or cold can affect the materials and performance of your staple gun. Store your tool in a location where temperatures remain relatively consistent. The best temperature is moderate.
Replacing Worn Parts
Over time, certain parts of your staple gun may wear out. Knowing when and how to replace these parts keeps your stapler in working order. Common parts that may need replacement include springs, firing pins, and magazine components. It’s always best to have replacement parts at the ready.
- Identify Worn Parts: Look for any signs of wear, such as a weak firing action or staples not penetrating the material fully. The user’s manual may include a list of replacement parts. Inspect all parts.
- Follow Manufacturer Instructions: Always follow the manufacturer’s instructions for replacing parts. This ensures that you’re doing so safely and correctly. Correct assembly is the only way to be sure it will operate properly.
Advanced Tips and Tricks
Beyond the basics of how to load staples into a staple gun, there are advanced techniques and considerations that can enhance your stapling experience. These suggestions can improve the speed, precision, and efficiency of your projects. These techniques will help you become more efficient.
Improving Stapling Accuracy
Achieving accuracy with your staple gun requires practice and understanding. These strategies will help you achieve more precise and cleaner results. Whether you’re working on upholstery, crafts, or construction projects, these tips are crucial. The goal is precise, neat stapling that requires little effort.
- Proper Angle: When stapling, hold the gun at a 90-degree angle to the material’s surface for optimal staple penetration. Avoid stapling at an angle, as this can cause the staples to bend or misfire.
- Consistent Pressure: Apply consistent pressure when firing the staple gun. This ensures the staples are driven in evenly and securely. Practice on scrap material to develop a feel for the pressure needed.
- Use a Guide: Use a guide (like a ruler or a straight edge) to help keep your stapling line straight, especially when working on long seams or edges. This makes accurate stapling easier.
Choosing the Right Staples for Different Materials
Selecting the correct staples is crucial for project success. Different materials require different types of staples. Choosing the wrong staple can lead to weak connections or damage to the materials. Taking the time to select the right staple will save both time and effort.
- Wood: For wood, use staples with longer lengths and a thicker gauge to provide secure hold. Choose staples designed for wood. The choice of staple can determine the outcome of the job.
- Fabric and Upholstery: For fabrics, use shorter staples that won’t pierce through the material. A wider crown can also offer a more secure grip. These staples are specifically designed for the project.
- Plastic and Insulation: When working with plastic or insulation, select staples that are appropriate for the material’s thickness and density. This might require longer, wider staples for greater penetration.
Safe Stapling Techniques
Safe stapling techniques are essential for any project. These practices prioritize your safety and project success. Implementing these will create a safer environment and better results. The more you know, the safer you’ll be.
- Secure the Material: Always secure the material you’re stapling. This can be done by clamping the material or holding it firmly. This step ensures that the material doesn’t shift during stapling.
- Avoid Over-Stapling: Avoid over-stapling, as this can weaken the material and make it difficult to remove staples later. Place staples at appropriate intervals for the best result. Over-stapling can ruin the project.
- Staple Away From Yourself: When stapling, always work away from your body. This will reduce the risk of accidental injury. Be aware of the position of the tool.
Frequently Asked Questions
Question: What do I do if my staple gun jams?
Answer: First, remove the magazine. Use pliers or a small tool (often provided with the stapler) to carefully remove any staples that are stuck. Then, check the staples in the magazine to ensure they’re aligned correctly. If the problem persists, consult your staple gun’s manual.
Question: What’s the best staple size for upholstery work?
Answer: For upholstery, use staples with a shorter length that will penetrate the fabric but not go through to the other side. A wider crown can offer better holding power. Check the manufacturer’s recommendations for your specific project.
Question: Can I use any staple in any staple gun?
Answer: No. Always check your staple gun’s manual to determine the correct size and type of staples to use. Using the wrong size can damage the gun and cause it to jam.
Question: How often should I lubricate my staple gun?
Answer: Lubricate your staple gun regularly, especially if you use it frequently. Apply a small amount of lubricant to the moving parts after every few uses or as recommended in the user’s manual. This will ensure smooth operation and prevent jams.
Question: How can I tell if my staple gun is worn out?
Answer: If your staple gun is having trouble firing staples, or if the staples are not fully penetrating the material, it may be time to replace certain parts or the entire gun. Always check the staples first, and then follow the manufacturer’s suggestions.
Final Thoughts
So, there you have it – the essentials of how to load staples into a staple gun. From the basic steps of inserting the staples to the importance of choosing the right staples and maintaining your tool, you now have the tools needed to complete almost any project. With practice and attention to detail, you’ll become a staple gun expert in no time. Remember to always prioritize safety and consult your tool’s manual for specific instructions. Now, go forth and staple with confidence! You’re now equipped to take on any stapling task.

I’m Michael R. Turner, the founder, lead writer, and passionate DIY enthusiast behind 101diytools.com. With years of hands-on experience in home improvement and power tools, I built this platform to share practical tips, in-depth guides, and honest reviews to help DIYers of all skill levels tackle projects with confidence and the right tools.