How to Hold a Staple Gun Safely and Effectively
Remember that time you tried to hang a picture, and the staple gun jammed, sending staples flying everywhere? Or when you were working on a DIY project, and the staples went in crooked? It’s frustrating, right? Mastering the art of how to hold a staple gun is the first step to avoiding these issues and becoming a confident DIYer. This guide will provide the knowledge you need to use this tool safely and correctly. You’ll learn how to approach any stapling job with confidence. By the end, you’ll be able to tackle projects with accuracy and ease, saving time and preventing mishaps, helping you improve your skills and efficiency in projects and repairs.
Key Takeaways
- Proper grip and stance are important for safety and accuracy when using a staple gun.
- Understanding the different types of staple guns can greatly improve your project results.
- Loading the staple gun correctly prevents jams and ensures efficient operation.
- Choosing the right staples for the material makes the project easier and improves the result.
- Knowing how to troubleshoot common problems, like jams, will save you time and frustration.
- Practice and patience are key to mastering the staple gun for various projects.
Getting Started with Your Staple Gun
Before you begin any project involving a staple gun, it’s essential to understand the basics. This involves identifying the different components, recognizing the types of staple guns, and, most importantly, prioritizing safety. Understanding the tool’s mechanics allows for more controlled and accurate results. A basic understanding helps you choose the right tool for the job. Also, it assists you in properly holding, loading, and using the staple gun to avoid injuries and project failures.
Identifying Staple Gun Components
Familiarizing yourself with the various parts of a staple gun is the first step toward safe and effective use. Each component plays a specific role, working together to drive staples into your chosen material. This knowledge empowers you to understand the tool’s inner workings, troubleshoot problems, and maintain your staple gun properly. By knowing what each part does, you can ensure each project starts and ends smoothly.
- Handle: This is the part you hold to operate the tool. It’s usually ergonomically designed to provide a comfortable grip and reduce hand fatigue during extended use. Ensure the handle is clean and dry before you begin, as a good grip is vital for safety.
- Magazine: This is where the staples are loaded. It’s usually a channel or compartment that holds a row of staples. The magazine’s size varies depending on the staple gun type and purpose. Knowing how to correctly load the magazine ensures the tool functions as intended.
- Trigger: Pressing the trigger activates the firing mechanism, driving the staple into the material. The trigger’s sensitivity and design can vary among different models. Getting familiar with the trigger action is important for control and precision, especially in projects that require careful work.
- Safety Mechanism: Many staple guns have a safety mechanism to prevent accidental firing. This can be a trigger lock or a contact element that prevents the gun from firing unless pressed against a surface. Understanding and using these safety features is important for preventing injuries.
- Staple Guide/Nose: This guides the staples as they are fired. It directs the staple into the material. The guide’s design and size can affect accuracy. Different models have varying guide styles.
Types of Staple Guns
There are several types of staple guns. Each is designed for specific tasks. Recognizing the differences helps you choose the right tool for the job, improving efficiency and project outcomes. Consider the materials, the size of the project, and the required precision when selecting a staple gun. Using the wrong tool can lead to frustration and potential damage to your materials.
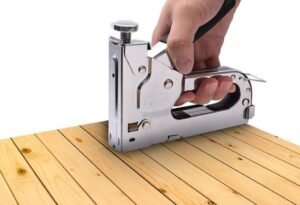
- Manual Staple Guns: These are hand-powered and require you to apply physical force to drive the staples. They’re typically more affordable and suitable for lighter tasks, like upholstery or attaching fabric.
- Electric Staple Guns: These use electricity to power the firing mechanism. They’re easier to use and require less effort than manual guns. They’re ideal for medium-duty tasks, such as attaching insulation or light trim work.
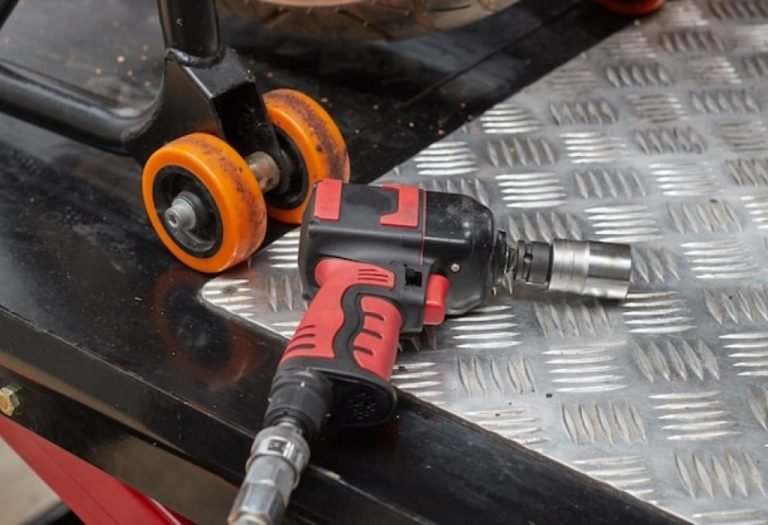
- Pneumatic Staple Guns: Powered by compressed air, these are the most powerful type, designed for heavy-duty projects. They are often used in construction, woodworking, and industrial applications. They offer speed and efficiency but need an air compressor.
- Hammer Tackers: These are designed to be swung like a hammer and are used for fast, large-scale jobs, such as installing roofing felt or house wrap. They’re less precise but very fast for covering large areas.
Safety First: Holding and Handling a Staple Gun
Safety is not just a suggestion; it’s a rule. Correct handling and posture are essential for preventing injuries and ensuring the accuracy of your work. Prioritizing safety will not only protect you but also allow you to focus on the project, leading to better outcomes. Before you begin any stapling task, make sure you’ve taken the necessary safety precautions.
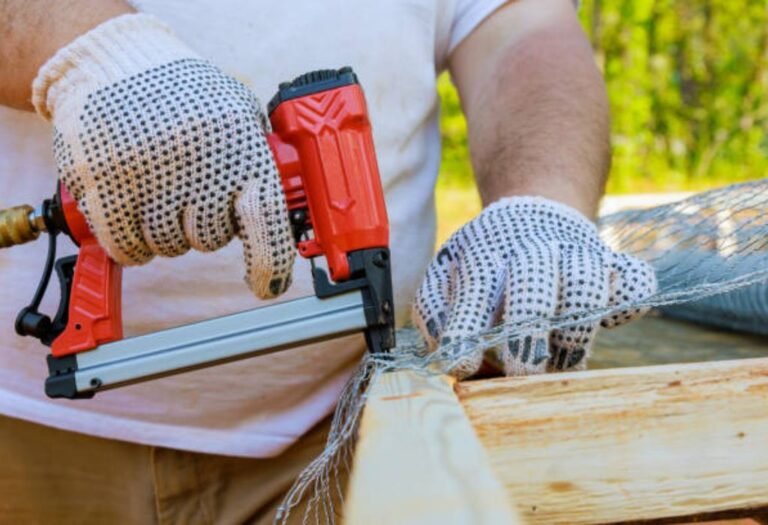
- Wear Safety Glasses: Staples can ricochet, so protect your eyes with safety glasses.
- Use Protective Gloves: Gloves improve your grip and protect your hands.
- Maintain a Stable Stance: Keep your feet shoulder-width apart to balance yourself.
- Avoid Pointing at Yourself or Others: Treat the staple gun as a loaded weapon.
- Ensure a Clear Workspace: Remove any obstacles that could cause you to stumble.
- Unplug or Disconnect the Power: Always unplug or disconnect the power source when loading, unloading, or clearing a jam.
The Correct Way to Hold a Staple Gun
How you hold the tool is essential for both accuracy and comfort. The goal is to maintain control and reduce strain during prolonged use. The proper grip allows you to apply consistent pressure. Also, it enables you to keep the staple gun aligned with your desired target. Mastering the correct hold ensures that you can execute stapling tasks with greater efficiency and achieve professional results.
Grip and Stance Techniques
The correct grip and stance are the cornerstones of safe and effective stapling. These techniques enable you to exert proper control. Also, they reduce the risk of accidents, and they help improve accuracy. Your hold and stance can directly affect project quality. They also determine your comfort levels during the work.
- Grip: Hold the handle firmly but not tightly. Your hand should wrap around the handle comfortably. This allows you to control the trigger and apply steady pressure. A firm grip will minimize slippage. However, avoid gripping too hard, as this can cause hand fatigue.
- Stance: Position your body so that you have a clear view of the working area. Keep your feet shoulder-width apart to provide a stable base. This stance will give you balance and reduce the chances of accidental slips or falls. Your stance should enable you to reach the work area easily.
- Arm Position: Keep your arm relaxed. Avoid tensing your muscles, as this can affect your control and lead to fatigue. Try to keep your elbow slightly bent. This will enable you to move and maneuver the tool without putting undue strain on your arm.
- Alignment: Ensure the nose of the staple gun is perpendicular to the surface you are stapling. This alignment helps the staples to penetrate the material evenly. It also helps to prevent them from bending or missing the target.
Applying Pressure and Trigger Control
Trigger control and the amount of pressure you apply are critical to successful stapling. They control the depth and accuracy of the staples. Practicing these techniques can improve your control over the tool. Also, it can reduce the chances of errors. Learning these skills ensures that each staple is driven correctly and flush with the surface.
- Applying Pressure: When using a manual staple gun, apply consistent pressure to the nose of the tool against the material. This ensures that the staple penetrates correctly. For electric or pneumatic models, you typically don’t need to apply as much pressure.
- Trigger Control: Squeeze the trigger smoothly and firmly. Avoid jerking or squeezing too hard, which can cause the staples to misfire or go in crooked. Practice squeezing the trigger with a controlled motion to improve your accuracy and reduce the chance of staple-gun recoil.
- Depth Control: For manual staple guns, the depth is determined by the pressure you apply. For electric or pneumatic models, the depth may be adjustable. Adjust the depth setting based on the material’s thickness to ensure the staple goes in flush.
- Angle of Approach: Ensure the staple gun is perpendicular to the material for the most effective staple. However, depending on your project, you may need to adjust the angle to get the result you want.
Avoiding Common Grip Mistakes
Certain grip mistakes can make stapling difficult. They can also lead to accidents and project errors. It’s beneficial to recognize these errors and learn how to fix them to improve both safety and efficiency. Avoiding these mistakes ensures that you’re using the staple gun in a way that minimizes the risk of injury or project failure.
- Gripping Too Tight: Causes hand fatigue and reduces control. Try to relax your grip while still maintaining control.
- Using an Unstable Stance: Can result in the staple gun slipping or misfiring. Always ensure that your feet are planted firmly on the ground, and your body is balanced.
- Pointing the Gun at Yourself: A dangerous habit that can cause serious injury if the gun accidentally fires. Always be aware of the tool’s orientation, and never point it towards any part of your body.
- Applying Uneven Pressure: Can result in staples that are not flush with the surface. Apply even and consistent pressure.
- Looking Away From the Target: Doing this can make the staples misfire. Keep your eyes on your work.
Loading and Using a Staple Gun Correctly
Correct loading is important to the proper operation of your staple gun. The process changes slightly depending on the type of tool, but the basic principles are the same. After loading, understanding how to use the gun to get accurate and effective results is the next step. Mastering these steps ensures that you have a smooth and efficient stapling experience.
Loading the Staple Gun
Loading your staple gun correctly is important for its functionality and safety. Follow the steps specific to your model. Correct loading ensures that the staples feed correctly and that the gun fires accurately. Always unload your staple gun before storing it. Proper loading will help prevent jams.
- Unplug or Disconnect: If using an electric or pneumatic model, unplug it from the power source or disconnect from the air compressor.
- Open the Magazine: Depending on the model, this might involve pressing a release button, sliding a magazine, or opening a compartment.
- Insert Staples: Place the staples into the magazine with their legs facing down. Ensure they are correctly aligned.
- Close the Magazine: Slide the magazine back into place. Lock it securely if necessary.
- Test Fire: After loading, always test fire the gun on a scrap piece of material to ensure it is working correctly.
Stapling Techniques for Different Materials
Different materials require different approaches. Knowing the best techniques for your target material improves project outcomes and minimizes potential issues. You can prevent damage to materials or achieving poor results with the correct approach. These techniques enable you to adapt your approach. They allow you to get the best results on any project you undertake.
- Wood: For wood, the staple should be long enough to penetrate the material fully and secure the item. Use a staple gun that is suitable for wood. Place the nose of the gun perpendicular to the wood surface and apply firm, even pressure.
- Fabric: When stapling fabric, place the fabric taut. Use staples that are the right length to secure the fabric without going through the material. Hold the gun at a slight angle to the wood.
- Upholstery: In upholstery, the staples are hidden. Make sure the staples are deep enough to hold the fabric but not so deep that they show. You should hold the fabric taut and adjust the staple depth as needed.
- Plastic: Plastic materials might be more delicate. They may require lower staple gun settings or specialized staples to prevent splitting or damage.
Troubleshooting Staple Gun Issues
Even with careful use, you may encounter issues. Knowing how to troubleshoot these problems can save you time and frustration. It also helps you maintain your staple gun, preventing future issues. Learning how to fix or address common problems helps you get back to your project quickly.
- Jams: If the gun jams, unplug it and remove the magazine. Use pliers or a screwdriver to remove the jammed staples. Reload the magazine and test fire.
- Misfires: Check the staples for correct loading and the correct staple size.
- Weak Staples: Adjust the staple gun’s power settings if it has them. Make sure the staples are the correct size for the material.
- Uneven Staples: Check your grip and stance. Make sure the gun is perpendicular to the material.
Choosing the Right Staples
Choosing the right staples is as important as knowing how to hold a staple gun. The type and size of staples you use can affect both the appearance and durability of your project. If you choose the wrong staples, it can make the stapling process more difficult. Also, it can compromise the effectiveness of your project. Select staples that match your project’s material and goals.
Staple Types and Sizes
A wide variety of staple types and sizes are available. Each has unique qualities and suitability for different projects. Understanding these options ensures that you select the right staples for your project’s needs. The right staples help you get the best outcome for your project.
- T50 Staples: These are the most common type, ideal for general-purpose tasks like upholstery, insulation, and light construction. They come in various lengths, typically from 1/4 inch to 5/8 inch.
- Narrow Crown Staples: These have a narrower crown width. They are best for fine trim, molding, and detailed work. They help to minimize the visibility of staples.
- Brads and Finish Nails: While not staples, these are often used in similar applications, such as trim work and cabinetry. They have a smaller head and leave a less noticeable mark.
- Staple Length: The staple length depends on the material you are stapling. It should be long enough to penetrate the materials and provide a secure hold. Use longer staples for thicker materials.
Material Compatibility and Staple Selection
Match your staple selection with the materials. This choice is critical to the success of your project. Using the wrong staples can lead to project failure or a poor appearance. Considering the material’s characteristics helps guarantee the project’s durability and aesthetics.
- Wood: Choose T50 staples in lengths suitable for the thickness of the wood.
- Fabric: Use staples that are long enough to grip the fabric and attach it to the underlying surface. Consider staple length and style to minimize fabric damage.
- Metal: Some staple guns are designed for specific metal work. Choose the correct staple type designed for the specific task.
- Plastic: Use staples specifically designed for plastic materials to avoid splitting or damaging the surface.
Avoiding Staple Size Mistakes
The wrong staple size can lead to several problems, affecting project quality and safety. Incorrect staple sizes can cause various problems. These errors can waste time, and they can even put your safety at risk. Understanding these errors and learning how to avoid them is important for project success.
- Staples Too Short: This can lead to a weak connection and staples pulling out easily. Always choose staples that will fully penetrate the materials.
- Staples Too Long: They can go through your material and can cause damage. The extra length can also be dangerous.
- Staple Width Issues: If the staple width is too wide, it can tear the material. If it is too narrow, it might not provide adequate support.
| Material | Best Staple Type | Key Considerations |
|---|---|---|
| Upholstery Fabric | T50 Staples (1/4″ to 5/16″) | Staples should not go through the fabric. |
| Wood Trim | Narrow Crown Staples | Minimizes visible staple heads. |
| Insulation | T50 Staples (3/8″ to 1/2″) | Secure insulation to the framing. |
| Cardboard | T50 Staples (1/2″ or longer) | Provides robust hold for packaging. |
Frequently Asked Questions
Question: Can I use any staple gun for any project?
Answer: No, it’s important to choose a staple gun that is suitable for the material and the task. Using the wrong type can lead to poor results or damage.
Question: How do I prevent staple jams?
Answer: Make sure you load the staples correctly, and don’t use bent or damaged staples. Also, make sure that you are using the right staples for the tool.
Question: What’s the best way to ensure staples are flush with the material?
Answer: Apply even pressure while keeping the nose of the staple gun flat against the surface. Adjust the staple gun’s depth settings if possible.
Question: How do I know what size staples to use?
Answer: Consider the thickness of the materials you are fastening. Choose staples long enough to penetrate the material securely.
Question: Are there safety precautions for electric staple guns?
Answer: Yes, unplug the gun when loading, unloading, or clearing a jam. Always wear eye protection and gloves.
Final Thoughts
Mastering how to hold a staple gun correctly opens doors for your DIY projects. This skill involves knowing the tool’s parts, the appropriate grip, and how to apply pressure. Also, it’s about choosing the right staples for the material and understanding the safety aspects involved. By taking the time to learn these techniques, you’ll be able to work more efficiently, minimize mistakes, and create projects with a professional finish. Keep practicing and experimenting. As you build your skills, you’ll discover the tool’s versatility. With the right approach and equipment, you can take on more complex tasks. Be safe, enjoy the process, and watch your skills grow as you improve your ability to tackle tasks around your home.

I’m Michael R. Turner, the founder, lead writer, and passionate DIY enthusiast behind 101diytools.com. With years of hands-on experience in home improvement and power tools, I built this platform to share practical tips, in-depth guides, and honest reviews to help DIYers of all skill levels tackle projects with confidence and the right tools.