How to Cut Wood with a Circular Saw Safely and Cleanly
The first time you try cutting wood with a circular saw, it looks easier than it feels. You set up the plank, line up the blade, and press the trigger. Within seconds, the saw roars to life, wood dust fills the air, and the cut begins. But when you inspect your work, the edge looks rough, uneven, and splintered. That’s when you realize cutting wood cleanly isn’t just about strength — it’s about technique and control.
Every professional woodworker started exactly this way, learning from rough cuts and crooked edges. The circular saw is one of the most powerful and versatile tools in woodworking, yet it demands precision. A single mistake in blade angle or pressure can ruin an entire piece of lumber.
According to woodworking experts, over 70% of beginners struggle with straight and splinter-free cuts during their first few projects. The good news is that mastering a few cutting techniques can instantly improve results. By learning how to measure, align, and guide your saw correctly, you can achieve professional-quality finishes without fancy equipment.
In this guide, you’ll discover step-by-step how to cut wood with a circular saw safely, accurately, and cleanly. Whether you’re trimming boards for furniture or slicing plywood for home projects, these techniques will help you build with confidence and precision.
Understanding the Basics of Cutting Wood with a Circular Saw
Before making your first cut, it’s essential to understand how the tool works. A circular saw uses a spinning toothed blade to slice through wood fibers at high speed. The base plate rests on the surface while the motor powers the blade through the material.
Every part of the saw has a purpose. The blade guard protects your hands, the base controls depth and angle, and the trigger activates the motor. Knowing each component helps you use the tool efficiently and safely.
Circular saws come in both corded and cordless versions. Corded saws provide continuous power for long projects, while cordless models offer mobility. Both can make accurate cuts if used correctly.
Proper alignment is vital. The saw must glide straight across the wood without forcing or twisting. Forcing the tool slows the blade and can burn the wood. A smooth, even feed rate ensures clean results.
Blade speed, measured in revolutions per minute (RPM), also affects the finish. Higher speeds cut faster and cleaner, especially with sharp blades. For beginners, a slower and controlled pace is best.
You must also understand cutting direction. Always cut with the wood grain when possible for smoother edges. Cross-cutting across the grain creates more splinters unless you use a fine-tooth blade.
Lastly, the stability of the wood matters. Always support both sides of the cut to prevent pinching or kickback. Once you know how the saw behaves, you’ll find that clean, accurate cuts come naturally.
Choosing the Right Blade for Wood Cutting
Your blade choice determines the smoothness and accuracy of each cut. Circular saw blades vary in diameter, tooth count, and material. For standard woodworking, a 7¼-inch blade is the most common and versatile.
Blades with fewer teeth (around 24) cut faster but leave rough edges. These are great for framing or construction work. Blades with more teeth (40 to 60) produce smoother finishes, ideal for furniture or trim.
Rip-cut blades are designed to follow the wood grain. They remove large chips quickly and are best for long, straight cuts. Cross-cut blades, on the other hand, cut across the grain and require more teeth for cleaner results.
Carbide-tipped blades last longer than steel ones. They resist heat and dulling, which keeps cuts precise for extended use. Always inspect your blade before each job — dull or dirty teeth tear fibers and cause splintering.
Specialty blades exist for plywood, laminate, and composite boards. Using the correct one prevents burning and reduces chipping.
Lastly, keep blades clean. Sap, resin, or dust buildup increases friction, making the motor work harder. A quick wipe with blade cleaner after each project helps maintain efficiency and accuracy.
Setting Up Your Work Area for Safe Cutting
A well-organized workspace makes cutting safer and easier. Start with a stable, flat surface such as a workbench or pair of sawhorses. Unstable setups cause vibration, which leads to crooked cuts.
Secure the wood using clamps so it doesn’t shift during operation. Even slight movement can throw off alignment or cause kickback.
Ensure proper lighting so you can see the cut line clearly. Shadows or poor visibility can lead to mistakes.
Safety gear is non-negotiable. Always wear safety goggles to protect your eyes from flying sawdust and splinters. Ear protection reduces fatigue during long cutting sessions. Gloves offer grip but should fit snugly to avoid interference with controls.
Keep cords out of the cutting path if using a corded saw. For cordless models, ensure batteries are charged and locked securely.
Finally, never start cutting until you’ve double-checked everything — the wood position, blade alignment, and safety gear. A few seconds of preparation can prevent accidents and produce better results.
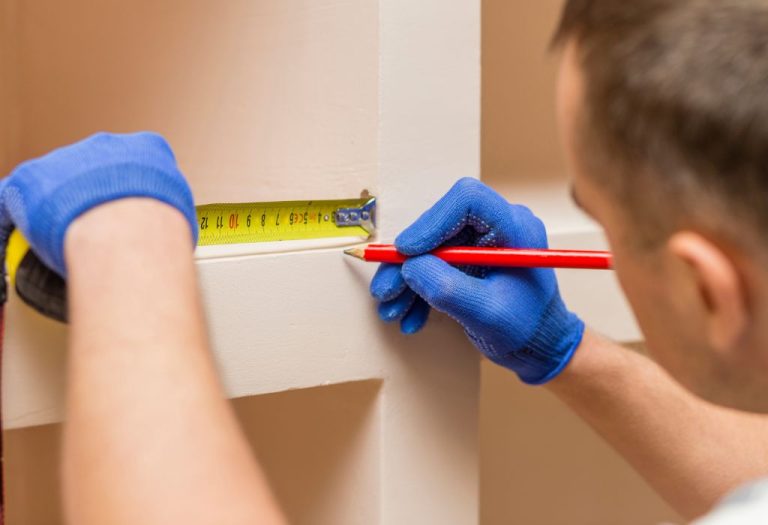
Marking and Measuring Your Cuts Accurately
Accurate measurements are the foundation of clean cuts. Start by marking your cut line with a pencil or chalk. Use a straight edge, square, or level to ensure perfect alignment.
Always consider the kerf — the width of material removed by the blade. If you ignore it, your piece may end up shorter than intended. Mark the waste side of the line and cut along it for precise dimensions.
Double-check all measurements before cutting. Rushing through this step often leads to wasted material.
If you need multiple identical pieces, use the first one as a template to mark the rest. This saves time and ensures consistency.
For long boards, use guide rails or a clamp-on straight edge. They help the saw glide smoothly without drifting off line.
Precision begins before the blade even touches the wood, so treat measuring and marking as seriously as cutting itself.
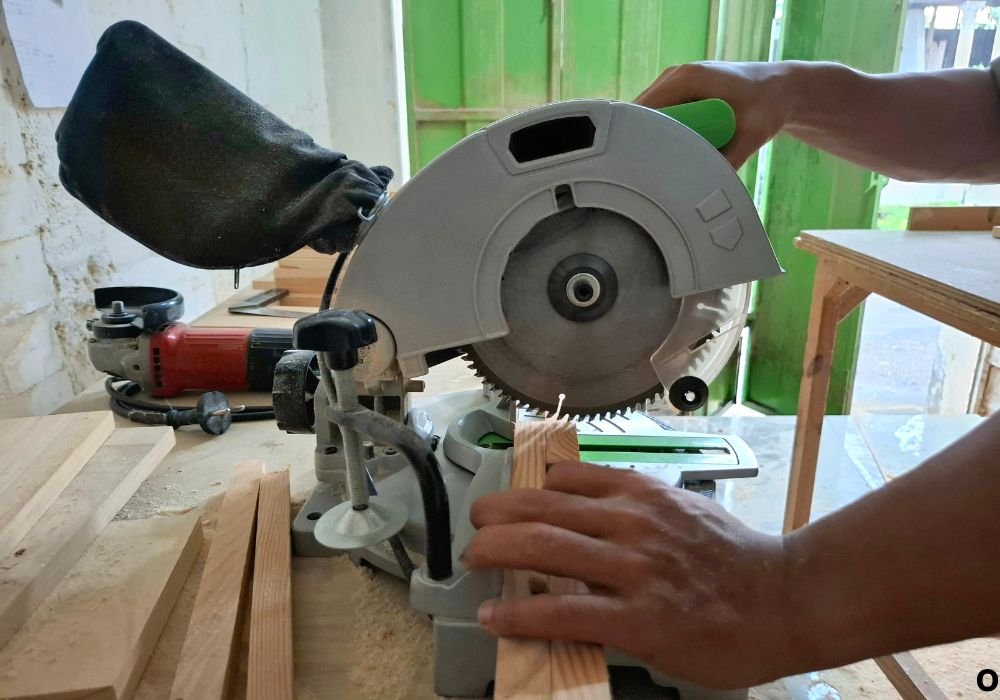
Making Straight Cuts with a Circular Saw
Straight cuts define the quality of your woodworking. Start by adjusting the blade depth — it should extend only about a quarter inch below the wood. Too deep, and the saw will kick harder; too shallow, and it may bind.
Hold the saw firmly with both hands. Position your body slightly to the side of the blade’s path for safety. Keep your eyes on the guide mark, not the spinning blade.
Use a steady, even speed when pushing the saw. Let the blade do the work — forcing it causes rough edges and strain.
For perfectly straight cuts, use a rip fence or a guide rail. Clamp it parallel to the cut line and let the saw’s base ride against it.
If you’re cutting freehand, maintain a slow and consistent feed. Small corrections mid-cut lead to wavy edges. It’s better to stop and restart than to push through an error.
Support both sides of the cut to prevent binding or breaking as the blade exits the wood. Always finish the cut completely before lifting the saw.
Once you get used to proper grip and feed pressure, straight, clean cuts become effortless.
How to Cut Plywood and Avoid Splintering
Plywood tends to chip and splinter because of its layered construction. The key to clean cuts is supporting the fibers as the blade passes through.
Always place the good side facing down. The blade’s teeth cut upward, meaning splinters appear on the top surface. Cutting with the good face down keeps visible edges clean.
Use painter’s tape or masking tape over the cut line. The tape holds surface fibers in place and prevents chipping.
Adjust the blade depth so only one-quarter inch of the tooth passes through the material. A deeper cut increases tear-out.
Choose a fine-tooth or plywood-specific blade with at least 40 teeth. The smaller teeth slice cleanly through thin layers.
Cut slowly and steadily. Pushing too fast rips the veneer and heats the blade.
After finishing, peel the tape carefully. You’ll find smoother edges and fewer chips. Mastering these steps transforms plywood cutting into a smooth, professional task.
Tips for Bevel and Angle Cuts
Bevel cuts add style and function to woodworking projects. To make one, adjust the base plate to the desired angle, usually between 0 and 45 degrees.
Mark your bevel line clearly and secure the wood firmly. Loose material will cause uneven edges.
Start the saw before contacting the wood, then guide it smoothly along the line. Maintain steady speed to prevent burning.
For compound angles or joints, practice on scrap pieces first. Circular saw bevel adjustments can vary slightly between brands, so testing helps fine-tune your accuracy.
Always double-check alignment with a square or protractor before starting the real cut.
Even a few degrees off can make pieces misalign later, especially in cabinetry or trim work. With patience and proper setup, bevel cuts add precision and polish to any project.
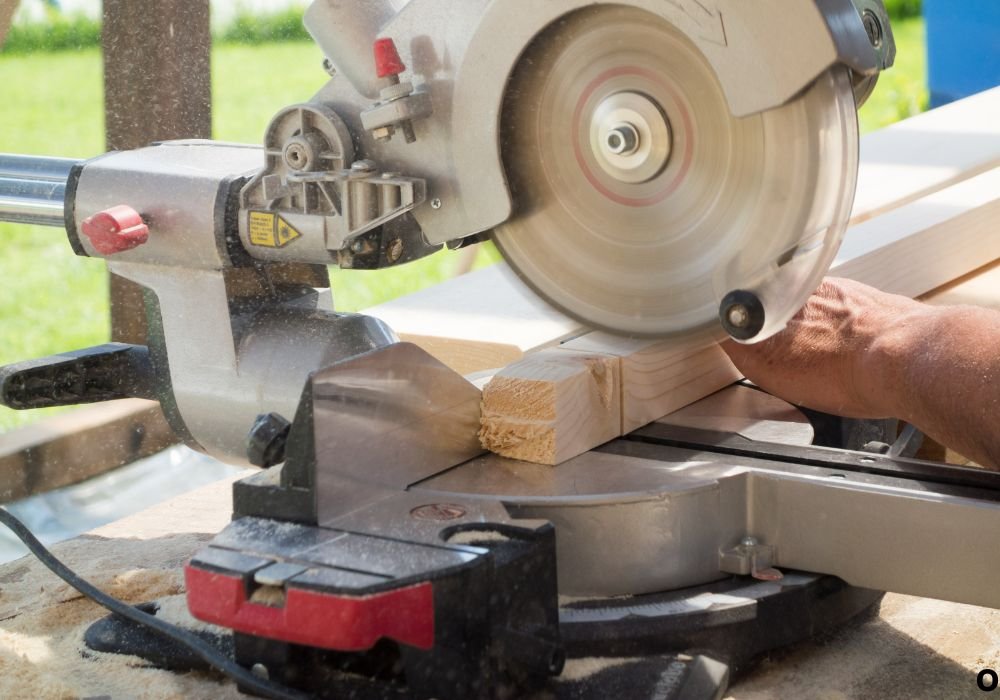
Cutting Thick or Hard Wood Efficiently
Hardwoods like oak or maple require patience. Use a sharp, high-quality blade rated for dense material. Dull blades heat up quickly and cause burning or rough cuts.
Set the blade depth so it clears the wood by about a quarter inch. Cutting too deep increases friction and motor strain.
Feed the saw slowly and steadily. Let the blade maintain its speed without forcing it through. If you notice smoke or burning, pause to let the motor cool.
For thicker wood, consider cutting in two passes. Start with a shallow scoring cut, then finish at full depth. This method reduces stress on the saw and improves accuracy.
Use clamps or sturdy supports under the material. Thick planks can shift if not secured tightly.
Finally, keep the blade clean from resin buildup. A clean blade cuts cooler, faster, and smoother.
Circular Saw Safety Tips for Every Woodworker
Safety should always come first. Before cutting, check that your blade is sharp and securely fastened. Loose blades are a major hazard.
Keep both hands on the saw during operation. Avoid distractions and ensure no one stands behind the cutting line.
Wait for the blade to reach full speed before contacting the wood. Starting too soon can cause the saw to jump.
Always unplug the tool or remove the battery before changing blades or making adjustments.
Avoid cutting small pieces that cannot be securely clamped. Never hold material with one hand while cutting with the other.
Stand slightly to the side of the blade’s path to protect yourself from kickback.
After finishing a cut, let the blade stop completely before setting the saw down. Proper habits like these build confidence and ensure safe, consistent results every time.
FAQ – Common Questions About Cutting Wood with a Circular Saw
How deep should I set my saw blade?
Set it about one-quarter inch below the wood surface for clean cuts and safety.
Can I cut wet or treated wood?
Yes, but use corrosion-resistant blades and wipe clean afterward to prevent rust.
What is the best way to get a straight edge?
Use a guide rail or clamp-on straight edge to lead the saw precisely.
How do I stop wood from splintering?
Use painter’s tape, cut with the good side down, and use a fine-tooth blade.
Do I need a guide rail for every cut?
Not always, but for long or visible cuts, guide rails ensure straight, smooth lines.
Should I push fast or slow while cutting?
Steady, moderate speed gives the cleanest finish and prevents overheating.
Can I use the same blade for hardwood and softwood?
Yes, but hardwood dulls blades faster. Replace or sharpen them regularly.
Why does my saw burn the wood?
It’s usually due to a dull blade, too slow feed, or excessive friction.
Can I use a circular saw for angled joints?
Yes, adjust the bevel base to your desired angle for precise cuts.
Do safety guards need to stay attached?
Always. Removing them increases the risk of severe injury.
Conclusion
Cutting wood with a circular saw isn’t about speed — it’s about precision, patience, and preparation. Every clean cut begins with the right blade, accurate measurements, and a secure setup.
Whether you’re slicing through plywood or thick hardwood, the same rule applies: let the saw do the work. A steady hand, sharp blade, and proper alignment make all the difference.
With practice, you’ll move from hesitant cuts to confident craftsmanship. Remember, safety and accuracy always come before speed. Master these techniques, and every board you cut will show your skill and care.

I’m Michael R. Turner, the founder, lead writer, and passionate DIY enthusiast behind 101diytools.com. With years of hands-on experience in home improvement and power tools, I built this platform to share practical tips, in-depth guides, and honest reviews to help DIYers of all skill levels tackle projects with confidence and the right tools.