How to Cut Plywood With Circular Saw Without Chipping
Every DIYer has faced it at least once—the frustration of cutting plywood only to see the edges splinter and chip apart. What begins as a simple project quickly turns into a messy, uneven finish.
Imagine spending hours measuring and aligning a perfect sheet, then watching thin veneer layers tear away in seconds. The result feels disappointing, especially when your goal was clean, furniture-grade cuts.
Plywood is a beautiful yet delicate material made of thin wood layers glued together. Its layered construction makes it strong, but it also makes it vulnerable to chipping under fast, rough cuts.
The good news is that professional carpenters achieve smooth, flawless edges every day using simple techniques. With the right blade, steady speed, and careful setup, anyone can cut plywood perfectly.
According to woodworking surveys, more than 70% of DIY cutting errors come from using the wrong blade or cutting on the wrong side. Once you fix those mistakes, clean results become effortless.
This guide will teach you exactly how to cut plywood with a circular saw without chipping. From setup to finishing, every step here ensures your next project looks sharp, smooth, and professional.
Why Plywood Requires Special Cutting Care
Plywood is not a single solid piece of wood but a series of thin layers glued together. Each layer, known as a veneer, has its grain running in opposite directions for strength and stability.
This cross-grain structure makes plywood durable, but it also makes it prone to splintering when cut. The thin outer layer, called the face veneer, is especially fragile and tears easily under pressure.
Unlike solid wood, plywood’s top and bottom layers react differently to the saw blade. The upward motion of a circular saw blade often pulls tiny fibers from the top surface, causing chips or rough edges.
Because of its layered nature, plywood requires both the right blade and cutting direction. A fine-tooth blade and controlled feed speed help reduce tear-out and preserve the smooth finish.
Even small mistakes like cutting too fast or using a dull blade can destroy a clean edge. Once the top layer splinters, no sanding can fully restore its appearance.
Understanding why plywood behaves this way helps you prepare for success. By adjusting your technique and tools, you can achieve factory-level cuts every single time.
Preparing the Workspace and Choosing the Right Tools
Cutting plywood correctly begins long before the blade touches the sheet. Preparation ensures accuracy, safety, and clean, splinter-free edges.
Start with a stable, flat surface such as a large workbench or two parallel sawhorses. Supporting the entire sheet prevents sagging, which can cause binding or tear-out during the cut.
Good lighting is essential for visibility, especially when following long chalk or pencil lines. Make sure your cutting area is clear of cords, offcuts, and clutter to avoid distractions.
Choose a fine-tooth carbide-tipped blade designed for plywood or laminate. A blade with at least 60 teeth ensures smoother cuts with minimal splintering.
Inspect the blade for sharpness and direction before mounting it. A dull or backward-facing blade will tear the veneer rather than slice cleanly through it.
Lastly, set up your circular saw for comfort and control. Ensure the handle grip feels natural, the base plate moves freely, and the safety guard functions properly before you begin.
Marking the Cut Line Clearly and Accurately
Accurate marking is the foundation of every clean plywood cut. A perfectly drawn line gives your circular saw a clear path to follow and eliminates guesswork.
Use a sharp pencil, fine-tip marker, or chalk line depending on the sheet’s size. A faint or uneven line makes it hard to align the saw blade correctly.
Always measure twice and mark once to avoid costly errors. When working with large sheets, use a straight edge or long ruler for consistent accuracy.
Apply painter’s tape along the cutting line before drawing your mark. The tape supports the surface veneer and significantly reduces chipping while cutting.
Mark on the waste side of the line so your final piece stays true to size. Remember that the saw blade itself removes about 1/8 inch of material called the kerf.
Before you begin cutting, double-check the measurement and angle of every mark. Precision here ensures every cut stays clean and square from start to finish.
Setting the Cutting Depth for Smooth, Safe Operation
Blade depth plays a major role in how cleanly your circular saw cuts plywood. Setting it correctly prevents tear-out, burning, and unnecessary strain on the motor.
The general rule is to set the blade about ¼ inch deeper than the plywood’s thickness. This allows the blade to cut cleanly through the bottom layer without forcing it.
If the blade extends too deep, it cuts aggressively and increases chipping. Too shallow, and the saw will struggle, leaving rough or incomplete cuts.
Unplug or remove the battery before adjusting the blade depth. Always check that the base plate is level and the locking lever holds the blade firmly in place.
Make a short test cut on a scrap piece to confirm the depth setting. A properly adjusted blade glides smoothly without grabbing or leaving burn marks.
Once your depth is dialed in, cutting becomes easier, quieter, and far more accurate. The right blade exposure gives you both control and professional-level precision.
Using a Guide Rail or Straight Edge for Accuracy
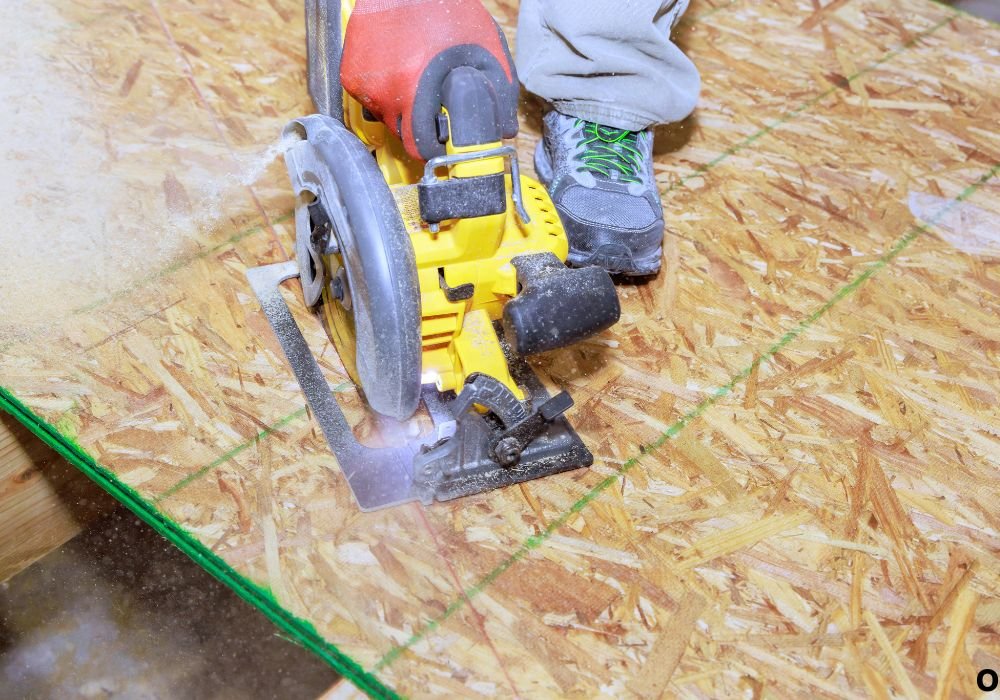
A guide rail or straight edge is the secret to perfectly straight plywood cuts. It keeps your saw aligned and removes the need for manual correction mid-cut.
Choose a reliable metal or aluminum guide that runs the full length of your sheet. If you don’t have one, a straight piece of wood clamped securely works just as well.
Measure the offset between your saw’s blade and the edge of its base plate. Clamp the guide that exact distance away from your cutting line to achieve precision.
Before turning on the saw, slide it gently along the guide to confirm smooth movement. This ensures your clamps are tight and the saw will not bump or bind.
For long panels, use additional clamps or weights to prevent shifting. The more stable the guide, the cleaner your finished edge will be.
Once the guide is locked in, focus only on maintaining a steady pace. Let the saw’s base glide along the edge, and you’ll achieve a perfect straight line every time.
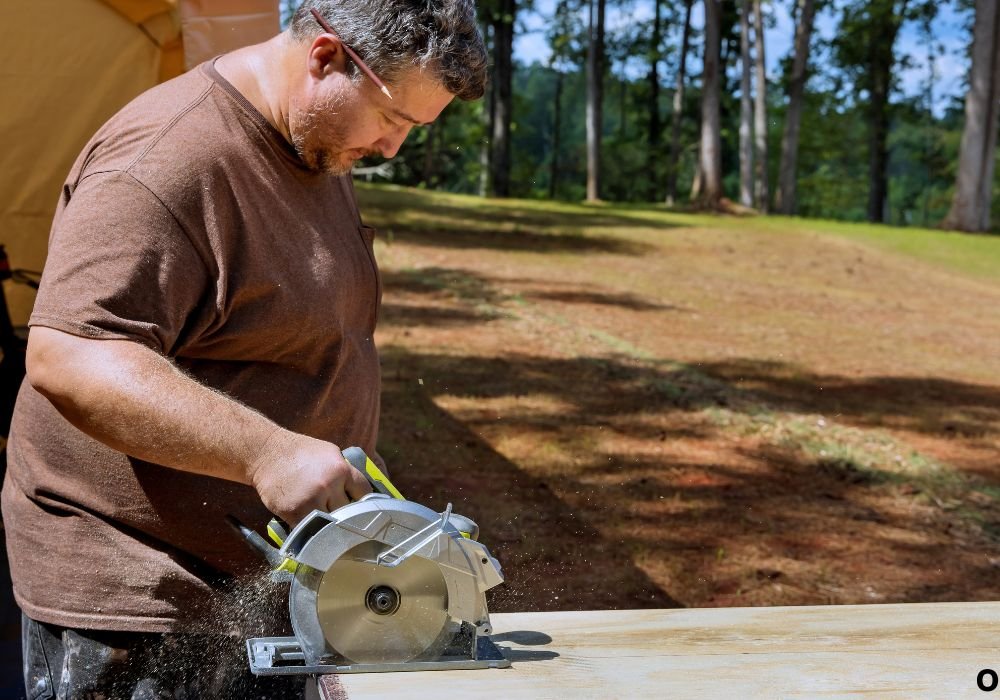
Cutting Technique: Step-by-Step for Chip-Free Results
The cutting process itself determines how smooth your plywood edge turns out. Each movement should be steady, deliberate, and well-controlled.
Place the sheet with the good side facing down, since a circular saw blade cuts upward. This keeps the top surface free from chips and splinters.
Start the saw before the blade touches the plywood and let it reach full speed. This prevents sudden jerks that could tear the veneer.
Guide the saw slowly along the cutting line using both hands. Keep constant forward pressure but never force the tool through the sheet.
Follow the guide edge instead of staring at the blade. Watching the saw’s shoe ensures a straighter line and reduces hand over-correction.
When you finish the cut, release the trigger and wait for the blade to stop completely before lifting the saw. This final habit guarantees safety and a flawless, chip-free finish.
Avoiding Common Mistakes That Cause Splintering
Most plywood cutting problems happen because of small, avoidable mistakes. Learning what causes splintering helps you achieve cleaner results every time.
The biggest mistake is using a dull or coarse-tooth blade. A worn blade tears the veneer instead of slicing through it cleanly.
Cutting with the wrong side up is another common error. Since a circular saw cuts upward, always keep the good side facing down to protect the visible surface.
Rushing through the cut creates heat and vibration, leading to rough edges. Slow, steady pressure allows the blade to glide smoothly and reduce tear-out.
Failing to support the plywood properly can also cause breakage near the end of the cut. Always keep both ends level to prevent sagging or splitting.
Finally, skipping painter’s tape or not scoring the cut line weakens the top veneer. Taking these small preventive steps ensures chip-free, professional-looking edges.
Supporting and Handling Large Plywood Sheets
Full-size plywood sheets can be difficult to manage, especially when working alone. Proper support keeps your cuts straight and prevents accidental binding.
Set up two or three sawhorses under the sheet for even weight distribution. You can also use scrap 2x4s across the supports to raise the plywood slightly.
If you are cutting large panels solo, position the sheet so the waste piece falls away safely. Always plan the direction of the cut to maintain control.
For longer cuts, use temporary support boards under both sides of the line. This keeps the panel from bending downward as the saw reaches the end.
Avoid cutting across gaps or unsupported areas, as it can pinch the blade. A well-supported sheet stays stable and reduces kickback risks.
When possible, ask a helper to hold the opposite end steady. Two sets of hands make managing large plywood cuts safer and far more accurate.
Tips for Finishing, Sanding, and Edge Perfection
Once your plywood is cut, a few finishing touches can elevate your project from good to great. Smooth edges not only look better but also make assembly easier.
Use fine-grit sandpaper or a sanding block to remove any small burrs. Always sand in the direction of the grain to avoid scratching the veneer surface.
For perfectly clean edges, lightly round the corners using a sanding sponge. This adds a professional look and prevents splinters during handling.
If your project requires a polished appearance, apply edge banding or veneer tape. These materials hide raw plywood edges and create a finished, furniture-grade look.
Wipe the edges with a damp cloth before painting or sealing. Removing sawdust ensures even color and stronger adhesion of coatings.
A clean, smooth edge is the sign of precision and patience. The extra few minutes spent finishing make your final piece stand out beautifully.
Frequently Asked Questions About Cutting Plywood With a Circular Saw
What is the best blade for cutting plywood cleanly?
Use a fine-tooth carbide-tipped blade with at least 60 teeth. It cuts smoothly and minimizes chipping on thin veneers.
Should I cut plywood with the good side up or down?
Always place the good side facing down. The saw blade spins upward, which keeps the top surface smooth and chip-free.
How deep should the blade be for plywood cutting?
Set the blade about one-quarter inch deeper than the sheet’s thickness. This gives control while reducing tear-out.
Can I use painter’s tape to prevent splintering?
Yes, tape along the cutting line holds the veneer firmly. It significantly reduces splinters and gives a crisp edge.
Why does my saw burn the plywood?
Burning occurs from dull blades or pushing too slowly. Keep the blade sharp and maintain a steady cutting pace.
How do I keep the cut straight on long sheets?
Use a guide rail or clamp a straight edge as your reference. Always align it carefully before you start cutting.
Can I cut plywood with a cordless circular saw?
Yes, as long as it’s powerful enough and fully charged. Use the same fine-tooth blade for clean results.
Do I need to score the line before cutting?
Scoring with a utility knife can help reduce tear-out. It’s especially useful for thin or delicate plywood surfaces.
Why is the edge rough after cutting?
This usually happens from using a coarse or dull blade. Switching to a plywood-specific fine blade will solve it.
How can I support large plywood sheets when cutting alone?
Use two or three sawhorses and scrap boards underneath. This keeps the sheet level and prevents sagging.
Should I push or pull the saw while cutting plywood?
Always push the saw forward steadily. Pulling it backward can cause kickback and damage the veneer.
How do I cut circles or curves in plywood?
Use a jigsaw or a plunge circular saw with a pivot guide. Circular saws are best suited for straight cuts.
What speed should I use for cutting plywood?
A moderate, consistent speed works best. Too fast tears the veneer; too slow burns the edges.
How can I make both sides smooth when cutting plywood?
Place a sacrificial board underneath and cut through both layers. It supports the bottom veneer and prevents tear-out.
Can I finish the edges after cutting plywood?
Yes, lightly sand and apply edge banding or paint. Finishing protects the edges and enhances the overall appearance.
Conclusion: Turning Rough Sheets Into Smooth Finishes
Cutting plywood with a circular saw may seem difficult at first, but the secret lies in patience and preparation. With the right tools and habits, every cut becomes clean and professional.
Proper setup, accurate marking, and the right blade choice make all the difference. Once you understand how plywood reacts, you can control the saw with confidence.
Each step, from depth adjustment to steady movement, contributes to smoother results. Following the correct technique transforms your circular saw into a precision instrument.
Mistakes like dull blades, poor support, or rushing can ruin even the best plans. Taking a few extra minutes to prepare ensures consistent, chip-free edges every time.
Finishing touches such as sanding and edge banding complete the look beautifully. A project with smooth, polished edges always stands out as well-crafted work.
Mastering how to cut plywood with a circular saw isn’t just about avoiding chips—it’s about learning control, precision, and pride in every perfect line you make.

I’m Michael R. Turner, the founder, lead writer, and passionate DIY enthusiast behind 101diytools.com. With years of hands-on experience in home improvement and power tools, I built this platform to share practical tips, in-depth guides, and honest reviews to help DIYers of all skill levels tackle projects with confidence and the right tools.