How to Cut Plexiglass With a Circular Saw Without Cracking
Anyone who has ever tried to cut plexiglass knows how fragile it can be. The sheet looks solid like glass, but one wrong move with a saw and it can crack, melt, or splinter in seconds.
Imagine preparing a beautiful DIY display case or window panel, only to watch the edges chip away halfway through the cut. It is one of the most frustrating moments for any maker or builder.Learn how to cut plexiglass with a circular saw safely and smoothly. Follow these expert steps to avoid chips, cracks, and achieve clean, professional cuts.
The truth is, plexiglass behaves differently from wood or metal. Its acrylic structure is sensitive to heat and vibration, which makes cutting it a delicate process.
Many beginners assume a circular saw will ruin the material completely. However, with the right blade, technique, and speed, a circular saw can produce smooth, flawless cuts without damage.
Professional fabricators use circular saws every day to shape thick acrylic sheets for signs, windows, and furniture. The secret lies in understanding the right setup and mastering control over pressure and speed.
This complete guide will show you exactly how to cut plexiglass with a circular saw safely and cleanly. By following these steps, you will achieve professional-quality results without cracks, chips, or melted edges.
Understanding Plexiglass and Its Properties
Plexiglass, also known as acrylic, is a transparent thermoplastic that mimics the appearance of glass. It is lighter, stronger, and more flexible, but it reacts differently when exposed to heat and pressure.
Unlike glass, plexiglass can expand or melt slightly during cutting. This sensitivity makes it vulnerable to cracking, chipping, or warping when improper tools or speeds are used.
The material’s hardness rating is high enough to resist minor impacts but not excessive vibration. That means even a small shake from the saw can cause fine fractures along the cutting line.
Plexiglass comes in various thicknesses, from thin decorative sheets to heavy structural panels. Thicker sheets can handle more heat, while thinner ones require slower cutting speeds and gentler handling.
Understanding how the material responds to temperature and stress is essential before making any cut. It ensures you adjust your saw’s blade speed and pressure for cleaner, safer results.
When you respect its properties, plexiglass becomes an incredibly versatile material. It can be shaped, drilled, and polished beautifully—if you treat it with patience and precision.
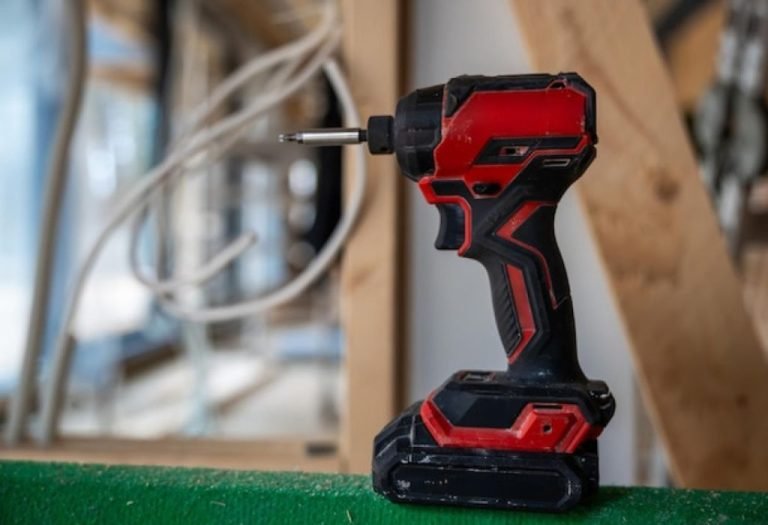
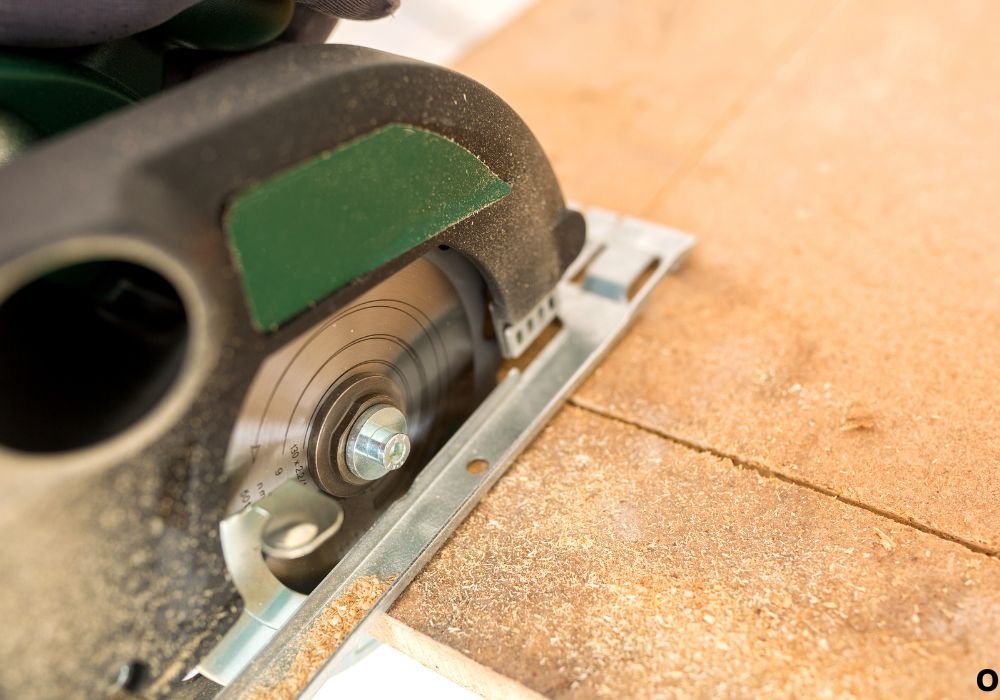
Choosing the Right Circular Saw and Blade
Not every circular saw or blade is suitable for cutting plexiglass. Using the wrong setup can easily melt the material or cause it to crack along the cut.
A fine-tooth carbide-tipped blade is the best choice for this job. It delivers smooth, controlled cuts without generating excessive heat.
Look for a blade with at least 60 teeth if you are using a standard 7¼-inch circular saw. The higher the tooth count, the cleaner the cut will be through the acrylic sheet.
Make sure your saw operates at a moderate speed rather than full RPM. Slower, controlled blade rotation prevents overheating and reduces the risk of melting the plexiglass edges.
It is also crucial to use a sharp, clean blade that has not been used for wood or metal. Dull teeth or residue buildup will increase friction and cause surface burn marks.
Choosing the right saw and blade combination is half the battle. Once you have the correct tools, the rest depends on preparation and proper cutting technique.
Preparing the Work Area and Safety Gear
Before starting any cut, it is important to prepare your workspace correctly. A safe, stable, and organized setup directly affects both accuracy and the quality of the cut.
Choose a large, flat surface where your plexiglass can rest completely. Avoid uneven tables or unstable supports that might cause vibration during cutting.
Use non-slip mats or padding under the sheet to prevent movement. This helps absorb vibration and keeps the material from shifting while you guide the saw.
Always wear safety goggles, gloves, and a dust mask before turning on the saw. Plexiglass particles are lightweight and can irritate your eyes or lungs if inhaled.
Make sure your cutting area is well-lit and free of clutter. Clear any nearby cords, tools, or debris that could get caught in the blade or cause distraction.
Finally, double-check that your saw is unplugged or switched off before adjusting anything. Proper safety preparation not only prevents injury but ensures precise, professional-looking cuts every time.
Marking and Supporting the Plexiglass
Accurate marking and stable support are crucial for achieving clean, professional cuts on plexiglass. Even the best blade cannot fix mistakes caused by poor alignment or weak support.
Start by measuring the exact size you need and mark the line using a fine-tip permanent marker. A clear, visible line helps you guide the saw precisely without hesitation.
Apply painter’s tape or masking tape along the cutting line. This simple step minimizes chipping and protects the top surface from scratches caused by the blade.
Place the plexiglass on a sturdy, flat workbench or sawhorse setup. Always support both sides of the sheet fully so it doesn’t sag or flex while cutting.
Use clamps or weighted blocks to secure the material in place. Even slight movement during cutting can lead to uneven edges or hairline cracks.
Finally, position a scrap board underneath the sheet to act as a sacrificial layer. This prevents blowout at the bottom and ensures a smooth finish through the entire thickness of the plexiglass.
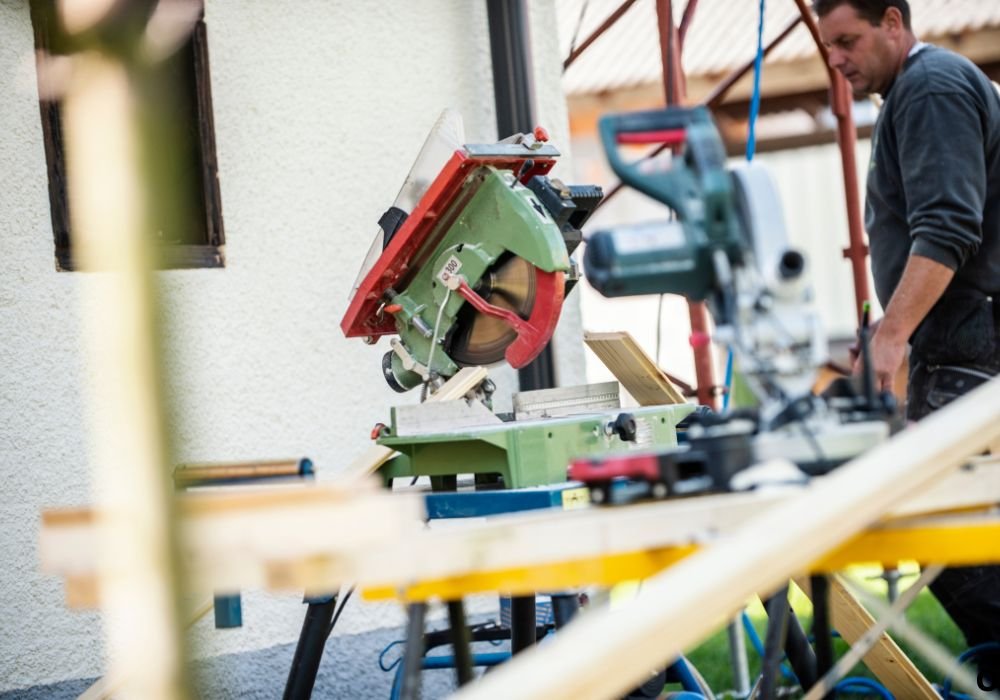
Cutting Plexiglass Step-by-Step
Cutting plexiglass with a circular saw requires patience and control. The goal is to let the saw glide naturally without forcing it through the material.
First, adjust the blade depth so it extends only about one-eighth of an inch below the plexiglass. This provides stability and prevents the blade from catching or overheating.
Start the saw before it touches the plexiglass surface. Allow the blade to reach full speed to ensure a clean, steady entry into the material.
Push the saw forward slowly and consistently while keeping firm pressure on the guide handle. Forcing it too quickly can cause cracks, melting, or jagged edges.
If the sheet is large, pause halfway to let the material cool. Heat buildup is the most common reason plexiglass fuses or distorts during cutting.
After finishing the cut, keep the saw steady until the blade stops spinning completely. This avoids accidental scratches or rough ends at the end of the cut.
Preventing Cracks and Melting
The most common challenge when cutting plexiglass is controlling heat. Excessive heat causes the edges to melt or fuse together, making the surface look cloudy or rough.
To prevent this, use a blade with many fine teeth and push the saw at a slow, steady pace. The smoother motion generates less friction and keeps the temperature low.
Always leave the protective film on both sides of the plexiglass while cutting. It reduces surface scratches and helps distribute pressure evenly across the sheet.
Avoid stopping in the middle of a cut, as that can create heat spots that melt the material. If you need to pause, lift the saw slightly off the surface to release the heat.
You can also blow compressed air along the cutting line to keep it cool. Some professionals lightly mist the surface with water for longer cuts to help manage temperature.
When you combine sharp blades, slow movement, and cooling control, you can cut even thick plexiglass sheets without a single crack. Clean, smooth edges always result from patience and precision.
Smoothing and Finishing the Edges
Once the plexiglass is cut, the edges may feel rough or slightly uneven. Finishing these edges gives your project a clean, polished, and professional look.
Start by using a fine-grit sandpaper or file to smooth any sharp corners. Move slowly along the edge in one direction to avoid scratching the surface.
For a cleaner finish, use a sanding block or orbital sander at a low speed. Avoid pressing too hard, as friction heat can melt the acrylic and dull the finish.
If you want a crystal-clear edge, polish the surface with a soft cloth and a small amount of plastic cleaner or compound. This restores shine and removes sanding haze.
Professional fabricators sometimes use flame-polishing for a glossy finish. However, this technique requires experience because too much heat can warp or bubble the plexiglass.
Taking time to smooth and polish the edges transforms a basic cut into a precision result. The finishing step completes your project with a look that rivals factory edges.
Common Mistakes to Avoid
Cutting plexiglass may look simple, but small errors can ruin an entire sheet. Knowing what to avoid saves time, material, and frustration.
The most common mistake is cutting too fast. Rapid blade movement builds up friction heat, causing the plexiglass to melt or crack along the cut line.
Using the wrong blade is another major issue. Wood or metal blades with large teeth tear through the surface instead of slicing cleanly.
Failing to support the sheet properly leads to vibration and rough edges. Always clamp the plexiglass securely and provide full support underneath.
Many beginners also forget to leave the protective film on during cutting. Removing it too early exposes the surface to scratches and burn marks.
Finally, skipping edge finishing leaves sharp, cloudy ends that can ruin your project’s appearance. Avoiding these mistakes ensures every cut looks clean, clear, and professional.
Frequently Asked Questions About Cutting Plexiglass
1. Can I cut plexiglass with a regular circular saw blade?
You can, but it’s not recommended. A fine-tooth carbide-tipped or plastic-cutting blade will give you cleaner, safer results.
2. What is the best blade for cutting plexiglass?
Use a 7¼-inch circular saw blade with at least 60 teeth. The more teeth the blade has, the smoother and cooler your cut will be.
3. Should I remove the protective film before cutting?
No, always keep the protective film on both sides. It helps prevent scratches and reduces chipping along the cut line.
4. Why does plexiglass crack when cutting?
Cracks happen due to vibration or heat buildup. Cutting slowly with a sharp blade and supporting the sheet properly prevents this.
5. How do I stop plexiglass from melting?
Use steady pressure, slower speed, and allow the blade to cool between cuts. You can also blow air along the cutting line to reduce heat.
6. Can I use a jigsaw instead of a circular saw?
Yes, a jigsaw with a fine-tooth blade works for smaller sheets or curved cuts. However, for long, straight lines, a circular saw provides cleaner results.
7. What speed should I use when cutting plexiglass?
Keep the saw at medium speed. High RPM creates friction heat, while slow speeds can snag or crack the material.
8. How thick of plexiglass can I cut with a circular saw?
Most standard saws can handle up to ½ inch thick sheets easily. For thicker panels, make multiple shallow passes instead of one deep cut.
9. Should I use water when cutting plexiglass?
A light mist of water can help control temperature during long cuts. Just make sure it doesn’t interfere with the saw’s electrical parts.
10. Do I need to clamp the plexiglass?
Yes, always secure the sheet with clamps. Even slight movement during cutting can cause jagged edges or vibration cracks.
11. Can I sand plexiglass edges after cutting?
Absolutely. Use fine-grit sandpaper or a file to smooth edges, then polish with a plastic cleaner for a clear finish.
12. Why does plexiglass sometimes chip at the end of a cut?
This happens when the bottom isn’t supported. Place a scrap board underneath to prevent blowout as the blade exits the material.
13. What happens if I push the saw too fast?
Forcing the saw overheats the blade and melts the edges. Always let the blade do the work and move slowly for smooth cuts.
14. How can I make the edges look shiny and professional?
Polish the edges with a plastic polish or use flame-polishing carefully. It restores a clear, glass-like finish when done properly.
15. Is cutting plexiglass dangerous?
It can be if you rush or skip safety gear. Always wear goggles, gloves, and a dust mask, and work in a clean, stable environment.
Conclusion: From Cracks to Clean Cuts
Cutting plexiglass with a circular saw may sound intimidating at first. However, with the right preparation, tools, and technique, it becomes a simple, rewarding process.
Choosing a fine-tooth blade, setting up proper support, and maintaining a steady feed rate are the keys to success. Each of these steps prevents cracking, melting, and vibration during cutting.
Patience is your greatest advantage when working with acrylic. Forcing the saw or skipping preparation almost always leads to damaged edges.
Always take the time to test your setup on a scrap piece before starting your main project. Small adjustments in pressure and speed make a big difference in the final result.
With these methods, you can achieve perfect, smooth cuts that look professionally finished. Once mastered, this skill lets you confidently create custom projects, displays, and home upgrades without fear of cracking plexiglass again.vAnyone who has ever tried to cut plexiglass knows how fragile it can be. The sheet looks solid like glass, but one wrong move with a saw and it can crack, melt, or splinter in seconds.
Imagine preparing a beautiful DIY display case or window panel, only to watch the edges chip away halfway through the cut. It is one of the most frustrating moments for any maker or builder.Learn how to cut plexiglass with a circular saw safely and smoothly. Follow these expert steps to avoid chips, cracks, and achieve clean, professional cuts.
The truth is, plexiglass behaves differently from wood or metal. Its acrylic structure is sensitive to heat and vibration, which makes cutting it a delicate process.
Many beginners assume a circular saw will ruin the material completely. However, with the right blade, technique, and speed, a circular saw can produce smooth, flawless cuts without damage.
Professional fabricators use circular saws every day to shape thick acrylic sheets for signs, windows, and furniture. The secret lies in understanding the right setup and mastering control over pressure and speed.
This complete guide will show you exactly how to cut plexiglass with a circular saw safely and cleanly. By following these steps, you will achieve professional-quality results without cracks, chips, or melted edges.
Understanding Plexiglass and Its Properties
Plexiglass, also known as acrylic, is a transparent thermoplastic that mimics the appearance of glass. It is lighter, stronger, and more flexible, but it reacts differently when exposed to heat and pressure.
Unlike glass, plexiglass can expand or melt slightly during cutting. This sensitivity makes it vulnerable to cracking, chipping, or warping when improper tools or speeds are used.
The material’s hardness rating is high enough to resist minor impacts but not excessive vibration. That means even a small shake from the saw can cause fine fractures along the cutting line.
Plexiglass comes in various thicknesses, from thin decorative sheets to heavy structural panels. Thicker sheets can handle more heat, while thinner ones require slower cutting speeds and gentler handling.
Understanding how the material responds to temperature and stress is essential before making any cut. It ensures you adjust your saw’s blade speed and pressure for cleaner, safer results.
When you respect its properties, plexiglass becomes an incredibly versatile material. It can be shaped, drilled, and polished beautifully—if you treat it with patience and precision.
Choosing the Right Circular Saw and Blade
Not every circular saw or blade is suitable for cutting plexiglass. Using the wrong setup can easily melt the material or cause it to crack along the cut.
A fine-tooth carbide-tipped blade is the best choice for this job. It delivers smooth, controlled cuts without generating excessive heat.
Look for a blade with at least 60 teeth if you are using a standard 7¼-inch circular saw. The higher the tooth count, the cleaner the cut will be through the acrylic sheet.
Make sure your saw operates at a moderate speed rather than full RPM. Slower, controlled blade rotation prevents overheating and reduces the risk of melting the plexiglass edges.
It is also crucial to use a sharp, clean blade that has not been used for wood or metal. Dull teeth or residue buildup will increase friction and cause surface burn marks.
Choosing the right saw and blade combination is half the battle. Once you have the correct tools, the rest depends on preparation and proper cutting technique.
Preparing the Work Area and Safety Gear
Before starting any cut, it is important to prepare your workspace correctly. A safe, stable, and organized setup directly affects both accuracy and the quality of the cut.
Choose a large, flat surface where your plexiglass can rest completely. Avoid uneven tables or unstable supports that might cause vibration during cutting.
Use non-slip mats or padding under the sheet to prevent movement. This helps absorb vibration and keeps the material from shifting while you guide the saw.
Always wear safety goggles, gloves, and a dust mask before turning on the saw. Plexiglass particles are lightweight and can irritate your eyes or lungs if inhaled.
Make sure your cutting area is well-lit and free of clutter. Clear any nearby cords, tools, or debris that could get caught in the blade or cause distraction.
Finally, double-check that your saw is unplugged or switched off before adjusting anything. Proper safety preparation not only prevents injury but ensures precise, professional-looking cuts every time.
Marking and Supporting the Plexiglass
Accurate marking and stable support are crucial for achieving clean, professional cuts on plexiglass. Even the best blade cannot fix mistakes caused by poor alignment or weak support.
Start by measuring the exact size you need and mark the line using a fine-tip permanent marker. A clear, visible line helps you guide the saw precisely without hesitation.
Apply painter’s tape or masking tape along the cutting line. This simple step minimizes chipping and protects the top surface from scratches caused by the blade.
Place the plexiglass on a sturdy, flat workbench or sawhorse setup. Always support both sides of the sheet fully so it doesn’t sag or flex while cutting.
Use clamps or weighted blocks to secure the material in place. Even slight movement during cutting can lead to uneven edges or hairline cracks.
Finally, position a scrap board underneath the sheet to act as a sacrificial layer. This prevents blowout at the bottom and ensures a smooth finish through the entire thickness of the plexiglass.
Cutting Plexiglass Step-by-Step
Cutting plexiglass with a circular saw requires patience and control. The goal is to let the saw glide naturally without forcing it through the material.
First, adjust the blade depth so it extends only about one-eighth of an inch below the plexiglass. This provides stability and prevents the blade from catching or overheating.
Start the saw before it touches the plexiglass surface. Allow the blade to reach full speed to ensure a clean, steady entry into the material.
Push the saw forward slowly and consistently while keeping firm pressure on the guide handle. Forcing it too quickly can cause cracks, melting, or jagged edges.
If the sheet is large, pause halfway to let the material cool. Heat buildup is the most common reason plexiglass fuses or distorts during cutting.
After finishing the cut, keep the saw steady until the blade stops spinning completely. This avoids accidental scratches or rough ends at the end of the cut.
Preventing Cracks and Melting
The most common challenge when cutting plexiglass is controlling heat. Excessive heat causes the edges to melt or fuse together, making the surface look cloudy or rough.
To prevent this, use a blade with many fine teeth and push the saw at a slow, steady pace. The smoother motion generates less friction and keeps the temperature low.
Always leave the protective film on both sides of the plexiglass while cutting. It reduces surface scratches and helps distribute pressure evenly across the sheet.
Avoid stopping in the middle of a cut, as that can create heat spots that melt the material. If you need to pause, lift the saw slightly off the surface to release the heat.
You can also blow compressed air along the cutting line to keep it cool. Some professionals lightly mist the surface with water for longer cuts to help manage temperature.
When you combine sharp blades, slow movement, and cooling control, you can cut even thick plexiglass sheets without a single crack. Clean, smooth edges always result from patience and precision.
Smoothing and Finishing the Edges
Once the plexiglass is cut, the edges may feel rough or slightly uneven. Finishing these edges gives your project a clean, polished, and professional look.
Start by using a fine-grit sandpaper or file to smooth any sharp corners. Move slowly along the edge in one direction to avoid scratching the surface.
For a cleaner finish, use a sanding block or orbital sander at a low speed. Avoid pressing too hard, as friction heat can melt the acrylic and dull the finish.
If you want a crystal-clear edge, polish the surface with a soft cloth and a small amount of plastic cleaner or compound. This restores shine and removes sanding haze.
Professional fabricators sometimes use flame-polishing for a glossy finish. However, this technique requires experience because too much heat can warp or bubble the plexiglass.
Taking time to smooth and polish the edges transforms a basic cut into a precision result. The finishing step completes your project with a look that rivals factory edges.
Common Mistakes to Avoid
Cutting plexiglass may look simple, but small errors can ruin an entire sheet. Knowing what to avoid saves time, material, and frustration.
The most common mistake is cutting too fast. Rapid blade movement builds up friction heat, causing the plexiglass to melt or crack along the cut line.
Using the wrong blade is another major issue. Wood or metal blades with large teeth tear through the surface instead of slicing cleanly.
Failing to support the sheet properly leads to vibration and rough edges. Always clamp the plexiglass securely and provide full support underneath.
Many beginners also forget to leave the protective film on during cutting. Removing it too early exposes the surface to scratches and burn marks.
Finally, skipping edge finishing leaves sharp, cloudy ends that can ruin your project’s appearance. Avoiding these mistakes ensures every cut looks clean, clear, and professional.
Frequently Asked Questions About Cutting Plexiglass
1. Can I cut plexiglass with a regular circular saw blade?
You can, but it’s not recommended. A fine-tooth carbide-tipped or plastic-cutting blade will give you cleaner, safer results.
2. What is the best blade for cutting plexiglass?
Use a 7¼-inch circular saw blade with at least 60 teeth. The more teeth the blade has, the smoother and cooler your cut will be.
3. Should I remove the protective film before cutting?
No, always keep the protective film on both sides. It helps prevent scratches and reduces chipping along the cut line.
4. Why does plexiglass crack when cutting?
Cracks happen due to vibration or heat buildup. Cutting slowly with a sharp blade and supporting the sheet properly prevents this.
5. How do I stop plexiglass from melting?
Use steady pressure, slower speed, and allow the blade to cool between cuts. You can also blow air along the cutting line to reduce heat.
6. Can I use a jigsaw instead of a circular saw?
Yes, a jigsaw with a fine-tooth blade works for smaller sheets or curved cuts. However, for long, straight lines, a circular saw provides cleaner results.
7. What speed should I use when cutting plexiglass?
Keep the saw at medium speed. High RPM creates friction heat, while slow speeds can snag or crack the material.
8. How thick of plexiglass can I cut with a circular saw?
Most standard saws can handle up to ½ inch thick sheets easily. For thicker panels, make multiple shallow passes instead of one deep cut.
9. Should I use water when cutting plexiglass?
A light mist of water can help control temperature during long cuts. Just make sure it doesn’t interfere with the saw’s electrical parts.
10. Do I need to clamp the plexiglass?
Yes, always secure the sheet with clamps. Even slight movement during cutting can cause jagged edges or vibration cracks.
11. Can I sand plexiglass edges after cutting?
Absolutely. Use fine-grit sandpaper or a file to smooth edges, then polish with a plastic cleaner for a clear finish.
12. Why does plexiglass sometimes chip at the end of a cut?
This happens when the bottom isn’t supported. Place a scrap board underneath to prevent blowout as the blade exits the material.
13. What happens if I push the saw too fast?
Forcing the saw overheats the blade and melts the edges. Always let the blade do the work and move slowly for smooth cuts.
14. How can I make the edges look shiny and professional?
Polish the edges with a plastic polish or use flame-polishing carefully. It restores a clear, glass-like finish when done properly.
15. Is cutting plexiglass dangerous?
It can be if you rush or skip safety gear. Always wear goggles, gloves, and a dust mask, and work in a clean, stable environment.
Conclusion: From Cracks to Clean Cuts
Cutting plexiglass with a circular saw may sound intimidating at first. However, with the right preparation, tools, and technique, it becomes a simple, rewarding process.
Choosing a fine-tooth blade, setting up proper support, and maintaining a steady feed rate are the keys to success. Each of these steps prevents cracking, melting, and vibration during cutting.
Patience is your greatest advantage when working with acrylic. Forcing the saw or skipping preparation almost always leads to damaged edges.
Always take the time to test your setup on a scrap piece before starting your main project. Small adjustments in pressure and speed make a big difference in the final result.
With these methods, you can achieve perfect, smooth cuts that look professionally finished. Once mastered, this skill lets you confidently create custom projects, displays, and home upgrades without fear of cracking plexiglass again.

I’m Michael R. Turner, the founder, lead writer, and passionate DIY enthusiast behind 101diytools.com. With years of hands-on experience in home improvement and power tools, I built this platform to share practical tips, in-depth guides, and honest reviews to help DIYers of all skill levels tackle projects with confidence and the right tools.