How to Cut Aluminum Angle with Circular Saw Cleanly and Safely
Aluminum angles are a versatile material used in countless DIY and professional projects — from framing and supports to brackets and furniture builds. They’re strong, lightweight, and corrosion-resistant, which makes them perfect for both indoor and outdoor use.
But when it comes to cutting them precisely, things can get tricky. The metal’s toughness and the risk of burrs or sparks often intimidate beginners. Many people wonder if a circular saw can handle this task. The answer is yes — when equipped with the correct blade and setup, your circular saw can cut through aluminum angle cleanly and efficiently.
This detailed guide will teach you how to prepare, cut, and finish aluminum angles safely using a circular saw, while avoiding common mistakes that lead to jagged edges or damaged blades.
Understanding Aluminum Angle Material
Before you start cutting, it’s essential to understand what makes aluminum angle unique. It’s typically an extruded aluminum profile shaped like an “L,” designed for strength and rigidity.
The material is softer than steel but harder than wood or plastic, meaning you need the right balance of blade speed and control. Aluminum angles come in various thicknesses and grades; most commonly used are 6061 and 6063 alloys.
6061 aluminum is stronger and more rigid, ideal for load-bearing structures, while 6063 offers better surface finish and corrosion resistance. Knowing your material helps you adjust your saw’s settings and select the proper blade.
Tools and Safety Equipment You’ll Need
Gathering the correct tools ensures you can cut aluminum efficiently and safely.
You’ll need:
- Circular saw with variable speed or steady RPM
- Carbide-tipped non-ferrous metal cutting blade (60–80 teeth)
- Clamps
- Measuring tape and marker
- Cutting lubricant or wax stick
- Protective eyewear, gloves, and ear protection
- Workbench or sawhorses
- Deburring tool or fine file
Always make sure your work area is clean and well-lit. Working in a clutter-free zone reduces vibration and enhances precision.
Preparing the Aluminum Angle for Cutting
Preparation determines how clean and accurate your cut will be. Begin by measuring and marking your cut line with a permanent marker or scriber. If you’re making multiple cuts, use a miter gauge or angle guide for consistency.
Clamp the aluminum firmly to your workbench or sawhorses. Any movement during cutting can cause the blade to bind or kick back.
Apply a small amount of cutting wax or lubricant along the marked area. This reduces friction and keeps the blade cool, preventing aluminum from sticking to the teeth.
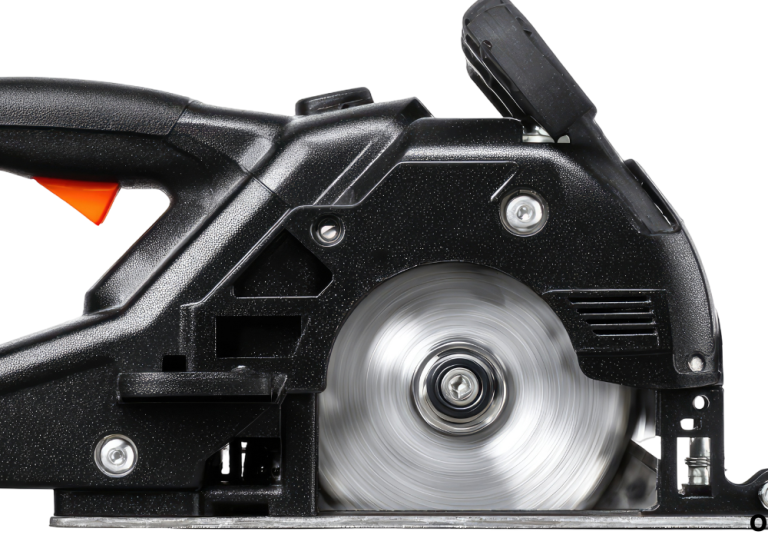
Choosing the Right Blade for Cutting Aluminum
The blade you use makes all the difference. A carbide-tipped non-ferrous metal cutting blade is the best choice for aluminum.
These blades have a negative hook angle and closely spaced teeth designed to slice through metal smoothly without grabbing. A 60–80 tooth count is ideal for most aluminum angles up to 3 mm thick.
Avoid using standard wood blades. They generate too much heat, causing aluminum to melt and stick, which ruins both the material and your saw.
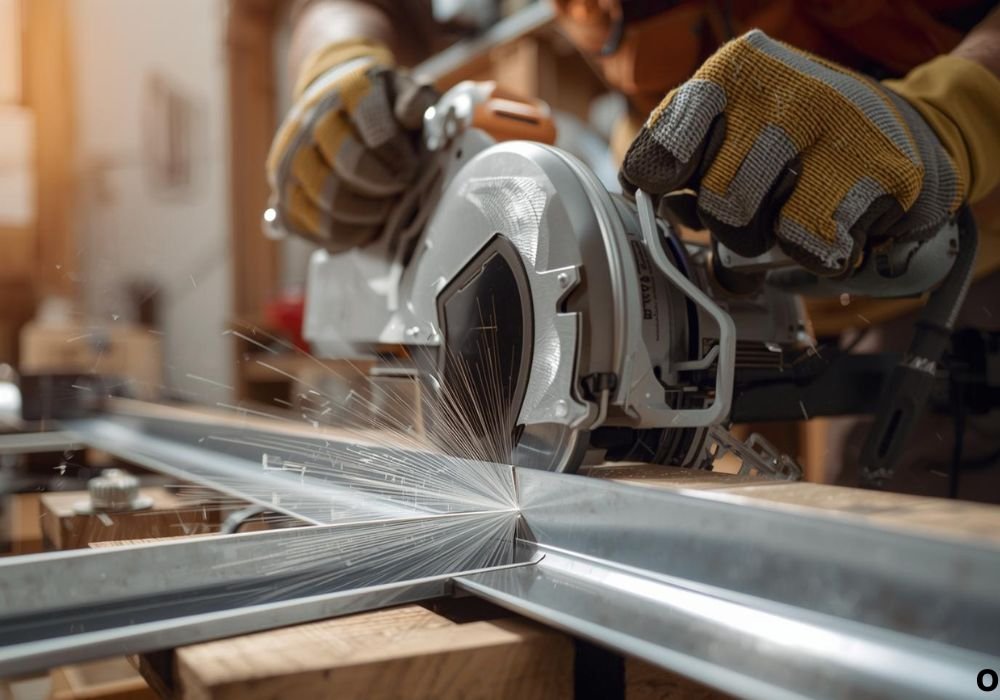
Step-by-Step Process: How to Cut Aluminum Angle with Circular Saw
Follow these steps carefully to ensure precision and safety:
- Set up your work area — Place the angle on a stable, flat surface.
- Clamp securely — Use at least two clamps to prevent vibration.
- Lubricate the blade — Apply cutting wax or spray to the teeth.
- Adjust blade depth — It should be just slightly deeper than the aluminum’s thickness.
- Start the saw — Let the blade reach full speed before contact.
- Cut steadily — Feed the aluminum slowly through the saw without forcing it.
- Support the offcut — Prevent bending near the end of the cut.
- Inspect and finish — Remove burrs with a file or sandpaper.
The key is to maintain control and steady pressure throughout the process.
Cooling and Lubrication Tips
Friction from cutting generates heat that can dull the blade or deform aluminum edges. Lubrication helps control both temperature and friction.
You can use cutting wax, beeswax, or light machine oil applied directly to the blade or material. Some professionals use WD-40 sparingly on the cut line.
Avoid excessive lubrication, which can splatter or cause slippage. Instead, apply a thin, even coat before each cut.
Common Mistakes to Avoid
Even small mistakes can affect your final result. Keep an eye out for these errors:
- Pushing too fast — Increases heat and burring.
- Using wood blades — Dulls quickly and causes rough edges.
- Ignoring clamping — Leads to vibration and uneven cuts.
- Skipping lubrication — Makes aluminum gum up the blade.
- Cutting too deep — Creates excessive sparks and rough edges.
Always prioritize precision and patience over speed for cleaner, safer cuts.
Finishing the Cut: Deburring and Polishing
Once you’ve made your cut, you may notice sharp edges or burrs. Use a deburring tool, fine metal file, or sandpaper (400–600 grit) to smooth them.
If you need polished edges, you can use a buffing wheel or a metal polishing compound for a clean, professional finish.
This not only enhances appearance but also prevents cuts when handling the aluminum.
Can I use my wood-cutting circular saw for aluminum?
Only if you switch to a non-ferrous metal cutting blade. Regular wood blades aren’t safe for aluminum.
Do I need lubricant for every cut?
Yes, a small amount prevents friction, heat buildup, and aluminum sticking to the blade.
Can I use a miter saw instead of a circular saw?
Yes, a miter saw with a fine-tooth non-ferrous blade offers even better precision.
Why does my blade spark when cutting?
Sparks occur from friction. Reduce feed speed and apply more lubrication.
How do I prevent burrs after cutting?
Use a sharp blade, steady pressure, and always finish with a deburring tool.
Handling Thick Aluminum Angles
Thicker aluminum (over 3 mm) requires a slower feed rate and possibly a blade with fewer teeth (around 48). This gives more chip clearance and keeps the blade cooler.
You can make shallow passes instead of one deep cut if needed. Allowing the saw to rest briefly between cuts also helps prevent overheating.
Extra Tip: If you’re cutting multiple thick angles, occasionally clean the blade with a brass wire brush to remove aluminum buildup.
Safety Practices During and After Cutting
Cutting metal always requires strict safety measures. Wear protective gear including safety glasses, gloves, and ear protection. Sparks and small shards can travel unexpectedly.
Keep flammable materials away from the work area. After cutting, allow the blade to cool before touching or changing it.
Clean up metal shavings immediately with a magnetic sweeper or brush — never with bare hands.
Alternative Tools for Cutting Aluminum Angle
If you don’t have a circular saw, consider these alternatives:
- Miter saw: Best for angle accuracy.
- Band saw: Ideal for thicker aluminum stock.
- Hacksaw: Works for small DIY tasks.
- Angle grinder: Good for quick cuts, though less precise.
Each tool has advantages, but for straight, repeatable cuts, the circular saw remains the most practical and efficient choice for home projects.
Can I cut aluminum indoors?
Yes, but make sure the space is ventilated and clear of flammable materials.
How often should I replace my cutting blade?
Replace once you notice increased burrs, noise, or rougher edges.
What’s the ideal RPM for aluminum cutting?
Around 3,000–3,800 RPM is safe for most blades designed for metal.
Can I stack aluminum pieces for multiple cuts?
Yes, but clamp them tightly together to prevent shifting.
Do I need to polish after every cut?
Not necessarily, but it’s recommended for visible or sharp edges.
Troubleshooting Cutting Issues
If your cuts aren’t turning out as expected, here’s how to fix them:
- Rough edges: Use a finer-tooth blade.
- Metal discoloration: Too much heat — slow down feed rate.
- Binding or kickback: Check clamping and ensure even pressure.
- Loud vibration: Use a stable bench and ensure the blade is balanced.
These simple corrections will improve both precision and blade longevity.
Can a circular saw cut through aluminum angles over 1 inch thick?
Yes, but you’ll need multiple passes and a slower feed rate.
Is it safe to cut aluminum without wax or oil?
No. It increases blade wear and leads to rough, hot cuts.
Can aluminum melt while cutting?
Only if you cut too fast or use the wrong blade type.
Does aluminum spark more than steel?
It produces smaller, less intense sparks, but still requires caution.
What’s the best way to clean the saw after cutting metal?
Use a brush and compressed air; avoid water or solvents on the motor.
Maintenance and Storage of Aluminum Angles
After cutting, store leftover aluminum properly to prevent oxidation. Keep them in a dry area, preferably wrapped in plastic or cloth to avoid moisture.
Clean any lubricant residue before storage to prevent surface dullness. Periodically inspect your saw blades and replace them when you notice dull or uneven teeth.
Routine maintenance ensures longer blade life and cleaner results on future projects.
Can I reuse aluminum scrap pieces?
Absolutely. Aluminum can be recycled and reused for smaller projects.
Should I paint or coat cut aluminum ends?
If exposed outdoors, applying a clear coat or paint prevents corrosion.
Can I drill aluminum right after cutting?
Yes, but make sure the metal has cooled and burrs are removed first.
Is flame cutting suitable for aluminum?
No, aluminum melts before it burns, making flame cutting unsafe.
Can I cut aluminum without a workbench?
You can, but stability and precision are greatly reduced. Always use a supported surface.
Conclusion
Cutting aluminum angle with a circular saw is a straightforward process once you understand the right setup and technique. By using a carbide-tipped non-ferrous metal blade, applying light lubrication, and maintaining a steady feed rate, you can achieve clean, professional cuts every time.
Always prioritize safety, keep your workspace stable, and take your time with each pass. Afterward, smooth and deburr the edges for a polished, finished look.
Whether you’re working on a home improvement project or a fabrication job, mastering this method ensures efficient, accurate results while extending your blade’s life and minimizing material waste.

I’m Michael R. Turner, the founder, lead writer, and passionate DIY enthusiast behind 101diytools.com. With years of hands-on experience in home improvement and power tools, I built this platform to share practical tips, in-depth guides, and honest reviews to help DIYers of all skill levels tackle projects with confidence and the right tools.