How to Cut a Taper with a Circular Saw Accurately
Tapered cuts are the secret behind elegant furniture design and balanced woodworking. Whether you’re shaping table legs, trimming panels, or crafting decorative edges, tapering adds both function and style. The best part—you can make perfect tapers with a circular saw right in your own workshop.
Most woodworkers assume you need a table saw or jointer for tapering, but that’s not true. With a simple jig, steady technique, and proper setup, a circular saw can deliver accurate, smooth taper cuts every time. The key lies in measuring precisely, aligning correctly, and guiding your saw safely along a clean path.
Cutting a taper might sound complicated, but it’s actually a straightforward process once you understand the geometry behind it. From marking the taper line to building a jig that keeps your saw straight, you’ll learn how to handle every step confidently.
In this complete guide, we’ll cover how to cut a taper with a circular saw using multiple methods, tips for clean results, and ways to avoid common mistakes. By the end, you’ll be able to create professional tapers with nothing more than a circular saw and some patience.
What Is a Taper Cut
A taper cut is when one end of a board is narrower than the other, creating a gradual angle along its length. This shape is common in furniture making—especially in table or chair legs—because it gives strength at the top while keeping a light, refined look toward the bottom.
Tapers can also serve functional purposes. For example, they help level surfaces, improve aerodynamics in projects like boat trim, or fit panels into uneven spaces. The slope can be subtle or dramatic, depending on design needs.
You can cut a taper in several ways: with a table saw and jig, a bandsaw, or even by hand with a circular saw. The circular saw method is ideal for those who need quick results without large stationary equipment.
The goal is to create a clean, consistent line from one end of the board to the other. Precision and stability are the two most important factors for success.
Tools and Materials You’ll Need
Before you begin, gather everything you need for accuracy and safety. Cutting tapers requires careful handling and support, so preparation matters.
You’ll need:
- Circular saw with sharp carbide-tipped blade
- Measuring tape and straight edge or chalk line
- Pencil or marking knife for layout
- Clamps for securing your workpiece
- Scrap plywood or MDF for making a taper jig
- Safety gear (glasses, ear protection, dust mask)
- Workbench or sawhorses
For most projects, a fine-tooth crosscut blade (40–60 teeth) provides a smoother edge with less tear-out. Avoid dull or damaged blades, which cause wandering cuts.
A circular saw jig—essentially a guiding sled—will make the biggest difference in accuracy. It keeps your saw perfectly aligned with the taper line throughout the cut.
Do I need a special saw for tapering?
No, any standard circular saw with an adjustable depth works fine.
Can I taper thick wood with a circular saw?
Yes, but make sure your blade depth matches the wood’s thickness.
Is a jig necessary?
Highly recommended for consistent and safe results.
Should I mark both sides of the board?
Yes, marking both helps you verify alignment during setup.
Can I cut multiple tapers at once?
Only if the boards are clamped tightly together and aligned perfectly.
Measuring and Marking the Taper
Accuracy begins with layout. Start by determining how much you want to remove from one end of the board. For example, if you’re making table legs, you might remove 1 inch from the bottom over a 30-inch length.
Mark both ends clearly—one at full width, one at the reduced width. Use a straight edge or chalk line to connect these points. This diagonal line represents your taper cut path.
Always mark on the waste side of the board so you can see the line clearly while cutting. If you’re making multiple identical pieces, use the first one as a template for marking the rest.
Double-check all measurements before clamping the board. Small errors at the start can lead to noticeable differences in final angles.
Setting Up a Taper Jig
A taper jig helps guide your saw consistently from start to finish. It’s simple to make with two pieces of plywood or MDF. One acts as a base, and the other supports the workpiece at an angle.
Cut your jig base slightly longer than your workpiece. Then, position the top guide board along your taper line, leaving a straight edge parallel to where the saw will travel. Screw or glue the guide board securely.
The taper jig creates a stable platform that keeps your circular saw aligned perfectly with the cut. The board rests on top of the jig, and clamps hold it in place during cutting.
You can reuse the jig for multiple pieces of the same taper angle. Label each side clearly so you can set it up quickly for future projects.
What materials work best for a taper jig?
½-inch plywood or MDF provides stability and smooth movement.
Can I buy a jig instead of making one?
Yes, but homemade jigs are easy and customizable for any angle.
Do I need to screw my board to the jig?
Not always—clamps or double-sided tape work well too.
How long should the jig be?
At least as long as your workpiece for even support.
Will one jig fit all projects?
You can adjust or rebuild depending on taper dimensions.
Setting Blade Depth and Angle
Set your circular saw blade depth so it cuts about ⅛ inch deeper than the board thickness. Too shallow and you’ll leave uncut fibers; too deep and you risk tear-out or blade binding.
For straight taper cuts, keep the saw base flat. You don’t need any bevel adjustments unless your project calls for angled edges. Check your blade alignment to ensure it’s parallel to the saw’s shoe for clean, accurate movement.
Lock all adjustments securely before starting. Loose bevels or wobbly depth settings can ruin your cut or cause dangerous kickback.
Finally, make a quick test cut on scrap wood to confirm that your saw tracks correctly and the blade depth is sufficient.
Clamping the Workpiece Securely
Once the jig is ready and your taper line marked, position your board on the jig so the waste side aligns with the saw path. Clamp it firmly on both ends to prevent shifting.
Never rely solely on your hands for holding the board. The vibration and torque from a circular saw can easily move unrestrained material. Two or more heavy-duty clamps ensure stability.
Keep clamps clear of the saw’s travel path. Position them near the ends of the board or use low-profile clamps if space is tight. Always double-check clamp placement before cutting.
If you’re cutting multiple tapers, use stop blocks or guide marks to ensure consistent positioning between pieces.
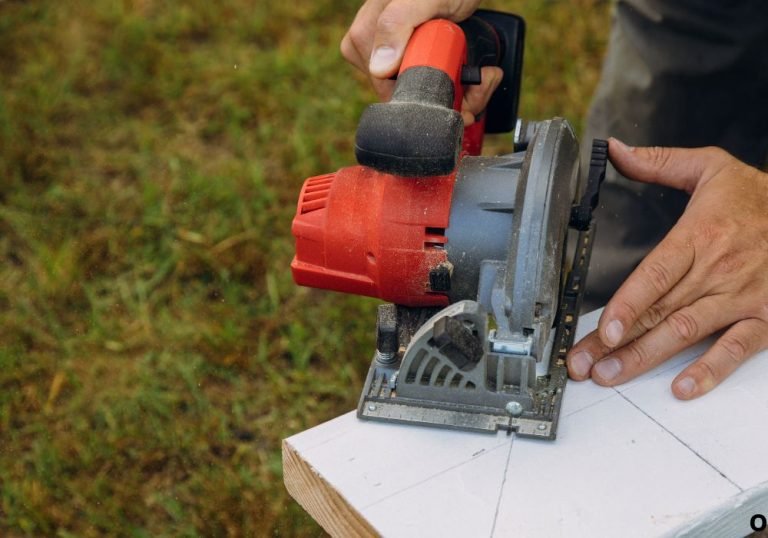
Making the Cut Safely
Start by positioning the circular saw at the near end of your taper line. Hold the saw firmly with both hands and ensure the blade guard retracts smoothly. Let the blade reach full speed before entering the wood.
Guide the saw slowly and steadily along the jig’s straight edge. Maintain consistent forward pressure without forcing the cut. Keep your eyes on the guide line—not the blade—to stay accurate.
If your board is long, pause midway to check alignment and clamp tightness. Resume cutting only when everything is stable.
Once finished, release the trigger and let the blade stop completely before moving the saw. Inspect the edge for smoothness and accuracy. If needed, sand lightly to clean up rough spots.
Should I push fast or slow during the cut?
Steady and moderate speed prevents tear-out and overheating.
Can I cut freehand without a jig?
Yes, but it’s harder to maintain precision and straightness.
Why does my saw bind mid-cut?
Usually because the board shifted or the blade is dull.
Do I need to support the cutoff piece?
Yes, especially for long boards—it prevents splintering.
Can I make multiple passes for cleaner results?
Yes, shallow passes reduce tear-out on delicate wood.
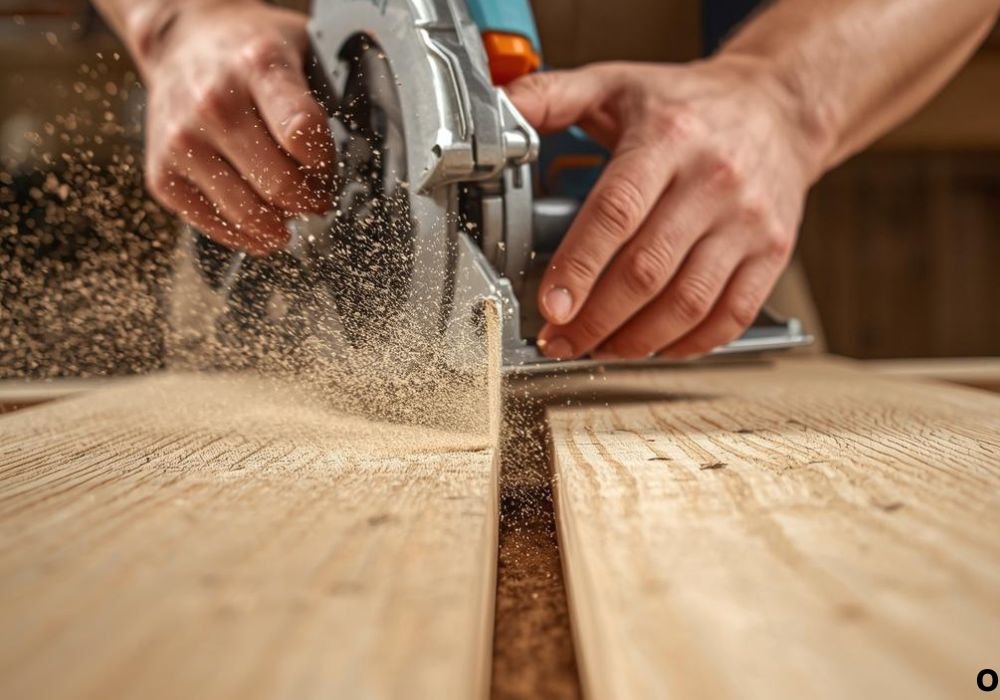
Smoothing and Finishing the Cut
After cutting, inspect your tapered edge carefully. Even with a fine blade, circular saws may leave small ridges or saw marks. A quick sanding pass removes these easily.
Use 120-grit sandpaper for smoothing and finish with 220-grit for a clean surface. Sand along the grain to maintain a natural look. If your taper is structural (like for a table leg), check that both sides are symmetrical before assembly.
For visible pieces, apply wood finish or paint immediately after sanding. This seals the surface and prevents moisture absorption, especially on open end grain.
If minor adjustments are needed, trim small amounts using the same jig for consistency.
Cutting a Taper Without a Jig
If you don’t have materials for a jig, you can still cut a taper by following the marked line manually. Clamp the board securely and use a long straight edge as a guide for your saw base.
Start at one end of the line and cut slowly. Keep the saw pressed gently against the guide edge the entire time. This approach requires extra attention to avoid wandering off the line.
To improve accuracy, score the taper line lightly with a utility knife before cutting. This helps the blade track smoothly and reduces tear-out on plywood or veneer boards.
While freehand tapering works, it’s best reserved for shorter boards or rough shaping before sanding and refining.
Common Mistakes and How to Avoid Them
The most frequent mistake when cutting tapers is misalignment. Always recheck your measurements before cutting—one misplaced clamp can change the angle entirely.
Cutting too fast leads to rough edges and burning. Let the saw glide naturally at a steady speed. Forcing it causes blade deflection and uneven thickness.
Failing to secure the jig or board firmly is another common issue. Movement during cutting creates jagged or crooked results. Always use at least two clamps and stable support.
Finally, using a dull or dirty blade reduces precision. Clean your blade regularly and replace it when cutting feels sluggish or produces smoke.
Why does my taper look uneven?
Probably due to movement or incorrect saw alignment—tighten clamps and recheck setup.
Can I fix a crooked taper?
Yes, re-clamp and trim slightly with the same jig to correct the angle.
What causes burn marks on the cut?
A dull blade or pushing too slowly in one spot.
Is it okay to flip the board and cut from the opposite side?
Yes, for thicker material, cutting halfway from each side prevents tear-out.
Do I need to sand after every cut?
Yes, light sanding ensures smooth surfaces for assembly or finishing.
Taper Applications in Woodworking
Taper cuts appear in countless woodworking projects beyond table legs. They enhance both strength and aesthetics in furniture design. Chair legs, side panels, cabinet edges, and picture frames often feature gentle tapers.
In home renovation, tapers help match uneven walls or floors. Door jambs, stair rails, and trim boards frequently need angled adjustments. Learning this technique saves time and reduces wasted material.
Tapered cuts also allow better weight distribution in structural builds. By reducing thickness where strength isn’t critical, you lighten the piece without compromising stability.
Mastering tapers is essential for anyone aiming to elevate their woodworking precision and craftsmanship.
Advanced Tapering Techniques
Once you’re comfortable with basic straight tapers, experiment with compound or curved tapers. These advanced cuts require both bevel and taper angles at once, giving elegant dimensions to furniture parts.
You can simulate a compound taper by tilting the circular saw blade slightly while guiding it through a taper jig. This creates a diagonal profile on both width and thickness simultaneously.
For curved tapers, draw the arc on your board and make several shallow straight cuts along the curve. Sand or plane afterward to smooth the transitions.
Always practice these methods on scrap wood before attempting final pieces. Small setup differences can dramatically change the final look.
Safety Tips for Cutting Tapers
Never compromise safety for speed. Always wear eye and ear protection before using your saw. Circular saws produce fine dust and loud noise that can cause lasting damage without protection.
Keep hands away from the blade path at all times. Use clamps or push blocks to guide your material. Never reach across the saw while it’s running.
Check your saw’s base for debris buildup that can tilt the cut unevenly. Clean it regularly and inspect the cord or battery connection for secure operation.
Unplug or remove the battery before adjusting blade depth or bevel angle. Double-check that the blade guard moves freely before starting. Safety is precision’s best friend in woodworking.
Maintenance and Care for Circular Saws
Proper tool maintenance keeps your cuts accurate and extends your saw’s lifespan. After each use, wipe the base plate clean and remove sawdust buildup. Dust can interfere with smooth operation and depth control.
Inspect the power cord or battery terminals for damage. Replace worn parts immediately to avoid electrical hazards. Lubricate moving levers occasionally for consistent adjustment.
Blade care is crucial. Resin and pitch buildup on teeth cause overheating and dullness. Clean blades with a mild solvent after each project. Store them dry and covered to prevent rust.
Well-maintained tools don’t just perform better—they make every project safer and more efficient.
Conclusion
Learning how to cut a taper with a circular saw opens endless possibilities in woodworking. With precise measurements, a steady setup, and the help of a taper jig, you can achieve clean, accurate angled cuts that rival any table saw result.
The process may look technical, but once you understand alignment and control, it becomes second nature. From elegant table legs to perfect trim boards, the circular saw proves to be an incredibly versatile tool.
Always prioritize safety, stability, and patience during cutting. Let the saw glide naturally, double-check your setup, and inspect every finished edge carefully. With these habits, your tapers will always look sharp, consistent, and professional.
Remember—every clean cut starts with confidence and control. Master these techniques once, and you’ll carry them into every woodworking project that follows.

I’m Michael R. Turner, the founder, lead writer, and passionate DIY enthusiast behind 101diytools.com. With years of hands-on experience in home improvement and power tools, I built this platform to share practical tips, in-depth guides, and honest reviews to help DIYers of all skill levels tackle projects with confidence and the right tools.