How to Cut a Groove with a Circular Saw Accurately
Grooves are among the most useful cuts in woodworking. They let you join panels, fit shelves, insert plywood backs, and create solid, professional-looking joints. While many assume grooves require a table saw or router, you can easily cut them with a circular saw—if you know the right method.
A circular saw may not seem like the ideal tool for fine joinery, but with careful setup, you can make perfectly straight and uniform grooves. The trick lies in multiple shallow passes and precise depth control. This approach allows the blade to remove just enough material per cut without burning or binding.
Whether you’re building furniture, cabinets, or simple wall panels, learning how to cut grooves accurately saves time and money. You don’t need expensive shop tools—just patience, technique, and a steady hand.
In this complete guide, you’ll learn everything about cutting grooves with a circular saw: setup, marking, depth adjustment, passes, safety, and cleanup. By the end, you’ll create perfect grooves that fit snugly and look professional.
What Is a Groove in Woodworking
A groove is a long, narrow channel cut into wood. It runs parallel to the grain and is typically used to hold another piece of wood or panel securely. Grooves differ from dados, which run across the grain, but both serve similar structural purposes.
You’ll find grooves in cabinet backs, drawer bottoms, and frame assemblies. They make joints stronger and help keep panels aligned. Cutting them accurately ensures tight fits without wobbling or gaps.
Circular saws can cut grooves by making several passes side by side. Each pass removes a small portion of material until the groove reaches the desired width and depth. With good control, you can match the precision of table saws.
Understanding how to manage these passes is key to success. Once mastered, it becomes one of the most versatile woodworking techniques you can perform with simple tools.
Tools and Materials You’ll Need
To cut grooves with precision, start with the right tools and setup. Preparation ensures accuracy, safety, and smooth workflow.
Essential tools:
- Circular saw with adjustable depth and bevel
- Measuring tape and straight edge or guide rail
- Clamps for securing the board
- Carpenter’s square or combination square
- Pencil or marking knife
- Chisel or router plane (for cleanup)
- Safety glasses and dust mask
Materials:
- Workpiece (solid wood or plywood)
- Spacer blocks or scrap wood for testing depth
- Optional wood glue for joint fitting tests
A sharp, fine-tooth blade (at least 40 teeth) provides clean cuts with minimal tear-out. Dull blades cause rough edges and excessive burning. Always inspect and clean the blade before starting.
Can I cut grooves in plywood?
Yes, but use a fine-tooth blade to reduce splintering.
What blade works best for grooves?
A carbide-tipped crosscut or combination blade gives smooth, accurate channels.
Do I need clamps?
Absolutely. They keep the board stable and prevent kickback.
Should I use a guide rail?
Yes, it ensures straight, consistent passes.
Is a dust mask necessary?
Yes, cutting wood produces fine dust that’s harmful to breathe.
Understanding Groove Types
Before cutting, it’s important to understand the kind of groove you’re making. There are three main types:
- Single-Slot Groove: A basic narrow channel for fitting a thin board edge or metal strip.
- Wide Groove: Created by overlapping cuts to hold thicker panels or sliding parts.
- Stop Groove: Ends before reaching the edge, common in drawers or decorative joints.
Circular saws excel at cutting through grooves that run the full length of the board (through-grooves). For stopped grooves, you’ll need to finish the ends with a chisel.
Knowing your groove type helps you plan cut width, number of passes, and blade depth. Proper planning ensures each cut fits your project precisely.
Measuring and Marking the Groove
Accuracy begins with clear layout lines. Use a measuring tape and pencil to mark where the groove starts and ends. Then, draw parallel lines showing the groove’s total width.
For example, if you need a ¾-inch groove, mark two lines ¾ inch apart. These guide your saw passes. Extend the lines across the full board to stay on track during cutting.
Double-check the marks for alignment and spacing. Even a small misalignment can cause gaps later when fitting the panel or joint.
If cutting multiple grooves, label each position with reference letters or numbers to avoid confusion. Organization helps keep results consistent across all pieces.
Adjusting the Circular Saw Cutting Depth
Depth control determines how deep the groove will be. Most grooves are between ¼ inch and ½ inch deep, depending on the thickness of the workpiece.
Unplug the saw or remove the battery before adjusting. Loosen the depth lever and set the blade to cut slightly deeper than half the material thickness for structural joints. Use a ruler or scrap piece for precise measurement.
Always test depth on scrap wood before cutting your actual workpiece. The blade should cut cleanly without scoring too deep. Adjust incrementally until you reach the exact depth required.
A consistent cutting depth across passes ensures the groove bottom remains flat and even.
How deep should grooves be?
Usually ¼ to ½ inch deep, depending on your joint strength needs.
Can I adjust depth mid-cut?
No, always stop and reset before resuming.
What happens if the groove is too deep?
It weakens the board and may cause cracking or loose joints.
Should I cut all the way through?
No, grooves are partial-depth cuts only.
Does depth affect fit?
Yes, precise depth ensures snug, stable panel fitting.
Setting Up a Straight Edge or Guide
A straight edge or guide rail ensures your circular saw runs perfectly straight. Without it, even slight hand movement can make the groove uneven or wide.
Clamp a sturdy straight edge parallel to your marked line. Align it carefully with the saw’s base plate so that the blade follows your layout marks exactly.
Measure from the blade’s edge to the saw’s base edge to set the correct offset. Lock clamps tightly on both ends to prevent shifting mid-cut.
If cutting multiple passes, don’t move the straight edge. Instead, shift the saw slightly sideways between passes to widen the groove. Consistent guidance keeps results clean and professional.
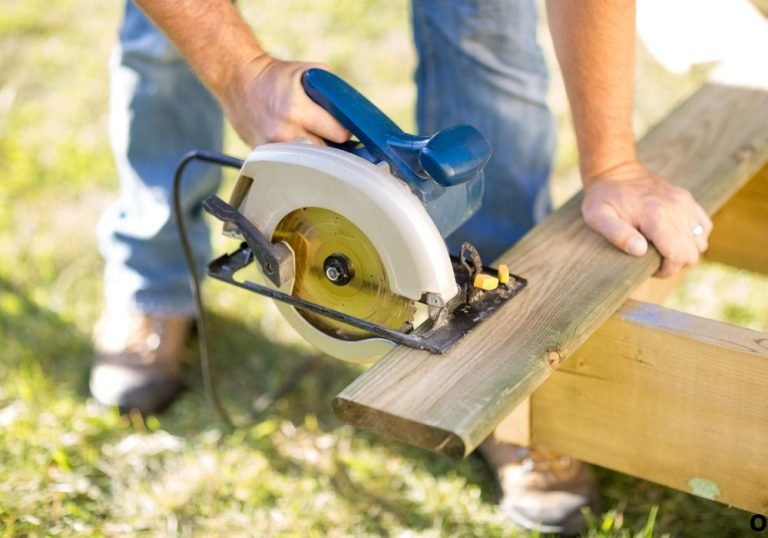
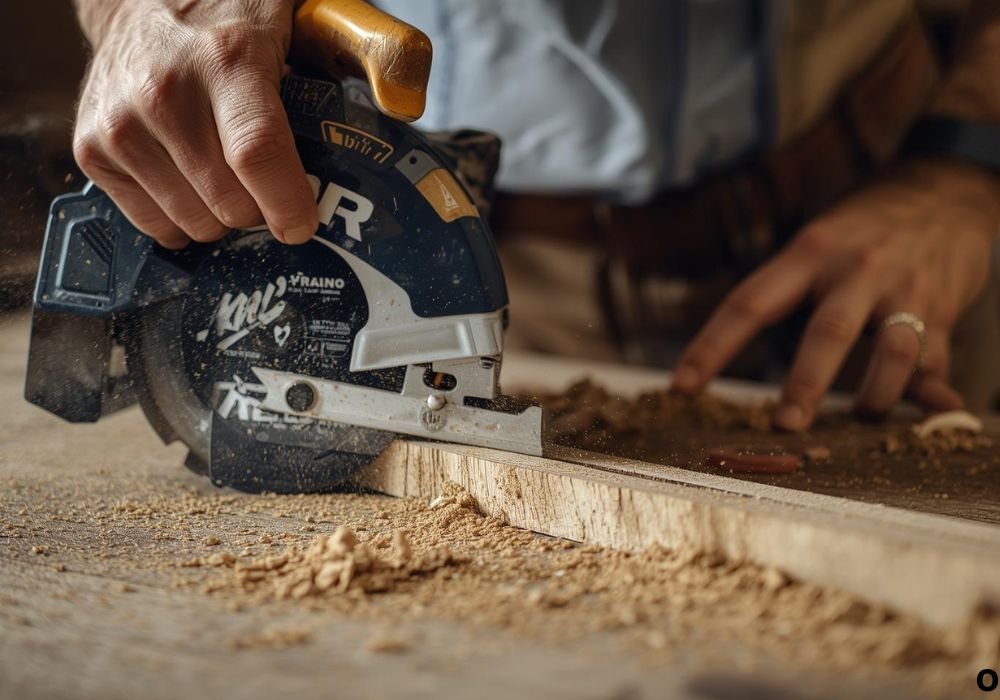
Making the First Pass
The first cut establishes the groove’s boundary and depth. Start by aligning the blade with the first layout line. Hold the saw firmly and let the blade reach full speed before entering the wood.
Move the saw smoothly along the straight edge. Apply steady, even pressure without forcing the cut. Let the blade do the work while maintaining balance and control.
Once the first cut is complete, back the saw out gently while keeping the blade lifted. Check that the line is clean and at the correct depth. If not, adjust the saw slightly and retest.
This initial pass acts as your reference line for the rest of the groove, so accuracy here determines overall quality.
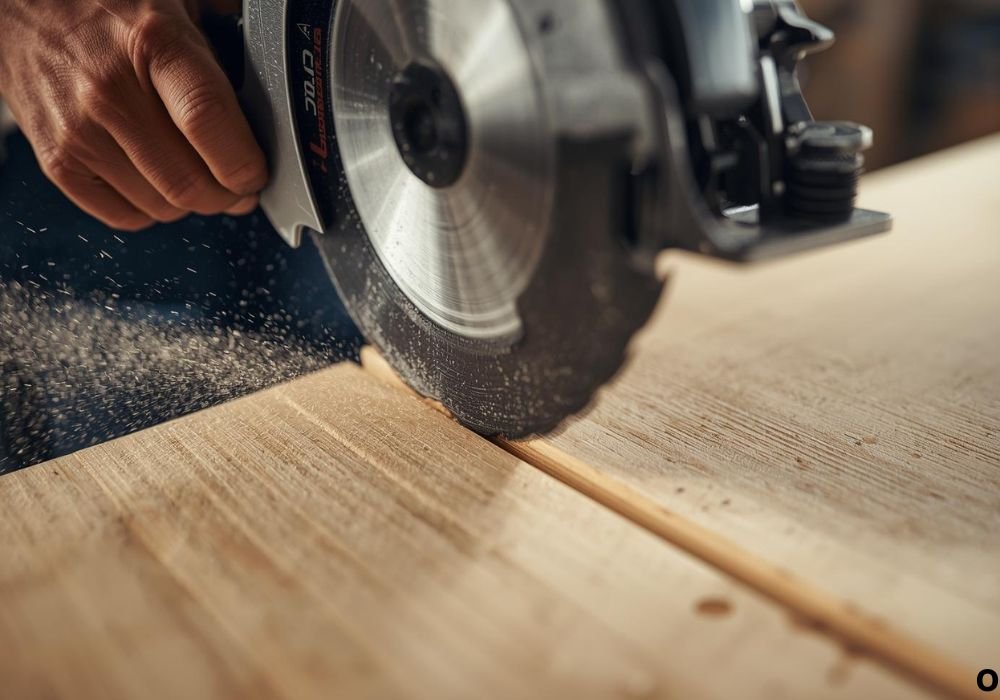
Making Multiple Passes to Widen the Groove
Circular saw blades are typically ⅛ inch thick. To cut wider grooves, you’ll need to make multiple overlapping passes. Each pass removes an extra section of wood until the desired width is reached.
After completing the first pass, shift the saw sideways by a fraction—usually the blade’s kerf width. Use the straight edge to maintain alignment for each cut. Repeat the process until you reach the groove’s opposite marking line.
Remove material gradually. Making shallow, controlled cuts reduces tear-out and keeps the groove bottom smooth.
Once complete, inspect the groove. If small ridges remain, make a final cleaning pass down the center.
How wide can a circular saw groove be?
As wide as needed—just make multiple passes for large grooves.
Can I cut grooves in one pass?
Only for very narrow slots. Wider ones need overlapping passes.
Why make shallow passes?
They prevent blade overheating and rough edges.
Do I need to adjust depth each pass?
No, keep the same depth for uniform bottoms.
How can I clean up rough ridges?
Use a chisel, file, or router plane for finishing touches.
Finishing the Groove Bottom
Even with precise cuts, the bottom of the groove might show minor ridges. Use a sharp chisel or router plane to flatten and smooth the surface.
Place the chisel flat inside the groove and shave lightly across high spots. Work gradually to avoid gouging. For wide grooves, a router plane provides faster, uniform leveling.
Once smoothed, check the groove width with your panel or insert piece. It should slide in snugly without force. If it’s too tight, lightly sand the edges of the groove for a perfect fit.
A clean groove bottom ensures strong joints and professional craftsmanship.
Cutting Stopped Grooves
Stopped grooves end before reaching the board’s edge. Circular saws can cut most of the groove, but the ends must be finished manually.
Mark the start and stop points clearly on the board. Begin cutting slightly inside the start mark to avoid overshooting. Lift the blade out of the wood just before reaching the end mark.
Use a sharp chisel to square off both ends of the groove. Work carefully to maintain the same depth and width.
Stopped grooves are common in furniture and drawer work. They hide joints from view while providing solid mechanical strength.
Cleaning and Sanding the Groove
After cutting, inspect the groove for debris, splinters, or uneven edges. Use a small brush or compressed air to clear dust and wood chips.
For smoother results, wrap sandpaper around a scrap piece of wood that fits the groove width. Run it through the channel several times to polish the sides.
Avoid over-sanding, which can widen the groove too much. The goal is to smooth surfaces without altering fit.
Once finished, test-fit the mating piece again. It should slide cleanly without binding or looseness.
How do I avoid burning the wood?
Use a sharp blade, steady speed, and take shallow passes.
Can I sand the groove with a Dremel?
Yes, use fine sanding drums for tight spaces.
Do I need to vacuum the groove?
Yes, clearing dust improves fitting and glue bonding.
What if the groove edges splintered?
Trim lightly with a sharp utility knife.
Should I seal the groove before use?
Only if it’s exposed—otherwise, keep it natural for glue adhesion.
Common Mistakes to Avoid
Many beginners struggle with uneven depths or crooked grooves. These problems usually result from poor setup or rushing the process.
Avoid cutting freehand—always use a guide. Freehand grooves drift easily and ruin alignment. Keep the saw base flat on the workpiece throughout the cut.
Never force the saw through wood. Overloading the motor causes rough edges and burns. Take multiple shallow passes instead.
Skipping depth tests or using a dull blade are other common errors. Always test first and maintain sharp tools for clean, safe results.
Patience and accuracy yield perfect grooves every time.
Safety Tips for Cutting Grooves
Circular saws are powerful and require proper handling. Follow these safety guidelines before starting any cuts:
- Always wear eye and ear protection.
- Clamp workpieces firmly to prevent movement.
- Keep both hands on the saw during operation.
- Stand to one side of the cutting line to avoid kickback.
- Never reach under the workpiece while cutting.
- Wait for the blade to stop completely before setting the saw down.
Following these precautions ensures smooth cuts and prevents injuries.
Practical Applications for Grooves
Grooves are useful in countless woodworking projects. You’ll find them in furniture frames, cabinet panels, drawers, and wall mounts.
In cabinet making, grooves hold the back panel securely. In drawers, they fit the bottom piece perfectly without visible fasteners. Shelving units use grooves to support shelves cleanly without screws.
You can also use grooves for sliding doors or decorative panel inlays. The technique remains the same—precision, clean edges, and consistent depth.
Once you master cutting grooves with a circular saw, you unlock endless creative possibilities in woodworking.
Maintenance and Blade Care
Keeping your circular saw blade sharp ensures smooth and safe cuts. Clean the blade regularly with resin remover to prevent buildup. Dull or dirty blades burn wood and reduce accuracy.
Inspect for missing or chipped teeth before every project. Replace damaged blades immediately. Store saws and blades in dry areas to prevent rust.
Lubricate moving parts occasionally, especially the bevel and depth adjustments. Proper maintenance extends tool life and keeps cuts consistent.
A well-maintained saw performs like new for years, making every groove accurate and professional.
Conclusion
Learning how to cut a groove with a circular saw transforms your woodworking ability. You no longer need a table saw or router for clean, precise joints. With the right setup—marking, depth control, multiple passes, and safety—you can achieve professional-quality grooves every time.
A circular saw is more versatile than most people realize. It handles not only crosscuts and rip cuts but also detailed joinery like grooves and dados. Mastering this skill opens doors to countless woodworking projects.
Take your time, measure carefully, and respect the tool. Once you get comfortable with groove cutting, your builds will become sturdier, cleaner, and more efficient.
With precision and patience, even a simple circular saw can create complex joinery that stands the test of time.

I’m Michael R. Turner, the founder, lead writer, and passionate DIY enthusiast behind 101diytools.com. With years of hands-on experience in home improvement and power tools, I built this platform to share practical tips, in-depth guides, and honest reviews to help DIYers of all skill levels tackle projects with confidence and the right tools.