How to Cut a Dado with a Circular Saw Accurately and Cleanly
Cutting a dado joint is one of the most essential woodworking techniques for creating strong, seamless connections between boards.
You’ll find dadoes in everything from bookshelves and cabinets to drawer bottoms and furniture frames — they’re the hidden grooves that give your projects strength and structure without relying solely on screws or nails.
While a table saw or router is traditionally used for dado cuts, your circular saw can handle the job perfectly with the right approach.
By making a series of shallow, overlapping passes, you can carve smooth, even grooves that fit snugly around another board’s edge or panel.
This method doesn’t just save time — it allows you to make precise dadoes even when working outside a workshop, right on the job site.
All it takes is the right blade setup, careful marking, and steady guidance to achieve joints that are strong, clean, and perfectly square.
In this detailed guide, you’ll learn how to cut a dado with a circular saw step-by-step — from marking and depth adjustment to making multiple passes and cleaning the groove for a perfect fit.
What Is a Dado Joint and Why It Matters
A dado joint is a flat-bottomed groove cut across the grain of a board.
It’s used to house the edge of another board, allowing them to fit together securely and distribute weight evenly.
There are a few common types of dado joints:
- Standard dado: Runs across the grain, typically for shelves or partitions.
- Stopped dado: Ends before reaching the board’s edge, used when the joint must be hidden.
- Through dado: Extends all the way across, often used for shelving or panels.
Dado joints offer greater strength than simple butt joints because they provide more surface area for glue and reduce lateral movement.
Making them accurately is key — a groove that’s too wide leads to a loose fit, while one that’s too tight can split the wood or warp the joint.
With careful planning, your circular saw can create dadoes that look machine-cut and fit perfectly every time.
Tools and Materials You’ll Need
Before you start cutting, make sure you have all the tools and materials ready.
Dado cutting requires precision, so proper setup ensures your results are consistent.
You’ll need:
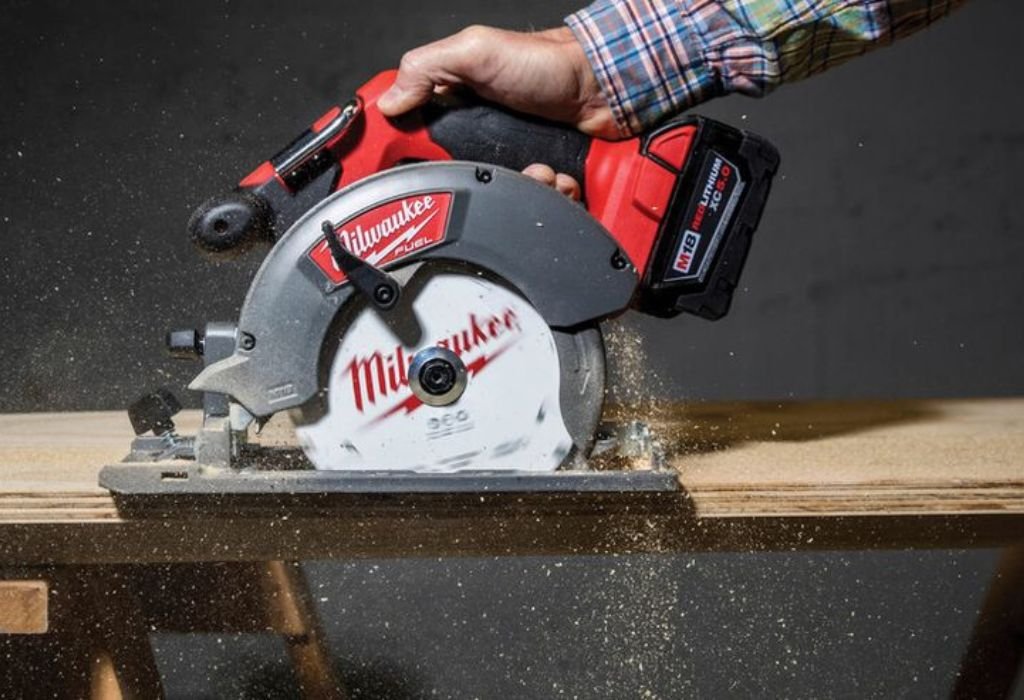
- Circular saw (7¼” or similar)
- Fine-tooth or combination blade (24–40 teeth)
- Measuring tape and marking gauge
- Carpenter’s square
- Clamps
- Straightedge or guide rail
- Chisel and mallet (for cleaning the groove)
- Sandpaper or file
- Safety goggles, gloves, and hearing protection
Optional but useful tools include a scrap wood test piece, depth gauge, and double-blade dado jig if you plan to make multiple grooves of the same width.
Step 1: Measure and Mark the Dado Location
Precision marking is the foundation of a clean dado joint.
Start by measuring the thickness of the board that will fit into the groove — this determines your dado width.
Place that board on the piece where the dado will be cut and trace both of its edges with a sharp pencil or marking knife.
You should now have two parallel lines outlining the width of the dado.
If you’re making multiple dadoes, use a marking gauge or square to ensure perfect alignment across all joints.
Label the waste section between the lines so you know which area to remove.
Accurate marking saves you from uneven grooves or loose joints later in assembly.
Step 2: Set the Depth of the Cut
Dadoes don’t go all the way through the wood — they’re shallow grooves typically one-third the thickness of your workpiece.
For example, if your board is ¾ inch thick, set your saw blade depth to around ¼ inch.
To adjust depth, unplug your saw (or remove the battery), flip it over, and loosen the depth lever.
Slide the base plate up or down until the blade height matches your desired dado depth, then tighten the lever securely.
Use a scrap piece of wood to test the depth before cutting into your actual material.
A correct depth ensures a snug fit without weakening the board.
Step 3: Clamp the Workpiece and Attach a Guide
A straight and accurate cut depends on a stable setup.
Place your workpiece on sawhorses or a solid table, ensuring it’s flat and fully supported.
Clamp it tightly so it doesn’t move while cutting — vibration can ruin precision.
Next, clamp a straightedge or guide rail along your dado’s outer marking line to guide the saw’s base.
This guide ensures your saw stays perfectly straight through each pass, especially important for dadoes that need to align with other parts later.
Measure the offset distance from your saw’s edge to the blade and position the straightedge accordingly.
Taking time to secure your guide pays off with cleaner, more accurate grooves.
Step 4: Make the First Cut Along the Dado Edge
Now it’s time to start carving out the dado.
Position your saw beside the straightedge, align the blade with one of your marked lines, and start the saw.
Let it reach full speed before gently lowering it into the wood.
Move the saw slowly and steadily along the line, maintaining constant pressure and keeping the base plate flat.
Stop at the opposite end of the dado and lift the saw once the blade stops spinning completely.
This first cut defines one edge of your groove — accuracy here sets the stage for the rest of the process.
Repeat the process along the other side of your dado marking using the same depth setting.
You’ll now have two clean lines marking the dado’s boundaries.
Step 5: Remove the Waste Material Between the Cuts
With the dado edges defined, the next step is to clear the material between them.
This is done by making a series of overlapping passes with your saw, each slightly offset from the previous one.
Adjust your straightedge or guide about ⅛ inch inward for each successive pass, and repeat until you’ve removed all material between the outer lines.
Let the saw’s teeth overlap the previous cut slightly so there are no high spots or ridges left behind.
Work slowly and check your progress frequently — the goal is to keep the bottom of the dado as flat as possible.
If needed, you can make a second set of shallow passes to smooth the floor of the groove.
Avoid forcing the saw; slow, deliberate passes give you cleaner, more precise results.
Step 6: Clean and Smooth the Bottom of the Dado
After roughing out the dado with the saw, the bottom will likely have small ridges or uneven sections.
This is perfectly normal and can be cleaned up easily.
Use a sharp chisel to pare away any high spots, holding it flat and working along the grain for smooth results.
Alternatively, a router plane or sanding block can be used for even smoother floors.
Once you’ve cleaned it up, test the fit by sliding the mating board into the dado.
It should fit snugly but not require force — if it’s too tight, shave off small amounts from the groove sides with your chisel.
Smooth, even dado bottoms ensure strong joints and perfect alignment during assembly.
Step 7: Make Multiple Dadoes (Optional Jig Method)
If your project involves several dadoes of identical width and depth, a dado jig can save enormous time.
A jig helps position your saw perfectly between cuts for repeatable, uniform results.
You can make a simple jig by attaching two parallel strips of wood spaced to match your saw’s base width.
This allows you to slide your saw back and forth between the guides, cutting consistent grooves without re-measuring each time.
Clamp the jig firmly to your workpiece and move it along your markings for each new dado.
This method works exceptionally well for shelves, dividers, or cabinetry panels where accuracy and repeatability are critical.
Step 8: Finishing and Assembling the Joint
Once the dado is cut and smoothed, it’s ready for assembly.
Before joining, test each fit again to confirm the board seats fully without gaps or rocking.
Apply a thin, even layer of wood glue inside the dado if the joint is permanent.
Press the mating board in place and clamp it securely while the glue dries.
For extra strength, you can add finishing nails or screws through the joint after ensuring perfect alignment.
Wipe away any glue squeeze-out immediately with a damp cloth for a clean finish.
Once dry, sand the surface lightly and prepare for painting or staining as desired.
Tips for Cleaner, More Accurate Dado Cuts

- Use a sharp, high-quality blade — dull blades tear fibers and leave rough edges.
- Mark clearly with a fine pencil or marking knife for better precision.
- Work slowly and let the saw do the cutting; forcing it leads to uneven grooves.
- Clamp everything — movement ruins accuracy in joinery cuts.
- Make multiple shallow passes instead of one deep cut for smoother results.
- Test on scrap wood first to perfect your setup before the real project.
- Keep your saw base clean so it glides smoothly along the guide.
These tips help you achieve dadoes that look like they were made on a professional table saw.
Common Mistakes to Avoid
Even experienced woodworkers sometimes run into trouble when cutting dadoes with a circular saw.
Here’s what to watch out for:
- Setting the blade too deep and weakening the workpiece.
- Forgetting to clamp the guide, leading to uneven or wandering cuts.
- Trying to clear too much material in a single pass.
- Not testing the fit before applying glue.
- Using a dull or dirty blade that leaves burn marks.
- Rushing through cleanup instead of flattening the dado bottom properly.
Avoiding these mistakes ensures stronger, cleaner, and more precise joinery every time.
FAQs
Can a circular saw really make a dado joint?
Yes. By making multiple shallow passes with a straightedge guide, you can achieve smooth, accurate dadoes with any standard circular saw.
What kind of blade should I use?
A fine-tooth carbide-tipped combination blade (24–40 teeth) works well for dadoes in both hardwood and softwood.
Do I need a special dado blade for a circular saw?
No, dado stacks are for table saws. With a circular saw, you create dadoes by overlapping regular blade cuts.
How wide should the dado be?
It should match the thickness of the board you’re fitting into it — measure carefully for a snug fit.
Can I cut stopped dadoes with a circular saw?
Yes, but you’ll need to stop before reaching the board’s edge and finish the corners with a chisel.
Should I use a router instead?
Routers make cleaner dadoes, but a circular saw works just as well if you don’t have one or need to work on-site.
How do I clean the bottom of the dado?
Use a sharp chisel, sanding block, or router plane to level out the bottom after cutting.
Can I cut dadoes in plywood?
Absolutely — just use a fine-tooth blade and shallow passes to avoid tear-out.
How deep should a dado be?
Typically one-third the thickness of your board, but you can adjust based on the strength and fit you need.
Do I need glue for a dado joint?
Yes, if you want a permanent bond. For removable shelves, friction fit alone is enough.
Conclusion
Cutting a dado with a circular saw might take a few extra steps, but it’s an incredibly useful technique to master for both beginners and experienced woodworkers.
Once you understand how to mark, guide, and control your cuts, your circular saw transforms into a precision joinery tool capable of professional-level results.
The key to a perfect dado is patience and accuracy — make multiple passes, maintain consistent depth, and clean up the groove for a flawless finish.
When done right, your joints will fit snugly, hold firmly, and add both beauty and strength to your projects.
So next time you need a dado for shelves, cabinets, or panels, skip the complicated tools — grab your circular saw, follow these steps, and watch your craftsmanship reach a new level.
A well-cut dado is more than a groove; it’s a mark of true woodworking precision.

I’m Michael R. Turner, the founder, lead writer, and passionate DIY enthusiast behind 101diytools.com. With years of hands-on experience in home improvement and power tools, I built this platform to share practical tips, in-depth guides, and honest reviews to help DIYers of all skill levels tackle projects with confidence and the right tools.