How to Cut a 60-Degree Angle with a Circular Saw Accurately and Safely
Every woodworker eventually faces a project that calls for precise angled cuts — whether it’s building furniture, framing a roof truss, or crafting a geometric shelf.
Among all the angles you’ll work with, a 60-degree cut can be one of the trickiest to get right, especially when you’re using a circular saw instead of a miter or table saw.
The reason is simple: circular saws typically tilt only up to 45 degrees, which means you can’t just adjust the bevel and cut directly at 60 degrees.
Instead, you’ll need to use a combination of setup tricks, jigs, and positioning techniques to achieve that perfect angle safely and accurately.
The good news is that once you understand the geometry behind the process, making a 60-degree cut becomes straightforward and repeatable.
Whether you’re cutting trim, plywood panels, or small wood joints, the key lies in marking correctly, supporting your material, and keeping your saw steady through the entire pass.
In this detailed guide, you’ll learn multiple methods to cut a clean, sharp 60-degree angle using a circular saw, even if your tool doesn’t tilt that far.
By the end, you’ll have the confidence and precision needed to make professional-grade angle cuts on any project.
Understanding the 60-Degree Angle Cut
A 60-degree cut is steeper than most standard woodworking angles, which usually fall between 15 and 45 degrees.
This angle often appears in triangular frames, picture borders, and hexagon or truss designs.
It’s important to distinguish between a 60-degree bevel cut and a 60-degree miter cut.
A bevel cut angles the blade through the thickness of the material, while a miter cut angles across the face of the board.
Since most circular saws only tilt up to 45 degrees, cutting a 60-degree bevel requires flipping the material or changing your cutting setup.
To achieve accuracy, you’ll need to measure the complementary angle — 30 degrees — to form the correct geometry.
Understanding this concept helps you plan your layout before touching the saw.
Precision in marking and alignment is what separates a clean, tight-fitting joint from a frustrating miscut.
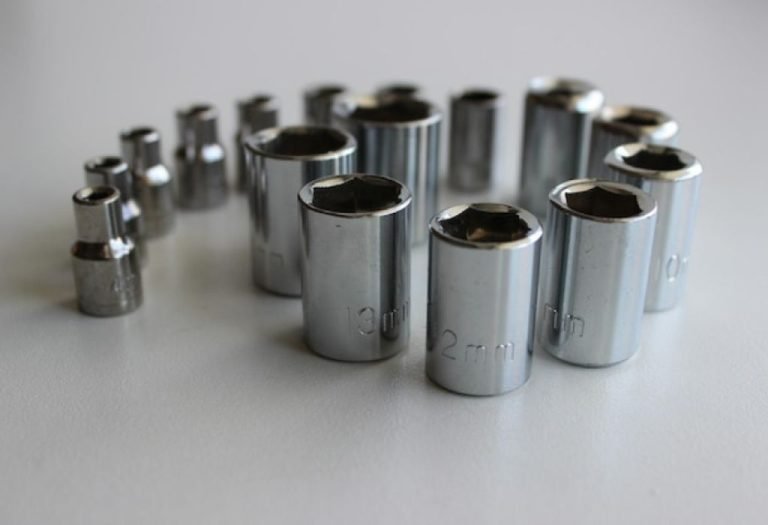
Tools and Materials You’ll Need
Before starting your 60-degree cut, make sure you have the right tools and setup to ensure accuracy and safety.
Having everything within reach allows you to focus fully on the technique instead of fumbling mid-cut.
Here’s what you’ll need:
- Circular saw with an adjustable bevel feature
- Protractor, digital angle finder, or speed square
- Measuring tape and sharp pencil
- Straightedge or cutting guide
- Clamps to secure your workpiece
- Workbench or sawhorses
- Safety goggles, ear protection, and gloves
Optional but helpful items include a bevel gauge for double-checking blade tilt and a jig or wedge for angled positioning.
Clean, flat surfaces and stable support are essential for preventing vibration and kickback while cutting.
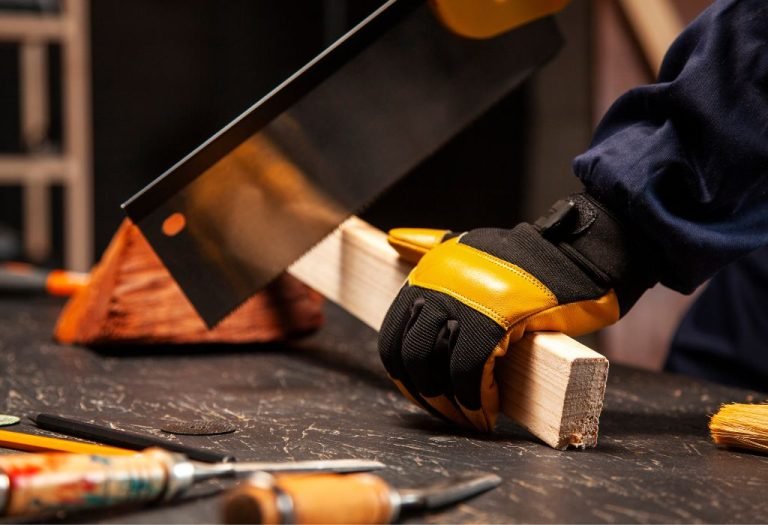
Step 1: Mark the 60-Degree Angle on Your Workpiece
Accurate marking is the foundation of a perfect 60-degree cut.
Even a minor mistake in layout can cause your final assembly to look uneven or leave gaps between joints.
Use a protractor or speed square to mark a 60-degree line across the face of your board.
If your speed square doesn’t have 60-degree markings, use a simple geometry trick: mark a 30-degree complementary angle from the opposite side.
Ensure your pencil line is dark and extends beyond the cutting zone to act as a visual guide while sawing.
If you’re cutting multiple pieces, use the first one as a template for the rest to ensure consistent angles.
Once marked, clamp the workpiece securely on your workbench or sawhorses so it won’t shift during cutting.
Good marking and secure clamping make the difference between a clean, professional cut and a crooked one.
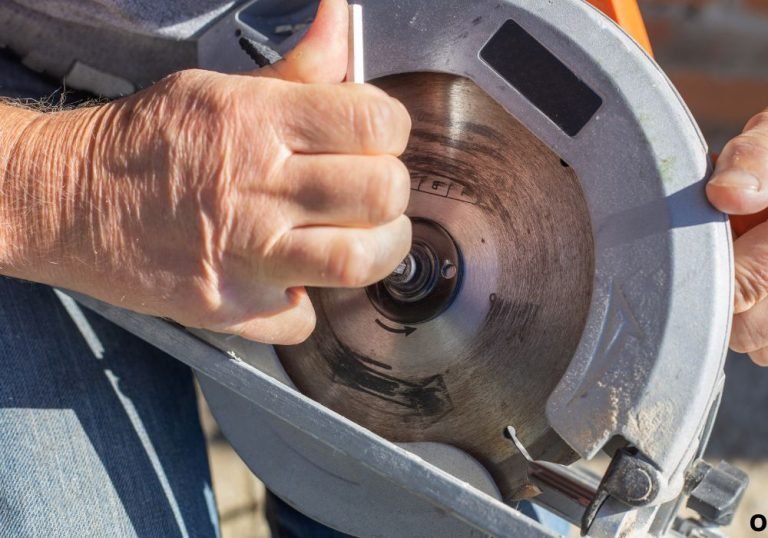
Step 2: Adjust the Bevel Angle on the Circular Saw
Because most circular saws tilt up to 45 degrees only, you’ll need to adjust your cutting approach to achieve a 60-degree result.
The trick is to create the complementary 30-degree angle by flipping the board or using a jig.
First, loosen the bevel adjustment knob on your saw and tilt the base plate to its maximum 30- or 45-degree position.
Use a digital angle gauge or bevel finder to measure the tilt precisely, as the factory markings can be slightly off.
If you’re cutting a 60-degree bevel, you’ll flip your workpiece after cutting at 30 degrees so that both faces form a 60-degree joint.
This method ensures perfect mating edges for triangles, frames, or geometric shapes.
Lock the bevel securely in place once adjusted, and double-check blade clearance before proceeding.
Tighten all knobs firmly to prevent any movement during cutting, which could ruin the accuracy.
Step 3: Set Up a 60-Degree Cutting Jig (Optional but Recommended)
Building a jig is one of the easiest ways to achieve a consistent 60-degree cut without complex math or flipping errors.
A jig keeps your saw stable at the correct angle and helps you repeat cuts quickly.
You can make a simple jig by cutting two pieces of scrap wood into a 30-degree wedge and attaching them together to form a 60-degree incline.
Mount this wedge securely to your work surface so your circular saw can rest on it at the desired tilt.
Clamp your material firmly against the jig so the blade meets it at a 60-degree angle.
Using a jig not only improves accuracy but also prevents blade drift or kickback when cutting steep angles.
Always test the setup with scrap wood first to confirm the angle is precise before cutting your final piece.
If your saw wobbles or the jig shifts, tighten all joints and clamps before resuming work.
Step 4: Make the Cut Safely and Smoothly
Once your angle and jig (if used) are ready, it’s time to make the actual cut.
Proper technique is crucial here to ensure safety and a smooth finish.
Position your circular saw at the edge of the workpiece with the blade aligned exactly on the pencil line.
Grip the handle firmly with both hands, keeping your body slightly to the side of the blade’s path.
Start the saw and allow it to reach full speed before beginning the cut.
Push the saw forward slowly and steadily without forcing it — let the blade do the work.
Keep your eyes focused on the cutting line and maintain consistent feed pressure until the blade exits the material completely.
Once finished, turn off the saw and wait for the blade to stop spinning before setting it down.
A properly executed 60-degree cut will have clean edges, minimal tear-out, and a perfect mating fit when joined with other angled pieces.
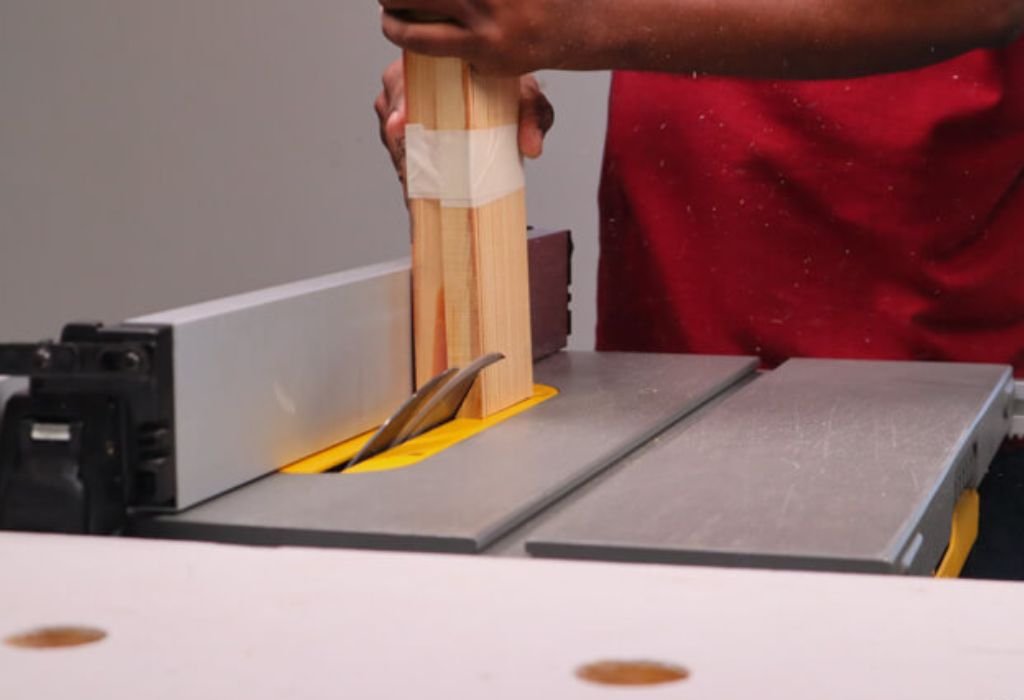
Step 5: Cutting Long Boards or Large Panels
When cutting longer boards, stability becomes even more important for maintaining accuracy.
Large panels tend to shift or flex during cutting, which can throw off your angle.
Use two sawhorses or a sturdy workbench to fully support the material from both ends.
If possible, enlist a helper to hold the off-cut section to prevent binding as you near the end of the cut.
Attach a straight guide or fence parallel to your cutting line to help your saw travel consistently along the 60-degree path.
This eliminates hand wobble and produces a perfectly straight, clean edge.
For sheet materials like plywood, use a fine-tooth carbide blade to minimize splintering along the cut line.
Applying masking tape over the line before cutting can further reduce tear-out.
Step 6: Check and Refine the Cut
Once your cut is complete, it’s essential to verify its precision before moving on to the next piece.
Use a digital angle gauge or protractor to measure the finished cut’s exact degree.
If it’s slightly off, lightly sand the edge or make a fine adjustment pass with your saw.
Small corrections ensure a perfect fit, especially for projects that require joining multiple angled pieces together.
Inspect the surface for any rough edges, splinters, or burn marks.
A clean 60-degree edge should feel smooth to the touch with no visible scorch lines.
If you notice blade marks, your feed rate may have been too fast or your saw blade may need cleaning.
Always prioritize smoothness and control over speed when cutting complex angles.
Tips for More Accurate 60-Degree Cuts
Accuracy comes from consistent setup and steady technique.
Following a few expert tips will help you get flawless results every time.
Use sharp, high-quality blades with at least 40 teeth to minimize chipping and ensure smooth cuts.
Double-check your markings and measurements before every pass — even a one-degree error can ruin symmetry.
When cutting small pieces, use clamps or jigs instead of holding them by hand for stability and safety.
Practice on scrap wood before cutting final pieces to confirm your method works perfectly.
If you make repeated 60-degree cuts often, consider building a dedicated angled sled or guide rail system.
A custom guide not only saves time but ensures identical angles across multiple workpieces.
Common Mistakes to Avoid
Many beginners struggle with angled cuts because they rush the setup or skip crucial checks.
Avoiding these common mistakes will save both time and material.
Don’t assume your saw’s built-in bevel gauge is perfectly accurate — always verify with a digital angle finder.
Avoid freehand cutting without guides; even minor shifts can completely throw off your angle.
Never cut without securing the material firmly, as movement during cutting increases the risk of kickback and uneven edges.
Also, don’t force the saw through the wood — pushing too hard creates vibration and heat that can burn the material.
Finally, avoid using dull or dirty blades, as they create friction and reduce precision dramatically.
A clean, sharp blade makes a cleaner, safer, and more efficient cut every time.
FAQs
Can a circular saw make a 60-degree bevel cut directly?
Most circular saws tilt only up to 45 degrees, so you can’t make a direct 60-degree bevel. Instead, you’ll need to flip the material or use a jig to achieve the complementary angle.
What’s the easiest way to cut a 60-degree miter with a circular saw?
Use a protractor or speed square to mark the angle accurately, clamp your guide in place, and follow the line slowly for a clean cut.
Do I need a special blade for angled cuts?
No special blade is required, but using a fine-tooth carbide blade ensures smoother cuts and reduces tear-out along angled edges.
Can I use a guide rail for a 60-degree cut?
Yes, a guide rail or straightedge helps maintain precision and is especially useful for long or repetitive angled cuts.
Is it possible to cut a 60-degree joint with two 30-degree bevels?
Yes, cutting two boards each at 30 degrees allows them to form a perfect 60-degree joint when joined together.
What safety precautions should I take?
Always wear protective gear, clamp your work securely, and stand to the side of the cutting path to avoid kickback.
How can I reduce splintering during angled cuts?
Use painter’s tape along the cut line and a fine-tooth blade to minimize tear-out on plywood or veneer surfaces.
Can I make a 60-degree cut in metal or plastic with a circular saw?
Only if you’re using a blade specifically designed for those materials. Always follow manufacturer safety guidelines.
Why is my 60-degree cut not fitting properly?
Re-check your marking and bevel setting — even half a degree off can cause misalignment. Use an angle gauge for accuracy.
Should I use a table saw instead for steep angles?
If you have access to one, yes — a table or miter saw is easier for consistent steep cuts. But with care, a circular saw can achieve the same precision.
Conclusion
Cutting a 60-degree angle with a circular saw may sound challenging at first, but with the right preparation and technique, it’s completely achievable.
By understanding the relationship between bevel and complementary angles, marking precisely, and using guides or jigs, you can make clean, professional-grade cuts every time.
Patience and accuracy are your best tools — rushing through setup or ignoring safety steps can turn a simple cut into a costly mistake.
Always prioritize stable clamping, sharp blades, and smooth, steady motion through the material.
Once you master the method, your circular saw becomes far more versatile, allowing you to handle complex angles for furniture, frames, and construction projects alike.
A 60-degree cut done right reflects not just your skill with tools but your understanding of craftsmanship and precision.

I’m Michael R. Turner, the founder, lead writer, and passionate DIY enthusiast behind 101diytools.com. With years of hands-on experience in home improvement and power tools, I built this platform to share practical tips, in-depth guides, and honest reviews to help DIYers of all skill levels tackle projects with confidence and the right tools.