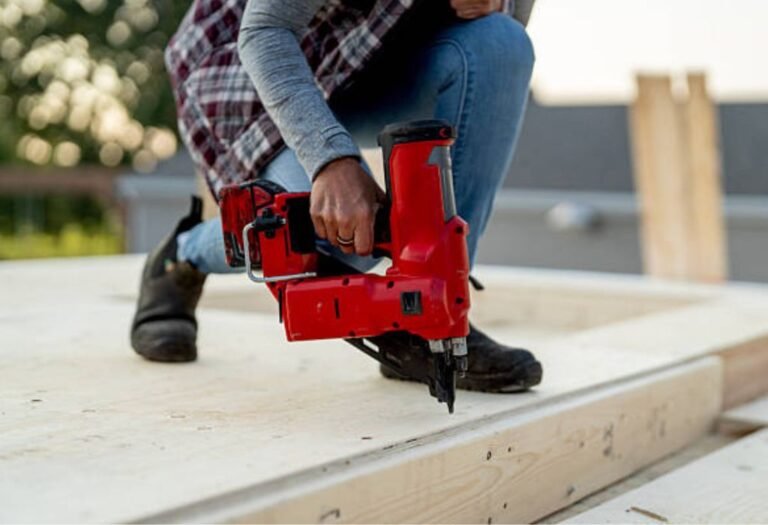
Simple Steps How to Connect Nail Gun to Compressor
Connecting your nail gun to an air compressor is a simple process crucial for efficient work. Always prioritize safety by first ensuring the compressor is powered off and depressurized. Then, securely attach the quick-connect coupler to your nail gun’s air inlet and connect it to the air hose, which should already be attached to the compressor, finally setting the appropriate PSI for seamless operation.
Simple Steps How to Connect Nail Gun to Compressor
Hey there! If you’re just getting started with power tools, or even if you’ve used them before but are new to pneumatic systems, figuring out how to connect a nail gun to a compressor might seem a bit daunting at first. But trust me, it’s a lot simpler than it sounds! Think of it like plugging in a lamp, but with a few extra safety steps. Once you know the process, you’ll be nailing away safely and efficiently in no time. I remember my first time, a bit intimidated, but after connecting it once, it became second nature. Let’s walk through it together.
The good news is that most air tools, including nail guns, use a pretty standardized connection system. This means that once you learn the basics of connecting one, you’ve pretty much got the hang of connecting them all. The key is understanding the components and following a simple sequence to ensure both your safety and the optimal performance of your nail gun. It’s all about making sure that powerful air gets from the compressor to your tool in a controlled way. So, let’s dive into the nuts and bolts of it!
How do I connect my nail gun to an air compressor safely and effectively?

Connecting your nail gun to a compressor is a straightforward process, but safety and correct procedure are key for a smooth experience. Here’s how I typically go about it, step-by-step, drawing from years of projects:
- Safety First, Always!
Before you even think about connecting anything, make sure your compressor is turned off and unplugged. This prevents any accidental start-ups. Also, always wear your personal protective equipment (PPE): safety glasses are non-negotiable, and hearing protection is a really good idea, especially with noisy compressors. I learned the hard way that a few minutes of noise can really mess with your ears! - Gather Your Gear & Inspect It
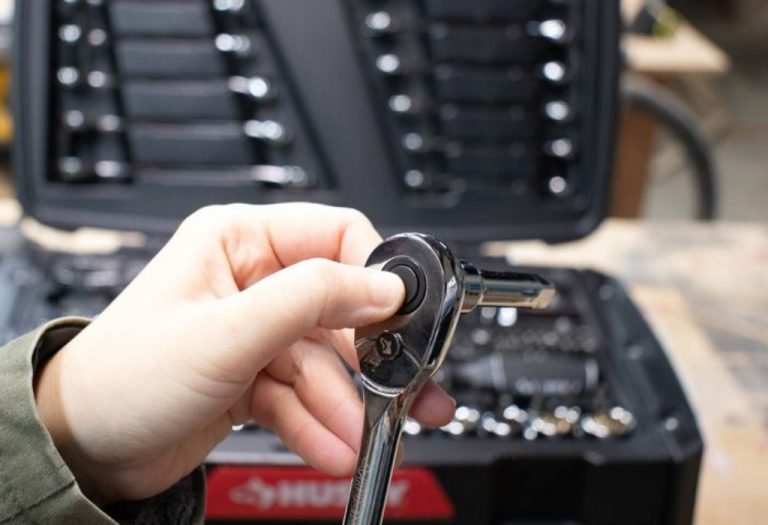
You’ll need your nail gun, your air compressor, and an air hose equipped with quick-connect fittings. Take a moment to inspect your air hose. Check for any cuts, bulges, or worn spots. A damaged hose can lead to air leaks or even a dangerous rupture under pressure. Also, check your nail gun for any obvious damage. A little TLC goes a long way! - Attach Quick-Connect Fittings (If Not Already Present)
Most air hoses and tools come with quick-connect fittings, but if yours don’t, you’ll need to install them. Your air hose will typically have a quick-connect coupler (the female part that receives a plug) on one end, and the nail gun will need a quick-connect plug (the male part). Use a little thread sealant tape (Teflon tape) on the threads before screwing them on. This prevents leaks, which are super annoying and waste air! - Connect the Air Hose to the Compressor
Locate the air output port on your compressor. It’s usually pretty obvious. Connect one end of your air hose (the end with the coupler) to this port. Make sure it clicks securely into place. Give it a gentle tug to confirm it’s seated properly. If it feels loose, it might leak air later. - Connect the Air Hose to the Nail Gun
Now, take the other end of your air hose (which should also have a coupler) and connect it to the quick-connect plug on your nail gun. Again, listen for that satisfying click and give it a slight tug to ensure it’s secure. This establishes the full air path to your tool. - Power Up and Set the Pressure
Plug in and turn on your air compressor. Let it build up to its maximum pressure. Once it stops, adjust the regulator on your compressor to the recommended operating pressure for your specific nail gun. This PSI (pounds per square inch) is crucial. You can usually find it in your nail gun’s manual or printed on the tool itself. Too little pressure and your nails won’t sink; too much and you could damage your material or even the tool. I always start a bit lower than recommended and gradually increase until the nails are perfectly flush. - Test the Connection and Fire
Load your nail gun with the appropriate nails. Before pointing it at your project, always test fire into a piece of scrap wood. This confirms everything is working correctly and allows you to fine-tune your pressure. Listen for any hissing sounds, which indicate an air leak that needs addressing (often just tightening a fitting or adding more Teflon tape).
When you’re finished with your project, remember to turn off and unplug the compressor. Then, release any remaining air pressure in the tank and the hose before disconnecting. This is a vital safety step and also extends the life of your equipment. Connecting your nail gun to a compressor doesn’t have to be intimidating; it’s a fundamental skill that opens up a world of DIY possibilities!
So there you have it! Connecting your nail gun to a compressor is a simple task once you know the steps and keep safety in mind. With these pointers, you should feel confident in getting your pneumatic nail gun set up and ready for your next big project. Happy nailing, and remember to always prioritize safety!

I’m Michael R. Turner, the founder, lead writer, and passionate DIY enthusiast behind 101diytools.com. With years of hands-on experience in home improvement and power tools, I built this platform to share practical tips, in-depth guides, and honest reviews to help DIYers of all skill levels tackle projects with confidence and the right tools.