How to Connect Impact Wrench to Air Compressor
Connecting an impact wrench to an air compressor might seem simple, but doing it correctly makes all the difference between powerful, efficient performance and frustrating tool failure.
Many DIYers and mechanics overlook the importance of matching air pressure, fittings, and hose size — which can lead to low torque output, air leaks, or even equipment damage.
Understanding how to connect an impact wrench to an air compressor properly ensures your tool delivers maximum power every time you pull the trigger.
Every impact wrench relies on a steady supply of compressed air to function at its full potential. According to industry standards, most air impact wrenches require 4–6 CFM at 90 PSI for consistent torque delivery .
Without the right connection setup, air pressure drops before it reaches the tool, reducing efficiency and slowing your work. That’s why choosing the correct hose diameter, fittings, and couplers is just as important as picking the wrench itself.
Beyond performance, safety is another major concern. A poorly sealed connection or a mismatched coupler can cause sudden hose bursts or air leaks, putting both you and your tools at risk. Proper setup — including the use of quick-disconnect fittings, inline filters, and regulators — prevents such accidents and extends the life of your compressor and wrench.
In this guide, you’ll learn step-by-step how to connect an impact wrench to an air compressor the right way.
From choosing compatible components to checking for air leaks and adjusting the regulator for optimal pressure, each section covers practical techniques used by professionals. Whether you’re setting up your first pneumatic tool or fine-tuning a workshop setup, this guide will help you achieve powerful, safe, and efficient results.
Understanding Key Specifications Before You Begin
Before connecting your impact wrench to an air compressor, it’s essential to understand the technical specifications that determine how well both tools will perform together. Matching the right air compressor, hose, and fittings ensures your impact wrench gets the airflow it needs for powerful torque and consistent operation.
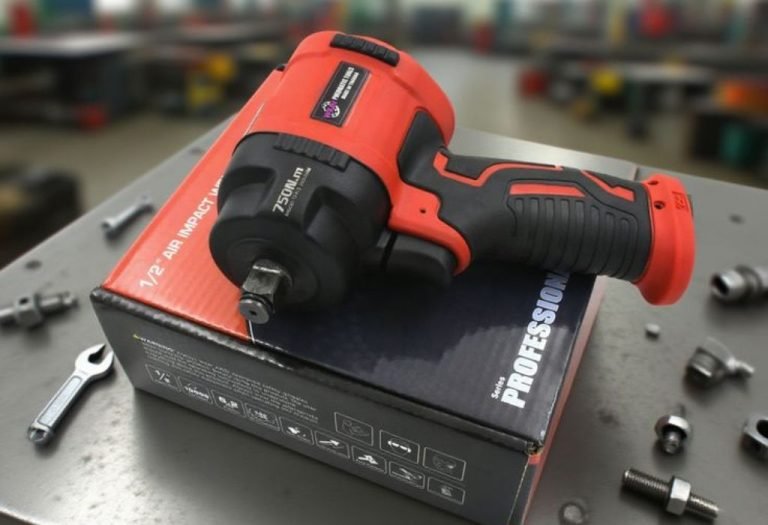
Impact Wrench Specs — Torque, Drive Size & Air Requirements
Every impact wrench is designed for specific torque and air requirements. The torque rating, usually measured in foot-pounds (ft-lbs), determines how much twisting force the tool can deliver. Smaller ⅜-inch drive wrenches are ideal for light tasks like furniture assembly or engine cover removal, while ½-inch or ¾-inch models handle heavy-duty automotive and industrial work.
Air consumption is equally important. Most impact wrenches require between 4 and 6 cubic feet per minute (CFM) at 90 PSI, but heavy-duty ones can need 8–10 CFM or more. If your compressor can’t supply enough CFM, the wrench will lose power, stall, or deliver inconsistent torque. Always check your wrench’s user manual to confirm its recommended CFM and PSI levels before connecting.
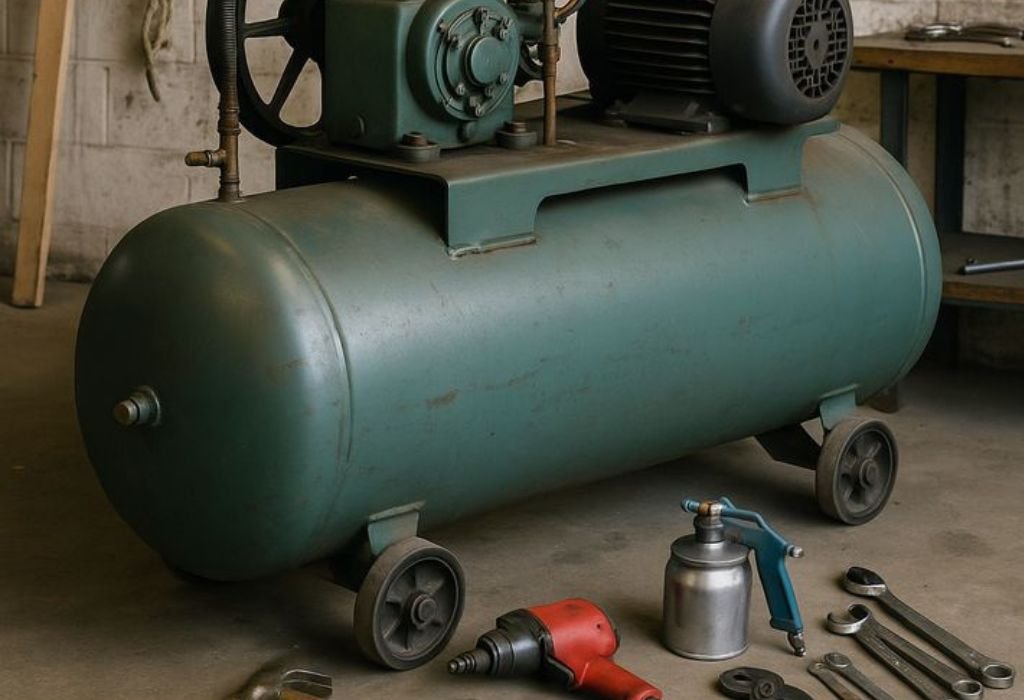
Compressor + Tank Specs — Matching to Tool Demand
Your air compressor’s job is to supply a steady flow of pressurized air. Compressors are rated by CFM (airflow) and PSI (pressure), and both must meet your tool’s demand. If your impact wrench requires 6 CFM at 90 PSI, choose a compressor rated slightly higher — around 7–8 CFM — to avoid pressure drops during continuous use.
Tank size also plays a role. A small 6-gallon compressor may handle short bursts but will struggle with long sessions. Larger tanks (20 gallons or more) provide consistent pressure for extended work. For professional use, two-stage compressors are ideal because they deliver higher pressure more efficiently, while single-stage units work fine for general DIY projects.
Hose and Fittings — Diameter, Length & Flow Efficiency
The air hose acts as the link between your compressor and the impact wrench, and its dimensions greatly affect performance. A narrow or excessively long hose restricts airflow, leading to lower pressure at the tool. For most impact wrenches, a ⅜-inch hose provides the best balance between flexibility and airflow, though high-torque tools may benefit from ½-inch hoses.
Pay attention to hose fittings and couplers. Use high-flow quick-connect fittings (often marked as “V-style” or “Hi-Flow”) to minimize air restriction. Couplers and plugs are usually threaded with NPT (National Pipe Thread) ends — typically ¼-inch NPT for most shop setups. Always use PTFE tape or thread sealant to prevent leaks when installing fittings.
Lastly, keep hose length minimal. A shorter hose reduces pressure loss, meaning your wrench receives maximum power directly from the compressor.
Step-by-Step: How to Connect Impact Wrench to Air Compressor
Now that you understand the basics, let’s move into the practical setup process. Follow these steps carefully to ensure a secure, leak-free connection that delivers full air power to your wrench.
1. Gather the Necessary Tools & Materials
Before you start, make sure you have:
- Air compressor
- Impact wrench
- Air hose (⅜-inch or ½-inch recommended)
- Quick-connect couplers and plugs (male/female)
- Teflon (PTFE) tape or thread sealant
- Air filter and lubricator (optional but recommended)
- Adjustable wrench or spanner
- Safety gear: goggles, gloves, and ear protection
2. Inspect and Clean All Connections
Before connecting anything, inspect the threads on your fittings, hose ends, and compressor outlet. Clean any dirt, debris, or metal filings, as these can cause leaks or damage the seals. Also, check that O-rings are intact and not worn out.
3. Install Fittings and Couplers
Apply PTFE tape around the male threads in a clockwise direction. Avoid over-wrapping — two to three turns are enough. Then, attach the quick-connect coupler to the compressor outlet and the matching plug to your hose or tool.
Tighten all connections using a wrench but avoid over-torquing, which can crack the fittings or distort the seals. If possible, use high-flow couplers to allow unrestricted airflow to your wrench.
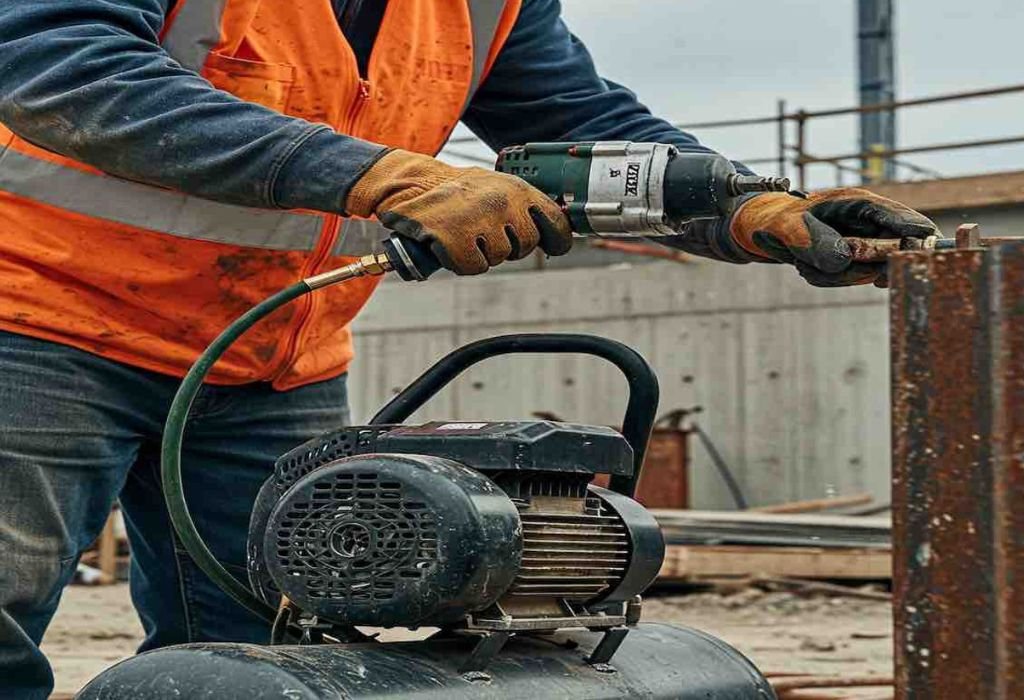
4. Attach the Air Hose to the Compressor and Tool
Connect one end of the hose to the compressor’s output fitting. If your compressor has a built-in regulator and moisture filter, ensure they’re installed before the hose connection. Attach the other end of the hose to the impact wrench using the quick-connect plug.
Press firmly until you hear a “click,” confirming a secure connection. Gently pull back to ensure the coupler locks properly.
5. Adjust Air Pressure Using the Regulator
Turn on your compressor and allow it to reach full pressure. Then, use the regulator knob to adjust the PSI to match your wrench’s requirements — typically around 90 PSI for most models. Start at a lower setting and gradually increase it while testing the wrench trigger.
Avoid exceeding the maximum rated pressure, as doing so can damage internal seals or cause unsafe operation.
6. Check for Air Leaks
Mix a few drops of dish soap with water and apply it to all connections using a brush or spray bottle. Bubbles forming around any fitting indicate a leak. Tighten those joints or reapply PTFE tape until the leaks stop completely.
This simple test ensures you’re not losing valuable air pressure during operation.
7. Run an Initial Test
After ensuring there are no leaks, pull the trigger on the impact wrench for a few short bursts. Observe how quickly it spins and whether the compressor cycles frequently. If the tool feels weak or stalls, check for pressure drops, hose kinks, or airflow restrictions.
Your impact wrench should now be ready for full use.
Best Practices for Maximum Performance
Following these pro-level practices will keep your setup efficient and your tools in peak condition.
Use High-Flow Components
Upgrade to high-flow couplers and plugs. These deliver up to 25% more air than standard fittings, ensuring your wrench performs closer to its rated torque output.
Keep Hose Runs Short and Straight
The longer the hose, the greater the air loss. Use the shortest possible hose with minimal bends to maintain optimal pressure. If you need longer reach, consider installing a wall-mounted air reel with a high-flow swivel base.
Maintain Lubrication and Moisture Control
Moisture in your airline can rust internal tool parts. Install an air filter and water separator between your compressor and hose. For added protection, use an inline oiler or add a few drops of pneumatic oil directly into the wrench’s air inlet before each session.
Prevent Pressure Drop
If you notice a loss of torque, check for restrictions in couplers, regulators, or hoses. Small-diameter hoses and low-quality fittings often cause noticeable pressure drops. Using a gauge at the tool inlet helps monitor true working pressure during operation.
Follow Safety Guidelines
Always wear protective eyewear and gloves. Avoid disconnecting hoses under pressure. Turn off and depressurize your system before changing fittings or tools. Keep hoses coiled neatly to avoid tripping hazards or accidental damage.
Common Problems and Troubleshooting
Even a perfect setup can develop issues over time. Here’s how to diagnose and fix the most common problems.
Low Power or Weak Torque
- Cause: Low compressor CFM, long hose, or air leaks.
- Fix: Use a larger compressor, shorten hose length, and inspect fittings. Ensure the compressor maintains at least 90 PSI during tool use.
Air Leaks at Connections
- Cause: Loose fittings or damaged O-rings.
- Fix: Apply new PTFE tape, tighten the fittings, or replace the worn seals.
Pressure Drops Under Load
- Cause: Inadequate tank size or flow restriction.
- Fix: Upgrade to a larger tank or replace restrictive couplers with full-flow versions.
Moisture in Air Line
- Cause: Condensation from humid air or insufficient moisture traps.
- Fix: Install a water separator and regularly drain your compressor tank.
Tool Surging or Jerky Operation
- Cause: Fluctuating pressure or lubrication issues.
- Fix: Check regulator for consistency and ensure the wrench is properly oiled.
Example Setups for Different Use Cases
½-Inch Impact Wrench (Standard Garage Setup)
- Compressor: 6–8 CFM @ 90 PSI
- Hose: ⅜-inch, 25 feet
- Fittings: ¼-inch NPT high-flow couplers
- Regulator: Set to 90 PSI
- Lubrication: Inline oiler or 2 drops before use
This setup is ideal for automotive tasks like lug nut removal and suspension work.
¾-Inch or 1-Inch Heavy-Duty Wrench (Industrial Setup)
- Compressor: 10–12 CFM @ 90 PSI minimum
- Hose: ½-inch, 25 feet or less
- Tank: 20–30 gallons
- Fittings: High-flow or V-style couplers
- Regulator: 100 PSI for consistent power
Perfect for tire shops or heavy machinery maintenance where continuous torque is needed.
Portable Compressor with Compact Impact Wrench
- Compressor: 3–4 CFM @ 90 PSI
- Hose: ¼-inch, 10 feet
- Use: Light-duty bolts and quick tasks
Portable compressors are convenient but not suitable for long, heavy use. Use short bursts to avoid pressure drops and overheating.
Maintenance Tips for Long-Term Use
- Drain the compressor tank daily to remove moisture buildup.
- Lubricate your impact wrench after every few hours of use.
- Inspect all fittings monthly for leaks or corrosion.
- Replace worn hoses immediately to prevent bursts.
- Store your compressor and hose in a dry, cool environment.
- Keep quick couplers clean and free of dust to maintain sealing integrity.
Consistent maintenance ensures optimal airflow, maximum torque, and safe operation.
Conclusion
Knowing how to connect an impact wrench to an air compressor properly transforms your pneumatic tools from underperforming to powerful, efficient, and reliable. The key is matching your compressor’s CFM and PSI with the wrench’s requirements, using the correct hose diameter, and ensuring airtight fittings.
By following the step-by-step setup — from gathering tools and sealing fittings to testing pressure and checking for leaks — you’ll achieve peak performance and longer tool life. Remember, small details like hose length, coupler type, and regular lubrication make a huge difference in results.
A properly connected system delivers consistent torque, faster work, and safer operation — whether you’re a professional mechanic or a weekend DIYer. Now that you know the process, you can confidently set up your impact wrench and get the job done right every time.

I’m Michael R. Turner, the founder, lead writer, and passionate DIY enthusiast behind 101diytools.com. With years of hands-on experience in home improvement and power tools, I built this platform to share practical tips, in-depth guides, and honest reviews to help DIYers of all skill levels tackle projects with confidence and the right tools.