How to Change Blade on Hyper Tough Circular Saw
If your Hyper Tough circular saw has started leaving burn marks, slowing down, or tearing the edges of your cuts — the problem isn’t the motor. It’s the blade.
Every blade has a lifespan. With each spin through wood or laminate, the teeth dull slightly. Over time, that sharp edge becomes a source of friction instead of precision.
A dull blade doesn’t just give bad results — it makes your saw work harder. The motor strains, the battery drains faster (for cordless models), and your accuracy suffers.
Many beginners think blade changes are complicated, but Hyper Tough designed their saws for easy, tool-assisted maintenance. With just a wrench, a few minutes, and some patience, you can restore that “brand new” cutting feel.
Changing your circular saw blade is a skill every DIYer and woodworker should master. It’s fast, safe, and it instantly brings back smooth cutting and reduced noise.
In this detailed guide, we’ll go beyond just the steps — you’ll learn how to do it, why it matters, and what small mistakes to avoid to keep your saw running perfectly.
Step 1: Know Your Tool Before You Begin
Before you touch the blade, take a minute to understand your saw’s build.
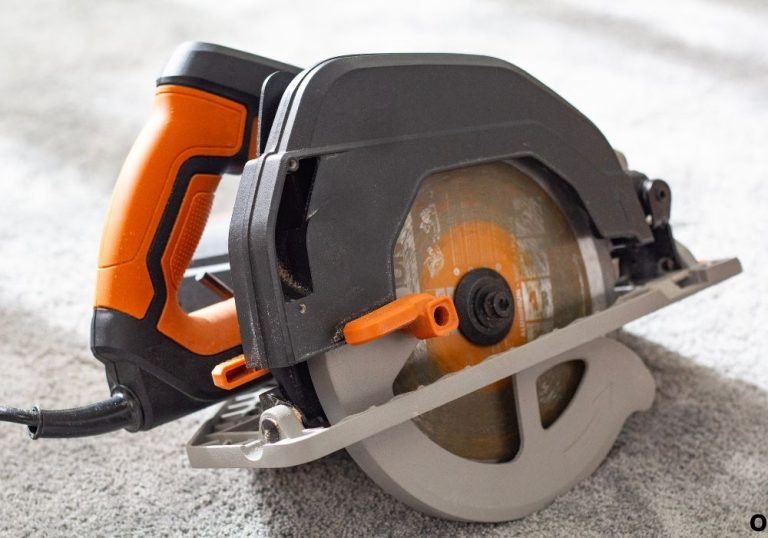
The Hyper Tough circular saw (corded or cordless) has a few key parts that make blade changes simple. You’ll find a blade guard, a spindle or arbor bolt, a spindle lock button, and a blade wrench usually stored on the saw body.
The blade guard is spring-loaded and automatically covers the teeth when the saw is lifted. You’ll manually lift it only when removing or installing the blade.
The spindle lock is your best friend in this process — it freezes the blade’s rotation so you can loosen the bolt safely.
And the wrench? It fits the center arbor bolt that holds the blade in place.
Most Hyper Tough saws use a 7¼-inch blade with a 5/8-inch arbor. Confirm the size printed on your existing blade before buying a replacement.
Also, note the rotation arrow stamped on the blade guard. The new blade’s arrow must point in the same direction.
Familiarizing yourself with these parts prevents confusion mid-process and ensures a smooth workflow once you start.
Think of this step as a small safety briefing between you and your tool — it’s what separates rushed mistakes from clean professional work.
Step 2: Safety First — Setting Up Your Workspace
Changing a circular saw blade means handling sharp edges and working close to the tool’s drive components. Safety is not optional — it’s the foundation.
Unplug your saw or, if it’s cordless, remove the battery entirely. Don’t rely on the trigger lock alone.
Lay the saw on a stable, flat surface. A wooden workbench or a large table with non-slip padding works best.
Put on cut-resistant gloves to protect your hands and safety glasses to shield your eyes from debris or accidental spring tension.
Keep your replacement blade nearby, still in its packaging, and your wrench within reach.
It’s also a good idea to have a soft cloth and a small brush ready for cleaning. Resin and sawdust often collect around the arbor, and cleaning it before installing the new blade improves contact and longevity.
If you’re working indoors, make sure your lighting is bright. Shadows near the blade can easily hide misalignment.
Preparing well saves more time than rushing ever will. Once you’ve done it once, this setup will become a habit for every future blade change.
Step 3: Lock the Blade and Loosen the Arbor Bolt
Now comes the mechanical part — removing the old blade.
Locate the spindle (or arbor) lock button on the saw housing, usually just behind the blade guard area. Press and hold it firmly. This locks the arbor shaft and prevents the blade from turning.
Insert your blade wrench into the center bolt. Here’s the important part — most Hyper Tough saws use reverse threading on the arbor bolt. That means you turn it clockwise to loosen and counterclockwise to tighten.
Apply steady, even pressure on the wrench. Avoid quick jerks — that’s how bolts strip or threads snap.
If it feels too tight, don’t force it immediately. Hold the spindle lock and gently tap the wrench handle with your palm or a small rubber mallet. That short, controlled shock helps break tension safely.
Once it loosens, remove the bolt and outer washer, setting them aside in a clean, safe place.
You’ll see an inner washer still on the arbor. Leave it unless it’s dirty or damaged. It keeps the blade centered and balanced during operation.
At this point, your blade is free — but don’t grab it carelessly. The edges might still be sharp enough to cut skin even if dull on wood.
Step 4: Removing the Old Blade
Pull the lower blade guard lever to lift it up and fully expose the blade.
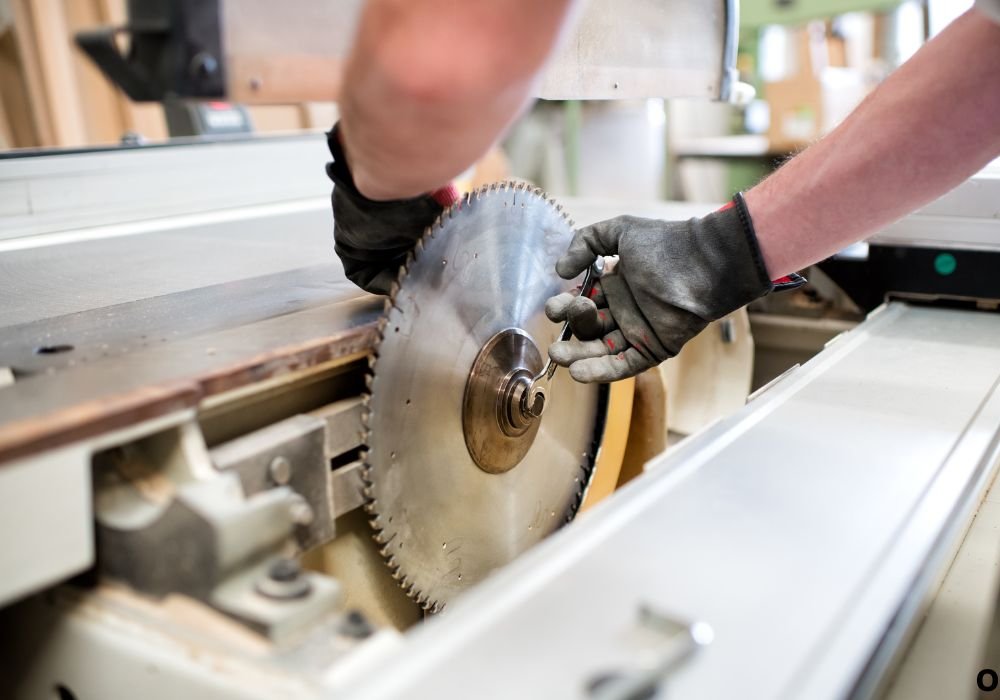
Grip the blade carefully from the center opening, keeping your gloves on. Slide it straight out of the arbor without tilting or twisting.
Inspect the blade’s teeth. Are they burnt, chipped, or missing? That’s a sign it’s overdue for replacement.
Clean the arbor area using your brush or cloth. Sawdust, resin, or metal dust can affect how the new blade seats.
If you notice sticky residue, use a drop of rubbing alcohol on a rag to wipe it clean. Avoid heavy solvents that could damage paint or rubber components.
Check that the inner washer sits flat and doesn’t have dents or warps. Replace it if it looks uneven.
Set the old blade aside in a cardboard sleeve or cloth for recycling. Don’t throw it loose into a toolbox — it can still cut.
This cleaning stage is often skipped, but professionals swear by it. A clean arbor means smoother spins and less vibration.
Now, your saw is ready for its fresh, sharp blade.
Step 5: Installing the New Blade
Unpack your new blade carefully. Check again that it matches your saw’s required diameter and arbor size.
Find the arrow on the blade surface — it shows the direction it spins. Match this arrow with the rotation arrow printed on your saw’s guard.
Lift the lower blade guard again and slide the new blade onto the arbor, teeth facing forward.
The blade should rest flat against the inner washer without any gap. If it rocks or wiggles, the washer might be misaligned.
Replace the outer washer and the arbor bolt, turning it counterclockwise to tighten (remember, reverse threading).
Hold the spindle lock again and tighten the bolt firmly using your wrench. You don’t need excessive torque — snug and secure is enough.
Spin the blade by hand once to make sure it moves freely and doesn’t rub the guard or shoe.
Release the guard and watch it snap back to its closed position. If it sticks or slows, clean the guard track before continuing.
This step is where precision meets patience — the better you align the parts now, the smoother your cuts will feel later.
Step 6: Testing the Blade Installation
Reattach your battery or plug the saw back into power. Keep the saw positioned safely on the table with the blade clear of any surface.
Hold it firmly, and give the trigger a short one-second squeeze.
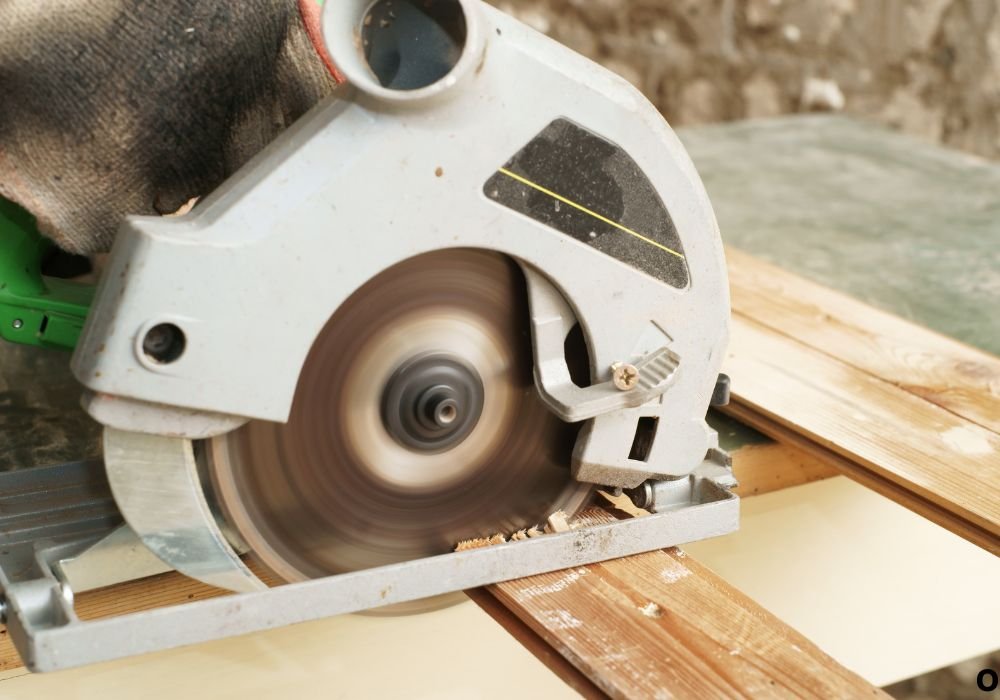
The blade should start, spin, and stop smoothly — no wobble, scraping, or rattle.
Listen closely. A properly mounted blade produces a clean “whoosh” sound. A vibrating or metallic “clink” means something isn’t seated right.
If you hear anything unusual, disconnect the power again and recheck your washers and bolt tension.
Once satisfied, make a test cut on scrap wood. The cut should be straight, smooth, and effortless.
Burn marks, hesitation, or sideways drift usually mean either the bolt is loose or the blade isn’t flat on the arbor.
Let the blade coast to a full stop before setting the saw down. Never rest the saw with a spinning blade.
Testing ensures not only safety but also guarantees your replacement job was perfect.
Common Mistakes to Avoid
Even experienced DIYers slip up during blade replacement. Here are some avoidable errors:
- Forgetting to remove the battery or unplug the saw — a dangerous and common mistake.
- Using the wrong wrench size — this can strip the bolt head permanently.
- Overtightening the bolt — it may warp the blade or damage threads.
- Installing the blade backward — the teeth must face the cutting direction.
- Skipping the cleaning step — debris on the arbor can cause wobble and vibration.
- Not checking guard movement — a sticky guard can jam mid-cut.
- Leaving residue on the washers — even tiny pitch buildup causes alignment errors.
- Failing to test run — skipping this means you might miss imbalance problems before cutting real wood.
Avoid these, and you’ll get professional results every single time you swap blades.
Maintenance Tips to Extend Blade and Saw Life
Your blade may be new, but carelessness can wear it out fast.
Clean blades after every major project. Resin and sawdust buildup cause heat and premature dullness.
Never cut through hidden screws, nails, or staples. Even one metal hit can chip carbide teeth.
Use the correct type of blade for the material. Fine-tooth blades for plywood, framing blades for lumber, and special blades for metal or plastic.
Store blades flat in dry areas to prevent bending. Humidity causes rust and warping over time.
Check your arbor bolt regularly. Even small vibrations can loosen it slightly during extended use.
Lubricate the guard hinge every few months with a dry silicone spray. Smooth guard movement improves safety.
Replace your blade as soon as it feels slower or louder — that’s cheaper than replacing a motor strained by resistance.
These small habits will keep your Hyper Tough circular saw cutting cleanly for years.
FAQs
Which way should the blade face when installed?
The teeth should point forward, matching the arrow on your saw’s blade guard housing.
Does the arbor bolt loosen clockwise or counterclockwise?
On most Hyper Tough saws, it loosens clockwise and tightens counterclockwise — reverse of normal threading.
Can I use a different brand’s blade?
Yes, as long as the diameter (7¼-inch) and arbor size (5/8-inch) match. Choose blades rated for 5,000+ RPM for safety.
Why does my new blade wobble during cuts?
The arbor bolt or washer might not be flat. Clean the surfaces and retighten gently until secure.
How often should I change my saw blade?
Change it when cutting becomes slow, edges burn, or sound pitch increases. Typically after 40–60 hours of use.
Conclusion
Changing the blade on your Hyper Tough circular saw isn’t just about maintenance — it’s about performance. A sharp, correctly mounted blade transforms how the saw feels in your hands.
With the right approach — unplugging first, locking the arbor, cleaning properly, and installing carefully — you’ll always get clean, straight cuts without stress.
This isn’t a complex repair. It’s a simple skill that saves money, protects your tool, and gives you smoother, faster results every time you build or trim.
So the next time your saw feels sluggish or your cuts look rough, don’t blame the tool — change the blade. Your Hyper Tough circular saw will reward you with power, precision, and reliability on every project.

I’m Michael R. Turner, the founder, lead writer, and passionate DIY enthusiast behind 101diytools.com. With years of hands-on experience in home improvement and power tools, I built this platform to share practical tips, in-depth guides, and honest reviews to help DIYers of all skill levels tackle projects with confidence and the right tools.