How to Adjust Depth on Staple Gun: A Simple Guide
Remember that time you were building a birdhouse and those staples just wouldn’t sit flush? One was sticking out, another was going too deep, and the whole project felt like a frustrating mess. Sound familiar? That’s because getting the depth right on your staple gun is essential for a clean, professional finish, and it can save you a lot of headaches. This guide helps you easily grasp the essential steps. You’ll learn the ins and outs of how this tool works, and you’ll become confident in using it for any DIY project. This post gives you practical knowledge, making your work easier and more rewarding. Get ready to improve your skills and get the results you want!
Key Takeaways
- Learn the fundamental components of a staple gun.
- Discover how to adjust the depth setting on various staple gun models.
- Understand the importance of selecting the right staple type and size for your task.
- Identify common issues and troubleshooting tips for consistent stapling.
- Explore safety precautions to prevent injuries while using a staple gun.
- Get some tips to maintain and care for your staple gun for the tool’s longevity.
Understanding Your Staple Gun: The Basics
Before you start adjusting anything, it’s good to know what makes a staple gun tick. Think of it like learning the parts of a car before you try to change the oil. The main parts include the body, the magazine (where the staples go), the trigger, and the depth adjustment mechanism. Knowing these parts gives you a baseline for how the tool functions. This base knowledge makes it easier to figure out how to adjust the depth and troubleshoot any issues later on. Familiarity is key to effective use.
Components of a Staple Gun
Let’s take a closer look at the key parts that make up a staple gun. This basic anatomy is shared by most models, even though their designs may vary. It begins with the body, which houses all the internal mechanisms. The magazine holds the staples, ready to be fired. The trigger activates the firing mechanism, sending the staple into the material. The depth adjustment is the feature that changes how deep the staples go. These components all work together to achieve accurate stapling.
- Body: The main structure that holds all the internal components. It often includes a handle for gripping and controlling the tool.
- Magazine: The compartment that holds the staples, ready for use. It usually has a sliding mechanism to load and unload staples.
- Trigger: The lever you pull to fire the staples. It activates the firing mechanism, which drives the staple into the material.
- Depth Adjustment Mechanism: This feature lets you control how deep the staples go into the material. It’s usually a dial or a sliding mechanism.
A well-made staple gun offers a solid feel in your hand, giving you more control. The magazine’s design affects how easily you can load staples. A good trigger provides a smooth firing experience, and an effective depth adjustment is key to get precise results. For the tool’s longevity, regular maintenance like keeping the magazine clean and lubricating moving parts will serve you well. Inspect the gun regularly for wear and tear, and replace any damaged parts. This way, you keep the tool in good working order.
Types of Staple Guns
Knowing the different types of staple guns can help you choose the right one for your projects. There’s a model made for almost every task you might imagine. Different kinds of staple guns are made for different applications. This means the depth adjustment mechanism may also differ. Learning about these types will help you select the tool that meets your needs. Understanding the features each type offers is important for getting the best performance from your tool.
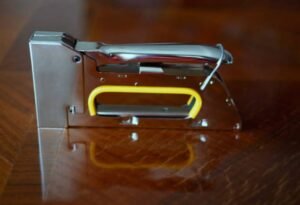
- Manual Staple Guns: These are the most common type and are powered by hand. You squeeze a handle to fire each staple. They’re good for small tasks and are typically more affordable.
- Electric Staple Guns: Powered by electricity, these offer more power and are useful for larger projects. They usually have an automatic firing mechanism, making them less tiring to use.
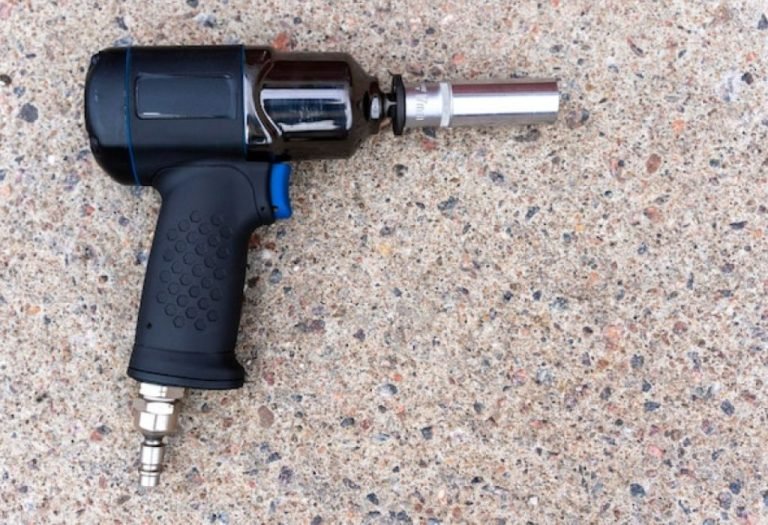
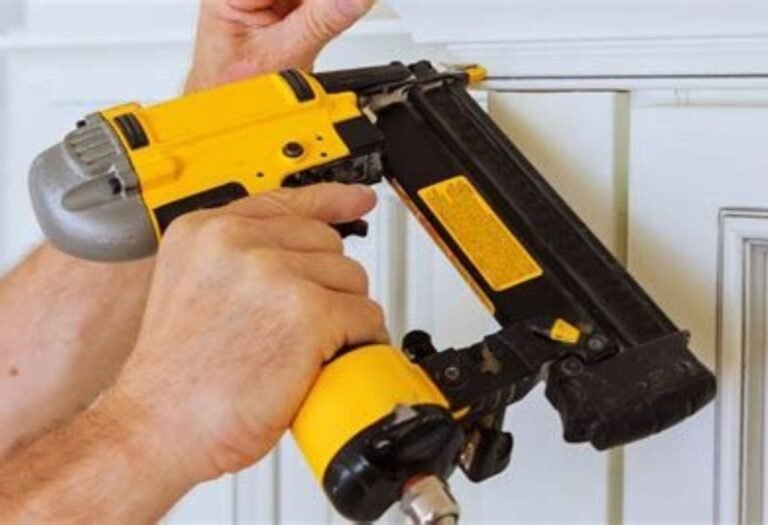
- Pneumatic Staple Guns: These use compressed air and offer the most power. They’re ideal for heavy-duty tasks and are often used in professional settings.
- Hammer Tackers: Designed for rapid stapling over larger areas, often used for insulation or roofing felt.
Each type offers different advantages. Manual staple guns are good for projects that don’t require a lot of staples. Electric ones are more suitable if you have a lot of stapling to do. Pneumatic staple guns are the choice for tough projects. Hammer tackers work well for tasks that require quick stapling over a large area. When you pick a staple gun, consider the nature of your projects. Think about the materials you’ll be working with, the frequency of use, and the level of power you need.
How to Adjust Depth on Staple Gun: Step-by-Step Guide
Now, let’s explore how to adjust the depth setting on your staple gun. The process is usually simple, but it can differ slightly depending on the model. Generally, most staple guns have a depth adjustment feature, whether it’s a dial, a slider, or a set of screws. Each type requires a slightly different approach. Understanding these differences can help you. The goal is to get the staples to sit flush with the material’s surface, so they don’t stick out or go too deep. Following these steps helps you master the technique and get great results.
Finding the Depth Adjustment Mechanism
The first step is to locate the depth adjustment feature on your staple gun. This feature is often a dial or a slider on the side or top of the tool. Some models may have a small screw you turn to adjust the depth. Knowing where the mechanism is will save you time and help you fine-tune the settings more quickly. Locate the adjustment mechanism before anything else. This ensures you’re ready to adjust the depth.
- Dial: A rotating wheel marked with numbers or symbols representing different depth settings. Turning the dial will change the depth.
- Slider: A sliding mechanism that moves back and forth to adjust the depth. The position of the slider determines the depth.
- Screw: Some staple guns have a small screw that adjusts the depth. You turn the screw with a screwdriver to change the depth.
The position and design of the depth adjustment mechanism depend on the manufacturer and the tool’s specific model. Manual staple guns and electric ones often use a dial or slider. Pneumatic models may use a more complex system. Reading the tool’s manual is a great way to figure out how to adjust the depth and any unique features that the model offers. This will give you the most accurate guide. Take the time to identify the adjustment mechanism, making the rest of the process straightforward.
Making the Depth Adjustments
Once you’ve found the depth adjustment mechanism, you can start making the adjustments. The goal is to get the staples to sit at the right depth. Start by making small changes, test the setting, and adjust again if needed. This step-by-step process helps you achieve optimal results. Adjusting the depth might feel a little fiddly at first, but with practice, it will become second nature. Fine-tuning the depth setting ensures the staples are placed correctly, providing a strong and neat finish.
- Start Shallow: Begin with the shallowest depth setting. This prevents the staples from going too deep.
- Test the Staples: Fire a staple into a scrap piece of the same material you’re working with. Check how the staple sits on the surface.
- Adjust Gradually: If the staple isn’t deep enough, adjust the depth slightly. Then, repeat the test.
- Repeat as Needed: Keep adjusting and testing until the staples are flush with the surface.
Working in small increments ensures you don’t overshoot. Testing on scrap material saves the actual project from potential damage. If the staples are sticking out, make the depth deeper. If they’re going too deep, make the depth shallower. Repeat this until you get it right. It may take a couple of tries to get the perfect depth, but the result is a professional finish. It takes a little practice, but it’s worth it for the improved look and strength of your work.
Selecting the Right Staples for the Job
The type and size of the staples you use matter just as much as how deep they’re driven. Selecting the right staples is key to a successful project. Using the wrong size or type can lead to problems. This could range from staples that don’t hold to staples that damage the material. Understanding the different staple types and sizes will give you an advantage. Knowing what to select will allow you to do better and more effective work. The right staples make a big difference in the final result.
Types of Staples
Different types of staples are made for various materials and applications. Staple selection depends on what you’re working with and what you want to achieve. The right type of staple can improve the bond and make your project more durable. Knowing the various options can help you. The most common are those made from steel, offering great strength and holding power. The shape of the staple also makes a difference. Narrow crown staples are good for finer work, and wide crown staples offer a wider grip.
- Standard Staples: Versatile and suitable for most general tasks, such as attaching fabric or paper.
- Heavy-Duty Staples: Designed for tougher materials, like wood. They provide a stronger hold.
- Insulation Staples: Wide-crown staples that are made for fastening insulation materials.
- Cable Staples: Made to hold cables in place, with a design that avoids damaging the wires.
Standard staples are great for lighter tasks. For working with wood, you would need heavier staples. Insulation staples have a broader crown for holding insulation firmly in place. Cable staples protect wires while fastening them. Your choice of staple is made easier if you consider what material you’re working with. Select the staple that matches the material’s thickness and use. When in doubt, it’s best to choose a slightly stronger staple than one that is too weak. Taking the time to choose the right staples will enhance both the appearance and durability of your project.
Choosing the Correct Staple Size
Staple size includes the leg length and crown width. The leg length is crucial because it affects the depth the staple goes into the material. The crown width will influence the area the staple covers. Choosing the right size ensures a secure hold without damaging the material. Getting the right staple size is key to a professional finish. Consider the materials you’re working with, their thickness, and the intended use of the finished product. Having a range of sizes helps.
- Leg Length: The length of the staple’s legs, which should be long enough to penetrate through the material.
- Crown Width: The width of the staple’s crown, which distributes the holding force.
- Material Thickness: Take into account the thickness of the material. Select a staple leg length that can penetrate the material completely.
- Application: The intended use of the finished project also plays a role in selecting the staple size. For instance, upholstery will need staples with specific features.
The leg length should be sufficient to pass through the material. A general rule is to choose a staple with legs long enough to go through the material and a bit more. The crown width is also important, as it impacts how much surface area the staple covers. The right size will depend on the material and the intended use. Choose staples that match these requirements. If you are not certain, it’s safer to go with a slightly longer staple than one that’s too short. Knowing the staple size helps you to get a secure and lasting hold.
Common Issues and Troubleshooting
Even with careful adjustments, you might face some issues while stapling. The good news is that most problems are easy to fix with some troubleshooting. By identifying these common issues, you can improve your stapling experience. Being able to solve them will give you confidence to keep working. Some solutions might involve simple adjustments, and others might mean inspecting the tool. It’s important to resolve these issues, so your projects don’t get delayed.
Staples Not Driving Flush
Staples not sitting flush with the surface is one of the most common issues. This problem can be due to a few things. Here are a few possible causes: depth setting, staple type, or material resistance. Taking a methodical approach to identifying and fixing this issue can save you time and prevent frustration. When staples do not sit flush, the project has a less professional look. Addressing this issue will also improve the strength of the hold.
- Incorrect Depth Setting: Adjust the depth setting. Start with small adjustments and test on a piece of scrap material.
- Staple Size: Make sure the staple size is appropriate for the material. Too short, and it won’t drive flush. Too long, and it might go too deep.
- Material Density: Some materials are denser than others. You might need to increase the power or use a longer staple for dense materials.
- Tool Malfunction: Ensure the staple gun is working correctly. Check the firing mechanism and the magazine for any issues.
If the depth setting is too shallow, the staples will not drive in far enough. If the staples are too short, they might not reach the necessary depth. Denser materials might require more power or longer staples. Check the tool if these solutions don’t work. Make sure the firing mechanism is working properly. Also, make sure the magazine is clean and that the staples are feeding correctly. By following these steps, you can get the staples to sit flush and have a great finish.
Staples Jamming
A jammed staple gun is a problem that can bring your project to a halt. A jam means the staples aren’t feeding correctly, and you won’t be able to continue working. This situation happens more often than you would like. But with a few simple steps, you can deal with this issue. Identifying the source of the jam is the first step in solving it. Understanding how to clear a jam quickly saves time. This helps you get back to work faster and makes your experience much easier.
- Check the Magazine: Make sure the staples are loaded correctly. Sometimes, a staple might be misaligned.
- Clear the Jam: Most staple guns have a jam-clearing mechanism. It might be a release button or a lever you need to open.
- Use the Right Staples: Ensure you are using the correct staple size and type. Incorrect staples can often cause jams.
- Tool Maintenance: Keep the staple gun clean. Dust and debris can build up and lead to jams.
Before attempting to clear a jam, make sure the tool isn’t connected to a power source. With electric and pneumatic guns, disconnect the power source first. Once the magazine is open, check for any misaligned staples. Use the jam-clearing mechanism. If the tool frequently jams, it might need maintenance. Disassembling the tool and cleaning the internal parts may be necessary. Avoiding jams keeps the project moving and reduces wasted time. This allows you to work more efficiently.
Safety Precautions While Using a Staple Gun
Using a staple gun involves some safety precautions that should always be followed. Staple guns can be powerful tools, and injuries can occur if you’re not careful. The goal is to make sure you use the tool safely. Be aware of the risks involved. Taking the right precautions can prevent injuries and keep your work area safe. Safety practices, such as wearing safety glasses, are essential. Following these guidelines helps you use the tool responsibly and safely.
Eye Protection
Wearing eye protection is important when using a staple gun. The projectiles or debris from stapling could cause serious eye injuries. Safety glasses or goggles are your best defense. A small investment can go a long way in protecting your vision. This helps protect against flying debris and stray staples. Safety glasses give a clear view. They protect your eyes. It is necessary to make sure they fit properly. Your eye health should always be prioritized. This is a crucial safety step.
- Safety Glasses: Wear safety glasses that meet safety standards. They protect your eyes from projectiles.
- Goggles: Goggles offer better protection than glasses. They cover your eyes completely and can protect against debris.
- Check the Fit: Make sure the glasses or goggles fit securely to protect against hazards.
- Inspect Regularly: Check for any damage to your eyewear. Replace them if you see any scratches or cracks.
Choosing the right eyewear helps to ensure you stay safe. Safety glasses are often good enough for most general projects. For work that produces more debris, goggles provide better protection. It’s important to inspect your eyewear.
Safe Operating Practices
Practicing safe operation is essential to avoid injuries when using a staple gun. Improper use can lead to serious accidents. These include accidental stapling or injury from the tool itself. Safe operating practices include keeping your hands away from the firing end. These precautions protect you and others. They create a safe work environment. Practicing these steps is important to minimize risks. It is important to always be cautious.
- Point Away: Always point the staple gun away from yourself and others. This helps prevent accidental injuries.
- Avoid Body Parts: Never place your hand or any other body part in the path of the staple.
- Secure the Material: Make sure the material is secure and won’t move while stapling.
- Disconnect Power: Disconnect the power or remove the battery when loading staples or when not in use.
Keep the tool pointed away from you and anyone else. Ensure the material is secure so it doesn’t shift while you work. Always disconnect the power before loading staples or doing any maintenance. Following these rules minimizes the risk of accidents. Practicing safe habits ensures your projects are both safe and productive. Safe operating practices should become second nature. This makes every project more enjoyable.
Caring for and Maintaining Your Staple Gun
Taking proper care of your staple gun helps to keep it working well and extends its life. Regular maintenance can prevent problems. This means the tool will be ready for the next project. Regular care ensures the staple gun performs well. It also guarantees a long life. The steps for tool maintenance are easy to follow. They also contribute to keeping the tool running at its best. Knowing how to maintain your tool is important.
Cleaning and Lubrication
Cleaning and lubricating your staple gun is important for maintaining peak performance. Dust, debris, and build-up can affect its function. Lubrication keeps the moving parts working smoothly. Proper care and cleaning ensure your tool works as it should. Cleaning removes the build-up. Lubricating decreases friction. This leads to easier and smoother stapling. This helps to prevent jams and other issues.
- Regular Cleaning: Use compressed air or a brush to remove debris from the magazine and firing mechanism.
- Lubrication: Apply a small amount of lubricant to the moving parts. This keeps them moving smoothly.
- Frequency: Clean and lubricate the tool regularly. Adjust the frequency based on how often you use it.
- Avoid Over-Lubrication: Too much lubricant can attract dust and debris. This could cause the tool to malfunction.
Regularly clean the magazine and the firing mechanism. Apply a small amount of lubricant to moving parts to keep them moving smoothly. Lubricate regularly, but be careful not to over-lubricate. Always use the right kind of lubricant. Follow the manufacturer’s recommendations. Cleaning and lubrication will make the tool last longer. It also prevents common problems and keeps your tool running effectively.
Storage
Proper storage of your staple gun is another essential step. When you store the tool properly, you protect it from damage and maintain its functionality. Proper storage helps to prevent rust and other damage. This also keeps the tool safe for future use. Storing the tool well ensures it is ready. This means you can use it whenever you need it. Storing the tool effectively is a key step.
- Dry Environment: Store the staple gun in a dry place. This helps to prevent rust.
- Protected from the Elements: Keep the tool away from direct sunlight, extreme temperatures, and moisture.
- Safe Location: Store the tool in a safe place. Keep it away from children and other hazards.
- Magazine Empty: Remove the staples from the magazine when you are not using the tool.
A dry environment protects the tool from rust and corrosion. Keeping the tool away from the elements will also prevent damage. A safe storage location protects it from accidental use or damage. Remove staples from the magazine when the tool is not in use. Following these storage tips will ensure your staple gun is always ready for use. By storing your tool properly, you can make sure it lasts for a long time. It helps make sure you’ll have it when you need it.
Frequently Asked Questions
Question: What do I do if my staple gun isn’t firing?
Answer: First, check to make sure the staple gun has power and staples loaded. Look for a jammed staple. Most staple guns have a jam-clearing mechanism to remove these. You should also check the firing mechanism to see if it needs repair or replacement.
Question: How do I know what size staples to use?
Answer: Measure the thickness of the material you’re stapling. The staple legs should be long enough to go through the material. Select a staple that is long enough to penetrate the material and slightly protrude on the other side. Consult the material manufacturer for any specific recommendations.
Question: Can I use different types of staples in my staple gun?
Answer: It depends on the staple gun. Read the tool’s manual to find what types and sizes are compatible. Using the wrong staples can damage the tool. Make sure to use staples that are designed for your tool.
Question: How can I prevent the staples from jamming?
Answer: Make sure the staples are loaded correctly. Ensure you’re using the right size and type of staples for the tool. Keep the magazine and firing mechanism clean. If jams occur, refer to your tool’s manual for jam-clearing instructions.
Question: What safety gear should I use?
Answer: Always wear safety glasses or goggles to protect your eyes. Also, consider gloves to protect your hands. Ensure the work area is well-lit and free of distractions. Always use the staple gun in a secure and controlled environment.
Final Thoughts
Learning how to adjust depth on staple gun doesn’t have to be complicated. With some practice and the right knowledge, you’ll be able to get the perfect finish. Mastering the depth adjustment feature is a must-know. From knowing the tool’s components to selecting the right staples and taking the right safety precautions, you now have the tools needed to approach any project with confidence. By following the tips in this guide, you can be sure of consistent, professional results. Remember to start with the shallowest setting, test on scrap material, and make adjustments in small increments. Always prioritize safety by wearing eye protection and using the tool carefully. Keep your staple gun well-maintained, and it will serve you well for years to come. Now go on, try it out, and watch your skills grow with every project!

I’m Michael R. Turner, the founder, lead writer, and passionate DIY enthusiast behind 101diytools.com. With years of hands-on experience in home improvement and power tools, I built this platform to share practical tips, in-depth guides, and honest reviews to help DIYers of all skill levels tackle projects with confidence and the right tools.