How Long After Power Washing Can You Sand a Deck?
A freshly power-washed deck often looks ready for sanding, but hidden moisture inside the wood can quietly destroy your efforts. Sanding too soon leads to raised grain, uneven color absorption, and a blotchy finish that peels months later.
Many homeowners rush the process, assuming a single sunny day is enough. Yet research shows that even clean wood can retain internal moisture for up to 48 hours, depending on temperature and humidity. ShinePro Services notes that letting the deck fully dry before sanding is essential to avoid structural and visual damage.
Imagine spending an entire weekend restoring your deck, only to have the stain fail because the boards weren’t dry enough. Proper drying time isn’t just about patience — it’s the difference between a smooth, professional surface and a costly do-over.
This guide explains how long to wait after power washing before sanding, what affects drying time, and how to prepare your deck safely for a flawless finish that lasts.
Why Drying Time Matters Before Sanding
When wood absorbs water during power washing, its fibers swell and lift. Sanding before those fibers settle back can tear them instead of smoothing them. The result is a rough, uneven surface that doesn’t hold stain evenly.
Wood that remains damp also clogs sandpaper quickly, making the sanding process inefficient. Worse, moisture trapped under stain or sealer can lead to blistering or peeling within months.
The drying phase gives wood time to normalize and reach a stable moisture level. Most deck experts agree that the surface should feel dry to the touch and register below 15% moisture content before sanding. Mr. Sander emphasizes that patience here ensures long-term results.
Skipping this step means your beautiful new finish might not survive its first season. Taking time to let nature do its job is the simplest way to protect your investment.
How Long Should You Wait Before Sanding a Deck
There’s no one-size-fits-all waiting period after power washing. The general rule is to wait at least 24 to 48 hours in warm, dry, and sunny conditions. However, in cooler or humid climates, the wait can stretch to 72 hours or even up to 7 days.
If you live in a shaded area or your deck faces north, drying takes longer because sunlight and airflow are limited. The denser the wood species — like cedar, mahogany, or pressure-treated lumber — the more water it holds and the slower it dries.
Using a moisture meter is the most reliable method to determine readiness. The ideal range for sanding is between 12% and 15% moisture content. Anything above that risks tearing fibers and trapping water under the stain.
In short, rushing saves a day but can cost a full refinishing later. A few extra days of drying often ensure years of better performance and smoother beauty.
Key Factors That Influence Drying Time
Several environmental and material conditions affect how long your deck needs to dry before sanding. Understanding them helps you plan the restoration timeline more accurately.
Weather conditions are the biggest factor. Sunlight, wind, and low humidity accelerate drying, while rain, shade, or high humidity slow it down dramatically. Decks washed in the morning dry faster because they receive sunlight throughout the day.
Wood type plays a major role too. Softwoods such as pine or redwood release moisture faster, whereas hardwoods like oak or ipe retain it much longer. Pressure-treated lumber, infused with chemical preservatives, can hold water deep inside its structure, requiring extended drying time.
Power washing intensity also matters. High-pressure settings can force water deeper into the grain. A thorough rinse might look dry on the surface but stay wet underneath for days.
Finally, deck location and airflow determine evaporation speed. Decks close to the ground or surrounded by walls dry slower because of limited air circulation. Raising planters or furniture temporarily helps airflow and reduces drying time.
How to Test If Your Deck Is Ready for Sanding
You don’t need expensive tools to test deck dryness, though a moisture meter gives the most accurate result. There are simple ways to gauge readiness before you start sanding.
Press your hand firmly on several boards — if they feel cool or slightly damp, they’re not dry enough. The same applies if you notice darker patches that differ in color from the rest of the surface.
Another quick check is the plastic wrap test. Tape a small square of plastic film over part of the deck and leave it for several hours. If condensation forms underneath, moisture is still escaping from the wood.
For precision, use a wood moisture meter. Insert its probes into the board surface. Readings below 15% mean you can safely start sanding. If it shows 16–20%, wait another day or two for better results.
Taking 10 minutes for this check can prevent days of wasted effort and expensive stain repairs later.
Preparing Your Deck for Sanding
Once the deck is dry, preparation becomes the next critical stage. Proper prep ensures even sanding and long-lasting results.
Start by inspecting all boards for damage, raised nails, or screws. Replace warped or cracked pieces and tighten any loose fasteners. These issues will worsen during sanding if ignored.
Next, remove debris such as leaves or dust left behind after washing. A shop vacuum or leaf blower helps clear out gaps between boards. Small stones or grit can cause deep scratches if caught under the sander.
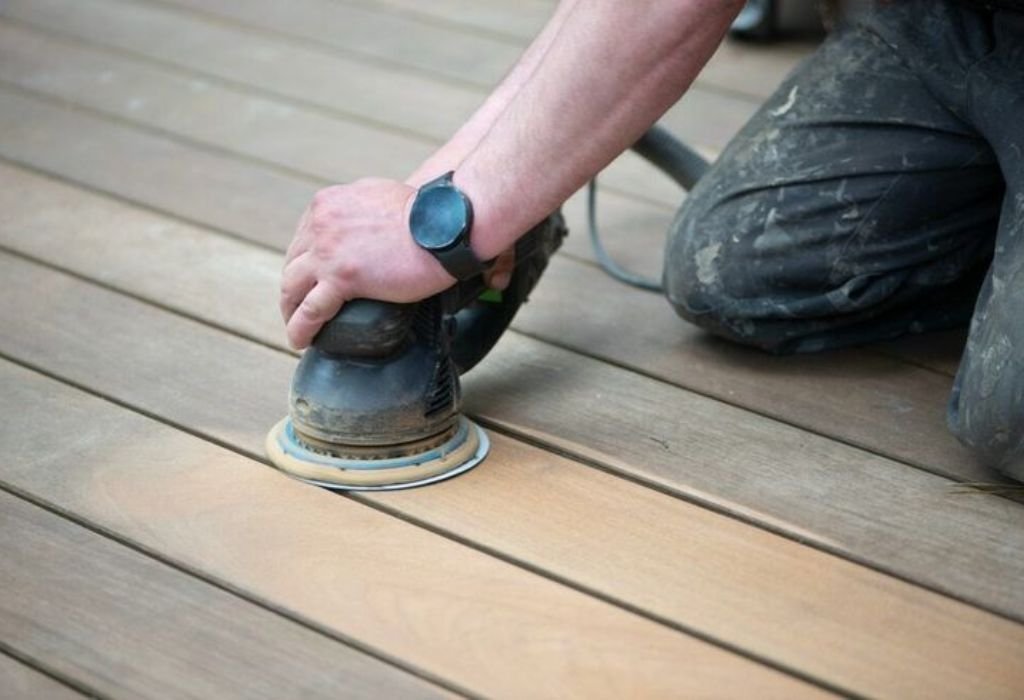
Choose the correct sanding grit based on your deck’s condition. For older decks, begin with 60-grit sandpaper to smooth rough spots and raised grain. Follow with 80- to 100-grit for a fine finish suitable for staining.
Always sand in the direction of the wood grain. Going against it can tear fibers and cause visible swirl marks. If using a random-orbit sander, move steadily and avoid lingering in one spot.
After sanding, remove all dust before staining. Even tiny particles left behind can prevent stain adhesion and cause uneven coloring. Wipe the deck with a damp cloth or use a tack cloth for a clean, smooth surface.
Common Mistakes to Avoid

The most frequent error homeowners make is sanding too soon. This mistake leads to clogged sandpaper, uneven texture, and staining problems later. Even if the surface feels dry, internal moisture can still be high.
Another common issue is not checking the weather forecast. Rain within 24 hours after sanding can reintroduce moisture, forcing you to wait all over again. Always schedule sanding during a stretch of warm, dry days.
Using the wrong sanding grit is another misstep. Starting with grit that’s too fine polishes the surface, closing the wood pores and preventing stain absorption. Too coarse a grit can gouge the surface, making it rough and uneven.
Many also forget to remove sanding dust completely. This invisible film prevents the stain from penetrating evenly, resulting in patchy color and poor durability.
Lastly, skipping board repairs before sanding is risky. Splintered or loose boards can damage your sander and compromise the final look. Fixing structural issues first ensures smooth, uniform sanding.
When to Stain After Sanding
Once sanding is complete, you can usually apply stain the same day — provided the weather remains dry and the wood surface feels clean and warm. Avoid waiting more than two days after sanding, as the wood can start absorbing airborne dust or moisture again.
Before applying any stain or sealer, check the manufacturer’s recommendations for moisture and temperature. Most stains perform best between 50°F and 90°F. Working outside these ranges can affect absorption and color consistency.
For the best result, apply the first coat evenly along the grain using a brush or pad. Let it dry thoroughly before adding a second coat. Each layer enhances color depth and protection from UV rays and water damage.
Proper timing between power washing, sanding, and staining ensures a finish that looks professional and lasts for years.
Long-Term Deck Maintenance Tips
After investing so much effort, maintaining the deck properly keeps it looking fresh. Regular cleaning and inspections help extend its lifespan.
Sweep the surface weekly to remove leaves, dust, and debris. Moisture trapped under dirt encourages mold growth and discoloration.
Once a year, wash the deck gently with mild detergent or specialized deck cleaner. Avoid using high pressure again unless you plan a full refinish, as repeated power washing wears down the wood.
Inspect for cracks, splinters, or loose nails every few months. Re-sand small rough areas lightly before they become major flaws.
Apply a fresh coat of sealer or stain every two to three years depending on sun exposure and traffic. According to Better Homes & Gardens, this regular upkeep prevents warping, fading, and costly replacements.
Good maintenance habits save time, money, and effort — and keep your deck safe and beautiful year after year.
Conclusion
The answer to how long after power washing can you sand a deck depends on weather, wood type, and moisture conditions — but the golden rule is patience. Waiting at least 48 hours, sometimes up to a week, ensures the wood is truly ready for sanding.
By understanding the drying process and testing properly, you protect your deck from damage, improve stain adhesion, and achieve a professional-grade finish. The few days you wait now guarantee a deck that remains smooth, strong, and stunning for years.
So don’t rush the drying phase — treat it as the foundation of your deck’s future durability. A little patience today means a longer-lasting deck tomorrow.

I’m Michael R. Turner, the founder, lead writer, and passionate DIY enthusiast behind 101diytools.com. With years of hands-on experience in home improvement and power tools, I built this platform to share practical tips, in-depth guides, and honest reviews to help DIYers of all skill levels tackle projects with confidence and the right tools.