How to Use a Power Hand Sander the Right Way
Every DIY enthusiast or professional woodworker knows the frustration of sanding by hand — hours of effort, aching wrists, and still uneven results. Nothing ruins a project faster than swirl marks or rough patches that stand out after painting or staining.
Now imagine transforming a dull, splintered board into a smooth, flawless surface in minutes instead of hours. That’s the power of using an electric hand sander correctly. When handled the right way, it doesn’t just save time; it delivers the kind of polished, professional finish that makes your work stand out.
Studies show that using a powered sander can reduce surface-prep time by nearly 60 percent compared to manual sanding. Yet, thousands of beginners damage their materials every year simply because they don’t understand how to use a power hand sander properly. From choosing the wrong grit to pressing too hard, small mistakes can turn an easy job into a costly do-over.
A power hand sander isn’t just about speed — it’s about control, consistency, and craftsmanship. Whether you’re refinishing furniture, restoring an old deck, or prepping cabinets for paint, mastering this tool lets you work faster while achieving a superior finish.
In this guide, you’ll learn exactly how to use a power hand sander the right way — from setup and safety to sanding technique, maintenance, and advanced tips. Each step will help you work smarter, protect your materials, and get that smooth, professional result every time.
What Is a Power Hand Sander and Why Use One?
A power hand sander is a compact, motor-driven tool designed to smooth surfaces quickly and evenly. It replaces the slow, uneven motion of manual sanding with consistent speed and controlled abrasion that removes imperfections efficiently.
Unlike hand sanding, which depends on personal pressure and stamina, an electric or cordless hand sander maintains uniform motion across the entire surface. This results in fewer scratches, reduced fatigue, and a professional-level finish that’s hard to achieve manually.
The tool uses replaceable sandpaper discs or sheets attached to a flat or orbital pad. As the pad vibrates or spins, it removes material from the workpiece, leveling edges, cleaning surfaces, and preparing them for paint or stain.
Power hand sanders are used in woodworking, home renovation, metal polishing, and even auto-body refinishing. They are ideal for smoothing rough lumber, stripping old finishes, or blending surfaces after filling and patching.
Because these sanders come in various types — from palm sanders to random orbital sanders — they can adapt to many surfaces and materials. Knowing which one fits your project determines both the quality of your finish and the time required to complete it.
What is a power hand sander?
It’s a handheld electric tool that smooths wood, metal, or plastic surfaces by rapidly moving abrasive sandpaper.
How does a power hand sander differ from manual sanding?
It works faster, maintains even pressure, and delivers smoother, more consistent results.
What materials can I use it on?
Most models can sand wood, remove paint from metal, or polish plastic when fitted with the right abrasive grit.
Why should I learn to use one correctly?
Proper use prevents swirl marks, gouges, or uneven surfaces that can ruin your finish.
Is a power hand sander suitable for beginners?
Yes — with basic safety knowledge and correct grit selection, even first-time users can achieve professional-looking results.
Safety First: Essential Precautions Before Sanding
Safety is critical when operating any power tool. Even small hand sanders generate dust, debris, and vibrations that can pose risks if handled carelessly.
Always start by equipping yourself with the right safety gear. Use safety goggles, a dust mask or respirator, and hearing protection when sanding for long periods. A well-ventilated workspace and non-slip shoes help prevent accidents.
Inspect your sander before each use. Make sure cords, switches, and dust ports are clean and damage-free. If the pad looks worn or uneven, replace it before turning the machine on.
Proper preparation prevents both injury and poor results. Clear your workspace of loose materials, secure your project firmly, and ensure the tool is unplugged before changing sandpaper or accessories.
What protective gear is needed?
Safety goggles, a dust mask or respirator, and ear protection should always be worn.
Why is dust collection important?
Fine sanding dust can harm your lungs and clog the tool, reducing efficiency and finish quality.
Should the tool be unplugged before replacing sandpaper?
Yes, always disconnect power to prevent accidental activation.
Can poor ventilation be dangerous?
Yes — sanding dust buildup can cause respiratory issues and even create fire hazards.
What setup mistakes lead to accidents?
Loose workpieces, damaged cords, and worn pads are common causes of poor performance and injury.
Choosing the Right Sander and Sandpaper Grit
Not all sanders are built the same. Understanding the different types helps you choose the best one for your project.
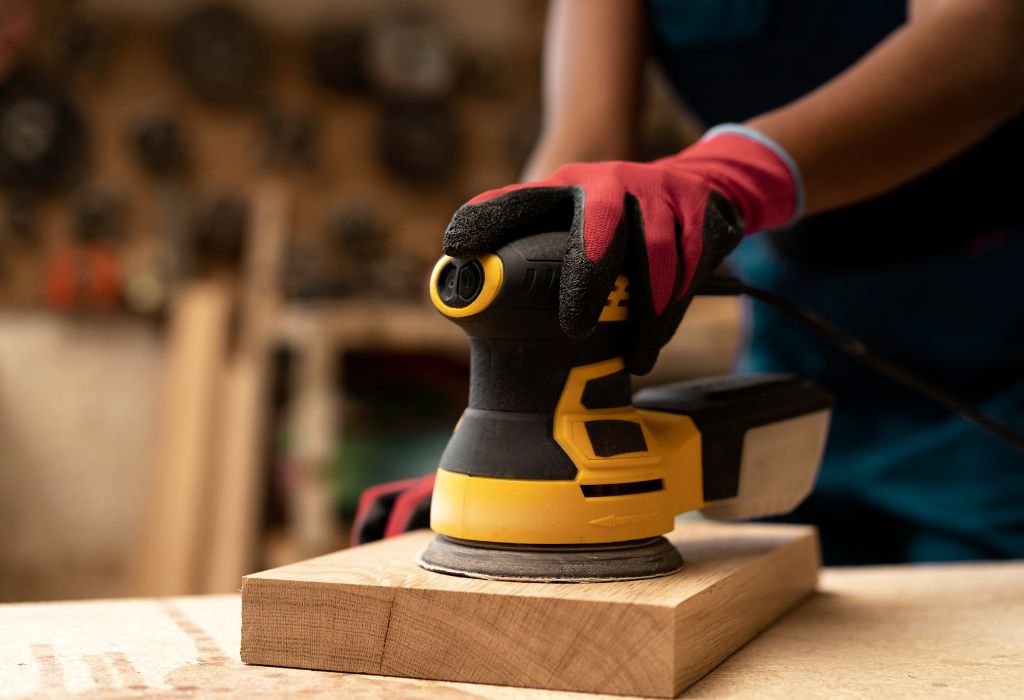
A palm sander is lightweight and great for light finishing. A random orbital sander offers faster removal with minimal swirl marks, while a belt sander is ideal for heavy material removal.
Equally important is choosing the correct sandpaper grit. Start with coarse grit (60-80) to remove paint or rough spots, then move to medium (100-150) for leveling, and finish with fine (180-220) for smooth surfaces.
The sandpaper type also matters. Aluminum oxide works well for wood, silicon carbide for metal or plastic. Hook-and-loop pads are easier to change and maintain consistent grip during use.
What type of sander should I use?
Palm and random orbital sanders work best for general tasks, while belt sanders handle aggressive material removal.
What grit should I start with?
Use coarse 60-80 for rough removal, medium 100-150 for smoothing, and fine 180-220 for finishing.
Why does grit selection matter?
The wrong grit can leave deep scratches or make your finish too smooth for paint to adhere properly.
Which sandpaper type fits my sander?
Choose sheets, discs, or belts depending on your model — always check compatibility before use.
How important is dust collection?
Very — built-in dust ports or vac attachments keep air clean and prolong pad life.
Step-by-Step: How to Use a Power Hand Sander
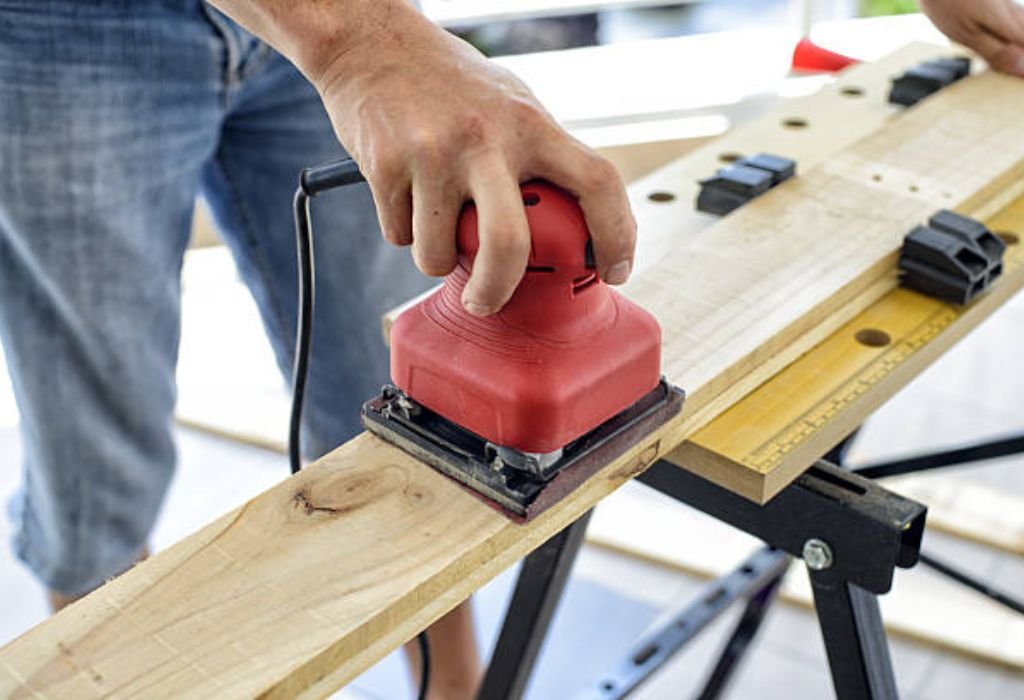
Using the tool correctly ensures both safety and the best finish possible. Always begin by securing your workpiece on a flat, stable surface.
Place the sander flat on the material before switching it on. This prevents gouging and helps start evenly.
Once running, apply light, even pressure — let the sander do the work. Moving too slowly can burn the surface; moving too quickly can leave rough patches.
Sand with the grain when using orbital or palm sanders to avoid visible scratches. Check your surface regularly, cleaning debris and replacing worn paper as needed.
Progress through grits systematically — coarse, medium, then fine — for best results.
Should the sander be on before touching the surface?
No, always set it flat first, then power on.
How much pressure should I apply?
Light pressure only — the motor handles the sanding for you.
Which direction should I move?
Follow the grain or move in small overlapping circles for even coverage.
How often should sandpaper be replaced?
Change it when clogged, worn, or when sanding slows down noticeably.
When is the surface ready?
When it feels uniformly smooth with no visible scratches or dull patches.
Common Mistakes and How to Avoid Them
Even experienced users make errors that affect finish quality. Understanding these mistakes helps you avoid them entirely.
One of the biggest is applying too much pressure. This can cause swirl marks or gouges. Let the tool’s weight do most of the work.
Another is skipping grit stages. Jumping straight from coarse to fine leaves hidden scratches that show up under paint or varnish.
Dust control is another overlooked factor. Without a dust extractor or vacuum attachment, debris builds up, clogging the paper and dulling results.
Sanding against the grain can tear fibers and create visible scratches. Always sand along or slightly across the grain depending on the tool type.
What happens if I press too hard?
Excess pressure damages both surface and sander pad, leaving deep marks.
Is it okay to skip grits?
No, each grit level removes the scratches left by the previous one for a flawless surface.
What if I sand against the grain?
You’ll create visible lines and a rough texture that’s difficult to fix.
Why is dust management crucial?
Dust affects visibility, clogging, and even breathing safety, impacting both finish and health.
What about wrong tool use?
Using a belt sander for finish sanding or a palm sander for heavy removal wastes time and materials.
Maintenance, Cleanup, and Finishing Techniques
Proper maintenance extends your tool’s life and keeps your workspace safe.
Always unplug or remove the battery before cleaning. Empty the dust bag or vacuum port frequently to prevent clogging and overheating.
Clean the sander’s housing and pad with a dry cloth after each project. Replace worn or damaged pads immediately to maintain even sanding motion.
After sanding, remove all dust from your workpiece. Use a tack cloth or shop vacuum to wipe the surface before applying paint or finish.
For final finishing, switch to very fine grit (220-320) to achieve an ultra-smooth texture. Wipe the surface clean again before applying your chosen finish or sealant.
How often should I empty the dust bag?
After every sanding session or whenever suction weakens.
What’s the best way to remove fine dust?
Use a tack cloth, vacuum, or compressed air for deep cleaning.
How do I know my pad needs replacement?
Uneven sanding or vibration often signals worn or damaged pads.
Can sandpaper be reused?
Only while still effective — clogged paper should be discarded.
Why is post-sanding cleaning important?
Leftover dust prevents paint or stain from adhering properly and ruins smoothness.
Advanced Tips and When to Upgrade Your Tool
Once you master the basics, optimizing your sanding technique and setup can further enhance your results.
For large surfaces like floors or decks, upgrading to a variable-speed random orbital sander gives greater control over aggressiveness and finish smoothness.
If you frequently work with detailed furniture or curved edges, consider a detail sander or corner tool for precise access.
Cordless sanders improve mobility and convenience, while smart dust-collection systems make cleanup faster and safer.
The cordless power-tool market is growing rapidly, driven by the need for efficiency and cleaner performance. Choosing a high-quality model with strong dust extraction and ergonomic grip enhances both comfort and finish consistency.
When should I upgrade my sander?
Upgrade when your projects require faster work, more control, or better dust collection.
Which features are worth paying for?
Variable speed, ergonomic grip, larger pad size, and efficient dust extraction systems.
Can I use the same sander for metal or plastic?
Yes, with proper abrasives, but dedicated tools often provide better control and finish.
How do I sand edges or corners?
Use a detail sander or hand-sanding sponge to follow contours smoothly.
What are upcoming trends?
Expect smart sanders with digital sensors, improved battery life, and automatic dust filtration.
Conclusion
Mastering how to use a power hand sander is one of the most valuable skills for any DIYer or professional finisher. With the right technique, grit sequence, and safety habits, you can turn rough materials into flawless masterpieces effortlessly.
Remember to choose the proper sander type, start with the correct grit, and let the tool’s motion — not excessive pressure — do the work. Keep your workspace clean, maintain your tool, and never skip finishing steps.
When used properly, a power hand sander saves time, boosts quality, and elevates every project from good to exceptional. Start practicing these techniques today and experience smoother, faster, and more professional results every time you sand.

I’m Michael R. Turner, the founder, lead writer, and passionate DIY enthusiast behind 101diytools.com. With years of hands-on experience in home improvement and power tools, I built this platform to share practical tips, in-depth guides, and honest reviews to help DIYers of all skill levels tackle projects with confidence and the right tools.