What Type of Power Sander Do I Need for Woodwork
Choosing the right power sander can make or break a woodworking project. Many DIYers begin sanding with excitement, only to find their wood covered in swirl marks or gouges that ruin the final finish. The problem isn’t effort—it’s using the wrong type of sander for the job.
Every power sander is built for a specific purpose. Some are designed for heavy stock removal, while others deliver delicate finishing touches. Using the wrong tool can waste hours of work and expensive materials.
According to The Home Depot, understanding your project type and matching the right tool can reduce sanding time by up to 40%. Similarly, Better Homes & Gardens highlights that random orbital sanders produce significantly smoother surfaces than traditional orbital models.
The question most woodworkers ask is simple but crucial: what type of power sander do I need to get the best balance of speed, precision, and surface quality? With so many options—belt, orbital, detail, and random orbit—it can be difficult to decide which tool fits your workflow.
What Type of Power Sander Do I Need
Choosing the right power sander determines how smooth and professional your final surface will look. Each tool is built for a specific sanding motion and intensity, and using the wrong one can easily cause scratches, dips, or uneven finishes that ruin the appearance of your work.
A belt sander is ideal for heavy stock removal and leveling rough wood quickly. Its continuous belt moves in a straight path, cutting through imperfections fast but demanding control to avoid gouges or burn marks.
Orbital sanders, on the other hand, move in tight circular vibrations that remove less material but deliver greater precision, especially on edges or smaller areas.
For most furniture or finishing projects, the random orbital sander offers the best balance between speed and smoothness.
Its dual-action motion—spinning and orbiting simultaneously—prevents visible swirl marks and creates a clean, uniform texture ready for staining or painting. This versatility makes it the most popular choice among professionals and DIY users alike.
Selecting a sander should always align with the surface size, wood hardness, and desired finish quality. Large tabletops and doors demand aggressive tools, while fine cabinetry benefits from gentle, controlled sanding.
By understanding how each sander type behaves and pairing it with the right grit sequence, every project can move from rough to refined with efficiency and confidence.
Belt Sanders — When Speed Matters Most
When it comes to removing large amounts of material quickly, belt sanders are unmatched in performance. These powerful tools use a continuous loop of abrasive paper stretched over two rotating drums to deliver aggressive sanding action.
Their speed and power make them ideal for flattening tabletops, leveling uneven boards, and stripping away old paint or varnish efficiently.
The strength of a belt sander lies in its ability to handle heavy-duty work that would take hours by hand. However, this same strength demands precision and care.
Applying too much pressure or holding the sander in one spot for too long can dig deep grooves into the surface. Smooth, even strokes along the wood grain are essential to maintain a flat, uniform finish.
For best results, it’s important to start with coarse grit sandpaper—typically 60 or 80—for rapid removal, then move to finer grits like 100 or 120 for smoothing before switching to a finishing sander.
Belt sanders excel at the early stages of sanding but are not designed for the final touch. Transitioning to a random orbital sander afterward ensures that scratches and lines from the belt are fully erased.
Modern belt sanders often feature variable speed controls, dust collection systems, and ergonomic handles for better control and cleaner workspaces.
When used properly, these machines can transform rough lumber into perfectly level surfaces, saving both time and effort. For large flat panels and furniture pieces, a belt sander remains the tool of choice for professionals seeking power, speed, and precision.
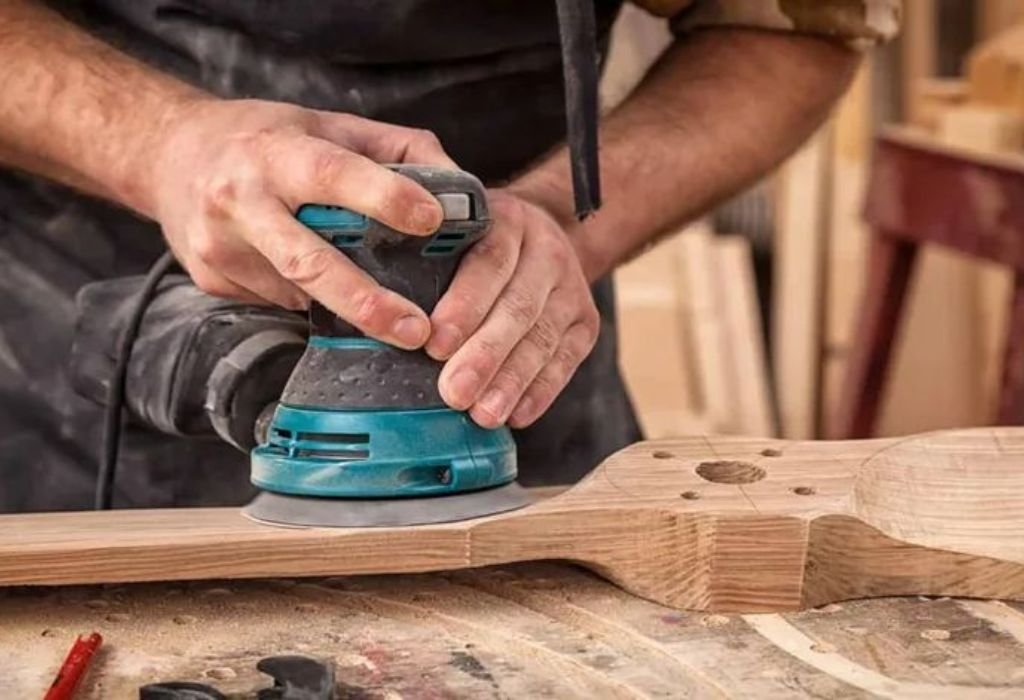
Random Orbital Sanders — The Versatile Finisher
Among all power sanders, the random orbital sander stands out as the most versatile and widely used tool for both professionals and DIY enthusiasts.
Its unique dual-action movement—combining rotation and orbital motion—delivers a swirl-free, consistent finish across a variety of wood surfaces. This makes it perfect for everything from heavy sanding to fine finishing without the risk of visible scratch patterns.
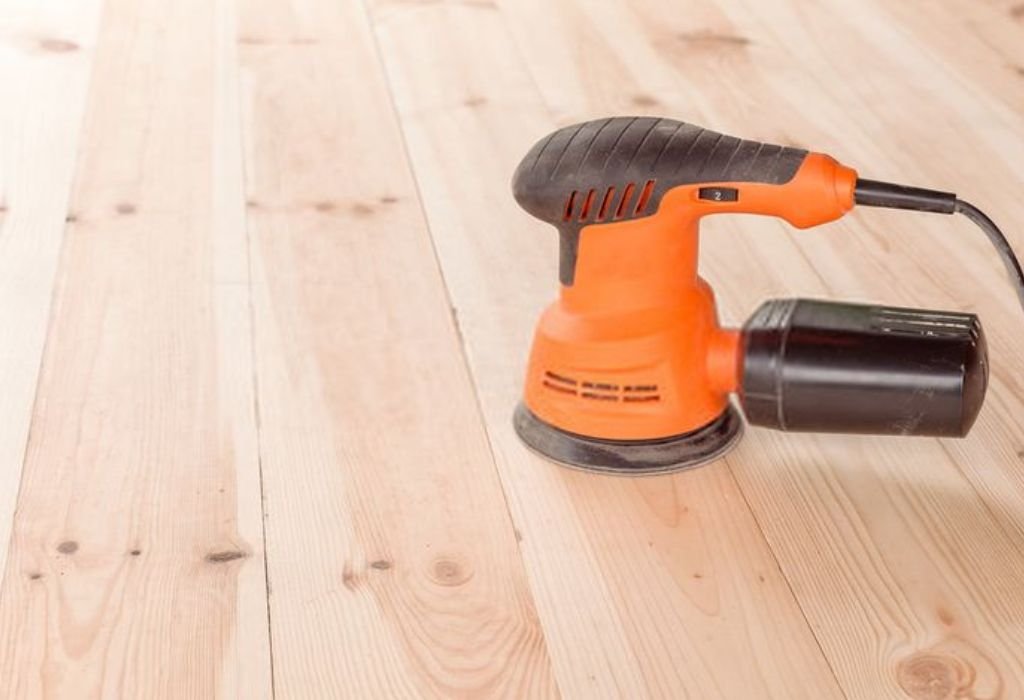
The design of a random orbital sander allows it to remove material quickly while maintaining control. Its round pad, usually 5 or 6 inches in diameter, evenly distributes pressure to avoid gouging the wood.
When paired with the right grit sequence, it can efficiently transition from surface leveling to final polishing. This versatility eliminates the need for multiple specialized tools, saving time and space in the workshop.
Variable speed control is one of the standout features of this sander. It lets users fine-tune performance depending on the task—lower speeds for delicate finishes and higher speeds for more aggressive sanding.
Advanced dust collection systems built into most models also help maintain a cleaner work environment and extend sandpaper life by reducing clogging.
Whether preparing raw wood, smoothing filler, or sanding between coats of finish, a random orbital sander ensures professional results with minimal effort. Its ability to handle both power and precision makes it an essential tool in any woodworking setup.
For most general applications, it remains the go-to solution for achieving a flawless, ready-to-finish surface efficiently and safely.
Orbital and Detail Sanders — Precision and Edges
When the project calls for fine detail work or edge sanding, orbital and detail sanders deliver the precision larger tools can’t achieve.
These sanders are designed for control, not aggression, making them perfect for finishing trim, cabinet frames, or small furniture parts where accuracy matters more than speed.
Their gentle motion and compact size allow them to reach corners, angles, and delicate contours without damaging the surrounding surface.
Orbital sanders, often referred to as “sheet sanders,” operate with a simple circular or back-and-forth motion. This movement provides even sanding on flat areas and works best with medium to fine grits ranging from 120 to 220.
They’re especially useful for preparing surfaces between coats of finish or removing minor imperfections before the final polish. Because they accept standard sandpaper sheets, they’re also cost-effective and easy to maintain.
Detail sanders, sometimes called “mouse sanders,” go a step further by focusing on precision in tight spaces. Their triangular pads reach corners, edges, and joints that round pads cannot access.
These tools are invaluable for intricate woodworking, carvings, or small repairs where accuracy and a smooth touch are crucial.
Although orbital and detail sanders don’t remove material as quickly as belt or random orbital sanders, their control and finesse make them essential in the finishing stage.
They bring refinement and consistency, allowing every corner and contour of a piece to look professionally done. When perfection in edges and details matters, these sanders complete the process with clean, uniform precision.
Matching Sander to Project — A Practical Decision Matrix
Every woodworking project demands a different balance of power, control, and precision. Understanding which sander to use for each situation not only improves efficiency but also determines the overall finish quality. The goal is to match the tool’s capability to the surface type, size, and level of detail required.
For large, flat surfaces like tabletops, doors, and hardwood floors, belt sanders are the most efficient choice. Their speed and aggressive sanding motion can level uneven boards, remove finishes, and shape rough lumber in minutes.
However, once the heavy work is done, it’s best to switch to a random orbital sander for smoother refinement. This combination ensures that deep sanding marks are erased and the surface becomes perfectly even before finishing.
When working with cabinetry, drawers, or furniture frames, the random orbital sander shines as the most versatile tool. It provides excellent control and uniform sanding results on both broad and narrow surfaces.
For edges, corners, and tight spots where circular pads can’t reach, a detail sander or sheet sander becomes essential. These smaller tools allow precise sanding around joints, carvings, and contours without damaging the surrounding areas.
Matching the sander also involves considering the type of wood and finish desired. Hardwoods benefit from higher grit progressions, while softwoods require gentler sanding to avoid compression marks.
By pairing the right tool and grit for each phase—coarse removal, smoothing, and final polishing—woodworkers can achieve professional-grade results on every project with minimal effort and maximum consistency.
Grit Progression — The Other Half of the Decision
Choosing the right power sander is only half the battle; the other half lies in selecting the correct grit sequence. Grit progression determines how smooth the final surface will be and how efficiently imperfections are removed.
Skipping grits or starting with the wrong one often leads to visible scratches, uneven texture, or wasted effort. Understanding the purpose of each grit stage helps produce a flawless, professional finish.
Coarse grits, typically between 40 and 80, are designed for heavy material removal. They’re ideal for stripping old paint, leveling rough boards, or removing deep imperfections.
Once the surface is even, medium grits like 100 to 150 take over, refining the texture and erasing marks left by coarser paper.
Fine grits, ranging from 180 to 220, prepare the surface for finishing, ensuring that stains or coatings apply evenly without blotching.
Proper grit progression means gradually stepping up through the grits without skipping numbers. Each stage removes the scratches left by the previous one, leaving the surface progressively smoother.
For most wood projects, an effective sequence would be 80 → 120 → 180 → 220. However, the final grit can vary depending on the type of finish—glossy coatings benefit from finer sanding, while matte finishes need less refinement.
Following a structured grit progression saves time, reduces rework, and enhances the appearance of the final product. Combined with the correct sander, grit selection transforms rough timber into a surface ready for flawless painting, staining, or polishing.
Dust Extraction, Pads, and Discs — Small Choices, Big Gains
Dust control and pad selection may seem secondary to sanding performance, but they play a crucial role in achieving consistent, high-quality results.
Even the most advanced sander loses efficiency when clogged with sawdust, and airborne dust can quickly compromise visibility and finish smoothness.
Investing in proper dust extraction and the right sanding accessories not only improves results but also protects health and extends tool life.
Modern power sanders often include built-in dust collection systems, ranging from simple bags to advanced vacuum ports.
A well-connected dust extractor keeps abrasive surfaces clean, prevents clogging, and allows sandpaper to cut efficiently for longer periods.
Multi-hole sanding discs improve airflow, drawing dust through the pad and minimizing swirl marks caused by trapped particles. Cleaner sanding also reduces the risk of dust contaminating paint or stain during finishing.
Pad selection directly influences control and surface quality. Hard pads deliver flatter results on large, even surfaces, while soft pads flex to follow curves and contours without over-sanding edges.
Interface pads, which attach between the backing pad and the disc, add cushioning for delicate work and help achieve ultra-smooth finishes. Hook-and-loop discs are favored for their convenience, allowing quick grit changes without adhesive residue.
Choosing compatible pads, discs, and extraction systems may seem minor, but together they make a major difference in sanding performance.
With proper airflow, dust removal, and surface contact, every pass becomes cleaner, faster, and more precise—turning an ordinary sander into a professional-grade finishing machine.
Budget, Ecosystem, and Ergonomics
Selecting the right power sander isn’t only about performance—it’s also about long-term value, comfort, and compatibility. A well-chosen tool fits seamlessly into your workflow, reduces fatigue, and supports future tool upgrades.
Evaluating the budget, ecosystem, and ergonomic features ensures that your purchase serves both current and future projects efficiently.
Budget plays a significant role in determining tool quality and features. Entry-level sanders may handle basic tasks, but professional models often include variable speed control, enhanced dust collection, and vibration reduction technology that significantly improve results.
Spending slightly more on a reliable, durable sander often pays off over time by reducing maintenance costs and producing better finishes.
Ecosystem compatibility is another smart consideration. Many brands now offer cordless sanders powered by shared battery platforms, allowing you to use the same batteries across multiple tools.
This not only saves money but also increases portability and convenience, especially when working in areas without power access.
Accessories such as sanding pads, dust bags, and extraction hoses are also easier to source when sticking within a single brand ecosystem.
Ergonomics is equally important for comfort and precision. A well-balanced sander with a comfortable grip reduces hand fatigue and allows better control during extended sanding sessions.
Features like low vibration and lightweight design further enhance handling and reduce strain. Choosing a sander that fits naturally in your hand can make hours of work feel effortless while ensuring consistent, professional results every time.
Safety, Technique, and Maintenance

Proper sanding technique and tool care are essential for both safety and achieving a flawless finish. Power sanders operate at high speeds, and even minor mistakes—like applying excessive pressure or skipping dust control—can lead to uneven results or damage.
Following safe practices and maintaining your equipment ensures smoother work, cleaner results, and longer tool life.
Safety begins with preparation. Always wear safety goggles, a dust mask, and hearing protection to guard against flying debris, fine particles, and prolonged noise exposure.
Secure your workpiece firmly before sanding, and ensure the area is free from loose materials that could obstruct movement.
When starting the sander, keep it slightly off the surface, then lower it gently once it reaches full speed to prevent gouging or burn marks.
Proper technique relies on consistency and patience. Allow the tool’s weight to do the work rather than forcing it down.
Move slowly along the grain in overlapping passes to maintain even sanding and avoid swirl marks.
Between each grit change, clean the surface with a vacuum or tack cloth to remove dust that can scratch the wood.
Regular maintenance keeps performance at its best. Replace worn pads, inspect power cords for damage, and clean ventilation openings to prevent overheating. Dust extraction systems should also be emptied frequently to maintain suction efficiency.
A well-maintained sander delivers smoother finishes, lasts longer, and operates more safely. Mastering both control and care ensures each sanding project ends with professional, consistent results.
Future Trends — Smarter Abrasives and Cleaner Shops
The future of sanding is evolving rapidly as technology transforms both tools and abrasives. Manufacturers are focusing on innovations that make sanding faster, cleaner, and more precise than ever before.
From advanced dust extraction systems to intelligent sensors, these improvements are setting new standards in woodworking efficiency and finish quality.
Modern sanding discs now feature engineered coatings that resist clogging and maintain sharpness for longer periods. Ceramic and zirconia abrasives outperform traditional aluminum oxide by offering higher cutting power and extended life.
These advancements reduce the need for frequent grit changes and lower overall material costs. In addition, stearated coatings help minimize heat buildup, preventing burn marks on sensitive wood surfaces.
Dust control is another area seeing major improvements. HEPA-grade filtration, antistatic hoses, and multi-hole pad systems are becoming common in professional sanders.
These designs not only protect the user’s health but also enhance visibility and surface quality by keeping the workspace virtually dust-free. The integration of automatic suction systems that adjust airflow based on tool speed further streamlines performance.
Ergonomics and connectivity are also shaping the next generation of power sanders. Brushless motors deliver longer lifespans and consistent torque, while smart tools can now track runtime and maintenance needs through digital apps.
As technology continues to evolve, sanders are becoming cleaner, quieter, and more efficient—making high-end results achievable for both professionals and hobbyists.
The future of sanding promises not just smoother surfaces, but smarter, safer, and more sustainable workshops.
Conclusion
Choosing what type of power sander do I need depends on understanding both the material and the finish you want to achieve.
Each sander has a unique role in woodworking: belt sanders deliver speed and power for rough leveling, random orbital sanders provide balance and smoothness for versatile tasks, and orbital or detail sanders refine the final details with precision.
When used together with the correct grit progression, they transform rough lumber into beautifully finished surfaces ready for staining or coating.
A successful sanding process is not about rushing but about control and consistency. Working through grits gradually—starting coarse and finishing fine—ensures that every scratch left by the previous step disappears completely.
Combining the right technique, light pressure, and effective dust extraction results in an even, professional-grade finish that enhances the natural beauty of the wood.
Long-term success also depends on investing in quality tools, maintaining them properly, and using them safely. Features like ergonomic grips, variable speed control, and advanced filtration systems may seem small but make a significant difference in comfort and results.
Matching the right sander to each stage of your project saves both time and material while achieving flawless craftsmanship.
Ultimately, mastering the use of power sanders is about understanding the balance between power, precision, and patience.
With the right sander, proper grit progression, and clean technique, every woodworking project can move from rough stock to a polished, professional masterpiece that reflects true attention to detail.

I’m Michael R. Turner, the founder, lead writer, and passionate DIY enthusiast behind 101diytools.com. With years of hands-on experience in home improvement and power tools, I built this platform to share practical tips, in-depth guides, and honest reviews to help DIYers of all skill levels tackle projects with confidence and the right tools.