Why Rivet Won’t Pop: A Beginner’s Guide to Solving the Problem
Figuring out why rivet won’t pop can be tricky when you’re just starting out. It’s a common problem that frustrates many beginners. Don’t worry, though; this guide is here to help! We’ll explore the main reasons this happens, offering simple, step-by-step solutions to get your project back on track. We’ll explore all the key aspects, so you can learn exactly what to do. Let’s get started!
The Basics of Riveting and Why It Matters
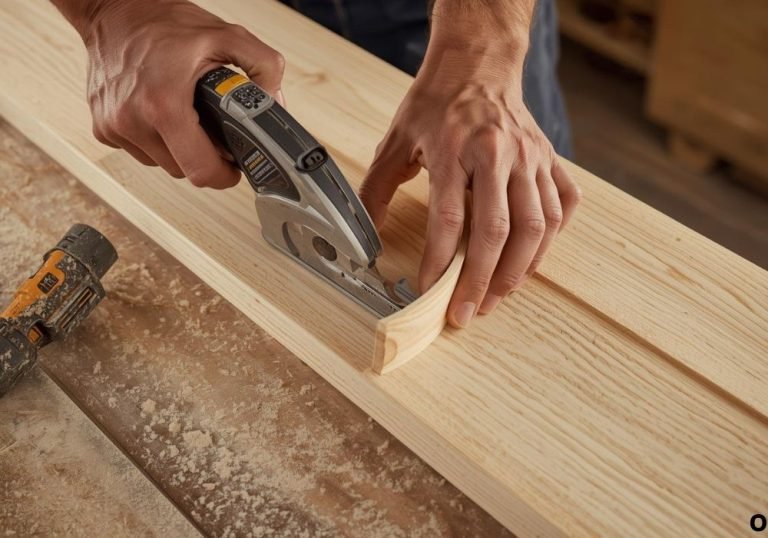
Riveting is a fundamental joining technique used in various industries. From crafting to construction, it helps secure materials together with a strong, lasting bond. The process involves inserting a rivet (a type of fastener) into pre-drilled holes in the materials, and then deforming the rivet’s tail using a specialized tool to create a head on the other side. This secures the pieces tightly. A correctly installed rivet is strong, resists vibration, and can support significant loads. Incorrect riveting can lead to weak joints, potential failure, and wasted time and resources.
The strength of a riveted joint depends on several factors, including the type of rivet, the material it’s made from, the material of the joined parts, the size of the holes, and the force used to set the rivet. Understanding these factors is key to successful riveting, preventing problems like a rivet that won’t set properly. Inconsistent riveting can result in a part that doesn’t meet the necessary standards, leading to rework or even rejection. Learning the proper techniques helps ensure your projects are secure and reliable.
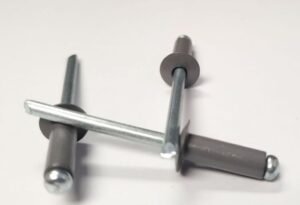
Rivet Types and Materials: Choosing the Right Fastener
There are different types of rivets, each designed for specific applications. Some common types include solid rivets, blind rivets (also known as pop rivets), and structural rivets. Solid rivets are generally the strongest but require access to both sides of the material for setting. Blind rivets, on the other hand, can be installed from one side, making them ideal for situations where the back side is inaccessible. Structural rivets offer a balance of strength and ease of use. The choice of rivet depends on the job’s demands, material, and accessibility constraints.
The materials from which rivets are made vary too, and this choice matters. Steel rivets are common due to their strength and durability, making them suitable for many applications. Aluminum rivets are lighter and corrosion-resistant, making them a great fit for use on aircrafts and outdoor projects. Copper rivets are often used in situations where electrical conductivity or corrosion resistance is needed. Understanding the characteristics of each material will improve the outcome of your projects.
- Solid Rivets: These are the strongest and are driven using a hammer or a rivet gun. They require access to both sides of the material.
- Blind/Pop Rivets: Easily installed from one side, a mandrel pulls the rivet head.
- Structural Rivets: Made to handle high loads and stresses.
- Aluminum Rivets: Best for projects where weight and resistance to corrosion are important.
- Steel Rivets: Ideal when maximum strength and durability is needed.
For example, if you are building a metal shed, you might choose steel rivets for their strength. If you are attaching metal panels to a wooden frame, you might prefer blind rivets for their ease of use. Choosing the correct rivet and material ensures the strength and longevity of your projects.
Tooling for Riveting: Essential Equipment
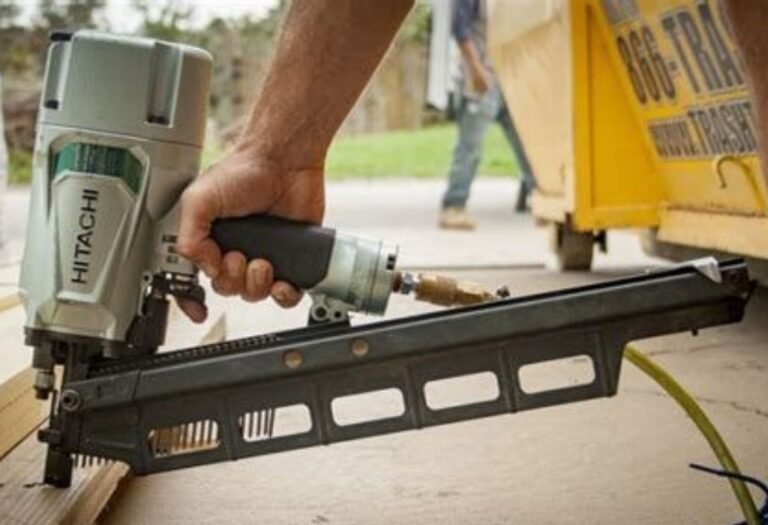
Successful riveting requires the right tools. For solid rivets, you’ll need a rivet hammer or a pneumatic rivet gun, a bucking bar (to support the rivet head during setting), and various rivet sets. For blind rivets, a rivet gun or a rivet tool is essential. These tools come in different sizes and power levels, so choose the right one for your projects. A rivet gun works by pulling a mandrel through the rivet, which expands and secures it.
Additionally, you may need a drill (for preparing holes), measuring tools (for accurate positioning), and safety gear, such as safety glasses. Choosing the correct tools will ensure that you achieve quality results with your riveting projects. Also, make sure that the rivet gun is of good quality and that the settings are appropriate for the rivet material, the metal being riveted, and the rivet’s diameter. Ensure the rivet gun is not too powerful for the materials you’re working with, as this may be a source of problems.
- Rivet Hammers and Guns: Used for solid rivets, a hammer or pneumatic gun deforms the rivet to create a secure joint.
- Rivet Sets: Used with rivet hammers, they help shape the rivet head properly.
- Rivet Guns: Specifically designed for installing blind rivets and pull the mandrel to set the rivet.
- Bucking Bars: Essential to support the rivet and provide a solid surface to work against.
- Drills and Measuring Tools: Needed for hole preparation and precision.
Before you start, check your equipment’s condition and make sure it is in good working order. Damaged tools can result in incorrect riveting and potential injuries. Regular maintenance, such as cleaning and lubrication, will extend the life of your equipment and prevent future problems.
Why Rivet Won’t Pop: Common Issues and Troubleshooting
If you’re facing a situation where why rivet won’t pop, it’s a common challenge. Often, the issue is not complex, and a few quick checks can solve the problem. One frequent cause is not applying enough force to the rivet gun or tool. Insufficient force prevents the rivet from expanding properly, leaving it loose and ineffective. Another cause could be using the wrong type or size of rivet for the job, causing the rivet to not set correctly. Checking your equipment and the rivets will solve most of the problems.
Furthermore, issues may arise due to problems with the rivet tool. For example, the tool might be clogged or malfunctioning. Inspecting your tools and rivets is vital. You should also verify that the material being joined is appropriate for riveting. Some materials, such as extremely thick or hard metals, may be hard to rivet properly. Let’s delve into the major causes in more detail.
Insufficient Force or Pressure
One of the primary reasons why a rivet won’t set is the lack of proper force. The rivet gun or tool must exert enough pressure to deform the rivet, causing it to expand and grip the material. If the force isn’t sufficient, the rivet will not fully expand, resulting in a loose joint. This is a common problem, especially for beginners who may not apply enough pressure at first.
Pneumatic rivet guns (air-powered) can have issues such as a low air pressure from the compressor. Manual rivet tools also need a good grip and steady squeeze to generate the required force. Make sure that the tool is appropriate for the rivet size and material and has a good power rating. If you are using an air tool, make sure your air compressor’s pressure is set to the manufacturer’s recommended level. Consider the material and choose the proper settings.
- Check Air Pressure: For pneumatic tools, confirm the air compressor is supplying enough pressure.
- Apply Firm Squeeze: For manual tools, ensure you apply firm, steady pressure.
- Verify Tool Settings: Check tool settings for the correct rivet type and material.
- Inspect the Tool: Make sure the tool itself is functioning properly, without clogs.
- Consider Material Thickness: If the material is too thick, the tool may not be adequate.
To fix this, if you’re using a manual tool, try using a firmer squeeze. For pneumatic tools, increase the air pressure to the recommended setting. If that doesn’t work, review the tool’s settings. Sometimes, even the angle you use can impact the outcome. A steady hand and a bit of practice can solve many riveting problems.
Incorrect Rivet Size or Type
Choosing the incorrect rivet size or type is another major cause of the issue of why rivet won’t pop. A rivet that’s too short won’t reach far enough to create a good grip. A rivet that’s too long may create a very large head that weakens the bond. Additionally, using the wrong rivet type for the materials involved can cause the rivet to fail. Blind rivets are great when you have only one-sided access, but if the materials are very thick, a different solution is best.
To choose the right rivet, measure the total thickness of the materials being joined. Add the material thicknesses and ensure the rivet’s grip range falls within that measurement. Check the material types; some materials may require specific rivet materials to achieve a secure hold. Review the manufacturer’s suggestions on the type and size of rivet that is appropriate for the task. The best practice is to always test a rivet or two before you start your project.
- Measure Material Thickness: Add up the thickness of the materials.
- Rivet Grip Range: Make sure the rivet’s grip range matches the total material thickness.
- Rivet Length: Choose a rivet length that provides proper grip.
- Material Compatibility: Select the correct rivet type for your materials.
- Consult the Manual: Check the instructions of the project.
An easy fix is to double-check the rivet’s grip range and select the appropriate size and type for your specific materials. Always test a few rivets to ensure proper fit before moving forward. This way, you won’t waste time and materials. If you aren’t certain, find an expert to consult before you start.
Tool Malfunctions and Wear
Sometimes, the rivet tool itself is the problem. A jammed or broken rivet tool can prevent the rivet from setting. Common issues include clogged nozzles or broken jaws (in blind rivet tools), which won’t allow the mandrel to pull through, preventing the rivet from expanding. A worn tool might not deliver enough force, which will also cause the rivet to not set correctly.
Regular maintenance can prevent many tool-related problems. Clean the tool regularly, lubricating moving parts according to the manufacturer’s instructions. Keep an eye out for any signs of wear, such as chipped jaws or leaks. If your tool is damaged, you may need to replace the damaged parts or the entire tool. Proper care and maintenance will improve the lifespan and make it function correctly.
- Check for Clogs: Clean the tool’s nozzle and jaws.
- Inspect Jaws: Replace worn or broken jaws.
- Lubricate: Apply lubricant according to the instructions.
- Check for Leaks: For pneumatic tools, fix any air leaks.
- Examine the Mandrel: Make sure the mandrel is straight.
To resolve tool-related issues, you should first try cleaning the tool thoroughly. If that doesn’t work, inspect the jaws and the mandrel. Repair or replace the tool, depending on the severity of the problem. Routine maintenance keeps your tools in top condition and prevents these types of problems.
Advanced Troubleshooting: Beyond the Basics
Sometimes, the reasons why rivet won’t pop require a deeper look. These involve factors like hole preparation, material properties, and environmental conditions. If you’ve already checked the basics and still face problems, these advanced steps can help you. They involve a detailed examination of the conditions and techniques.
Material properties, such as hardness and thickness, play a key role in riveting. Extremely thick or dense materials can be difficult for standard rivets to penetrate and set. Hole preparation is also important; if the holes are too large, the rivet might not grip properly, while holes that are too small can prevent the rivet from fitting correctly. Let’s delve deeper into these advanced troubleshooting methods.
Hole Preparation Problems
The holes you drill for the rivets are critical. If they are the wrong size or poorly aligned, it can create issues. Holes that are too large will not give the rivet enough material to grip, creating a loose joint. Holes that are too small can make it impossible for the rivet to be inserted. Poor alignment will make the riveting process hard and may cause the rivet to bend or deform improperly.
To avoid these problems, always check the rivet manufacturer’s instructions for hole size suggestions. Use a drill press to get clean, precise holes. Ensure the holes are perfectly aligned. If you need to make corrections, use a reamer to make sure the hole is straight and round, but do not make it any larger than the maximum. If you do make a hole that is too large, consider moving the rivet to a new location. Double-check your measurements to ensure accuracy.
- Correct Hole Size: Use the right drill size for your rivets.
- Accurate Alignment: Make sure the holes line up perfectly.
- Clean Holes: Make sure there are no burrs or debris.
- Use a Drill Press: For precise, straight holes.
- Check Pilot Holes: Ensure pilot holes are accurate.
To solve issues with hole preparation, carefully measure and drill the holes according to the rivet specifications. If you’ve made a mistake, you may need to use a larger rivet, move the rivet, or fill the hole. Proper hole preparation is a foundation for successful riveting.
Material Properties and Limitations
The type and thickness of the materials being joined can impact whether a rivet will set properly. Harder materials, like some steels, may require more force. Thicker materials can need a longer rivet or a more powerful tool. If the materials are brittle, the rivet may not grip the materials.
When working with these materials, select the correct rivet type and size for the job. You may need a stronger rivet or a more powerful tool. Make certain that the rivet is designed for the specific type of materials. If in doubt, test a few rivets before starting your project. Consult the material’s properties for more information. Researching the materials you are using is essential.
- Material Hardness: Choose rivets that are suited for harder materials.
- Material Thickness: The rivet’s grip range has to accommodate the thickness.
- Material Type: Match the rivet material to the materials being joined.
- Material Flexibility: Be aware of materials that are prone to cracking.
- Consult a Professional: When dealing with unknown materials.
If you have problems with material properties, make sure you choose the right rivets and tools for the job. Make sure the rivets can handle the materials you are working with. Testing and experimenting are a great way to handle problems related to materials.
Environmental Factors and Conditions
Environmental factors can have an effect, too. Temperature and humidity can slightly impact the materials. Rust can weaken materials, and excessive moisture can cause corrosion. The work area itself should be clean, dry, and well-lit. The wrong environment can cause problems, so it is important to take these environmental factors into account.
To fix these issues, protect your materials from extreme temperatures and humidity. Work in a dry, well-lit area. Remove any rust or debris from the materials. Clean the project and the tools. Ensure there is nothing that will cause issues. By addressing environmental factors, you can improve the quality of your work.
- Temperature Control: Avoid working in extreme temperatures.
- Humidity Control: Keep your work area dry.
- Cleanliness: Make sure the work area is clean and free of debris.
- Storage: Store the materials properly.
- Check for Rust: Address any signs of rust or corrosion.
By controlling the environment, you ensure better results. Keeping the work area clean, dry, and at a moderate temperature is crucial. Address any signs of damage or wear before starting. Taking these precautions is important to your project’s success.
Alternative Fastening Methods
Sometimes, if you’re consistently running into the issue of why rivet won’t pop, alternative fastening methods can be helpful. If you have been struggling to make the rivet work, these might provide a better solution. There are times when it’s better to use a different joining technique. Let’s explore some of these alternatives.
The right fastening method depends on the project’s specifics, including the materials, load requirements, and aesthetic preferences. Screws and bolts are great for projects that need to be disassembled. Welding may be a superior option. Understanding your choices helps you achieve the best outcome.
Screws and Bolts: When to Choose Them
Screws and bolts provide different advantages over rivets, especially when you need to take the project apart. They are great when you want the option to disassemble the parts later, for adjustments or repairs. They can also be a better choice for materials too thin for riveting, or when greater clamping force is needed. Choosing between screws, bolts, and rivets is all about the project’s needs.
Screws are typically used in lighter applications, providing a secure joint without the need for specialized tools. Bolts are usually used for projects that will experience higher stress or require more strength. Bolts and screws also come in a variety of materials and sizes to fit various applications. To choose between these two, evaluate your project’s design requirements. The correct choice will make your project easier to complete and improve its longevity.
- Disassembly: Screws and bolts let you easily take parts apart.
- Thin Materials: Screws work well with thinner materials.
- Adjustments: Screws and bolts allow for easy adjustments.
- Clamping Force: Bolts can deliver greater clamping force.
- Tool Availability: Screws and bolts are easier to work with.
If you need to change your project later or if the materials are not suited for riveting, screws and bolts can be a better choice. You can adjust the tightness of the joint. You will also get a stronger bond in some situations.
Welding: For Permanent Joints
Welding creates permanent joints between metals using heat. It’s a powerful method that’s ideal for projects that must be incredibly strong and rigid. Welding is an excellent choice for a variety of tasks where the look or strength of the joint is important. However, it requires specific skills and equipment, so it isn’t always the easiest option for beginners.
Different welding techniques such as MIG (Metal Inert Gas), TIG (Tungsten Inert Gas), and stick welding are suited for various metals and applications. Choosing the appropriate welding method depends on the type of metals being joined, the required strength, and the appearance. If you need a strong, permanent bond, welding might be a great option for you. Safety must be a priority when welding.
- High Strength: Welding creates very strong joints.
- Permanent: Welded joints are meant to be permanent.
- Versatile: Welding works with many different metals.
- Appearance: It can offer a clean, finished appearance.
- Requires Skill: Welding requires training and practice.
When selecting welding, consider the long-term use and the need for maximum strength. While it may require more equipment and skill, it offers a sturdy and aesthetically pleasing finish. Always make safety your top priority when welding.
Frequently Asked Questions
Question: What do I do if a rivet spins and won’t set?
Answer: If a rivet spins without setting, it means it’s not gripping the material. You may need to remove it (by drilling it out) and try again. Ensure the hole is the correct size, the rivet is the right type, and you’re using sufficient force.
Question: How can I tell if a rivet is set correctly?
Answer: A correctly set rivet should have a head on both sides that is flush with the material or slightly rounded. It should be tight, without any movement between the joined pieces. Inspect it for proper shape and tightness.
Question: Can I use rivets on wood?
Answer: Rivets are generally used for joining metal. They aren’t usually recommended for wood because they do not grip the wood effectively. Screws or other fasteners designed for wood are typically a better solution.
Question: How do I remove a rivet if I made a mistake?
Answer: You can remove a rivet by drilling out the head with a drill bit that is the same size as the rivet body. Be careful not to damage the surrounding material while drilling.
Question: Why is my rivet gun not pulling the mandrel?
Answer: If your rivet gun isn’t pulling the mandrel, check for several issues. The tool may be clogged, the jaws might be worn or broken, or the air pressure might be too low. Check the tool for clogs. Make sure that the air pressure is correct for the tool.
Final Thoughts
This detailed guide has explored why why rivet won’t pop, including the key steps to fixing common issues. By understanding the basics of riveting, the different types of rivets, the importance of correct tooling, and proper hole preparation, you’re now better equipped to handle this challenge. You’ve also learned about the importance of choosing the correct rivet and applying the correct pressure. The ability to troubleshoot these problems improves your skills and your project’s outcome. Remember that practice and patience are key.
Don’t be discouraged if you face issues at first. Most problems can be solved by checking the basics and making small adjustments. If you’re encountering the same issue repeatedly, explore the tips for advanced troubleshooting. With practice and attention to detail, you’ll become more skilled. Try different materials, tools, and techniques to help you learn. Riveting is a helpful skill. So keep practicing, and don’t stop exploring!

I’m Michael R. Turner, the founder, lead writer, and passionate DIY enthusiast behind 101diytools.com. With years of hands-on experience in home improvement and power tools, I built this platform to share practical tips, in-depth guides, and honest reviews to help DIYers of all skill levels tackle projects with confidence and the right tools.