How to Avoid Puckering When Stapling Fabric: A Practical Guide
Ever started a sewing project, only to have the fabric bunch up in unsightly lumps when you staple it? I’ve been there! It’s frustrating when your hard work is marred by unwanted folds and wrinkles. This guide will walk you through the techniques that will prevent those annoying fabric puckers, so your projects look smooth and professional. You’ll learn the best practices for handling materials, choosing the right tools, and executing the process flawlessly, improving the quality of your finished items. By the end, you’ll feel confident creating sleek and beautiful designs, eliminating the stress and improving the appearance of your sewing and crafting endeavors.
Key Takeaways
- Proper fabric preparation, like ironing, is essential to smooth results.
- Choosing the right staples and staple gun can dramatically affect the finish.
- The angle and spacing of staples impact the finished look.
- Different fabric types require adjustments in technique.
- Practicing on scrap fabric improves your skills and reduces mistakes.
- Careful handling of fabric during the process eliminates unwanted imperfections.
Understanding Fabric Puckering
Fabric puckering, that unsightly bunching or wrinkling that appears when stapling fabric, is a common sewing problem. It occurs when the fabric is pulled, stretched, or compressed during the stapling process. This can be caused by various factors, including incorrect tension, unsuitable staple choices, or improper handling of the material. The results are visible imperfections, negatively impacting the project’s overall appearance and structural integrity.
There are several reasons for puckering. The primary cause is often uneven distribution of pressure. If the staple gun applies force inconsistently across the material, some areas will be pulled more than others. In addition, the staple’s design and size play a critical role; an incorrect choice can damage the fabric fibers, creating distortion. Moreover, the fabric type matters; delicate materials tend to pucker more easily than sturdy ones.
Causes of Puckering
-
- Uneven Pressure: When the staple gun doesn’t apply consistent pressure, certain areas of the fabric will be pulled more than others, creating puckers.
Using a staple gun with adjustable pressure settings can help manage the force applied to the fabric, minimizing the risk of unevenness. Practice on scrap fabric before beginning the main project to get the feel of the tool and adjust settings accordingly. A consistent application of force is essential for a clean result.
-
- Incorrect Staple Choice: The wrong staples can damage fibers and lead to bunching.
Choosing the right staple size and type is critical. The staples should be long enough to penetrate the materials but not so long they protrude. Fine-wire staples are better suited for delicate fabrics, while thicker staples are better for heavier materials. Experiment with a few staples and see which offers the best finish.
-
- Fabric Tension: Too much or too little tension during the process can lead to distortions.
Maintaining the right tension is crucial. If the fabric is pulled too taut, it will pucker when stapled. However, if it’s too loose, the staples won’t secure properly. A bit of slack is often needed, allowing for the natural give of the fabric without creating visible creases. Experimentation is important to find the right amount.
-
- Staple Angle and Spacing: Incorrect angles and spacing can make fabric bunch up.
Staples that are not set perpendicular to the fabric surface can pull the material in unwanted directions. Appropriate spacing is equally important; too close together, and the fabric will likely distort, while staples that are too far apart will not secure the fabric effectively. Consistent and even spacing and a perpendicular angle help prevent bunching.
Preparing Your Fabric for Stapling
Proper fabric preparation is a critical step in preventing puckering. The steps you take before reaching for your staple gun significantly impact the final result. Simple steps like ironing and pinning can make the difference between a project with a flawless finish and one that requires rework. These initial measures ensure the fabric lies smoothly, allowing you to staple without pulling or distorting the material.
Thorough preparation starts with cleaning your fabric, which removes dirt, debris, and manufacturing residues. Next, ironing the fabric is essential to eliminate wrinkles and creases. Proper pinning or fabric adhesive also helps to hold the fabric in place, preventing unwanted movement during the stapling process. Taking these steps sets the stage for a smooth, professional-looking outcome.
Cleaning and Ironing
-
- Cleaning the Fabric: Washing or cleaning the fabric before stapling is a smart first step.
Before beginning your project, ensure the fabric is free of dirt, dust, and any residues from the manufacturing process. This step is particularly important for fabrics that are stored for a while. Washing and drying the fabric according to the manufacturer’s instructions can prevent potential issues like shrinkage or color bleeding during the project. It also provides a better surface for stapling.
-
- Ironing the Fabric: Ironing ensures a smooth surface for a seamless stapling procedure.
Ironing removes any wrinkles or creases, setting the fabric flat. Use the appropriate heat setting for your fabric type; a too-high setting can damage the material, while a setting that is too low may not smooth out wrinkles effectively. A steam iron can be especially effective for releasing stubborn creases. Make sure the ironed fabric is completely cool before starting.
-
- Fabric Handling: Treat delicate fabrics with extra care.
Handle delicate fabrics gently to avoid stretching or distorting them. Avoid pulling or tugging when ironing, stapling, or pinning. The aim is to preserve the fabric’s natural drape and appearance. For sensitive fabrics, consider using a pressing cloth between the iron and the fabric to prevent shine or scorching.
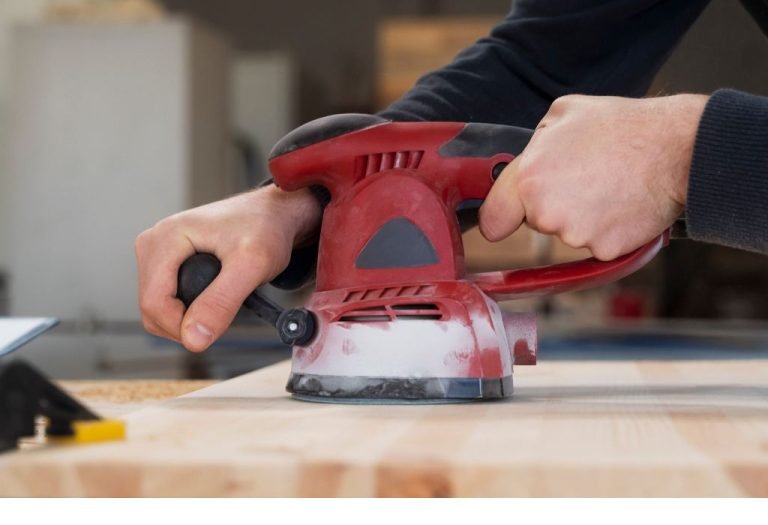
Choosing the Right Tools and Supplies

Selecting the right tools and supplies is crucial to achieve a professional finish, preventing puckering during the stapling process. The staple gun, staples, and any additional accessories must be the appropriate type and size for your chosen fabric. Using the correct tools and staples is essential for achieving a clean, even result.
Consider the fabric’s weight and type. Heavier fabrics require a more robust staple gun and longer, thicker staples to ensure proper holding power. Delicate fabrics require a fine-wire staple gun and shorter staples that will not tear or damage the material. Selecting the right tools and supplies sets the stage for a well-executed project.
Staple Gun Selection
-
- Manual Staple Guns: Manual staple guns are generally fine for lighter tasks.
Manual staple guns, which you operate by hand, can work well for certain projects, especially those that involve light to medium-weight fabrics. These tools give you good control over pressure and placement but can cause fatigue during prolonged use. When selecting a manual staple gun, look for one that is comfortable to hold and that has an easy-to-use mechanism.
-
- Electric Staple Guns: Electric staple guns can be a good choice for larger projects.
Electric staple guns offer more consistent force and can be faster than manual models, reducing hand fatigue. They are a good choice for projects involving a lot of stapling or for heavier fabrics. Some electric models offer adjustable power settings, allowing you to fine-tune the force depending on the fabric. Choose a model that is easy to manage and has safety features.
-
- Pneumatic Staple Guns: Pneumatic guns are a step up in terms of power.
Pneumatic staple guns, which use compressed air, are generally used for heavy-duty stapling jobs. These offer greater speed and precision, making them ideal for professional or industrial use. They are usually more expensive and require an air compressor. Pneumatic guns are a suitable choice for tough fabrics or projects requiring significant holding power.
Staple Selection
-
- Staple Types: Staple types vary, so make the right selection based on your project.
The type of staples you choose should align with your fabric and the staple gun you’re using. Fine-wire staples are generally suitable for delicate materials, while heavier-duty staples are better for thicker, more durable fabrics. Staples are available in different materials, like galvanized steel, which resists corrosion. Check the manufacturer’s specifications on your staple gun to ensure compatibility.
-
- Staple Size: Match the staple size to the fabric thickness for a flush finish.
Select staples of the correct length to penetrate the fabric and secure it without going all the way through the material. Using staples that are too short may not provide adequate hold, while those that are too long can protrude. The staple should be flush against the fabric and not create unsightly bulges. Experimenting with different sizes on scrap fabric is wise before beginning your project.
-
- Staple Material: Galvanized steel staples offer durability and prevent rust.
For projects that might experience moisture or outdoor use, choose staples made of corrosion-resistant materials, such as galvanized steel or stainless steel. These staples will not rust or degrade over time, preserving the integrity and look of your project. If you’re working with fabrics that could be exposed to the elements, this choice is crucial. Consider these factors when selecting your staples.
Stapling Techniques to Minimize Puckering
The way you handle your fabric and execute the stapling process directly affects the final result. Knowing and applying the right techniques can make a significant difference. Proper angle and spacing, controlling the fabric tension, and using the right stapling motion are all vital to achieving a smooth, professional finish. Mastering these methods will make your stapling process more efficient and reduce the chances of puckering.
Before you begin the main part of your project, it’s wise to practice your technique on a piece of scrap fabric. This gives you the chance to assess your staple gun’s force, fine-tune your spacing, and confirm the right angle of your staples. Once you are confident, you can move forward with the project, knowing you are using the right techniques.
Angle and Spacing
-
- Correct Angle: Aim for perpendicular staples.
The staples should be driven into the material perpendicular to the surface. This ensures that the staple penetrates the fabric evenly, which minimizes the possibility of pulling or distorting the material. If the angle is off, the fabric may bunch up or be pulled to one side. A perpendicular angle helps the staples secure the fabric while keeping the appearance smooth.
-
- Even Spacing: Consistent spacing between staples helps create an even finish.
Maintain consistent spacing between staples. This even distribution of staples ensures that the fabric is secured uniformly, without any areas that might be under-secured or over-secured. Use a ruler or guide to maintain even intervals, particularly on curved or irregular edges. Consistent spacing produces a professional look and prevents uneven stress.
-
- Staple Depth: Make sure the staples fully penetrate the materials.
The staples should penetrate the fabric and any underlying materials without going all the way through, creating an unsightly gap. Set the staple gun’s depth control (if available) to ensure the staples penetrate sufficiently without damaging or exposing the staples. Proper depth secures the fabric. Practice on scrap materials to find the ideal staple depth.
Managing Tension
-
- Avoiding Too Much Tension: Too much tension is a primary cause of puckering.
Be mindful of the tension you’re applying to the fabric. Too much tension can cause the material to stretch and pucker around the staples. Gently stretch the fabric as you staple. The goal is to provide a smooth, even surface without pulling the fabric too tight, which can result in creases. Maintaining the right amount of slack keeps the fabric from distorting.
-
- Avoiding Too Little Tension: Too little tension may cause the fabric to be loose.
Conversely, too little tension can cause the fabric to be loose around the staples, leading to a wavy or unprofessional finish. The fabric should be taut enough to remain in place without wrinkling. Test the tension by stapling a small portion of the fabric. Make adjustments until you have the correct balance. The correct balance secures the fabric and keeps it smooth.
-
- Fabric Characteristics: Adapt your approach based on fabric type.
Different fabrics require different amounts of tension. Delicate fabrics generally require less tension than sturdier ones. Heavier materials may tolerate greater tension. Consider the properties of your fabric and make adjustments as needed. Always test your technique on scrap fabric before beginning the main project. Adaptability to the material is very important.
Stapling Motion
-
- Smooth and Steady: A smooth motion is better to minimize fabric movement.
Staple with a smooth and steady motion. Avoid jerky movements, as these can cause the fabric to shift. Hold the staple gun firmly, align it with the fabric surface, and squeeze the trigger or press down with a constant pressure. A steady approach helps prevent unwanted movement and ensures even distribution of pressure, reducing the chance of puckering.
-
- Avoiding Multiple Hits: Avoid restapling in the same spots.
Try to drive each staple in a single, controlled motion. Restapling the same spots can damage the fabric and lead to distortion. If a staple does not set properly, remove it and try again, but avoid repeatedly striking the same area. A precise and steady technique will help you minimize mistakes and achieve a professional finish.
-
- Working in Sections: Staple in smaller segments for better control.
If you’re working on a large project, break it into smaller segments. Staple each segment separately to maintain control and prevent the fabric from shifting. This technique makes it easier to manage fabric tension and spacing. Working in sections also reduces the chance of errors. Proceeding step-by-step is an effective strategy.
Dealing with Different Fabric Types
Fabric characteristics, from delicate silks to sturdy canvas, influence how you tackle your stapling projects. Recognizing the unique properties of each material and making the right adjustments to your technique is essential. Using a method that works well on one type of fabric may not be effective on another. Adapting your technique based on the fabric’s characteristics is a smart approach for a high-quality finish.
Delicate fabrics call for extra care and precision. They might tear easily. Heavier materials, on the other hand, can be more forgiving. Adaptations in staple size, pressure, and tension are often needed to ensure that the fabric is secured without distortion. Understanding the fabric’s characteristics and making the right adjustments will give you more control, reducing the chances of imperfections.
Delicate Fabrics
-
- Low Pressure: Reduce pressure to prevent damage.
Delicate materials, such as silk or chiffon, are vulnerable to tearing. Reduce the pressure on your staple gun to prevent damage to the fabric. If your staple gun has adjustable settings, use the lowest pressure possible while still ensuring that the staples hold the fabric in place. The lower pressure prevents the fabric from ripping. Handle delicate materials with great care.
-
- Fine Staples: Choose the right staple size and type.
Use fine-wire staples, which are less likely to tear the fabric. These staples have narrower legs and are generally made of thinner wire, reducing the chance of damage. Select a staple size that is long enough to secure the fabric without poking through the other side. Fine staples are essential for delicate fabric. The right staple size is key for delicate materials.
-
- Use Stabilizers: Stabilizers provide extra support.
Consider using fabric stabilizers to provide additional support. These materials, like interfacing or tissue paper, can be placed between the fabric layers before stapling. They help reinforce the fabric and reduce the likelihood of it tearing or stretching during the process. Using a stabilizer is a good method for handling delicate fabrics.
Medium-Weight Fabrics
-
- Standard Pressure: Standard pressure works well with many medium fabrics.
Most medium-weight fabrics can tolerate a standard amount of pressure from a staple gun. Begin by testing the pressure on scrap fabric. The staple should penetrate the fabric and provide a secure hold without distorting the material. Keep an eye out for wrinkles or bunching, and adjust the pressure if needed. Standard pressure is a suitable starting point.
-
- Regular Staples: The choice of staple size and type can vary.
Regular staples are usually sufficient. However, consider the thickness of the fabric. If it’s a thicker material, you might need slightly longer staples to ensure they penetrate through both layers. If the fabric is prone to fraying, opt for staples made of a corrosion-resistant material. Regular staples generally work well, so choose the right size and type.
-
- Consistent Technique: Maintain consistent stapling techniques.
Apply even spacing and a consistent angle as you staple to achieve a professional finish. Keep an eye on the tension. If the fabric begins to bunch up, ease up slightly. Working methodically helps maintain an even finish. Using a consistent stapling method provides the best results for medium-weight fabrics.
Heavy Fabrics
-
- Increased Pressure: Increase the pressure when working with heavy fabrics.
Heavy fabrics, such as canvas or denim, often require increased pressure from your staple gun to ensure the staples fully penetrate and secure the material. Start with a higher pressure setting, and adjust as needed. Test the pressure on scrap fabric to find a setting that provides a firm hold without causing the staples to bend or deform. The increased pressure is often needed.
-
- Longer Staples: Use longer, stronger staples.
Longer staples are needed to effectively secure heavy fabrics. Heavier fabrics have greater thickness, so the staples should be long enough to pierce through the fabric and into any supporting material. Opt for staples made of sturdy material to avoid bending or breaking during the process. The right staples will help provide a secure and long-lasting hold.
-
- Heavy-Duty Staple Gun: Use a heavy-duty gun to handle the material.
Choose a heavy-duty staple gun that is designed for working with tough materials. These guns usually have more power and are better suited for penetrating thick fabrics. Make sure the staple gun is designed to handle the size and type of staples that you’re using. If you have the right staple gun, the process will become easier. A heavy-duty staple gun makes the job easier.
Practicing and Problem-Solving
Practice is essential to achieving successful stapling results. Testing your methods on scrap fabric before beginning a project will allow you to perfect your technique. You can test staple placement, tension, and pressure. This helps you get familiar with the process. If you encounter issues during the process, it’s vital to have strategies for addressing them.
Identifying and resolving problems is a skill that comes with experience. Problems like puckering can often be fixed with slight adjustments to your technique. You’ll gain valuable experience. You will also develop the skills to make changes and maintain high-quality results. Through practice and experience, you will become a more confident and skilled craftsperson.
Practicing on Scrap Fabric
-
- Testing Techniques: Practice different techniques to optimize your approach.
Use scrap pieces of fabric that are similar to your main project. This allows you to experiment with staple gun settings, staple spacing, and tension. Practice on various sections of the scrap fabric to test the effects of adjustments. Testing on scrap fabric is essential to refine your technique and prevent mistakes. Practice is the best path to achieving a flawless finish.
-
- Identifying Problems: Spot and correct problems before starting the project.
Use the scrap fabric to identify issues like puckering, staple distortion, or insufficient hold. Make adjustments and try again. This helps you detect and fix problems, fine-tuning your technique for your real project. Identifying problems during practice allows you to avoid wasting time and materials on the real project. Address the problems now. Correct them early.
-
- Improving Skill: Practice is the key to improving stapling skills.
Practice can dramatically improve your stapling skills. The more you work with your staple gun and fabric, the more comfortable and confident you will become. You will also develop a better “feel” for the material and how it responds to staples. Keep practicing to develop your skills. This process is key to your success.
Problem-Solving
-
- Dealing With Puckers: If puckers appear, try to resolve them.
If you see puckering, don’t panic. Check the staple gun’s pressure settings. Ensure the fabric is not being pulled too tightly or loosely. Adjust the spacing and angle of your staples. If the puckering persists, you can try removing the staples and restapling the area, being careful to maintain consistent tension and spacing. Be patient, take the time to fix the issue, and learn from it.
-
- Dealing With Staple Issues: Address staple problems immediately.
If the staples are not setting properly, check the staple gun for any jams. Make sure you are using the correct staple size and type for your fabric. Inconsistent staple placement can also cause distortions. Consider removing any staples that are not correctly set and replacing them, making sure to maintain a consistent angle and spacing. Address any staple problems immediately.
-
- Seeking Advice: Seek advice from more experienced professionals.
If you are encountering persistent issues or need guidance, seek advice from someone with more experience. This could involve asking a sewing friend or searching for advice online. They may offer insights and solutions you haven’t considered. Don’t be shy about asking questions. This is a great way to advance your technique. Seeking advice can accelerate your learning.
Frequently Asked Questions
Question: What causes fabric to pucker when stapling?
Answer: Puckering can occur due to uneven pressure from the staple gun, incorrect staple choice, excessive or insufficient fabric tension, and incorrect angles or spacing of the staples.
Question: How do I prevent puckering when stapling delicate fabrics?
Answer: Use low pressure on the staple gun, select fine-wire staples, and consider using fabric stabilizers like interfacing to provide extra support and prevent the fabric from tearing or stretching.
Question: How should I handle staple placement to prevent bunching?
Answer: Maintain even spacing and a perpendicular angle for each staple to ensure the fabric is secured uniformly without pulling or distorting the material.
Question: Can I fix puckering after the fabric has been stapled?
Answer: Yes, you can try removing the staples and restapling the area. Adjust your technique and make sure the fabric tension and staple spacing are consistent.
Question: What’s the best way to practice my stapling technique?
Answer: Practice on scrap fabric to test staple gun settings, staple spacing, and tension. This helps you improve skills before you work on the actual project.
Final Thoughts
Avoiding puckering when stapling fabric doesn’t have to be a struggle; it’s a skill that can be developed. By focusing on preparation, choosing the right tools, and applying proper techniques, you can achieve professional-looking results every time. Remember, prepping your fabric correctly, especially cleaning and ironing, lays the foundation for a smooth surface. Selecting the proper staples and using the right staple gun for the fabric is essential.
Ensure that you adjust the tension correctly and maintain a consistent stapling angle. Moreover, don’t be afraid to experiment and practice. Remember that all fabric types are different, and the methods might vary. The effort you invest in learning these techniques and improving your skills will pay off in the long run. Take the time to understand the tools and materials you are working with. The key is in understanding your materials and how they interact. With practice, you’ll be able to create perfectly stapled projects.

I’m Michael R. Turner, the founder, lead writer, and passionate DIY enthusiast behind 101diytools.com. With years of hands-on experience in home improvement and power tools, I built this platform to share practical tips, in-depth guides, and honest reviews to help DIYers of all skill levels tackle projects with confidence and the right tools.