How Much PSI for Staple Gun: Finding the Right Air Pressure
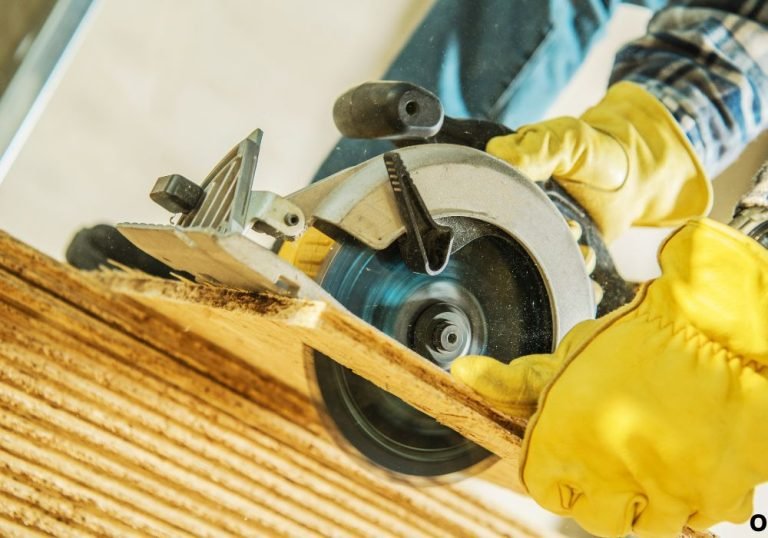
Picture this: You’re tackling a DIY project, eager to build a bookshelf from scratch. You grab your pneumatic staple gun, ready to fasten those wood pieces together, but then you pause. How much air pressure should you use? Too little, and the staples won’t drive in properly. Too much, and you risk damaging the wood or even the tool itself. This common dilemma is something every DIY enthusiast and professional experiences. This guide helps you determine the correct air pressure for your projects, ensuring your staples drive flawlessly. We’ll explore the factors that influence the right pressure for your how much psi for staple gun, giving you the knowledge to achieve perfect results.
Key Takeaways
- Understanding the importance of air pressure for optimal staple gun performance.
- Learn how to choose the right PSI for different types of staple guns and projects.
- Discover how to troubleshoot common issues related to air pressure.
- Explore the impact of staple size and wood type on pressure requirements.
- Become familiar with safety measures when working with pneumatic tools.
- Gain confidence in operating your staple gun efficiently and safely.
Choosing the Right Air Pressure
Selecting the correct air pressure is a critical step for successful stapling. The right pressure ensures staples are driven flush without damaging the work material, preventing them from either sticking out or sinking too deep. The optimal PSI value varies based on several factors, including the type of staple gun, the material being stapled, and the length of the staples. Setting the pressure appropriately will not only improve the appearance of your work, but also increase the longevity of your staple gun.
Factors That Influence PSI Settings
Multiple variables influence the ideal PSI setting for your staple gun. These variables include the type of the staple gun, the material you’re working with, and the size of the staples you are using. Ignoring these elements could lead to imperfect fastening or potentially damage the materials or the tool itself. Proper consideration of these variables ensures the staples are driven correctly, guaranteeing the integrity and aesthetics of the work.
-
- Staple Gun Type: Different staple guns are designed for different tasks, and their optimal pressure levels will vary accordingly.
Staple guns are not one-size-fits-all tools, and their design dictates the pressure range they can handle. For instance, a finish nailer, used for detailed trim work, typically requires a lower PSI than a framing nailer, which drives larger fasteners into heavier materials. The type of staple gun is frequently printed on the body of the tool, helping the user understand its designated use and preferred operational range. Reading the manufacturer’s manual is key to identifying the appropriate pressure settings. The size and type of the air compressor also influences the achievable PSI, with larger compressors providing sustained higher pressures compared to smaller, portable models.
-
- Material Type: Softer materials like pine require less pressure than hardwoods like oak.
The type of material significantly influences the PSI needed. Softer woods, such as pine, have less resistance and need lower air pressure to prevent the staples from over-sinking or causing splitting. Harder woods, like oak or maple, require higher PSI because they are denser. Using insufficient pressure in hardwoods results in staples that are not fully driven, which decreases the strength and the neatness of the connection. For materials like plywood, which can have varying densities, the settings should be adjusted to find the best balance between complete fastening and avoiding damage to the surface.
-
- Staple Size: Longer staples, designed for thicker materials, often need more pressure.
The size of the staple is a key consideration when selecting the right PSI. Longer staples, designed to penetrate thicker materials or attach multiple layers, demand more force to be driven completely. This increased force is provided by higher PSI settings. Conversely, shorter staples, frequently used for thinner materials or delicate projects, require lower pressure to prevent damage. This direct relationship between staple length and needed pressure ensures that staples are securely set at the right depth for the required application, thereby guaranteeing the durability and look of the finished piece. Always refer to the staple gun’s manual and test the settings on a scrap piece of the material first.
-
- Air Compressor’s Output: Ensure your compressor can supply the required PSI consistently.
The ability of the air compressor to consistently supply the right PSI is a frequently overlooked factor, but it’s a critical component for effectively using a staple gun. The compressor’s size, its tank capacity, and its CFM (cubic feet per minute) rating determine its capacity to provide steady and consistent air pressure. A compressor that cannot keep up with the staple gun’s needs will lead to inconsistent fastening, including staples that are not fully driven or inconsistent driving depths. Match the compressor’s specifications, including its maximum PSI and CFM, with the tool’s requirements to ensure reliable performance. A larger tank generally supports longer periods of stapling before the compressor needs to recharge, resulting in a more continuous workflow.
Air Pressure Adjustment: Tips and Techniques
Adjusting the air pressure on your staple gun is usually a straightforward process, but taking the time to do it correctly makes a big difference in the results. The majority of staple guns have a pressure regulator located on the tool itself or at the air compressor. This regulator lets you fine-tune the pressure to match the requirements of the job at hand. Here are some techniques to help you set the air pressure.
-
- Locating the Regulator: Most staple guns have a regulator on the tool or compressor.
Finding the pressure regulator is the first step when setting the correct PSI. On the staple gun, the regulator is usually located near the handle, where you connect the air hose. On air compressors, the regulator is typically on the front panel with the air pressure gauge. Check the tool’s manual if you’re unsure. The gauge will show the current air pressure being supplied to the tool. It’s important to know where the controls are and how to adjust them before starting any project, ensuring that you can easily and accurately make changes to the pressure settings as needed.
-
- Initial Pressure Setting: Start with a low PSI and increase it gradually.
When starting, always begin with a low air pressure setting. This method prevents accidentally damaging the material. Starting low lets you gradually increase the pressure until you find the perfect setting for your material and staple size. This controlled approach reduces the likelihood of over-driving the staples, which can split the wood or cause the staples to sink too deep. Test the staples on a piece of scrap wood first. This way, you will save your actual project from potential damage while you’re determining the ideal setting.
-
- Test on Scrap Material: Always test the settings on a similar piece of scrap wood.
Before beginning work on your project, test the settings on a scrap piece of material that matches the wood or material of your main project. This step is critical because it lets you see how the staples will perform at different pressure levels. It helps you avoid damaging the actual workpiece. Observing the results on the scrap piece will let you fine-tune the pressure until the staples are driven flush with the surface without sinking too deep or protruding. Using scrap materials guarantees you’re able to optimize the staple gun’s performance and achieve the desired results before you start the real task. This practice is particularly helpful when working with different types of wood, since they can respond differently to the same PSI setting.
-
- Observe Staple Depth: The staple should be flush, not over-driven or under-driven.
Staple depth is an easy way to measure whether your pressure settings are correct. The ideal setting is when the staple head sits flush with the material surface. If the staple is under-driven, it sits above the surface, meaning the pressure needs to be increased. If the staple is over-driven, sinking into the wood and potentially weakening the connection, it means the pressure must be reduced. This visual check offers instant feedback on your pressure adjustments, helping you achieve perfect results on your project. Always ensure the staples are flush with the material; this not only looks better but also guarantees the connection’s strength and stability.
Troubleshooting Common Issues with PSI
Even with careful adjustments, you may encounter issues while using a staple gun. Problems are often related to incorrect PSI settings. Learning to identify and fix these problems will improve your efficiency. Here are some common problems and solutions.
-
- Staples Not Driving Flush: Increase the PSI gradually.
When staples are not driven flush with the material surface, the most likely issue is that the air pressure is too low. To correct this, gradually raise the PSI on your staple gun or air compressor. It is important to increase the pressure in small increments. After each adjustment, test the gun on scrap material to check the staple depth. If the staples still don’t drive flush, keep raising the pressure until they do. Don’t go too high, though, as that can lead to other issues. This process lets you find the right pressure setting without damaging the wood or compromising the quality of your work.
-
- Over-Driven Staples: Lower the PSI setting.
Over-driven staples are caused by excessive air pressure, leading the staples to sink too deep into the material. If this happens, lower the PSI on your staple gun or air compressor. Make small adjustments, testing on scrap material after each adjustment, to see the effect. The goal is to set the staples flush without sinking. Over-driven staples can reduce the strength of the bond and impact the appearance of the finish. Always test and adjust the pressure until the staples are set at the correct depth.
-
- Staple Gun Jamming: Check for obstructions and the correct PSI.
A jammed staple gun is a common problem, often due to a combination of issues. Check that your air pressure is in the correct range, as too high or too low settings can contribute to jams. Ensure you are using the correct staple size and type for your gun, and that the staples are properly loaded into the magazine. Additionally, inspect the gun for any physical obstructions, such as debris or bent staples. If the jam persists, consult the staple gun’s manual for disassembly instructions to clear the jam safely. Regular maintenance and proper use of the gun can reduce jamming problems.
-
- Air Leaks: Inspect connections and the tool itself.
Air leaks can affect the performance of your staple gun. The first step in finding air leaks is to inspect the connections between the air hose and the staple gun and air compressor. Tighten any loose connections. Check the tool for any visible damage or wear, like a cracked housing or damaged seals, which might cause air to escape. If a leak is detected, you might need to replace the damaged parts or consult a professional for repair. Air leaks not only reduce the efficiency of the tool but can also mean the air pressure is not consistent, which impacts the staple depth. Regular inspection and proper maintenance can prevent many air leak problems.
Staple Guns and PSI: Types and Applications
The type of staple gun impacts the needed PSI range. Different staple guns are designed for specific projects, meaning they need different air pressure. Choosing the right tool for the job is essential, as is understanding the air pressure needed for that tool.
Crown Staplers and Framing Nailers
Crown staplers and framing nailers are specialized tools designed for tasks needing strong and secure fastening. They are frequently used in construction and woodworking, requiring the right amount of air pressure to deliver the necessary force. These tools are commonly used for tasks like assembling furniture, installing decking, and other tasks needing structural stability. Knowing the best settings for each tool is essential for getting the job done correctly.
-
- Crown Staplers: Used for tasks such as installing insulation or roofing felt, often use a lower PSI.
Crown staplers are specifically designed for applications needing a broad staple crown to securely fasten materials, such as insulation, roofing underlayment, and upholstery. Since the materials that are commonly used are not as dense as hardwood, the PSI requirements are generally lower, often between 70 to 90 PSI. The wider crown of the staples helps to distribute the pressure, preventing materials from tearing or ripping under stress. Always consult the manufacturer’s recommendations for your specific staple gun model and the material you’re working with to ensure proper pressure settings. Using the correct PSI ensures the staples are driven flush, creating a strong and secure fastening that stands up to the demands of the job.
-
- Framing Nailers: Designed for heavy-duty work, these often need a higher PSI.
Framing nailers are built for demanding tasks, driving large nails into heavy lumber for constructing framing, decks, and other structures. These tools require higher PSI settings, often within the range of 80 to 120 PSI, to drive the large nails effectively and completely. The higher pressure guarantees that the nails penetrate the wood completely, making for a strong, reliable joint. The specific PSI needed will depend on the nail size, the type of wood, and the tool manufacturer’s recommendations. Incorrect settings can cause the nails to not set correctly, impacting the structure’s strength and safety. It is very important to use the proper pressure settings.
-
- Recommended PSI Ranges: Refer to the tool’s manual for specific recommendations.
The optimal PSI settings for crown staplers and framing nailers vary depending on the exact model and the work materials. The tool’s manual is a great resource. You can also look up the specific guidelines the manufacturer provides. These manuals will provide specific recommendations on the recommended pressure settings for various staple or nail sizes and wood types. Reading the manual will give you the details needed for the best performance and to avoid tool damage. Always start with the manufacturer’s suggested PSI and then make any adjustments based on how the staples are driven into your chosen materials. Taking the time to read the manual will increase the likelihood of success and prevent any damage.
Finish Staplers and Brad Nailers
Finish staplers and brad nailers are designed for detail work, with uses like trim installation and decorative projects, where a neat finish is essential. These tools require precise pressure control to prevent damage to the material. Knowing the correct PSI settings makes a difference in getting the results you need.
-
- Finish Staplers: Great for attaching trim or molding, requiring lower PSI than framing tools.
Finish staplers are excellent for precise work, particularly in installing trim, molding, and other decorative elements. Because these tasks frequently involve thinner and more delicate materials, the PSI settings for finish staplers are typically lower than those for framing tools. The recommended range is frequently between 60 to 100 PSI. The lower pressure prevents the staples from over-driving or damaging the wood, providing a clean, professional finish. It is essential to choose the right PSI for the specific task and the material, making sure the staples are set flush without splitting or denting the wood surface. Using the right settings will increase the quality and look of your finished work.
-
- Brad Nailers: Used for delicate work, they use a lower PSI to avoid material damage.
Brad nailers are designed for delicate work, using thin nails (called brads) to fasten trim, molding, and other decorative elements where a nearly invisible fastener is needed. The low PSI settings, often between 60 to 90 PSI, help prevent damage to the material, such as splitting or denting. This precision is essential in projects where aesthetics are important. Always test the gun on a piece of scrap wood of the same type and thickness to find the best settings. The right pressure guarantees the brads are set flush with the surface without damaging it, contributing to a clean, professional finish. Always using the correct settings is essential for detail work.
-
- PSI Adjustments: Fine-tune settings to prevent damage to the work material.
Fine-tuning the PSI settings is critical with finish staplers and brad nailers. The aim is to get a finish without any damage to the material. Start with a low pressure setting and slowly increase it, checking the staple depth or nail depth on scrap material. This method gives you total control. The perfect setting drives the fastener flush with the surface without over-sinking. Small adjustments based on the results you see guarantee the best finish, with each nail or staple set at the right depth. This careful adjustment is important for projects where aesthetics are the key element.
Other Staple Gun Types
There are many other types of staple guns for different tasks. These guns are designed with specific features, air pressure requirements, and applications. Understanding these differences helps in using the right tool.
-
- Electric Staple Guns: Operate without the need for an air compressor.
Electric staple guns are a convenient alternative to pneumatic models, especially for light-duty tasks, requiring no air compressor. They are frequently corded or battery-powered, providing portability and ease of use. While they don’t require PSI settings, they have power settings that can be adjusted to match the material and staple size. These settings determine the driving force, much like how PSI influences pneumatic tools. Electric staple guns are a great choice for tasks like upholstery, craft projects, and basic home repairs, providing a simpler option for users who don’t want to use an air compressor.
-
- Manual Staple Guns: Require manual force, with no PSI adjustments.
Manual staple guns are a basic and affordable alternative to both pneumatic and electric models. They use mechanical force to drive staples, without the need for air pressure or electricity. These tools are ideal for light-duty tasks, such as crafts, upholstery, and attaching light fabrics. Since manual guns do not use air pressure, they don’t have PSI settings. Users manually apply the force required to drive the staples, making them a simple option. The force needed depends on the material and staple size. Manual staplers provide an accessible choice for those needing a simple and reliable stapling method without the added complexity of electrical or pneumatic systems.
-
- Specialty Staple Guns: Tools designed for specific applications, such as flooring or roofing.
Specialty staple guns are made for very specific applications, like installing flooring, roofing, or other specialized tasks. They are designed with unique features and settings tailored for their intended use. For instance, flooring staplers often have a mechanism to set staples at a consistent angle and depth for a professional finish. Roofing staplers are made for the heavy-duty fastening of roofing materials. The PSI settings of these specialty tools vary based on their purpose and the materials they’re made to fasten. Always check the tool’s manual for specific instructions and settings. These specialty tools greatly increase efficiency and guarantee quality results in their respective fields.
Safety and Best Practices
Working with staple guns, like all tools, requires attention to safety to prevent injuries and guarantee the safety of the user. Understanding and following safety guidelines and best practices helps prevent accidents and promotes a safe working environment.
Safety Guidelines for Pneumatic Staple Guns
Using pneumatic staple guns involves certain risks. Following these guidelines helps keep you safe while you work.
-
- Wear Eye Protection: Always wear safety glasses or goggles.
Eye protection is important when using a staple gun. Flying staples or debris from the impact can cause serious eye injuries. Safety glasses or goggles are a necessity, and they should comply with safety standards, providing full protection. Regularly check your eye protection for any damage or scratches that could affect your ability to see. When using a staple gun, prioritize eye protection to avoid possible injuries, guaranteeing a safe work experience.
-
- Use Hearing Protection: Wear earplugs or earmuffs.
Pneumatic staple guns can be noisy, especially when used frequently or in an enclosed space. Exposure to loud noises can cause hearing damage. Using earplugs or earmuffs is essential, providing protection and reducing noise exposure. Choose ear protection that fits comfortably and gives adequate protection for the work environment. Protecting your hearing is a simple but important measure in your safety plan, guaranteeing your hearing health.
-
- Disconnect the Air Supply: Disconnect the air supply before maintenance or adjustments.
Before performing maintenance, clearing jams, or making any adjustments to the staple gun, always disconnect the air supply. This prevents any accidental firing of staples, which could lead to injury. This safety step removes the power source and prevents the tool from being activated unexpectedly. This simple step is vital for avoiding accidents. Regular maintenance and careful handling are important for safe operation and increased tool longevity.
-
- Never Point the Gun at Yourself or Others: Treat the staple gun as a loaded weapon.
Never point the staple gun at yourself or others. This essential rule prevents accidental injuries. Always treat the staple gun with the respect you would give to a loaded weapon, as it has the potential to cause serious harm. Keep the gun pointed downward, away from any body parts. This rule requires constant caution and awareness. Making safety a priority is necessary to prevent severe injuries when using the tool.
-
- Read the Manual: Always consult the tool’s manual for specific safety instructions.
The tool manual is the best source of safety and operating instructions. Every tool has its own specific features, safety recommendations, and operating procedures. The manual gives vital information on safe operation, maintenance, and possible hazards associated with the tool. Always read and understand the manual before using the staple gun. Following the instructions and safety advice in the manual helps prevent accidents. This knowledge is important for using the tool and for the user’s safety.
Best Practices for Optimal Performance
To get the best performance from your staple gun and to ensure safety, follow these best practices.
-
- Regular Maintenance: Keep the tool clean and lubricated.
Regular maintenance is important for the performance and longevity of your staple gun. Clean the tool after each use to remove dust and debris. Properly lubricate the moving parts, as directed by the tool’s manual. Lubrication reduces friction, prevents jams, and keeps the tool operating smoothly. Regular maintenance improves the staple gun’s efficiency and reliability and also contributes to its lifespan. Following a maintenance schedule guarantees the tool’s performance and prevents premature wear or malfunctions. This practice is vital for both performance and safety.
-
- Use the Correct Staples: Always use the size and type recommended.
Only use the size and type of staples recommended by the staple gun’s manufacturer. This guideline is important for both safety and performance. Using the wrong staples can cause jams, damage the tool, or result in staples that are not driven properly. Check the tool’s manual or the label on the gun for the specifications. The right staples will guarantee that the tool works correctly and delivers the results you need. Taking the time to check the specifications guarantees your safety and the success of your project.
-
- Proper Air Pressure: Adjust the PSI for the material and staple size.
Proper air pressure is a key factor in using a staple gun correctly and in safety. You have to adjust the PSI according to the material you are using and the staple size. Incorrect pressure can lead to staples not being set flush, damaging the material, or causing the tool to malfunction. Start with a low pressure setting and slowly raise it, testing on a scrap piece. This method lets you get the right balance between the force needed to drive the staple and preventing damage. Careful adjustment and proper testing will provide the best results and guarantee both the quality and look of your finished work.
-
- Check the Work Area: Ensure the work surface is free of obstructions.
Make sure the work surface is free of obstructions. Before using the staple gun, check the area for any obstructions, such as knots in the wood, metal, or other items that could affect staple placement. Removing these obstructions will let you set the staples accurately and keep the gun from jamming. Also, be sure the work area is stable and well-lit. Checking the work area ahead of time is vital for safety, efficiency, and getting the right results.
-
- Practice on Scrap Material: Always test settings on scrap wood.
Before beginning work on the main project, always practice using the staple gun on scrap material of the same type and thickness. This step is necessary for optimizing the air pressure and staple depth. It lets you test and fine-tune the settings before working on your project. The scrap material will let you see the effects of the air pressure settings and make any needed adjustments. The goal is to set the staples flush without damaging the material. This practice is crucial for getting professional-quality results. Testing on scrap material saves time and avoids mistakes.
Frequently Asked Questions
Question: What happens if the air pressure is too low?
Answer: If the air pressure is too low, the staples may not be driven completely into the material, leaving them protruding above the surface. This can compromise the hold and the appearance of the finished work.
Question: What if the air pressure is too high?
Answer: If the air pressure is too high, the staples may sink too deep, potentially weakening the material or causing splitting. Additionally, the tool may wear out quicker due to excessive impact.
Question: Can I use different sizes of staples in my staple gun?
Answer: No, you should only use staples of the size and type recommended for your staple gun. Using incorrect staples can cause jams, damage the tool, or result in improper fastening.
Question: How often should I lubricate my staple gun?
Answer: It’s best to lubricate your staple gun regularly, following the manufacturer’s recommendations in the tool manual. This usually involves lubricating the tool before each use or after a certain amount of operating hours to maintain smooth operation.
Question: What safety gear should I use when using a staple gun?
Answer: Always use safety glasses or goggles, ear protection, and appropriate work gloves when operating a staple gun. Disconnect the air supply before maintenance or adjustments, and always treat the tool as if it’s loaded.
Final Thoughts
Determining the correct how much psi for staple gun setting is essential for successful stapling. From understanding the relationship between air pressure and staple depth, to choosing the right PSI for different projects, this guide provided the knowledge needed for effective and safe use. Remember that the correct PSI helps secure the staples, preventing damage to the work surface and ensuring the tool works correctly. Start with the manufacturer’s recommendations and make careful adjustments based on the material and staple size. By following these guidelines and taking safety measures, you can increase both the quality and appearance of your project. Continue to test on scrap material and stay focused on safety. Now, go ahead and tackle your next project with confidence, knowing you have the knowledge to get the perfect results.

I’m Michael R. Turner, the founder, lead writer, and passionate DIY enthusiast behind 101diytools.com. With years of hands-on experience in home improvement and power tools, I built this platform to share practical tips, in-depth guides, and honest reviews to help DIYers of all skill levels tackle projects with confidence and the right tools.