What Gauge Nail Is Best for Molding? A Detailed Guide
Picture this: you’re finally tackling that long-awaited home improvement project, adding beautiful new molding to your living room. You’ve got the trim, the miter saw, and the caulk. But wait – what about the nails? Choosing the right what gauge nail for molding is a small detail that makes a big difference. Get it wrong, and you could end up with a wobbly, unsightly mess. This guide explores the specifics of molding nails, ensuring your project is a smooth success. You’ll learn the essential factors to consider when choosing the right nails, preventing frustrating mistakes and ultimately saving time and money. Learn to get a professional finish on every molding project!
Key Takeaways
- Learn about various nail gauges and their uses in molding projects.
- Understand how nail length influences holding power and prevents damage.
- Discover different nail types, like brads, finish nails, and headless pins.
- Explore the best nail for various molding profiles and applications.
- Master techniques for proper nail gun usage, reducing splitting.
- Determine how to select the right nails for baseboards, crown molding, and more.
Choosing the Right Gauge
Selecting the correct nail gauge is the first important step when beginning your molding project. The gauge of a nail is essentially its thickness; it determines both the nail’s holding strength and the visibility of the nail head. Choosing the appropriate gauge balances secure fastening with minimizing damage to the molding. Consider the type and the thickness of the molding material when choosing a gauge to ensure a strong hold without splitting the wood. A smaller gauge means a thinner nail, which is often preferable for delicate molding profiles, where it minimizes the risk of splitting the wood.
Nail Gauge Explained
The term “gauge” refers to the diameter, or thickness, of a nail. It’s important to differentiate between nail gauge and nail length, which indicates how long the nail is. The gauge is represented by a numerical value, but the larger the number, the smaller the nail’s diameter. Therefore, a 15-gauge nail is thinner than a 14-gauge nail. This seems counterintuitive, but it’s crucial for understanding the properties of nails for your molding project.
-
- 15-Gauge Nails: These nails are a popular option for general molding tasks. Their thickness provides a balance between holding power and minimizing splitting. They work especially well with softwood molding.
15-gauge nails are a popular choice due to their versatility. They’re thick enough to provide a secure hold for many molding types while being thin enough to reduce the chance of splitting the wood, particularly in softer materials like pine or fir. They are an excellent middle-ground option for baseboards, casings, and other general molding installations. You can easily find these in both straight and angled versions. They are suitable for most homeowner projects.
-
- 16-Gauge Finish Nails: Thinner than 15-gauge nails, these are ideal for detailed work and molding where a less visible nail head is desired. They are more frequently used in hardwoods and trim applications where a smaller hole is beneficial.
16-gauge nails offer a good balance between strength and subtlety. Their smaller diameter allows for neater work, producing less noticeable nail holes that require less filler and finishing work. These nails are a top choice for more delicate molding or when working with harder woods where splitting is a concern. The smaller diameter reduces the chance of the wood splitting and helps maintain the integrity of the molding. They’re commonly used for crown molding, door casings, and window trim.
-
- 18-Gauge Brad Nails: These are the thinnest and leave the smallest hole. Used for delicate moldings or when nail heads need to be virtually invisible. Ideal for intricate trim work.
18-gauge brad nails are an excellent choice when a nearly invisible nail hole is essential. They’re best suited for attaching thin molding or delicate trim pieces where minimizing any damage is a top priority. Due to their thinness, they provide very little holding power on their own, often requiring the use of construction adhesive to help create a strong, lasting bond. Their small size makes them perfect for projects where aesthetics are critical, such as small decorative trim, picture frames, or detailed millwork.
Factors Affecting Gauge Selection
Several factors play a significant role in selecting the appropriate nail gauge for molding. The type of wood, the thickness of the molding, and the desired finish all influence the decision. Considering these factors ensures a secure, visually appealing result and helps to prevent damage to the molding or the wall. If working with hardwood, a thinner gauge may be necessary to minimize splitting, whereas thicker molding may require a sturdier gauge.
-
- Wood Type: Different wood types have varying densities. Softwoods (pine, fir) are less dense and more prone to splitting, so a thinner gauge is often preferable. Hardwoods (oak, maple) are denser and can handle thicker gauges.
The type of wood is a key consideration when choosing a nail gauge. Softwoods, like pine and fir, are more susceptible to splitting. Using a thinner gauge, such as a 16- or 18-gauge nail, will minimize the risk of damaging the wood when the nail is driven in. Hardwoods, like oak and maple, are denser and can typically handle thicker nails, such as 15- or 16-gauge nails, without splitting. Always consider the wood’s density and select the appropriate gauge to ensure a clean, strong hold.
-
- Molding Thickness: Thicker molding requires a sturdier hold, often needing a thicker gauge. Thinner molding can use thinner gauges to minimize damage.
The thickness of your molding will also influence the nail gauge you should choose. Thicker pieces of molding, such as heavy baseboards or crown molding, require nails that provide a strong hold. This is where a 15- or 16-gauge nail is more appropriate, as they offer enough strength to secure the molding firmly against the wall. Thinner molding, like decorative trim or small edging, may be better suited for a thinner gauge. Using an 18-gauge brad nail will prevent splitting and ensure a cleaner finish.
-
- Finish Desired: If you want minimal visible nail heads, choose a thinner gauge. The smaller the gauge, the smaller the nail head, and the less patching required.
The final finish of your project should also guide your nail gauge selection. If you want the nail heads to be as inconspicuous as possible, opt for a thinner gauge, such as an 18-gauge brad nail. These nails leave a very small hole that is easily filled and concealed with putty or caulk. For molding where the nail holes are less of a concern, or when you want more holding power, a slightly thicker gauge like a 15- or 16-gauge nail can be used. This will still allow for a clean finish, but might require a little more filling and sanding.
Nail Length and Its Importance
The length of the nail is just as important as the gauge. The nail must penetrate deep enough into the underlying structure (stud or wall) to provide sufficient holding power. It is generally recommended to have at least two-thirds of the nail’s length embedded in the underlying structure. Nail length is directly proportional to how much holding power the nail provides. Using the correct length ensures that the molding is securely fastened without damaging the wall.
Calculating Nail Length
When selecting the length of the nail, it is important to accurately calculate the required length. This calculation helps to ensure that the nail penetrates the wall sufficiently while avoiding damage. This calculation is a simple process involving the molding thickness plus the penetration needed into the wall’s stud. Failure to consider the nail length can result in the molding not being secure.
-
- Measure Molding Thickness: Determine how thick your molding is. This is the first step in calculating the necessary nail length.
To accurately determine the correct nail length, measure the thickness of your molding. This measurement is crucial, as it’s the distance the nail must travel through the molding before reaching the wall. Use a ruler or measuring tape to measure the thickness at several points to ensure consistency, as molding thickness can vary slightly. Make sure you select the correct length for your project.
-
- Estimate Wall Penetration: The nail needs to penetrate the wall’s stud or backing. A good rule of thumb is to aim for at least two-thirds of the nail’s length to be in the stud.
Once you know the thickness of the molding, you should determine how deep the nail needs to go into the underlying structure. The purpose is to ensure a strong grip. The stud or backing provides the main holding power for the molding, so the nail must penetrate it sufficiently. A common recommendation is to aim for at least two-thirds of the nail’s length within the stud. For example, if you’re using a 2-inch nail, about 1.33 inches should be embedded in the stud.
-
- Calculate Total Length: Add the molding thickness to the desired penetration depth into the wall. This gives you the ideal nail length.
After determining the thickness of the molding and the necessary penetration, you’re ready to calculate the total nail length needed. Add these two measurements together to get the ideal nail length for your project. Let’s say your molding is 0.75 inches thick, and you want the nail to penetrate the wall by 1.25 inches. Your total nail length should be 2 inches. Always round up to the nearest available nail size if the precise length isn’t available.
Avoiding Common Length Mistakes

Avoiding common mistakes in nail length selection is vital for a successful molding installation. Nails that are too short won’t provide adequate holding power, while nails that are too long can damage the wall behind the molding. Using the proper length nails protects the wall behind the molding and also helps ensure the molding’s stability over time.
-
- Too Short: Nails that are too short will not penetrate the stud deeply enough, and the molding may come loose over time.
Using nails that are too short is a common mistake that can lead to significant problems. When nails are too short, they won’t reach deep enough into the stud or backing. This results in inadequate holding power, and the molding is likely to come loose. Short nails might initially seem fine, but they won’t withstand the natural expansion and contraction of the wood or any minor impacts. Make sure to carefully measure and choose nail lengths that provide sufficient grip.
-
- Too Long: Nails that are too long can puncture the wall on the other side. This can damage your walls.
Using nails that are too long is another common mistake that can create more issues. If the nails are too long, they will pierce through the wall behind the molding. This causes visible holes or damage on the other side of the wall. This can ruin your walls and could mean extra repair work. When measuring nail length, always consider the thickness of the molding and the depth of penetration needed in the stud. Aim to avoid any potential harm to the structure.
-
- Incorrect Calculations: A failure to correctly calculate the total nail length is likely to cause either of the above problems.
Incorrect calculations of the nail length are often the root cause of these issues. A miscalculation can lead to the use of nails that are too short or too long. Make sure to take accurate measurements and apply the appropriate formulas. Double-check all measurements and calculations to prevent mistakes. This will ensure that the nails penetrate the underlying structure correctly and deliver a secure, durable result.
Nail Types: Brads, Finish, and Headless Pins
Understanding the different types of nails is key to selecting the right one for your molding project. Three common types are brad nails, finish nails, and headless pins. Each nail type has its unique characteristics and is best suited for specific applications. Knowing the differences between these nail types will guide you toward the ideal choice for your project.
Brad Nails
Brad nails, typically 18-gauge, are known for their small diameter and small heads. Their thin profile makes them ideal for delicate molding projects where a subtle finish is important. These nails provide a clean finish, and the holes are easily filled.
-
- Characteristics: Thin, small heads, ideal for delicate trim and minimal visibility.
Brad nails are characterized by their extremely thin bodies and tiny heads. These features make them a great option for any project where a clean, neat appearance is required. They create minimal damage to the wood, leaving small nail holes that are easily filled. They are perfect for decorative trim, picture frames, and other applications where aesthetics are critical. The small profile means they have limited holding power, so they are often used with construction adhesive for extra security.
-
- Applications: Decorative trim, picture frames, attaching thin moldings.
Brad nails are specifically designed for applications where appearance is critical. They are ideal for projects like decorative trim, picture frames, and attaching thin molding. They are particularly effective when working with pre-finished or painted trim, as the small nail holes require minimal filling and touch-up. They are also a great choice for delicate millwork and projects where you want the nails to be practically invisible.
-
- Advantages: Minimal damage, easy to conceal.
The primary advantage of brad nails is that they cause minimal damage to the wood. This leaves very small nail holes that are easy to fill with wood putty or caulk. This allows you to achieve a smooth and professional finish. The small head is also easier to conceal compared to other types of nails. This is especially useful for projects where the goal is a seamless, flawless look.
Finish Nails
Finish nails are the workhorses of molding. They have a larger diameter and heads compared to brads, offering increased holding power. Finish nails are used for a variety of molding tasks, and are a good option for most molding applications. Their versatility makes them a staple for professional and DIY projects alike.
-
- Characteristics: Thicker than brads, with heads, providing good holding power.
Finish nails are slightly thicker than brad nails, providing a balance of holding power and visual impact. Their heads are usually designed to be countersunk. This allows for easy concealment with wood filler. They are available in a variety of gauges and lengths to fit many applications. The slightly larger diameter makes them suitable for a broader range of molding applications, providing a secure grip.
-
- Applications: Baseboards, crown molding, door frames, and window casings.
Finish nails are versatile and suitable for a wide range of molding projects. They are frequently used for installing baseboards, crown molding, door frames, and window casings. Their strength is well-suited for holding heavier or larger moldings in place. The nail heads can be easily set below the surface and filled, which provides a professional finish.
-
- Advantages: Stronger hold, suitable for a wide range of applications.
The primary advantage of finish nails is their ability to provide a strong hold for various molding projects. They are able to secure heavier moldings. Finish nails are suitable for a large range of applications, from baseboards to crown molding. This versatility makes them a reliable option for most molding tasks. You can be assured that the molding will be securely attached.
Headless Pins
Headless pins are small, thin nails that have no heads. These pins provide a nearly invisible finish. The absence of a head means that the pin is fully concealed. This makes them ideal for projects where aesthetics are important.
-
- Characteristics: Extremely thin with no heads, leaving almost no visible mark.
Headless pins are thin, creating minimal visual disturbance. Their most significant characteristic is the absence of a head. This design makes them perfect for applications where an invisible finish is essential. The lack of a head means they can be easily driven into the wood without leaving a trace. This allows for a very clean and professional finish.
-
- Applications: Delicate trim, intricate detailing, and projects where the nails must be hidden.
Headless pins are the perfect choice for delicate trim, intricate detailing, and any project where you want to completely hide the fasteners. This includes projects such as small decorative trim, jewelry boxes, and any other application where the appearance must be perfect. These pins are ideal when attaching pre-finished materials or when minimal filling and touch-up work are desired.
-
- Advantages: Virtually invisible, perfect for a flawless look.
The main advantage of headless pins is that they offer a nearly invisible finish. This is very important when aesthetics are a priority. Their small size means they are easy to conceal, and the holes are almost nonexistent. This feature is particularly valuable when working on projects where the nails must be completely hidden for a flawless look. The lack of a head offers many advantages.
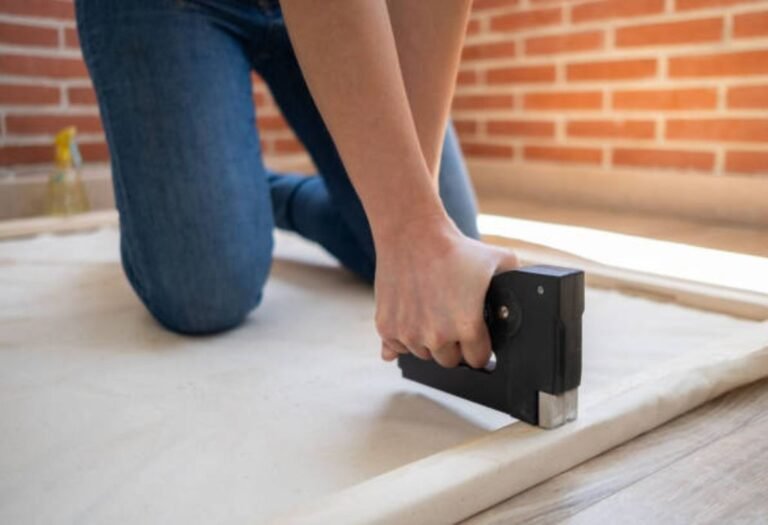
Best Nail Gun for Molding
The correct nail gun is a key tool in any molding project. A quality nail gun ensures that the nails are driven accurately and efficiently. This can save significant time and effort. Using the correct nail gun will lead to a cleaner and more professional finish.
Nail Gun Features
Several features are important to consider when selecting a nail gun for molding. The gauge, angle, and type of nail gun will influence its usability and performance. Understanding these features will help you pick the right tool for your project.
-
- Gauge Compatibility: Ensure the nail gun is compatible with the gauge of nails you need (15-18 gauge).
The first thing to confirm is that the nail gun is designed to accept the correct gauge nails for your project. Nail guns are designed for specific gauges, such as 15-gauge, 16-gauge, or 18-gauge. Make sure that the nail gun you choose is compatible with the gauge of nails you will be using. This compatibility is important for making sure the nails fit properly in the magazine and are driven correctly.
-
- Angled or Straight: Angled nail guns are often better for reaching tight spaces.
Nail guns are available in both angled and straight configurations. Angled nail guns have a magazine that is positioned at an angle relative to the handle, allowing them to reach tighter corners. Straight nail guns have a magazine aligned with the handle, which offers a more direct line of sight. Angled nail guns are useful when working in areas where access is limited, such as in corners or close to walls. The angle provides an advantage.
-
- Power Source: Consider pneumatic (air-powered) or cordless options. Cordless offers greater maneuverability.
Nail guns are either pneumatic (air-powered) or cordless. Pneumatic nail guns are powered by compressed air and typically require an air compressor. Cordless nail guns run on batteries, offering freedom from cords and a power source. Cordless guns are very convenient to use, and they offer greater maneuverability and portability. Pneumatic nail guns usually provide more consistent power and are generally lighter. Choose the power source that best fits your work style.
Using the Nail Gun Properly
Proper nail gun use is essential for achieving professional results. Correct techniques minimize damage to the molding and ensure a secure attachment. These methods also reduce the chance of splitting the wood. Safe and appropriate nail gun handling is always recommended.
-
- Adjust Depth: Adjust the depth setting to ensure nails are countersunk without damaging the wood.
Make sure you adjust the depth setting on your nail gun. The depth setting controls how far the nails are driven into the material. The goal is to set the nails just below the surface of the wood without damaging the molding. Experiment on scrap pieces of wood to find the correct depth setting. Always make minor adjustments to achieve the ideal depth.
-
- Maintain Angle: Hold the nail gun perpendicular to the molding to avoid angled nails.
When using a nail gun, hold it perpendicular to the molding. This ensures that the nails are driven straight into the wood. Hold the gun level against the molding and make sure it’s in line. This creates a more secure hold and minimizes any risk of the molding coming loose. Correct alignment of the nail gun promotes a clean and professional finish.
-
- Stagger Nails: Stagger the nails to increase holding strength.
Staggering the nails is a great way to improve the holding strength of the molding. Instead of driving nails in a straight line, alternate their placement to create a zigzag pattern. This distributes the pressure and helps to prevent the molding from pulling away from the wall. This technique is especially useful for longer pieces of molding and areas that will be subject to movement or stress.
Best Nails for Common Molding Types
Different types of molding require different nail choices. Knowing which nails are best for baseboards, crown molding, and other common trim elements will help you to achieve great results. Selecting the right nails avoids damage to the molding and ensures a clean, professional finish.
Baseboards
Baseboards are typically thick, and strong holding power is usually required. This means the best nail choices will be slightly thicker. With the thickness of baseboards, you need nails that are strong and long enough to provide a secure grip.
-
- Recommended Gauge: 15- or 16-gauge finish nails.
The best nails for baseboards are generally 15- or 16-gauge finish nails. These nails provide a good combination of strength and visual appeal. The 15-gauge nails offer a slightly more powerful hold, whereas 16-gauge nails will still provide enough holding power while leaving smaller holes. These gauges will provide the necessary grip without damaging the baseboard material.
-
- Length Considerations: Aim for nails that penetrate the wall stud at least two-thirds their length.
When selecting the length of the nails for baseboards, ensure they will securely fasten the molding to the underlying wall. The nail length should provide sufficient grip. Measure the thickness of the baseboard, and then calculate how much penetration you need into the stud or wall. This often means using nails that are at least 2 inches long. This guarantees that the baseboard will stay firmly attached to the wall. This is a key factor.
-
- Application Tips: Pre-drill pilot holes in harder wood baseboards to prevent splitting.
When attaching baseboards, pre-drilling pilot holes in harder wood can reduce the risk of splitting. Using a drill bit slightly smaller than the nail diameter before driving the nails will make them less prone to splitting. This is especially useful for dense materials like oak or maple. Make sure to carefully place the nail gun to avoid accidentally splitting the wood.
Crown Molding
Crown molding is often installed at an angle, and it requires nails that will hold it securely in place. The nail type and length must be carefully chosen to ensure a strong hold. The goal is to securely attach the molding and provide a professional finish.
-
- Recommended Gauge: 15- or 16-gauge finish nails.
For crown molding, 15- or 16-gauge finish nails are commonly recommended. These gauges give sufficient holding power without being overly thick. The slightly smaller diameter of the 16-gauge nails will result in smaller holes. When installing crown molding, the angle and location of the nails are critical for long-lasting performance. The right gauge provides a great look.
-
- Length Considerations: The nail should penetrate the wall stud at least two-thirds of its length.
The length of the nails for crown molding should allow for adequate penetration into the underlying structure. Make sure you calculate the required nail length, considering the thickness of the crown molding and the amount of penetration needed into the stud or ceiling joist. This calculation is a must, as it determines how secure your molding will be. A nail that is too short won’t hold the molding securely, whereas a nail that is too long could cause damage.
-
- Application Tips: Use angled nails for more secure attachment and to reach the wall studs.
For crown molding, using angled nails can help ensure a more secure attachment. Use an angled nail gun or drive the nails at an angle. This can improve the holding power, especially when working on walls that aren’t perfectly straight. Angled nails also help you to reach the wall studs or ceiling joists, which offer the most reliable support. Using angled nails can make a major difference in the stability of your crown molding.
Door and Window Casings
Door and window casings need to be securely fastened for stability. Choosing the correct nail gauge and length will give a professional, long-lasting finish. Correct nail selection and application is important for both the aesthetics and durability of the trim.
-
- Recommended Gauge: 16-gauge finish nails.
When fastening door and window casings, 16-gauge finish nails are a good choice. This gauge provides an ideal balance of holding power and minimal visibility. The smaller diameter of the 16-gauge nails reduces the risk of splitting the wood and allows for neat finishing. They are very versatile for a wide range of casing profiles and materials.
-
- Length Considerations: Ensure the nail penetrates the stud adequately, using the two-thirds rule.
For door and window casings, the correct nail length is vital for a secure installation. Make sure you consider the thickness of the casing and the underlying wall structure. Use the two-thirds rule to determine the depth of penetration needed in the stud. Choose nails that allow for this necessary penetration. Make sure the nails provide a long-lasting, secure attachment.
-
- Application Tips: Pre-drill pilot holes in hardwood casings to prevent splitting.
For hardwood casings, pre-drilling pilot holes will reduce the chance of splitting. Use a drill bit that is slightly smaller than the diameter of the nail. This will help the nail to enter the wood more easily and straight, decreasing the risk of damage. Pre-drilling is especially useful for dense wood that is more prone to splitting. Always take this extra step for the best results.
Real-Life Examples
Understanding real-life examples is a great way to visualize the application of correct nail choices. They also show how decisions affect the outcome of projects. Here are some examples of projects, along with the choices made and the outcome.
- Scenario 1: Installing Crown Molding in a Living RoomA homeowner wanted to install crown molding. The project required precise installation and a clean finish. The project involved a fairly simple room with straight walls. The homeowner opted for 16-gauge finish nails. They used a pneumatic nail gun and carefully measured the length. They used the two-thirds rule for the nail’s penetration into the wall’s studs, and used the correct angle. The result was a neat crown molding project with minimal visible nail holes.
- Scenario 2: Adding Baseboards in a BedroomA DIY enthusiast added baseboards to a bedroom. They chose to use 15-gauge finish nails to secure the baseboards to the wall. The walls were not perfectly flat. Due to these slight irregularities, the DIY enthusiast made sure to pre-drill pilot holes in the baseboard. This ensured the baseboards were firmly attached, creating a professional-looking finished product. The pre-drilled holes prevented the baseboard from splitting.
Frequently Asked Questions
Question: What is the difference between brad nails and finish nails?
Answer: Brad nails are thinner and leave smaller holes, ideal for delicate trim, while finish nails are thicker, providing more holding power for general molding applications.
Question: How do I choose the right nail length?
Answer: Measure the molding’s thickness and add the desired penetration depth into the wall’s stud. Ensure the nail penetrates the stud by about two-thirds of its length.
Question: What gauge nail is best for crown molding?
Answer: Generally, 15- or 16-gauge finish nails are recommended for crown molding, balancing holding power with a neat finish.
Question: Can I use a nail gun for all molding projects?
Answer: Yes, but choose the correct nail gun type and settings. Consider pneumatic vs. cordless based on your needs.
Question: How do I prevent wood splitting when using a nail gun?
Answer: Use the correct gauge nail, pre-drill pilot holes for hardwood, adjust the nail gun’s depth setting, and use a consistent angle.
Final Thoughts
Selecting the right what gauge nail for molding seems like a minor detail, but it makes a big difference in the success of your project. Choosing the right nail gauge, considering the length, and using the right nail type will make sure that your molding looks great and lasts. Remember to consider the wood type, molding thickness, and the look you want. By understanding the differences between brads, finish nails, and headless pins, you will achieve the professional look you’re going for. Use a nail gun correctly, adjusting the depth, and staggering the nails for extra grip. Carefully calculating the nail length and making sure that the nail penetrates deeply enough into the framing will give you results you can be proud of. With these tips, your next molding project will be a smooth and rewarding experience, resulting in beautifully finished trim. So, gather your materials, select your nails carefully, and get started confidently!

I’m Michael R. Turner, the founder, lead writer, and passionate DIY enthusiast behind 101diytools.com. With years of hands-on experience in home improvement and power tools, I built this platform to share practical tips, in-depth guides, and honest reviews to help DIYers of all skill levels tackle projects with confidence and the right tools.