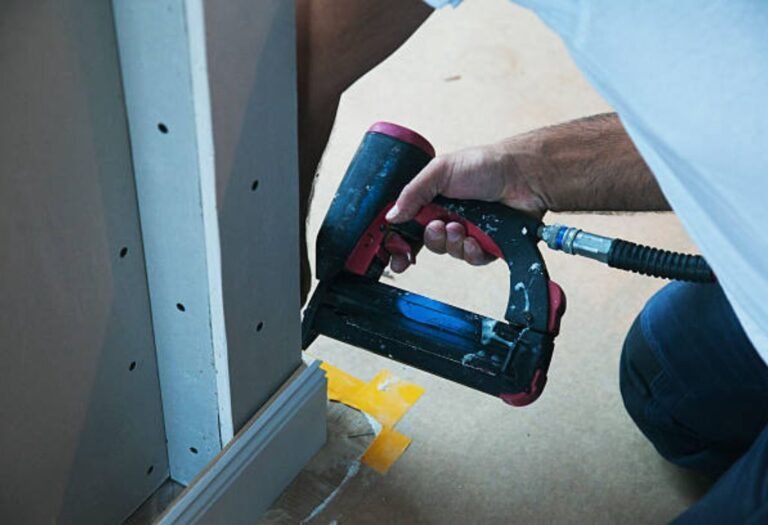
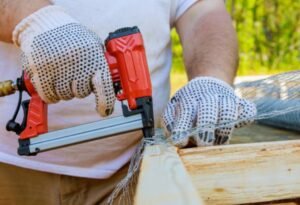
How to Fix a Nail Gun Leaking From Trigger Fast and Easy
Fixing a nail gun leaking from its trigger is often a fast and easy DIY task, primarily indicating worn O-rings or seals. The solution involves safely disassembling the trigger assembly, carefully inspecting and replacing any damaged O-rings, and then reassembling the unit. This straightforward repair effectively stops leaks and restores your nail gun’s optimal performance quickly.
Ever been in the middle of a project, the rhythm of your work flowing, only to hear that dreaded hiss? You stop, bewildered, and realize it’s coming from your trusty nail gun. Specifically, it’s that annoying sound of your nail gun leaking from trigger. Frustrating, right? It feels like your day just ground to a halt, and all that precious air pressure is just vanishing into thin air, literally.
I know that feeling all too well. One minute you’re nailing boards like a pro, the next you’re staring at your tool, wondering if it’s time for an expensive replacement. But here’s the good news: a nail gun leaking from trigger isn’t always a death sentence for your tool. In fact, many times, it’s a relatively simple fix that you can tackle yourself with a few basic tools and a bit of patience.
So, take a deep breath! Instead of tossing it aside or rushing to the store, let’s roll up our sleeves. In this post, I’ll walk you through how to diagnose and fix a nail gun leaking from trigger problem, fast and easy. You’ll be back to your projects, confident and leak-free, in no time.
Key Takeaways
- Prioritize Safety: Disconnect air supply immediately before any work.
- Pinpoint Leaks: Use soapy water to accurately identify the trigger leak source.
- Inspect O-rings: Worn or cracked trigger O-rings are primary suspects.
- Replace Seals: Install new O-rings and seals from a suitable repair kit.
- Clean Components: Thoroughly clean the trigger valve and surrounding parts.
- Tighten Fasteners: Ensure all trigger housing screws are securely tightened.
- Lubricate Properly: Apply silicone grease to new O-rings for optimal seal.
📑 Table of Contents
Understanding Why Your Nail Gun is Leaking from the Trigger
Before we dive into the fix, it’s helpful to understand what causes a nail gun leaking from trigger in the first place. Think of your nail gun as a carefully sealed system that relies on compressed air to drive nails. When air escapes where it shouldn’t, especially around the trigger, it’s usually due to a compromised seal.
The Basics of Nail Gun Air Leaks
Your nail gun’s trigger mechanism is a crucial component. When you press the trigger, it opens a valve, allowing a burst of compressed air to propel the striker, which in turn drives the nail. This valve needs to seal perfectly when the trigger isn’t pressed to prevent air from escaping. Any imperfection in this seal, and you’ve got a leak.
Common Culprits Behind Trigger Leaks
- Worn or Damaged O-Rings: These small rubber rings are the unsung heroes of your nail gun. They create airtight seals between moving parts. Over time, O-rings can dry out, crack, or get squashed, leading to a nail gun leaking from trigger.
- Damaged Trigger Valve: The valve itself, which the O-rings seal against, can sometimes get cracked, pitted, or simply wear out. This is less common but definitely a possibility.
- Dirt and Debris: Sometimes, tiny bits of sawdust, grime, or even metal shavings can get lodged within the trigger mechanism. These can prevent O-rings or the valve from seating properly, causing a leak.
- Loose Fasteners: Less likely for a trigger-specific leak, but sometimes, if the tool’s casing screws are loose around the trigger area, it can affect the seals.
Safety First: Preparing for the Fix
Working with pneumatic tools requires a healthy respect for safety. Before you even think about disassembling your nail gun, make sure you take these crucial steps.
Essential Safety Precautions
- Disconnect the Air Hose: This is paramount. Always, always disconnect your nail gun from the air compressor before any inspection or repair.
- Release Residual Air: Even after disconnecting, there might be some compressed air left in the tool. Fire a couple of “dry” shots into a safe material (like a scrap piece of wood) to ensure all air pressure is released.
- Unload Nails: Remove all nails from the magazine. You don’t want any accidental firing while you’re working on it.
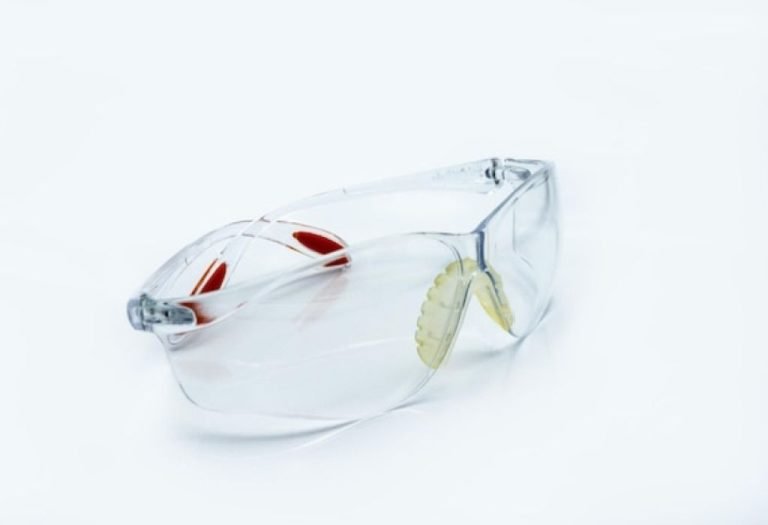
- Wear Safety Glasses: Eye protection is a must. Small parts can spring out unexpectedly.
Gathering Your Tools
Having the right tools ready makes the job smoother. Here’s what you’ll likely need:
- Screwdrivers: Flathead and Philips, various sizes.
- Allen Wrenches: Many nail guns use Allen screws.
- Pliers: Needle-nose pliers can be handy for small parts.
- Replacement O-Rings/Seal Kit: This is crucial. Try to find a kit specific to your nail gun model. Check your manufacturer’s website or a reliable tool parts supplier.
- Pneumatic Tool Oil: For lubricating new O-rings.
- Clean Rags or Paper Towels: For cleaning parts.
- A Container: To keep track of small screws and parts.
Step-by-Step Guide to Diagnosing and Fixing the Leak
Now that you’re prepared and safe, let’s get down to business. Fixing a nail gun leaking from trigger might seem daunting, but by following these steps, you’ll likely find the culprit and fix it.
Initial Inspection and Locating the Leak
First, re-connect your air hose (briefly, just for this test!) and listen closely. Can you hear the hiss? Try to pinpoint exactly where it’s coming from around the trigger. A great trick is the “soap solution test.” Mix a bit of dish soap with water in a spray bottle or small cup. With the air connected, spray or dab the solution around the trigger area. Bubbles will form where the air is escaping, clearly showing you the source of the nail gun leaking from trigger.
Disassembling the Trigger Mechanism
This is where things get a little more intricate.
- Consult Your Manual: If you still have it, your nail gun’s user manual is your best friend. It will often have diagrams showing how to disassemble the tool.
- Remove the Casing: Carefully unscrew the outer casing screws around the trigger and handle area. Place these screws in your container.
- Observe and Document: As you gently pull parts apart, pay close attention to how everything fits together. Take photos with your phone at various stages – these will be invaluable during reassembly. The trigger mechanism itself usually comes out as a small assembly.
Inspecting and Replacing Worn Parts
Once you have the trigger assembly exposed:
- Inspect O-Rings: Look for any O-rings around the trigger valve stem or inside the valve housing. Are they flattened, cracked, or hardened? Carefully remove them using a small pick or screwdriver (be gentle!).
- Clean Everything: Use a clean rag to wipe away any dirt, dust, or debris from the trigger valve and its housing. This is often all that’s needed if the O-rings look good.
- Install New O-Rings: Take your replacement O-rings from your kit. Lightly coat them with pneumatic tool oil. This helps them slide into place and ensures a better seal. Carefully seat the new O-rings where the old ones were.
- Check the Trigger Valve: Examine the valve itself for any visible damage like chips, cracks, or deep scratches. If the valve itself is damaged, you might need to replace the entire trigger valve assembly.
Reassembly and Testing
- Reverse the Steps: Carefully put everything back together, referring to your photos if needed. Ensure all parts are seated correctly.
- Tighten Screws: Snug up all casing screws. Don’t overtighten, as this can strip threads or crack plastic.
- Final Leak Test: Reconnect the air hose and repeat the soap solution test. If you’ve done everything correctly, the bubbles should be gone, and your nail gun leaking from trigger problem should be fixed!
Preventing Future Nail Gun Leaks from the Trigger
An ounce of prevention is worth a pound of cure, especially when it comes to keeping your tools in top shape and avoiding a nail gun leaking from trigger scenario again.
Regular Maintenance is Key
- Oil Your Nail Gun: Add a few drops of pneumatic tool oil into the air inlet before each use or at least daily if you’re using it frequently. This keeps the internal O-rings and moving parts lubricated and supple, preventing them from drying out and cracking.
- Keep it Clean: Regularly wipe down your nail gun. Prevent sawdust and debris from accumulating around the trigger and other moving parts.
- Proper Storage: Store your nail gun in a clean, dry place, ideally in its case. Extreme temperatures and humidity can degrade O-rings faster.
Using the Right Air Pressure
Always use the recommended air pressure for your specific nail gun and the task at hand. Over-pressurizing your tool can put undue stress on seals and components, leading to premature wear and leaks.
Quality Air Supply
Moisture and contaminants in your compressed air can wreak havoc on your nail gun’s internal components.
- Use a Moisture Trap: Install a moisture trap on your air compressor or in-line with your air hose to remove water vapor from the air.
- Drain Compressor Tank: Regularly drain your compressor’s air tank to remove accumulated moisture.
When to Call a Pro (or Consider a New Tool)
While fixing a nail gun leaking from trigger is often a DIY job, there are times when it’s better to seek professional help or, yes, even consider a replacement.
Recognizing the Limits of DIY
If you’ve followed all the steps, replaced the O-rings, and your nail gun is still leaking, or if you encounter complex internal damage that seems beyond your skill level, it might be time to call a professional tool repair shop. Sometimes, a component like the entire main valve or piston might be at fault, requiring specialized tools or knowledge.
Weighing Repair Costs vs. Replacement
Consider the age and overall condition of your nail gun. If it’s an older model, has seen a lot of wear and tear, and repeatedly develops issues, the cost of parts and your time might quickly approach the cost of a new, more reliable tool. Get an estimate for professional repair if you’re unsure, and then compare it to the price of a new nail gun. Sometimes, investing in a new tool provides better long-term value and peace of mind.
| Symptom (Nail Gun Leaking from Trigger) | Likely Cause | Common Fix | Parts Needed |
|---|---|---|---|
| Constant hiss from trigger area | Worn/damaged O-ring | Replace O-rings | O-ring kit for specific model |
| Air seeping around trigger stem | Damaged trigger valve seal | Replace trigger valve assembly | Trigger valve kit |
| Intermittent leak, worse with use | Dirt/debris obstructing seal | Clean trigger mechanism | N/A (cleaning supplies) |
| Leak after recent repair | Improper reassembly, loose fasteners | Re-check assembly, tighten screws | N/A (tools) |
Conclusion
Dealing with a nail gun leaking from trigger can be a real nuisance, but as you’ve seen, it’s often a fixable problem rather than a reason to panic. By understanding the common causes, taking proper safety precautions, and methodically inspecting and replacing worn parts, you can usually get your nail gun back to its old self.
Remember, regular maintenance, like oiling and keeping your tool clean, goes a long way in preventing these issues in the first place. You’ve got the knowledge now to tackle that pesky leak and keep your pneumatic tools running smoothly. So go ahead, get that nail gun fixed, and get back to making sawdust and building amazing things with confidence!
Frequently Asked Questions
Why is my nail gun leaking from the trigger?
A leak from the trigger area of your nail gun usually indicates worn or damaged internal O-rings or seals within the trigger valve assembly. Over time, these components can dry out, crack, or become compressed, preventing a proper seal and allowing compressed air to escape.
What parts typically need replacing when a nail gun leaks from the trigger?
The most common culprits are the small O-rings and seals that create an airtight seal around the trigger valve and its plunger. Often, a complete trigger valve repair kit, which includes all necessary O-rings and sometimes the valve itself, is the most effective solution for a nail gun leaking from the trigger.
Is it safe to continue using a nail gun if it’s leaking air from the trigger?
No, it is not safe to use a nail gun that is actively leaking from the trigger. The loss of air pressure can lead to inconsistent firing, misfires, or nails not fully seating, posing a significant risk of injury to the user or bystanders. Always repair leaks before operating the tool.
How do I go about fixing a nail gun that’s leaking from the trigger myself?
First, ensure the nail gun is disconnected from the air supply and depressurized. Then, carefully disassemble the trigger housing, noting the position of all parts. Inspect and replace any worn O-rings or the entire trigger valve assembly before reassembling and testing for leaks.
What tools are essential for repairing a nail gun trigger leak?
You’ll typically need a set of screwdrivers (Phillips and flathead), possibly Allen wrenches or Torx bits, and a pair of needle-nose pliers or a small pick tool to remove old O-rings. Having pneumatic tool oil or silicone grease specifically designed for O-rings will also aid in reassembly and sealing.
How can I prevent my nail gun from leaking from the trigger in the future?
Regular maintenance is key; ensure you lubricate your nail gun daily with a few drops of pneumatic tool oil into the air inlet. Additionally, store your tool in a clean, dry environment and avoid exposing it to excessive dust or moisture, which can degrade seals and lead to your nail gun leaking from the trigger.

I’m Michael R. Turner, the founder, lead writer, and passionate DIY enthusiast behind 101diytools.com. With years of hands-on experience in home improvement and power tools, I built this platform to share practical tips, in-depth guides, and honest reviews to help DIYers of all skill levels tackle projects with confidence and the right tools.