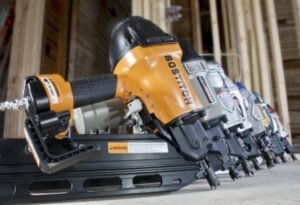
Master How to Unjam a Nail Gun With These Easy Steps
Unjamming a nail gun is straightforward if you prioritize safety and follow specific steps. This guide details easy procedures to clear common jams, ensuring you can quickly and safely get your tool back in working order. Learn how to diagnose the issue and apply simple fixes to resume your projects without hassle.
Ever been in the middle of a crucial DIY project or a professional job, feeling the rhythm of productivity, when suddenly—click, fizzle, no nail! Your trusty nail gun, usually a beacon of efficiency, has gone silent, jammed mid-fire. It’s a frustrating moment, isn’t it? That sudden halt can throw your whole workflow off kilter and leave you scratching your head. But don’t worry, you’re not alone, and the solution is often much simpler than you might think.
A jammed nail gun is a common occurrence, much like a hiccup in an otherwise smooth operation. Whether you’re a seasoned carpenter or a weekend warrior tackling a new fence, knowing how to unjam a nail gun quickly and safely is an invaluable skill. It saves you time, prevents damage to your tool, and most importantly, keeps you safe. There’s no need for panic or brute force; just a clear head and a few straightforward steps.
In this comprehensive guide, we’re going to walk through everything you need to know to diagnose and fix a nail gun jam. We’ll cover the essential safety precautions, identify common types of jams, and provide a detailed, step-by-step process to get your nail gun back in action. So, take a deep breath, grab your nail gun, and let’s master how to unjam a nail gun together with these easy steps.
Key Takeaways
- Prioritize Safety: Always disconnect power and air before inspection.
- Locate the Jam: Check both the magazine and nosepiece for obstructions.
- Clear the Magazine: Remove all fasteners from the nail gun’s strip.
- Access the Nose: Unlatch and open the front nosepiece carefully.
- Extract Obstruction: Use pliers or screwdriver to gently remove jammed nails.
- Test Thoroughly: Reconnect power; test firing on a scrap piece of wood.
- Prevent Future Jams: Use correct nails and keep your tool clean.
📑 Table of Contents
Safety First: Your Absolute Priority
Before you even think about touching a jammed nail gun, remember this golden rule: safety always comes first. A nail gun is a powerful tool, and even when it’s not firing correctly, it still holds potential energy and sharp nails. Approaching a jam without proper precautions is incredibly risky and can lead to serious injury.
Disconnect the Power Source
This is the most critical first step, without exception. If your nail gun is pneumatic, disconnect it from the air compressor. If it’s an electric or cordless model, remove the battery pack or unplug it from the power outlet. This eliminates the chance of the gun accidentally firing while you’re trying to clear the jam. Think of it like turning off the car before you look under the hood – it’s non-negotiable.
Understand the Dangers
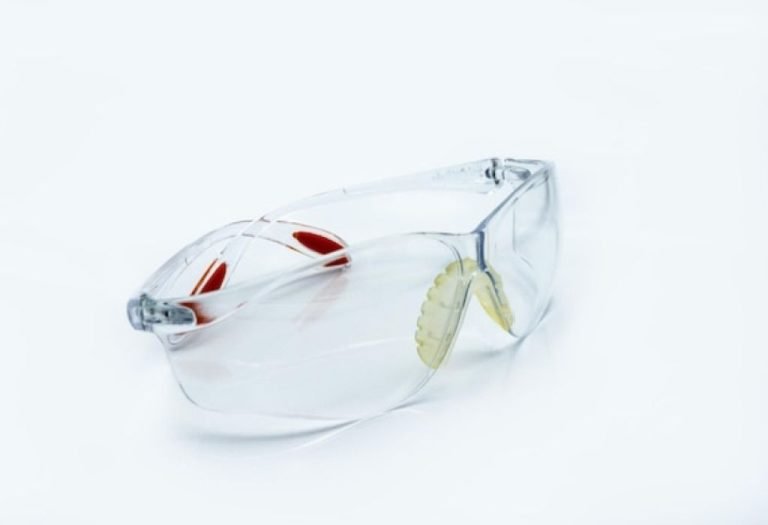
Even after disconnecting the power, there’s still a loaded magazine of nails and a powerful spring mechanism. Never point the tool at yourself or others. Always assume there’s a nail ready to fire, even if you can’t see it. Wear safety glasses to protect your eyes from flying debris or spring-loaded components. Gloves can also offer an extra layer of protection for your hands.
Identifying the Type of Jam
Not all jams are created equal. Understanding what caused your nail gun to seize up can help you pinpoint the solution more quickly. A quick visual inspection is often the key to figuring out how to unjam a nail gun efficiently.
Common Causes of Nail Gun Jams
- Bent Nails: Sometimes a nail in the strip gets bent or deformed, preventing it from feeding correctly into the firing mechanism.
- Wrong Nail Size or Type: Using nails that aren’t specifically designed for your model of nail gun can cause significant feeding issues. Always double-check your nail gun’s specifications.
- Magazine Issues: The magazine itself might be bent, dirty, or have a broken spring, leading to nails not feeding smoothly.
- Debris: Dust, wood chips, or other foreign objects can accumulate in the firing mechanism or nail channel, blocking the path of the nail.
- Worn Parts: Over time, components like the driver blade or nosepiece can wear down, leading to misfires and jams.
Visual Inspection – Where to Look First
Once your nail gun is safely powered down, perform a thorough visual check.
- Check the Magazine: Are the nails loaded correctly? Is there a bent nail visible in the strip? Is the magazine door fully closed?
- Inspect the Nosepiece: Look into the firing area at the very front of the gun. Can you see a partially driven nail, a bent nail, or any debris obstructing the exit point?
- Examine the Driver Blade: This is the part that pushes the nail. Sometimes a nail gets stuck around the driver blade itself.
This initial inspection will often tell you where the problem lies, giving you a clear direction on how to unjam nail gun.
Step-by-Step Guide to Clearing a Magazine Jam
A magazine jam is one of the more common types and often the easiest to fix. This happens when the nails aren’t feeding correctly from the magazine into the firing chamber.
Empty the Magazine
First, carefully open the magazine latch and remove the entire strip of nails. If there are multiple strips, take them all out. This allows you to inspect the nails and the magazine channel thoroughly.
Inspect the Magazine Channel
Once the nails are out, look inside the magazine channel. Are there any loose, bent, or broken nails stuck inside? Use a pair of needle-nose pliers or a sturdy pick to gently remove any obstructions. Sometimes, a piece of wood splinter or debris can get lodged here. Make sure the follower spring (the part that pushes the nails forward) is moving freely and isn’t bent or damaged.
Reassemble and Test
If you found a bent nail, discard it. Reload a fresh, straight strip of nails into the magazine, ensuring they are seated correctly. Close the magazine latch firmly. Reconnect the power source and test fire on a scrap piece of wood. If the problem was a simple magazine jam, your nail gun should be back to its usual reliable self.
Tackling a Nosepiece or Driver Blade Jam
These jams are a bit trickier because they involve the critical firing mechanism. This is where a nail gets stuck right at the point of exit or around the driver blade.
Locate the Nosepiece Latch
Most nail guns have a quick-release latch or lever on the nosepiece, specifically designed to allow access for clearing jams. Consult your nail gun’s manual if you can’t locate it immediately. It’s usually a small lever or a button that releases the front cover.
Carefully Open the Nosepiece
Once you’ve found the latch, release it and carefully open the nosepiece. Be cautious, as there might be a spring under tension, or a partially driven nail could suddenly shift. Keep your face clear of the opening.
Remove the Obstruction
With the nosepiece open, you should be able to see the jammed nail or debris. Use a pair of needle-nose pliers to grasp the nail and gently pull it out. If a nail is wrapped around the driver blade, try to gently work it free. Never force it, as this could damage the driver blade or other internal components. If the nail is badly bent and stuck, you might need to cut it with wire cutters before you can remove the pieces. Once the obstruction is clear, close the nosepiece securely until the latch engages. Learning how to unjam a nail gun in this scenario requires a delicate touch.
Troubleshooting Stubborn Jams and Prevention Tips
Sometimes, despite your best efforts, a jam just won’t clear, or it keeps happening. This indicates a deeper issue. However, many jams can be prevented with good habits.
When to Seek Professional Help
If you’ve followed all the steps for how to unjam a nail gun and the tool is still jamming, or if you suspect internal damage to the driver blade, spring, or other components, it’s time to call in the professionals. Attempting to disassemble your nail gun beyond the manufacturer-designated access points can void your warranty and potentially cause further damage or injury. A qualified technician can diagnose and repair internal issues safely.
Best Practices for Preventing Future Jams
An ounce of prevention is worth a pound of cure, especially with power tools.
- Use Correct Nails: Always use the specific gauge, length, and head type of nails recommended by your nail gun’s manufacturer.
- Regular Cleaning and Maintenance: Periodically clean out the magazine and nosepiece areas. Air compressors for pneumatic guns often require oiling; check your manual for specific maintenance schedules.
- Don’t Overfill the Magazine: Overfilling can put undue pressure on the nails and the feeding mechanism, leading to jams.
- Store Properly: Keep your nail gun in a clean, dry environment, preferably in its case, to prevent dust and debris from entering the mechanism.
- Inspect Nails Before Loading: Quickly check your nail strips for bent or deformed nails before loading them into the magazine.
Testing Your Nail Gun After Unjamming
Once you’ve cleared the jam and reassembled everything, it’s crucial to test your nail gun to ensure it’s functioning correctly and safely before resuming your project.
Dry Firing (Without Nails)
First, with no nails loaded and the power connected, point the nail gun at a safe, clear area (away from people or fragile objects). Engage the safety contact tip and pull the trigger a few times. Listen for the normal sounds of operation. You should hear the driver blade cycling smoothly without any grinding or unusual noises. This confirms that the internal mechanisms are moving freely.
Test Firing on Scrap Material
Next, load a fresh strip of nails and find a sturdy piece of scrap wood. With all safety precautions in place (safety glasses on!), fire a few nails into the scrap material. Observe how the nails are driven. Are they consistently flush or countersunk? Is the nail gun operating smoothly without hesitation or further jams? This final test confirms that your efforts to how to unjam a nail gun were successful and that the tool is ready for action.
If everything seems normal, congratulations! You’ve successfully unjammed your nail gun and saved yourself potential frustration and repair costs. If it still misfires or jams, repeat the clearing steps or consider professional service.
Facing a jammed nail gun can feel like a major setback, but with the right approach, it’s a manageable hiccup in your workday. By prioritizing safety, carefully diagnosing the issue, and following our step-by-step guide, you now have the knowledge and confidence to tackle most common nail gun jams head-on. Remember, knowing how to unjam a nail gun isn’t just about fixing a tool; it’s about maintaining your efficiency and ensuring your safety on every project.
So, the next time your nail gun goes quiet, you’ll be prepared to quickly assess the situation, clear the obstruction, and get back to doing what you do best – building, creating, and finishing your projects with precision. Keep these tips handy, and happy nailing!
Frequently Asked Questions
How do I know if my nail gun is jammed?
You’ll typically notice a nail gun jam when the tool stops firing nails, misfires, or the motor runs without driving a fastener. Often, a nail might be visibly bent or stuck in the nosepiece, preventing the next nail from being loaded.
What’s the very first safety step before attempting to unjam a nail gun?
Before you even think about how to unjam your nail gun, you must immediately disconnect the power source. For pneumatic guns, unplug the air hose; for cordless models, remove the battery to prevent accidental firing and potential injury.
What are the general steps to unjam a nail gun successfully?
After ensuring the nail gun is disconnected from power, the process to unjam typically involves opening the magazine to remove any remaining nails. Next, locate and open the nosepiece latch to access the jammed nail, then carefully remove the obstruction using pliers or a screwdriver if needed.
What tools might I need to unjam a nail gun effectively?
You generally won’t need many specialized tools to unjam your nail gun. A pair of needle-nose pliers or regular pliers can be very helpful for grasping and pulling out stubborn jammed nails. A small flathead screwdriver might also be useful for prying open latches or clearing debris.
Why does my nail gun keep jamming frequently, even after I unjam it?
Frequent jamming often indicates an underlying issue beyond a single trapped nail. Common causes include using incorrect nail sizes or types, insufficient air pressure for pneumatic models, or a build-up of dirt and debris within the tool’s firing mechanism that requires thorough cleaning.
Can regular maintenance help prevent my nail gun from jamming in the future?
Absolutely, regular maintenance is key to preventing your nail gun from jamming. This includes using the correct fasteners, ensuring proper air pressure for pneumatic tools, and regularly cleaning and lubricating the moving parts according to the manufacturer’s recommendations.

I’m Michael R. Turner, the founder, lead writer, and passionate DIY enthusiast behind 101diytools.com. With years of hands-on experience in home improvement and power tools, I built this platform to share practical tips, in-depth guides, and honest reviews to help DIYers of all skill levels tackle projects with confidence and the right tools.