Master How to Shoot Nails Straight Like a Pro Today
Achieving perfectly straight nail shots requires mastering proper technique, not just brute force. Focus on selecting the right nail for the material, maintaining a firm grip and stable stance, and initiating the strike with precision. Consistent practice and attention to these details will prevent bent nails and split wood, transforming your work into that of a true professional.
Ever found yourself staring at a crooked nail, half-bent and defiant, wondering if there’s some secret handshake to getting it right? You’re not alone! It’s one of those fundamental DIY skills that seems simple on the surface, but can quickly lead to frustration, bent nails, and even a sore thumb or two. Whether you’re hanging a picture, building a bookshelf, or embarking on a bigger home improvement project, knowing how to shoot nails straight is absolutely essential.
I remember my first few attempts at nailing. It was less like construction and more like a chaotic game of whack-a-mole, with the mole (the nail) always winning. But over time, and with a lot of practice (and a few colorful metaphors), I learned the techniques that turn a wobbly strike into a confident, straight drive. And guess what? It’s not magic; it’s just a matter of understanding the physics and refining your form.
Today, we’re going to dive deep into the art and science of nailing. By the end of this guide, you’ll have a clear roadmap to confidently shoot nails straight every single time. So grab your hammer (and maybe a spare box of nails), because we’re about to transform your nailing game from amateur hour to pro-level precision!
Key Takeaways
- Master Your Grip: Ensure a firm, two-handed hold for ultimate stability.
- Aim Perpendicularly: Always position the nail gun 90 degrees to the surface.
- Apply Consistent Pressure: Press firmly and steadily against the workpiece.
- Maintain Your Tool: Keep your nail gun clean and regularly serviced.
- Choose Correct Nails: Use the right nail type and length for the job.
- Practice Makes Perfect: Hone your technique consistently on scrap materials.
📑 Table of Contents
- The Right Tools for the Job: Setting Yourself Up for Success
- Mastering Your Grip and Stance: The Foundation of Accuracy
- The Art of the Swing: Power Meets Precision
- Common Pitfalls and How to Avoid Them
- Practice Makes Perfect: Drills to Improve Your Nailing Skills
- Conclusion: The Satisfaction of a Job Well Done
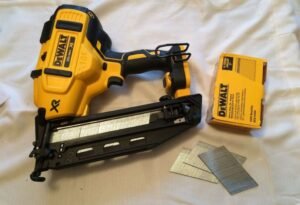
The Right Tools for the Job: Setting Yourself Up for Success
Before you even think about swinging, having the right equipment makes a world of difference. You wouldn’t try to cut steak with a butter knife, right? The same principle applies here. Choosing the correct hammer and nails is the first step to being able to shoot nails straight.
Choosing the Right Hammer
- Claw Hammer (Curved vs. Straight): For general DIY, a curved claw hammer (16-20 oz) is your best friend. The curved claw helps remove nails easily. Straight claw (rip) hammers are better for demolition.
- Weight Matters: A heavier hammer (16 oz or more) does more work with less effort on your part, allowing you to shoot nails straight with more power and fewer strikes. Too light, and you’ll tire out and lose accuracy.
- Handle Comfort: Look for an ergonomic handle that feels good in your hand and offers a good grip. A comfortable grip reduces fatigue and improves control.
- Face Type: Most general-purpose hammers have a smooth face. A milled (waffle) face is great for framing as it grips the nail head, but it will leave marks on the wood, so avoid it for finish work.
Selecting the Correct Nails
Nails come in various types, lengths, and gauges. Using the right one for your project is crucial:
- Length: As a general rule, your nail should be long enough to penetrate the receiving material by at least two-thirds of its total length. For example, if you’re attaching a 1-inch board to a 2-inch stud, a 2.5-inch nail would be appropriate.
- Gauge (Thickness): Thicker nails are stronger but harder to drive. Thinner nails are easier to drive but less strong and more prone to bending.
- Type: Common nails are robust but have a thick head. Finish nails have smaller heads for less visible fastening. Brad nails are even smaller, perfect for delicate trim. Knowing these helps you decide how to shoot nails straight for specific tasks.
Essential Safety Gear
Always prioritize safety! A bent nail or a missed swing can lead to injury. When you’re trying to shoot nails straight, a little extra protection goes a long way:
- Safety Glasses: Non-negotiable. Nails can shatter or ricochet. Protect your eyes!
- Work Gloves: Offer grip, protect against splinters, and cushion your hands from repetitive impact.
- Appropriate Footwear: Closed-toe shoes, ideally steel-toed, prevent painful encounters with dropped tools or nails.
Mastering Your Grip and Stance: The Foundation of Accuracy
Your body is the machine, and like any good machine, it needs proper calibration. How you hold the hammer and position your body directly impacts your ability to shoot nails straight.
The Perfect Hammer Grip
Forget the “choke up” grip you might use for other tools. For a hammer, you want to hold it near the end of the handle. This maximizes leverage and allows the hammer’s weight to do more of the work. A firm but relaxed grip prevents fatigue and ensures better control through the swing. Imagine shaking someone’s hand – that’s the kind of firm but not bone-crushing grip you want.
Your Body’s Foundation: Stance and Balance
Stand comfortably with your feet shoulder-width apart, facing the work piece. Your weight should be balanced, allowing for a natural rotation of your torso and arm. Avoid leaning too far in or out. Good balance gives you stability, which is vital for directing the hammer to shoot nails straight.
Guiding the Nail: The “Starter” Tap
This is where many beginners go wrong! Instead of launching into a full swing, use your non-dominant hand to hold the nail upright against the wood. Hold it near the head, keeping your fingers away from the direct path of the hammer. With a light, controlled tap from the hammer, just embed the nail enough so it stands on its own. Once it’s secure, you can remove your guiding hand. This initial tap is crucial for ensuring you can shoot nails straight from the very beginning.
The Art of the Swing: Power Meets Precision
Nailing is less about brute force and more about controlled power. The swing is where all your preparation comes together to shoot nails straight.
Short, Controlled Swings for Starting
After the initial tap, you don’t need a massive swing. Use short, controlled strokes to drive the nail further in until about half its length is embedded. Focus on hitting the nail head squarely. Keep your eye on the nail head, not the hammer. This precise start prevents the nail from bending and sets the stage for a straight drive.
Full Swings for Driving Home
Once the nail is stable and partially embedded, you can transition to a fuller, more powerful swing. The power should come from your elbow and shoulder, not just your wrist. Arc the hammer head in a smooth, controlled motion, aiming to hit the nail head squarely with the center of the hammer face. Let the weight of the hammer do the work. Don’t “chase” the nail; let your swing carry through.
Finding the Sweet Spot: Consistent Contact
The key to driving a nail straight is hitting its head squarely and consistently. Imagine a line going from the center of the hammer face directly through the nail and into the wood. Your goal is to keep that line consistent. If you hit the nail off-center, it’s more likely to bend. Practice aiming for the exact center of the nail head with each strike. This consistency is how you learn to shoot nails straight every single time.
Common Pitfalls and How to Avoid Them
Even pros occasionally bend a nail, but they know why it happened and how to correct it. Understanding common mistakes will help you diagnose and fix your technique.
The Bent Nail Blues
A bent nail is usually a sign of one of two things: either you’re hitting it off-center, or you’re not using enough power (or the right amount of power at the right time). If it bends at the start, you likely hit it crooked. If it bends further in, you might be hitting it too lightly, causing it to wobble, or the nail itself is too thin for the wood.
- Solution: Focus on precise, square hits, especially at the beginning. Ensure your hammer swing is aligned with the nail’s path. If the nail is struggling to penetrate dense wood, consider a pilot hole (drill a slightly smaller hole first) or a stronger nail.
Hitting Your Thumb (Ouch!)
This is probably the most common and painful mistake. It usually happens when your guiding hand stays too close for too long, or your aim is off. Remember the “starter” tap? That’s your best defense.
- Solution: Use that initial tap to embed the nail enough so it can stand on its own. Then, remove your guiding hand entirely before you take any full swings. If you’re nervous, try holding the nail with a pair of needle-nose pliers or a specialized nail holder tool initially.
Working with Tricky Angles and Materials
Sometimes you can’t just nail straight down. Nailing into corners, tight spots, or dense hardwoods requires slight adjustments.
- Solution: For angles, sometimes it’s easier to start the nail at a slight angle to the wood before trying to drive it in straight. For hardwoods, drilling a pilot hole (a slightly smaller diameter than the nail) can prevent splitting and make it easier to shoot nails straight without bending them.
Practice Makes Perfect: Drills to Improve Your Nailing Skills
Like any skill, mastering how to shoot nails straight requires practice. Don’t be afraid to experiment and build muscle memory. Dedicate a bit of time to these simple drills, and you’ll see a huge improvement.
The Scrap Wood Challenge
Grab a piece of scrap wood (2x4s work great) and a box of nails. Your goal is simple: drive 10 nails perfectly straight, flush with the surface, without bending a single one. Start slow, focusing on your grip, stance, and swing. Increase your speed gradually. This drill helps you internalize the feel of a successful drive.
Speed and Accuracy Drills
Once you’re consistently nailing straight, try timing yourself. Can you drive 5 nails straight in under a minute? Under 30 seconds? This isn’t just about speed; it’s about maintaining accuracy under slight pressure. This drill refines your muscle memory and confidence.
- Focus on a target: Draw small circles on your scrap wood. Try to hit the center of each circle with the nail head. This hones your precision and helps you learn to shoot nails straight exactly where you want them.
Quick Reference Checklist for Straight Nailing
- ✓ Right Tools: Correct hammer weight and nail type for the job.
- ✓ Safety First: Always wear safety glasses and gloves.
- ✓ Proper Grip: Hold the hammer near the end of the handle.
- ✓ Stable Stance: Feet shoulder-width apart, balanced.
- ✓ Starter Tap: Embed the nail with a light tap, then remove guiding hand.
- ✓ Square Strikes: Aim for the center of the nail head every time.
- ✓ Controlled Power: Use short swings to start, full swings to finish.
- ✓ Eye on the Nail: Focus on the nail head, not the hammer.
- ✓ Practice: Repetition builds confidence and skill.
Conclusion: The Satisfaction of a Job Well Done
Learning how to shoot nails straight is one of those foundational skills that empowers you to tackle countless projects around the house. It’s about precision, control, and understanding your tools. No more bent nails, no more frustration, just the satisfying thud of a nail driven home perfectly.
Remember, everyone starts somewhere. The journey from fumbling beginner to confident builder is paved with practice and patience. By focusing on the right tools, proper technique, and consistent practice, you’ll soon be able to confidently shoot nails straight like a seasoned pro. So go ahead, grab that hammer, and start building your confidence one perfectly straight nail at a time!
Frequently Asked Questions
What’s the fundamental technique for how to shoot nails straight?
The key is to hold the nail firmly with your non-dominant hand, keeping it perfectly perpendicular to the wood surface. Aim for a consistent, controlled swing, striking the nail head squarely in the center with each blow.
Why do my nails keep bending, and how can I prevent it?
Nails often bend due to an inconsistent hammer strike or if the nail isn’t perfectly perpendicular to the surface when you start. Ensure your swing is fluid and hits the nail head directly and squarely, driving it straight into the material rather than at an angle.
What’s the best way to start a nail so it goes in straight?
To start a nail straight, hold it securely near the head with your thumb and forefinger, making sure it’s vertical and stable on the wood. Give it a few light, precise taps to embed the tip firmly, then remove your fingers before delivering full, controlled hammer blows.
How can I shoot nails straight without splitting the wood, especially near edges?
To avoid splitting, especially near edges or in hardwood, consider blunting the nail tip slightly with a hammer tap before driving it in. Alternatively, you can pre-drill a pilot hole that is slightly smaller than the nail’s shank diameter, which guides the nail and reduces resistance.
Does the type of hammer or my grip affect my ability to shoot nails straight?
Absolutely. A hammer with a comfortable grip and appropriate weight for the job provides better control and reduces fatigue. Hold the hammer near the end of the handle for maximum leverage and a more powerful, consistent swing, which is crucial for driving nails straight and efficiently.
Should I always aim to shoot nails straight at a 90-degree angle into the wood?
While a 90-degree angle is ideal for most standard applications to ensure maximum holding power and a clean finish, sometimes driving nails at a slight opposing angle (toe-nailing) can increase structural rigidity, particularly in framing. However, for general tasks and appearance, always strive to shoot nails straight and perpendicular to the surface.

I’m Michael R. Turner, the founder, lead writer, and passionate DIY enthusiast behind 101diytools.com. With years of hands-on experience in home improvement and power tools, I built this platform to share practical tips, in-depth guides, and honest reviews to help DIYers of all skill levels tackle projects with confidence and the right tools.