Get Rid of Framing Nailer Depth Issues Once and For All
Eliminate frustrating framing nailer depth issues forever by understanding their true causes. This guide provides actionable solutions to achieve consistent, perfectly flush nails, primarily by addressing crucial factors like proper air pressure regulation, precise depth adjustment settings, and regular tool maintenance.
Get Rid of Framing Nailer Depth Issues Once and For All
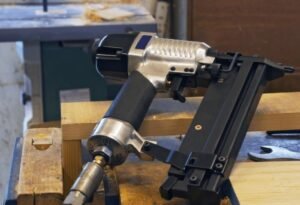
Hey there, fellow builders and DIY enthusiasts! Have you ever been in the middle of a project, firing away with your trusty framing nailer, only to find nails either stubbornly sticking out or sinking so deep they practically disappear? I totally get it – those frustrating framing nailer depth issues can really slow you down and mess with your stride. But here’s the good news: most of these problems are totally fixable, and often with just a few simple adjustments. It’s a common hurdle, and with a bit of know-how, you can get that nailer hitting the sweet spot every single time.
I’ve been there, scratching my head, wondering if it was me, the nailer, or just a bad day. Turns out, it’s usually a combination of factors, all easily tackled once you know what to look for. Let’s dive into how you can make those inconsistent nails a thing of the past and get your projects moving smoothly.
What’s the real culprit behind common framing nailer depth issues, and how can I consistently achieve perfect nail depth every time?
Ah, the age-old question! Getting your nailer to consistently drive nails to the perfect depth – flush with the surface, not proud, not buried – often boils down to a few key areas. From my own experience, it’s like a symphony where all the instruments need to be in tune. Here’s what I’ve learned makes the biggest difference:
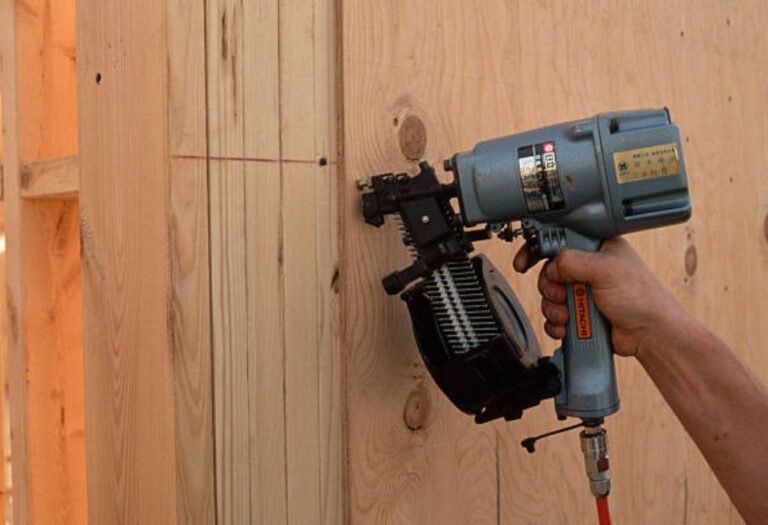
- Your Air Pressure is Goldilocks: This is often the first place I look. If your nails are sticking out, your air pressure might be too low. If they’re blowing through the wood, it’s likely too high. I usually start around 90-100 PSI for most framing tasks and adjust from there. Think of it like a delicate dance; a little more or less pressure can make all the difference when tackling framing nailer depth issues.
- The Tool’s Depth Adjustment Dial: Many nailers have a small dial or lever right on the nose of the tool. This is your primary control for fine-tuning depth. It’s super handy! I always start by making a small adjustment, then testing on a scrap piece of the same material. It’s better to make several small tweaks than one big guess, trust me. One time, I forgot about this entirely and spent an hour adjusting air pressure only to realize the tool’s setting was way off!
- Wood Density Matters: You wouldn’t use the same settings for soft pine as you would for dense oak or even an engineered lumber like an LVL, right? Softer woods require less pressure and a shallower depth setting, while harder materials need more oomph to drive the nail properly. If I’m switching wood types, I automatically anticipate needing to adjust my air pressure and the tool’s depth setting to prevent any framing nailer depth issues.
- Nail Length and Type: Are you using the correct nail length for your material thickness? Are they bright, galvanized, or coated? Coated nails often drive with less effort and can sometimes sink deeper than bright nails at the same setting. Always ensure you’re using the right nails for the job and that they’re compatible with your nailer.
- Tool Maintenance and Wear: A clean and well-maintained tool performs best. Check the driver blade for wear; if it’s chipped or worn, it might not be driving nails consistently. Also, make sure the nose piece isn’t gunked up with sawdust or debris, which can interfere with proper seating and depth. A quick clean and a few drops of pneumatic tool oil can work wonders.
- Your Compressor’s Performance: Is your air compressor keeping up? If it’s struggling to maintain consistent pressure, or if your hose has a leak, you’ll see inconsistent nail depths. Ensure your compressor is adequately sized for your tool and task, and always check for kinks or leaks in your air lines. Nothing’s more frustrating than chasing framing nailer depth issues only to find a tiny pinhole leak in your hose!
My best advice is to always grab a scrap piece of lumber that matches what you’re working with. Before you start nailing away on your actual project, fire a few test nails. Adjust your air pressure and the tool’s depth setting incrementally until you get that perfect, flush drive. It takes a couple of minutes, but it saves so much headache and rework down the line.
So, take a deep breath! Those frustrating framing nailer depth issues are entirely manageable. By systematically checking your air pressure, adjusting your tool’s settings, understanding your materials, and keeping your gear in tip-top shape, you’ll be driving perfect nails like a pro in no time. You’ve got this!

I’m Michael R. Turner, the founder, lead writer, and passionate DIY enthusiast behind 101diytools.com. With years of hands-on experience in home improvement and power tools, I built this platform to share practical tips, in-depth guides, and honest reviews to help DIYers of all skill levels tackle projects with confidence and the right tools.