How to Cut Acrylic Sheet with Circular Saw Safely and Smoothly
Acrylic sheets are a popular alternative to glass for home projects, signs, and displays. They’re lightweight, durable, and visually clear — but cutting them properly can be tricky. If done wrong, the sheet can chip, crack, or melt under the heat of the saw.
Imagine spending hours measuring and marking your acrylic only to end up with rough, melted edges. Frustrating, right? The good news is that you can achieve professional-grade cuts at home using a simple circular saw, provided you follow the right steps and use the proper tools.
This guide will walk you through everything you need to know: from choosing the right saw blade and setup to safety tips and cutting techniques. Let’s make sure your next acrylic cutting project goes flawlessly.
Understanding Acrylic Sheets and Their Properties
Acrylic, also known as Plexiglass or PMMA, is a thermoplastic material known for its optical clarity and strength. Unlike glass, it doesn’t shatter, but it’s sensitive to heat and friction.
When cutting acrylic with a circular saw, the blade’s friction can generate heat, which may melt the edges. That’s why choosing the correct blade type and speed is crucial for clean results.
There are two main types of acrylic sheets — cast and extruded. Cast acrylic is more durable and easier to cut without cracking, while extruded acrylic tends to melt faster. Knowing which type you’re working with helps determine the right feed rate and technique.
Tools and Materials You’ll Need
Before you begin, gather all necessary materials to ensure a smooth workflow. Having the right setup can prevent mistakes and keep the acrylic from cracking.
You’ll need:
- Circular saw with adjustable speed
- Fine-tooth carbide or plastic-cutting blade (60-tooth or higher)
- Clamps
- Straightedge or guide rail
- Masking tape or painter’s tape
- Measuring tape and marker
- Safety glasses and gloves
- Sandpaper (320–600 grit) or a deburring tool
Using these materials ensures that the sheet remains stable, and the cut edges stay smooth without melting.
Preparing the Acrylic Sheet for Cutting
Preparation is key to achieving clean cuts. Start by marking your cutting line clearly using a permanent marker or grease pencil. Place masking tape over the line to reduce chipping and help the blade glide smoothly.
Next, secure the sheet firmly using clamps. The acrylic must not vibrate during cutting, as even a slight movement can cause cracks. Make sure the surface beneath it is flat and well-supported.
If your sheet is covered with a protective film, leave it on during the cut. It helps minimize scratches and edge damage. Always double-check your measurements before turning on the saw.
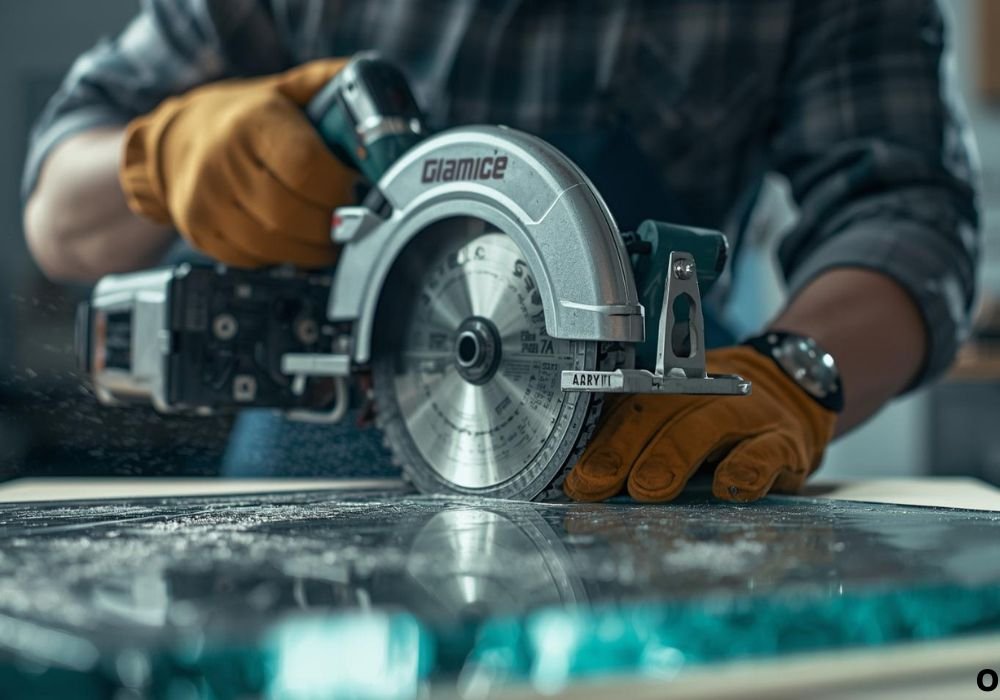
Choosing the Right Blade for Acrylic
The blade is the most critical factor in getting clean, smooth results. A carbide-tipped fine-tooth blade is ideal for cutting acrylic with a circular saw.
Look for blades labeled “plastic-cutting” or “non-ferrous metal.” These blades have less aggressive teeth that reduce vibration and heat buildup. The higher the tooth count (60–80 teeth), the smoother the edge you’ll get.
Avoid using standard wood-cutting blades, as they can cause chipping or melt the acrylic due to excess friction. Always check the blade’s RPM rating and ensure it matches your saw’s speed range.
Step-by-Step Guide: How to Cut Acrylic Sheet with a Circular Saw
Now that everything is ready, let’s move to the actual cutting process.
- Set the saw speed – Use a moderate speed to prevent overheating.
- Position the sheet – Place the acrylic on a stable, flat surface.
- Clamp it down – Secure both ends tightly.
- Align the blade – Make sure it follows your marking line.
- Start the cut – Begin slowly, letting the blade reach full speed before it touches the sheet.
- Feed steadily – Don’t push too fast; let the blade do the work.
- Support the offcut – Prevent the free piece from snapping off near the end.
- Finish and smooth – Use sandpaper or a deburring tool to remove any roughness.
Patience is key. Rushing through the cut often leads to melted edges or cracks.
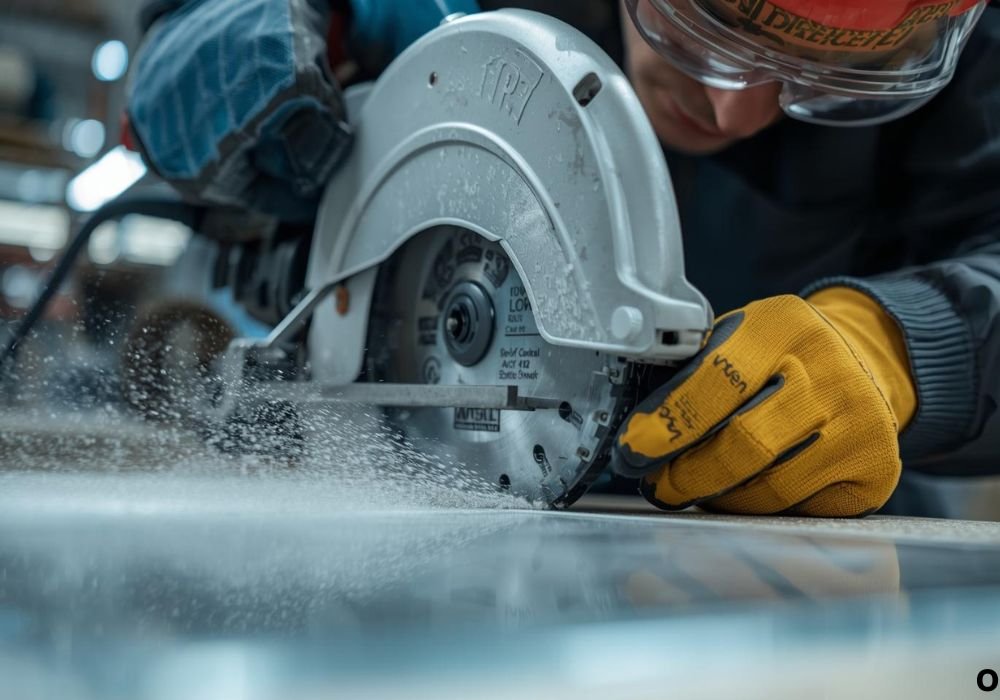
Safety Tips When Cutting Acrylic
Safety should always come first when using power tools. Acrylic can produce fine dust and sharp fragments during cutting.
- Wear eye protection and a dust mask.
- Keep your hands away from the blade at all times.
- Use clamps instead of holding the sheet by hand.
- Ensure your work area is well-ventilated.
- Never remove the protective cover until the cut is finished.
Following these guidelines ensures your project remains accident-free and your results professional-looking.
Common Mistakes to Avoid
Even experienced DIYers make mistakes when cutting acrylic. Here are a few common ones to avoid:
- Using the wrong blade type – Wood blades cause chipping.
- Feeding too fast – Generates heat and melts the sheet.
- Not securing the sheet – Causes vibration and cracks.
- Ignoring cooling pauses – Acrylic can warp from heat buildup.
Remember, slow and steady wins the race when working with this material.
Smoothing and Finishing the Edges
After cutting, your edges might have minor roughness. You can easily fix this using fine-grit sandpaper. Start with 320 grit and move up to 600 for a polished finish.
For even smoother results, use a flame polishing method — carefully pass a butane torch over the edge to restore clarity. Be gentle, as too much heat can deform the acrylic.
You can also apply acrylic polish for a glossy edge that looks factory-finished.
Maintenance and Care After Cutting
Once your acrylic is cut, it’s important to handle it properly to prevent scratching or warping. Store sheets flat in a cool, dry area and avoid direct sunlight.
Clean your acrylic surfaces with mild soap and water — never use ammonia-based cleaners, as they can cloud the finish. When drilling or reshaping, always use tools designed for plastics.
Proper care ensures your acrylic projects maintain their clarity and strength over time.
Troubleshooting Cutting Problems
Sometimes, even after careful preparation, issues may arise.
- Edges melting: Reduce saw speed or pause periodically.
- Cracks forming: Use a finer blade and check for tight clamping.
- Rough edges: Increase tooth count or sand afterward.
- Vibration marks: Ensure a stable workbench and sharp blade.
These quick fixes help you recover and perfect your next attempt easily.
Alternative Cutting Methods
If you don’t have a circular saw, you can use other methods to cut acrylic:
- Scoring and snapping: Works well for thin sheets under 3 mm.
- Jigsaw: Ideal for curved cuts.
- Table saw: Suitable for straight, long cuts with precision.
- Laser cutting: Offers the cleanest and most accurate results.
Each method has its own pros and cons, but for most DIY projects, a circular saw remains the most accessible and reliable option.
FAQs
Can you cut acrylic with a regular wood blade?
No. Wood blades tend to chip and overheat the acrylic. Always use a fine-tooth plastic-cutting blade.
How do I prevent the acrylic from melting?
Use moderate speed, avoid pushing too hard, and take cooling pauses between cuts.
What is the best thickness for circular saw cutting?
Circular saws work best with sheets at least 3 mm thick to prevent cracking.
Should I remove the film before cutting?
No. Keep the protective film on to reduce scratches and edge damage.
How can I get a smooth edge after cutting?
Use sandpaper or flame polishing for a clean, transparent edge finish.
Conclusion
Cutting acrylic sheets with a circular saw might seem intimidating, but with the right preparation, it’s a straightforward process that produces professional results. Using a fine-tooth blade, keeping a steady feed rate, and taking time to prepare your workspace will make all the difference.
Always prioritize safety and precision over speed. By following the steps outlined here — from setup to finishing — you’ll be able to create smooth, clean cuts without cracks or melting. Whether you’re making home décor, signage, or protective panels, mastering this method will help you achieve reliable, beautiful results every time.

I’m Michael R. Turner, the founder, lead writer, and passionate DIY enthusiast behind 101diytools.com. With years of hands-on experience in home improvement and power tools, I built this platform to share practical tips, in-depth guides, and honest reviews to help DIYers of all skill levels tackle projects with confidence and the right tools.