How to Cut a Perfect 90-Degree Angle with a Circular Saw (Step-by-Step Guide)
Every woodworking or construction project demands precision, and the 90-degree angle cut sits at the heart of them all.
Whether you’re building furniture, framing a door, or trimming plywood sheets, a perfectly square cut is what separates a professional finish from a sloppy one.
Circular saws are powerful, versatile, and compact — but unlike table saws, they rely heavily on your control and alignment to make an accurate square cut.
One small deviation from the line or a tilted base plate can result in edges that don’t fit flush, ruining your measurements or your joint alignment.
Fortunately, cutting a perfect 90-degree angle with a circular saw isn’t difficult once you understand the right setup and technique.
By focusing on marking accuracy, saw stability, and guiding the blade properly, you can achieve smooth, straight, and true cuts every time.
In this guide, you’ll learn everything you need to know — from marking your material and adjusting your saw, to making clean, square cuts without tear-out.
Follow along carefully, and you’ll soon master the skill that every woodworker and DIY builder must have: the flawless 90-degree cut.
Understanding What a 90-Degree Cut Means
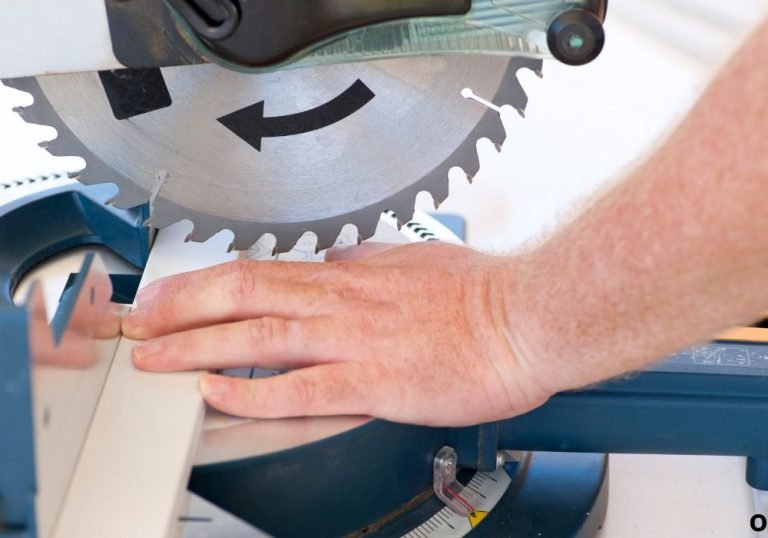
When you make a 90-degree cut, you’re cutting square — meaning the blade travels perfectly perpendicular to the surface of the material.
This ensures the face and edge of your cut meet at a right angle, forming a flat, even corner that fits seamlessly into other pieces.
There are two types of 90-degree cuts: a crosscut, where you cut across the wood grain, and a rip cut, where you cut along the grain.
Both require the same 90-degree setup on your circular saw, but the feed direction and blade type may differ slightly.
Most circular saws come with an adjustable base plate, also known as a shoe, that can tilt between 0 and 45 degrees.
To achieve a 90-degree cut, this base plate must be set exactly at the “0” mark — meaning the blade is perfectly vertical to the work surface.
Even a small misalignment of one or two degrees can cause gaps in joints or uneven surfaces.
That’s why checking your setup before every cut is essential to maintaining true accuracy.
Tools and Materials You’ll Need
To cut clean, accurate 90-degree angles, you’ll need more than just your circular saw.
A few simple measuring and guiding tools make the process much easier and more precise.
Here’s what you’ll need:
- Circular saw (7¼-inch preferred for general work)
- Carpenter’s square or speed square
- Measuring tape
- Straightedge or cutting guide (optional but helpful)
- Pencil or marking knife
- Clamps to secure your workpiece
- Safety glasses and ear protection
If you’re working on large boards, use sawhorses or a stable workbench to keep the material well-supported during the cut.
Having a steady setup ensures that the saw glides smoothly and doesn’t bind or wander off the line.
Step 1: Check and Adjust the Saw’s Base Plate
The foundation of a perfect 90-degree cut lies in your saw’s setup.
Before anything else, make sure your circular saw’s base plate (shoe) is square to the blade.
Loosen the bevel adjustment lever or knob on your saw and set the angle to “0°.”
Once aligned, tighten the lever firmly so it doesn’t shift during the cut.
Don’t just rely on the factory scale — manufacturing tolerances can be slightly off.
Use a carpenter’s square to check if the blade and base plate meet at a true 90-degree angle.
If you see any gap between the blade and the square, fine-tune the adjustment until it’s perfectly flush.
A correctly squared blade guarantees a true perpendicular cut every single time.
Step 2: Measure and Mark Your Cutting Line
Precision begins with accurate measurement and marking.
Use a measuring tape to find the exact length or section you need to cut.
Mark your cut line clearly with a pencil, and extend it across the width of the board for visibility.
For thicker materials, wrap the line slightly over the edge so you can see it while cutting.
Next, place a speed square against the edge of your material and draw a straight 90-degree line across it.
This tool ensures your mark is perfectly square, even if your board edges aren’t perfectly straight.
If you plan to make several cuts at the same length, create a marking jig or use a stop block for consistent accuracy.
Good marking practices prevent uneven joints and keep your measurements consistent throughout your project.
Step 3: Secure Your Material Properly
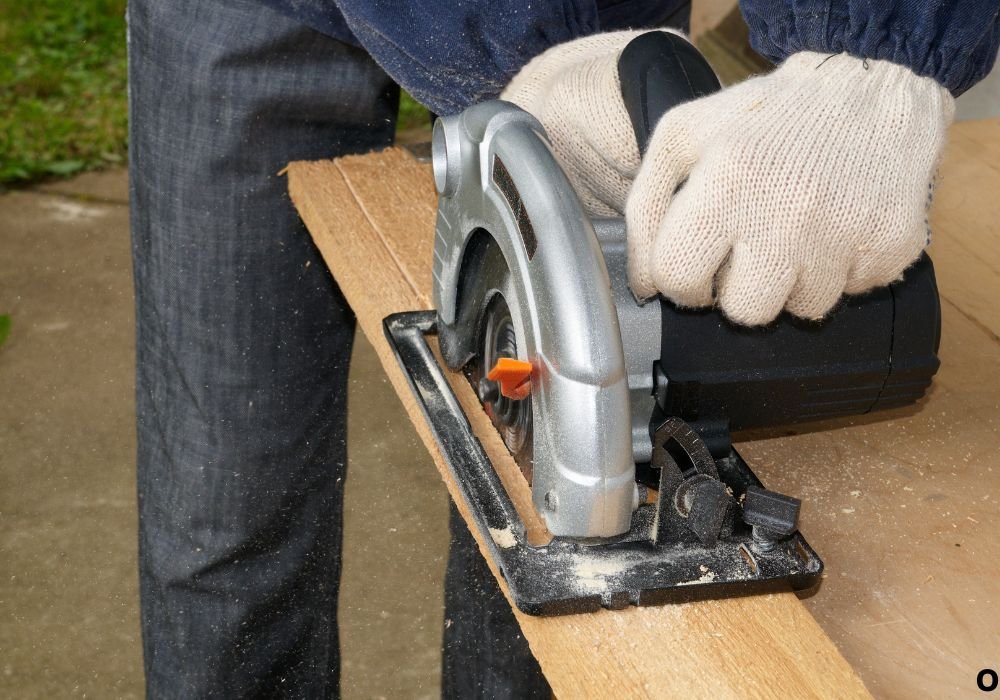
One of the most overlooked steps in cutting is stability — and that’s where many mistakes begin.
If your material moves even slightly while cutting, it can throw your line off instantly.
Place your workpiece on a pair of sawhorses or a workbench with proper support under both sides of the cut.
Make sure the section that will drop off is free to fall away once the cut is complete.
Use clamps to hold the board firmly in place so it doesn’t shift under the saw’s vibration.
If cutting large sheets, position your clamps far enough from the blade path to avoid interference.
This small step eliminates kickback risk and guarantees a cleaner, more controlled finish.
Stability equals accuracy — never skip securing your material.
Step 4: Align the Saw with the Cutting Line
Before turning on the saw, take a moment to align it precisely with your marking line.
Position the front edge of the saw’s base plate directly on your measurement mark.
Look down through the blade notch or sight window on your saw to ensure the blade’s kerf aligns perfectly with the line.
Remember that the kerf (the width of the blade’s cut) will remove material — so decide whether to cut on the inside or outside of the line.
If you want your finished piece to be the exact length you measured, cut just to the waste side of the line.
This ensures your measurement stays true after cutting.
Once aligned, hold the saw handle firmly with both hands, ready to start cutting smoothly.
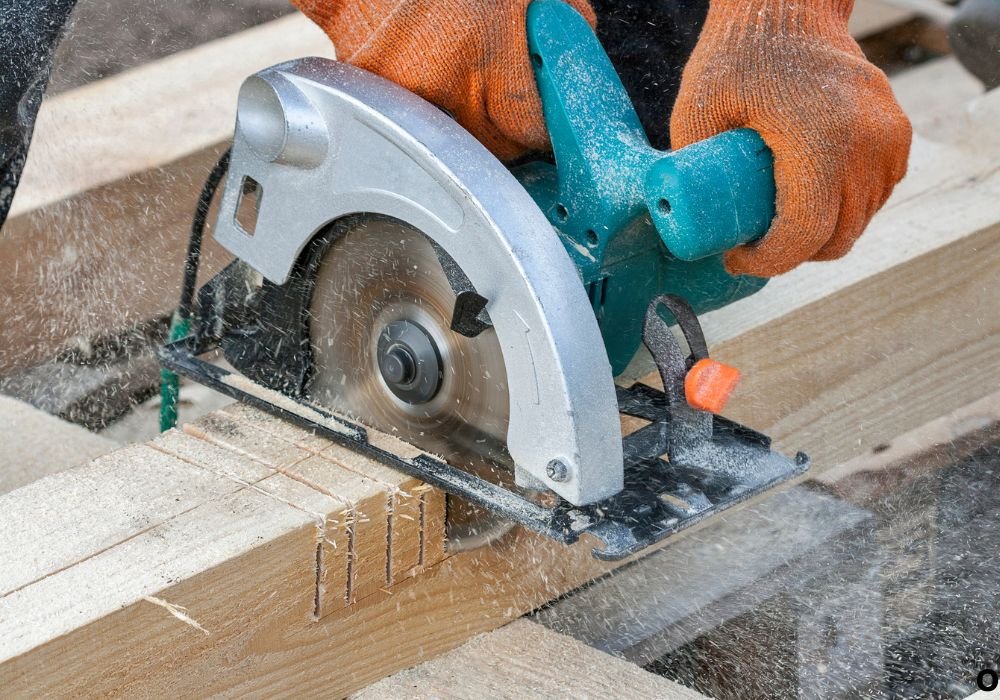
Step 5: Make the 90-Degree Cut
Now it’s time for the most important part — executing the cut itself.
Start your saw and allow the blade to reach full speed before entering the material.
Guide the saw forward slowly and steadily, letting the blade do the work without forcing it.
Maintain consistent pressure and keep the base plate flat against the surface at all times.
Watch the front edge of the base and keep it aligned with your pencil line throughout the cut.
Avoid twisting the saw mid-cut — any sideways motion can tilt the blade and cause uneven edges.
As you near the end, support the offcut piece to prevent splintering or binding.
When finished, release the trigger and let the blade stop completely before setting the saw down.
You should now have a smooth, square 90-degree cut that’s clean, straight, and ready for assembly.
Step 6: Verify the Accuracy of the Cut
Even with perfect technique, it’s important to check your cut for accuracy.
Use your carpenter’s square to test the freshly cut edge against the board’s face.
If the square fits flush without gaps or tilts, congratulations — you’ve achieved a true 90-degree cut.
If you see light or uneven gaps, your saw may not have been perfectly aligned.
Small errors can often be corrected by sanding or trimming with a hand plane.
However, consistent inaccuracies mean your saw’s base plate may need recalibration.
Regularly checking your cuts ensures your tools remain accurate and reliable for all future projects.
Step 7: Prevent Tear-Out and Rough Edges
Circular saws can sometimes cause tear-out — small splinters or rough edges along the top or bottom of the cut.
This happens when the teeth pull wood fibers upward too aggressively, especially on plywood or veneered boards.
To minimize tear-out, always cut with the good side facing down, since the blade’s rotation cuts upward through the material.
You can also apply painter’s tape along the cut line to hold fibers in place.
Using a fine-tooth or plywood blade instead of a coarse framing blade also helps achieve smoother results.
For extra precision, make a shallow scoring cut (about ⅛ inch deep) along the line first, then cut through fully on the second pass.
These small adjustments can make your 90-degree cuts look factory-smooth and ready for finishing.
Tips for Perfect 90-Degree Cuts Every Time
- Check alignment regularly: Always confirm that your saw’s base and blade remain at a true 90 degrees before starting.
- Keep your blade sharp: Dull blades wander, burn wood, and create rough cuts.
- Use a cutting guide: A straightedge or guide rail keeps the saw perfectly aligned on long cuts.
- Mark the waste side: Avoid cutting into your measured section by always knowing which side of the line to follow.
- Practice first: Make a few test cuts on scrap material before working on your final pieces.
- Stay steady: Don’t rush or push too hard; smooth control produces the cleanest results.
Common Mistakes to Avoid
Even experienced woodworkers sometimes make errors that lead to uneven cuts.
Recognizing these mistakes will help you avoid them in your own work.
- Forgetting to check that the blade is perfectly square to the base.
- Letting the saw tilt slightly during the cut instead of keeping the base flat.
- Cutting on the wrong side of the line, shortening the finished piece.
- Using a dull or wrong-type blade for the material being cut.
- Not supporting the workpiece properly, causing it to pinch the blade near the end.
- Moving the saw too quickly or forcing it through tough grain, which leads to burning.
By slowing down and double-checking each step, you’ll prevent almost all of these common issues.
FAQs
How do I make sure my circular saw is set at exactly 90 degrees?
Use a carpenter’s square against the blade and base plate. Adjust the bevel knob until there’s no gap, then tighten firmly.
What’s the difference between a 90-degree bevel and a 90-degree miter cut?
A bevel cuts through the thickness of the material at an angle, while a miter cut angles across the face. A 90-degree cut is square on both planes.
Can I use a guide rail or straightedge for better accuracy?
Yes, guide rails or straightedges are perfect for keeping your saw straight, especially on long cuts or plywood sheets.
Why is my 90-degree cut not square even though my saw says 0°?
Factory angle indicators can be slightly off. Always check the alignment with a square before cutting.
Should I cut on the inside or outside of the line?
Always cut on the waste side (outside) of the line so your finished piece stays the correct size.
What blade type is best for smooth 90-degree cuts?
Use a fine-tooth carbide blade for finish work or a general-purpose blade for framing and construction cuts.
How can I prevent splintering on plywood edges?
Cut with the good face down and use masking tape or a scoring pass before the full cut.
Can I cut multiple boards at once for the same length?
Yes, stack and clamp them tightly, then cut through all at once — just make sure the saw has enough depth.
What’s the safest way to start the cut?
Let the saw reach full speed before engaging the wood, and keep your hands clear of the cutting path.
Do I need to recalibrate my saw often?
Check squareness regularly, especially if you drop your saw or notice repeated inaccuracies.
Conclusion
Cutting a perfect 90-degree angle with a circular saw is a foundational skill every woodworker must master.
It’s the starting point for precise joints, square frames, and clean finishes across every type of project.
By focusing on accurate marking, stable support, and consistent blade alignment, you can achieve cuts that are perfectly square, smooth, and professional-looking.
Even if your saw isn’t new or high-end, careful technique and patience always deliver great results.
Always remember to verify your setup, cut slowly, and check accuracy after each pass.
With practice, your circular saw will feel as precise as a table saw — and every project you build will show the difference.
A clean, square 90-degree cut isn’t just a skill — it’s the foundation of craftsmanship, precision, and pride in every piece you make.

I’m Michael R. Turner, the founder, lead writer, and passionate DIY enthusiast behind 101diytools.com. With years of hands-on experience in home improvement and power tools, I built this platform to share practical tips, in-depth guides, and honest reviews to help DIYers of all skill levels tackle projects with confidence and the right tools.