How to Clean a Circular Saw the Right Way for Smooth Cutting
Every craftsman knows the feeling of pride that comes with a perfectly smooth cut.
But over time, even the best circular saw begins to struggle, leaving behind burn marks or rough edges.
This usually isn’t a sign of a weak motor or dull blade—it’s the result of dirt, resin, and sawdust buildup.
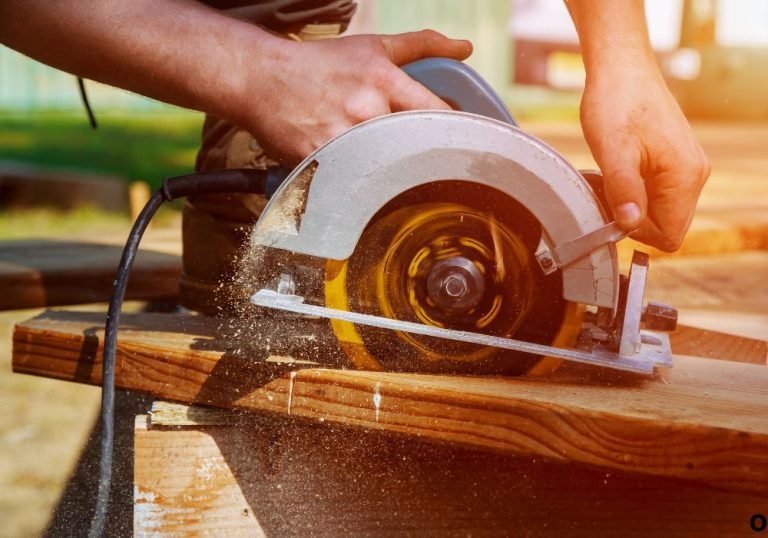
Your circular saw works hard cutting through wood, metal, and plastic, and each cut leaves behind microscopic debris.
That dust eventually clogs vents, gums up moving parts, and dulls the blade.
Before long, the saw sounds louder, cuts slower, and produces uneven results.
The good news is that cleaning your circular saw isn’t complicated.
With the right approach and a few careful steps, you can restore its original cutting power and keep it performing like new for years.
Why Cleaning Your Circular Saw Is So Important
Regular cleaning does more than just make your saw look good—it directly impacts how it performs.
Dust and resin buildup increase friction and make the motor work harder than necessary.
When the blade teeth are coated in sap or pitch, the saw generates extra heat during cutting.
That heat can warp blades and damage the wood’s surface finish.
A dirty vent or fan restricts airflow, causing the motor to overheat and wear out prematurely.
In extreme cases, it can even pose a fire hazard in dusty workshops.
By cleaning your circular saw frequently, you extend its lifespan and maintain precise cutting accuracy.
It also helps prevent accidents caused by stuck guards or clogged triggers.
Safety First: Preparing for Cleaning
Before you start cleaning your saw, always disconnect it from power.
For corded models, unplug it completely; for cordless saws, remove the battery pack.
Wear protective gloves to avoid sharp blade edges.
Even a dull circular saw blade can cut skin easily when handled carelessly.
Place your saw on a clean, flat surface with plenty of light.
A workbench or sturdy table works best for visibility and control.
Gather all necessary supplies in advance so you don’t have to stop midway.
This includes tools, cleaning solution, brushes, and a cloth or compressed air can.
Preparation not only ensures safety but also helps you clean more efficiently.
It’s always better to plan your steps than rush through the process.
Tools and Materials You’ll Need
Cleaning your circular saw doesn’t require fancy equipment.
Most of what you need can be found around the workshop or home.
Here’s a simple checklist:
- Phillips and flathead screwdrivers
- Soft wire brush or nylon brush
- Compressed air or small vacuum
- Mild dish soap or degreaser
- Warm water
- Rags or microfiber cloths
- WD-40 or light machine oil
- Safety gloves and glasses
If you’re cleaning the blade separately, consider using a dedicated blade cleaner or pitch remover.
Avoid harsh chemicals like bleach or oven cleaner, as they can damage coatings and labels.
Having these supplies ready saves time and ensures each component gets the proper care it deserves.
Step 1: Remove the Blade
Start by removing the saw blade for a thorough cleaning.
This is the part that collects the most dirt, resin, and buildup.
Engage the blade lock if your saw has one, or use a wrench to hold the arbor steady.
Turn the arbor nut counterclockwise to loosen and remove the blade.
Carefully slide the blade off and place it on a soft cloth or cardboard sheet.
Handle it gently to avoid bending the plate or chipping the carbide teeth.
Inspect the blade for dull edges, rust spots, or damaged teeth.
If the blade shows serious wear, this might be the perfect time to sharpen or replace it.
Always note the direction of blade rotation before removing it.
This ensures you reinstall it correctly later.
Step 2: Clean the Blade Thoroughly
A dirty blade is the main reason most saws perform poorly.
Resin buildup increases friction and heat, dulling the edge faster than normal.
Mix warm water with mild dish soap in a shallow pan or bucket.
Submerge the blade for about 10 to 15 minutes to soften hardened residue.
Use a soft brass or nylon brush to gently scrub between each tooth.
Focus on the flat areas near the cutting edge where pitch tends to accumulate.
Avoid using steel wool or abrasive pads, which can scratch the blade coating.
Once clean, rinse with water and dry completely with a lint-free cloth.
Spray a light coat of WD-40 or a corrosion inhibitor to prevent rust.
Let it dry before reinstalling the blade onto your saw.
Step 3: Clean the Saw Housing and Guard
The saw’s housing and blade guard trap fine sawdust and resin during every cut.
Over time, these particles harden and block movement.
Use a soft brush or compressed air to remove loose debris from the outer casing.
Pay special attention to the vents and around the trigger area.
If your guard is removable, detach it for a deeper clean.
Wash it with mild soap and water, then dry thoroughly to prevent corrosion.
Avoid soaking the motor housing in water or spraying directly into vents.
Instead, use a slightly damp cloth to wipe down surfaces safely.
A clean housing ensures better airflow, smoother guard movement, and a more consistent cutting experience.
Step 4: Clean the Base Plate and Shoe
The base plate, also called the shoe, ensures your cuts stay accurate.
However, dirt and sap buildup can make it sticky and hard to glide smoothly.
Wipe the entire base with a damp cloth to remove surface grime.
If pitch or glue residue remains, apply a small amount of mineral spirits.
Use gentle circular motions to clean off sticky spots without damaging the finish.
Avoid rough scrubbing, which can scratch the metal surface.
For aluminum or magnesium shoes, never use acidic cleaners—they can corrode the metal.
Dry the surface completely and apply a thin coat of lubricant if needed.
This step helps your saw slide effortlessly across the material for straighter, cleaner cuts.
Step 5: Blow Out Dust from the Motor and Vents
Dust is the silent enemy of every power tool.
It sneaks into vents, fans, and switches, slowly suffocating your saw’s motor.
Use compressed air to blow dust out of the vents and cooling slots.
Work in short bursts to avoid forcing debris deeper inside the housing.
If you don’t have compressed air, a small workshop vacuum works just as well.
Attach a narrow nozzle to reach tight corners around the motor casing.
Avoid poking wires or parts inside with metal tools.
A gentle air stream is more than enough to dislodge trapped dust.
Clean vents keep your saw cooler and extend motor life significantly.
Step 6: Lubricate Moving Parts
After cleaning, proper lubrication ensures all parts move freely.
Dry friction can wear down pivot points and cause squeaky or sticky movement.
Apply a few drops of light machine oil to the blade guard pivot.
Open and close the guard several times to spread the oil evenly.
Lightly lubricate any hinges, height adjustments, or tilt mechanisms.
Avoid over-lubricating, as excess oil attracts more dust later.
Wipe away any extra with a dry cloth.
This step ensures your saw operates smoothly and quietly during use.
Step 7: Reassemble and Inspect
Once everything is clean and dry, it’s time to reassemble your circular saw.
Slide the blade back onto the arbor in the correct rotation direction.
Tighten the nut securely without over-torquing.
Ensure the blade guard moves freely and returns automatically.
Spin the blade by hand to confirm there’s no wobble or resistance.
Plug in or reinsert the battery, but don’t start cutting yet.
Run the saw briefly to test balance and airflow.
If everything sounds smooth, your saw is now ready for precise, effortless cutting again.
How Often Should You Clean a Circular Saw
How frequently you clean your saw depends on how often you use it.
For professionals cutting daily, a weekly deep cleaning is recommended.
DIY hobbyists can clean their saws after every few projects or heavy cutting sessions.
If you work with resinous woods like pine or cedar, buildup occurs faster.
A quick visual check before storage also helps catch early signs of dirt or rust.
Wipe down the housing and blade after every use for preventive care.
Regular maintenance takes minutes but saves hours of frustration later.
It also reduces the need for expensive repairs or premature replacements.
Additional Tips for Long-Term Maintenance
Never store your circular saw while it’s still warm from cutting.
Heat and trapped moisture can cause rust or warping.
Always unplug or remove the battery before long-term storage.
This prevents accidental startups and conserves battery life.
Store your saw in a dry, dust-free environment away from direct sunlight.
Humidity accelerates rust, especially on blades and fasteners.
Label and date your blades after cleaning so you can track maintenance intervals.
Finally, consider using a blade cover to protect teeth from dings and moisture.
Proper storage habits keep your saw ready for action whenever you need it.
Common Mistakes to Avoid When Cleaning
Many users unknowingly damage their saws during cleaning.
Understanding what not to do can save you from costly mistakes.
Avoid spraying cleaners directly into vents or the motor area.
Moisture can cause internal corrosion or short circuits.
Never soak the entire saw or use high-pressure water.
Only the blade and removable parts should be washed with liquid.
Don’t use harsh chemicals like acetone or oven cleaner on coated blades.
They strip away protective finishes and weaken the metal.
Finally, never reassemble the saw before all parts are completely dry.
Even a few drops of moisture can lead to rust formation.
Benefits of Regular Cleaning
A clean circular saw performs better and lasts longer.
You’ll notice smoother operation, faster cuts, and less noise.
It also reduces vibration and improves the accuracy of your work.
Clean blades stay sharper longer and produce cleaner edges.
Preventing buildup helps the motor maintain consistent RPMs under load.
You’ll also save money by avoiding premature wear and replacements.
More importantly, a clean saw is safer to use.
Clear guards and working triggers reduce the risk of kickback or malfunctions.
FAQs
How often should I clean my circular saw?
Clean it after every few heavy uses or weekly if used daily. Frequent cleaning prevents pitch buildup and overheating.
Can I use WD-40 to clean my circular saw?
Yes, but only as a lubricant or rust inhibitor. Avoid using it as a cleaner—it can attract dust and debris.
What is the best cleaner for circular saw blades?
A mix of warm water and mild dish soap works best. For stubborn resin, use a commercial pitch remover.
Can I use compressed air to clean the motor?
Yes, but use short, controlled bursts. Too much pressure can push dust deeper into the motor housing.
Should I remove the blade before cleaning?
Always remove the blade. It allows thorough cleaning and prevents injury during maintenance.
Can I clean a rusty circular saw blade?
Yes, soak it in vinegar or use rust remover, then scrub gently and dry completely.
Is it okay to use alcohol for cleaning?
You can use isopropyl alcohol to remove sticky residue but avoid soaking plastic parts.
How can I prevent sawdust buildup in the future?
Blow out vents after each use and wipe down surfaces regularly with a dry cloth.
Can I wash the entire saw in water?
Never submerge the saw. Only the blade and removable parts should come into contact with liquid.
What happens if I don’t clean my circular saw regularly?
Dirt buildup causes overheating, poor cuts, and may permanently damage the motor or blade.
Conclusion
A circular saw is one of the most reliable tools in any workshop.
But even the toughest machine needs care to stay at its best.
Cleaning your saw regularly keeps it cutting like new and prevents long-term damage.
It’s a simple habit that improves performance, extends lifespan, and enhances safety.
Remember to unplug before cleaning, use mild soap solutions, and dry thoroughly.
A few minutes of maintenance after each project ensures years of flawless operation.
When your saw glides effortlessly through material again, you’ll know it was worth the effort.

I’m Michael R. Turner, the founder, lead writer, and passionate DIY enthusiast behind 101diytools.com. With years of hands-on experience in home improvement and power tools, I built this platform to share practical tips, in-depth guides, and honest reviews to help DIYers of all skill levels tackle projects with confidence and the right tools.