How to Rip Boards with a Circular Saw Accurately
You finally set up your workshop and decide to build a new wooden shelf. The wood is there, the plan is clear, and your circular saw hums with excitement. But as you start cutting, the blade drifts off the line, leaving the board uneven. The result is frustrating — crooked edges, wasted wood, and another trip to the lumberyard. Every beginner faces this moment when they realize that ripping a board straight is harder than it looks.
Ripping boards means cutting along the grain, splitting a wide piece of wood into narrower strips. Professionals make it look effortless, but it’s all about preparation, blade choice, and guidance. A circular saw, when used properly, can deliver clean, precise cuts that rival table saws. The secret lies in understanding the technique, setting up correctly, and letting the tool do the work at its own pace.
According to woodworking experts, more than 70% of cutting errors occur because users rush or ignore proper alignment. When you learn to control your saw, measure correctly, and follow a steady rhythm, your cuts will be straighter and cleaner than ever before.
In this complete guide, you’ll learn how to rip boards with a circular saw accurately. From choosing the right blade to guiding your saw with confidence, every step here ensures smooth, straight cuts that make your projects look professional and satisfying.
Understanding the Basics of Ripping Boards
Ripping means cutting wood along its grain rather than across it. When you rip a board, you’re reshaping its width, not its length. This type of cut requires more control because the saw must follow the grain precisely without drifting.
Circular saws are excellent tools for ripping because they offer flexibility and portability. Unlike a table saw, which requires space and setup, a circular saw allows you to make clean cuts anywhere. However, without the right setup, it can easily wander off line.
The main difference between ripping and crosscutting lies in the direction of the wood fibers. Crosscuts slice across them, while rip cuts follow their natural pattern. Following the grain puts more strain on the blade, so the right power and blade type matter.
Always use a sharp blade designed for ripping. Dull blades can burn the wood, create jagged edges, and even increase the risk of kickback. Clean cuts depend on sharpness, speed, and pressure balance.
Maintaining a steady hand is crucial during a rip cut. Small wobbles add up quickly, creating uneven edges. Using a straight edge or rip fence helps prevent errors.
Safety is another key factor. Never rush a rip cut. Keep your board firmly supported, and ensure no loose objects or cords are in your path.
Ripping boards can feel intimidating at first, but with proper technique, it becomes second nature. Once you understand these basics, you’re ready to move toward precision and confidence.
Choosing the Right Blade for Ripping Boards
The blade determines how cleanly your circular saw rips wood. Ripping requires fewer teeth and wider gullets to remove material quickly along the grain.
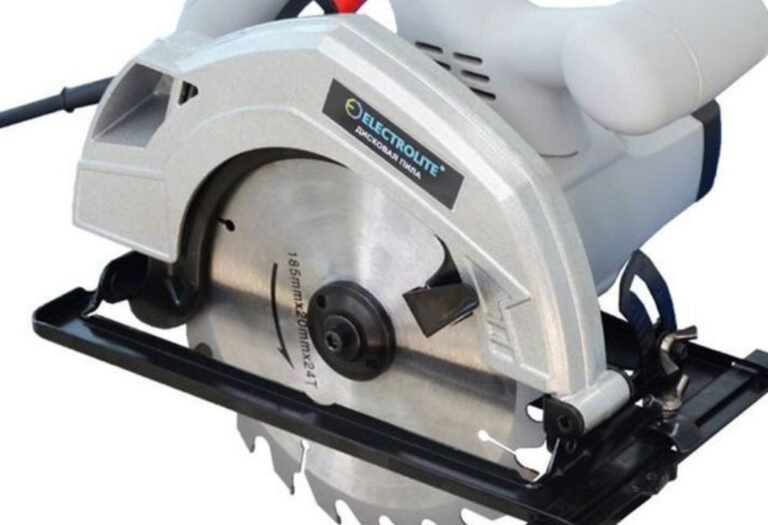
For most tasks, a 24-tooth carbide-tipped blade works best. It provides fast, efficient cuts with minimal resistance. Fine-tooth blades, such as 40T or 60T, are better suited for crosscutting rather than ripping.
Carbide-tipped blades may cost more initially but last far longer and stay sharper under heavy use. They also resist heat buildup, which can warp cheaper blades.
If you often cut hardwoods like oak or maple, consider a specialized rip blade with anti-friction coating. It stays cooler and cuts cleaner through dense materials.
Inspect your blade before every use. Warped or chipped blades cause vibration and uneven cuts. Replacing a blade costs less than ruining your entire board.
Cleaning the blade periodically with resin remover helps maintain efficiency. Dust and pitch buildup increase friction, reducing speed and accuracy.
Remember that circular saw blades spin clockwise. Always install the blade with teeth facing forward toward the direction of rotation. A backward blade won’t cut properly and can damage both the tool and the wood.
Choosing the right blade ensures smooth performance and a professional-looking result. It’s a small detail that makes a huge difference in quality.
Preparing the Work Area for a Clean Rip Cut
A well-prepared workspace prevents mistakes before you even start cutting. Begin with a stable surface like sawhorses or a sturdy workbench. Make sure the board is fully supported from end to end.
Use clamps to hold the board firmly in place. Movement during cutting causes misalignment, uneven pressure, and unsafe conditions. Tighten the clamps enough to stop slipping but without damaging the wood.
Clear your area of debris, cords, or sawdust piles. A clean floor ensures stable footing and balance. Good lighting also helps you follow your cutting line more accurately.
Mark your cut line with a pencil and straight edge. For better visibility, use masking tape over dark wood before marking. Double-check the measurements before starting.
Always wear safety gear — goggles, ear protection, and dust masks. Circular saws produce high noise levels and fine sawdust that can irritate eyes and lungs.
Before cutting, check that your blade guard moves freely and retracts properly. A stuck guard increases the risk of kickback.
Plan your cutting direction so the saw’s cord and body don’t interfere with your path. This small adjustment prevents awkward movements mid-cut.
A good setup takes a few minutes but guarantees professional-quality results. Preparation is the foundation of every accurate rip.
Setting the Correct Depth and Alignment on Your Circular Saw

Blade depth directly affects cutting efficiency and safety. As a rule, set the blade so it extends about one-quarter inch below the wood’s surface.
Too shallow, and the blade strains to cut, heating up quickly. Too deep, and it increases kickback risk while removing too much material. Adjusting properly ensures clean, smooth movement through the grain.
Next, check alignment between the saw base and the blade. Lay your saw flat on the board and ensure the blade follows your marked line perfectly. Even slight misalignment leads to uneven edges.
If your saw has a bevel adjustment, confirm it’s locked at zero degrees for straight rip cuts. A loose bevel angle will cause the blade to wander.
Before cutting, practice a few dry runs without powering the saw. Glide it along the guide to check comfort and positioning. This step builds muscle memory for a steady cut.
Proper alignment means your saw glides effortlessly along the cut line without forcing or adjusting mid-way.
Accurate depth and alignment are the core of straight, precise rips. Once dialed in, your saw will handle every cut with confidence and control.
Using a Rip Guide or Straight Edge for Accuracy
A rip guide or straight edge is your best friend for precision. It ensures your saw follows the cut line perfectly from start to finish.
You can buy a commercial rip guide or make one at home using a long, straight board or metal ruler. Clamp it securely to your workpiece parallel to your cut line.
Position the saw’s shoe snugly against the guide edge. This keeps the blade aligned and prevents drifting, even if your hand wobbles slightly.
For longer boards, track systems provide unmatched accuracy. They guide the saw smoothly along an aluminum rail, delivering factory-quality cuts.
If you don’t have a track, mark multiple reference points along your cut line to stay on track manually. Always recheck spacing between the saw base and the guide before cutting.
Avoid pushing the saw too hard against the guide. Let it glide naturally while maintaining light pressure.
A good rip guide transforms your circular saw into a precision tool. With practice, you’ll make straight cuts that rival table saw results.
Step-by-Step Process to Rip Boards with a Circular Saw
Start by measuring the width of the strip you want to cut. Use a tape measure and mark both ends of the board clearly. Connect the marks with a straight edge to form your cut line.
Set the blade depth so it just clears the board’s thickness. Adjust the saw’s base plate to rest flat against the surface.
Clamp your guide parallel to the cut line, ensuring it stays secure through the entire length. Position the saw so its blade aligns exactly with your mark.
Before starting, ensure the blade isn’t touching the wood. Pull the trigger and allow the saw to reach full speed. This prevents jerky starts and helps the blade cut smoothly.
Push the saw forward steadily, keeping light pressure against the guide. Do not force it through — let the blade do the work.
Keep your eyes on the line ahead, not directly on the blade. Anticipating the path prevents minor course corrections that cause uneven edges.
Once you finish the cut, release the trigger and wait for the blade to stop completely before setting the saw down.
Inspect your edge for smoothness. Small ridges can be sanded or planed easily, but major deviations usually result from pushing too fast or losing alignment.
Follow these steps patiently, and you’ll get straight, clean rips every time.
Common Mistakes to Avoid While Ripping Boards
One of the biggest mistakes is skipping the guide. Freehand ripping rarely stays straight and usually wastes material. Always use a straight edge or fence.
Cutting with a dull blade is another problem. It causes burns, smoke, and rough edges. Replace or sharpen blades regularly.
Pushing too fast overheats the motor and strains the blade. Smooth, consistent pressure yields better results.
Failing to secure the board causes movement and kickback. Always clamp your workpiece firmly before cutting.
Ignoring grain direction also leads to tear-out and splintering. Follow the grain whenever possible for cleaner edges.
Misaligned saw shoes create uneven bevels. Double-check alignment before every session.
Avoid starting mid-board unless you’re making plunge cuts. Begin from an edge whenever possible.
Finally, never stand directly behind the saw. Maintain a balanced, offset stance for safety and control.
Safety Tips When Ripping Boards with a Circular Saw
Always wear safety goggles, hearing protection, and a dust mask. Circular saws produce debris that can harm your eyes and lungs.
Inspect the tool and blade before every use. Look for cracks, chips, or loose guards.
Keep both hands on the saw during operation. Avoid reaching across the blade or leaning over the cut line.
Maintain a clean, clutter-free workspace. Tripping hazards and tangled cords increase accident risk.
Never cut through nails, screws, or knots without checking first. These can shatter blades or cause kickback.
Stand to the side of the saw’s path rather than directly behind it. This minimizes injury risk if the saw binds.
Unplug or remove the battery when changing blades. Accidental activation can cause serious harm.
Remember: safety habits build confidence, and confidence builds skill.
FAQ – Common Questions About Ripping with a Circular Saw
Can I rip wide boards with a small circular saw?
Yes, but make multiple shallow passes instead of one deep cut to avoid overloading the motor.
What’s the best saw blade for straight cuts?
A 24-tooth carbide-tipped blade provides the best balance between speed and smoothness for ripping.
How do I stop my cuts from drifting off line?
Use a rip guide or fence and maintain steady pressure against it while cutting.
Do I need a track saw for perfect rips?
Not necessarily. A circular saw with a straight edge or clamp guide can produce equally straight cuts with practice.
How deep can a 7¼-inch saw cut safely?
Most 7¼-inch saws can cut up to 2¼ inches deep, which is enough for standard lumber.
Conclusion
Ripping boards with a circular saw isn’t just about power — it’s about precision and patience. With the right blade, setup, and guide, anyone can achieve straight, professional-quality cuts at home.
Take time to prepare your workspace, measure accurately, and let the saw glide naturally through the wood. Avoid rushing, maintain control, and follow safety practices every time.
Once you master the rhythm of steady, guided cuts, every project feels smoother and more enjoyable. The more you practice, the straighter your cuts — and your confidence — will become.
ChatGPT can make mistakes. Check important info.

I’m Michael R. Turner, the founder, lead writer, and passionate DIY enthusiast behind 101diytools.com. With years of hands-on experience in home improvement and power tools, I built this platform to share practical tips, in-depth guides, and honest reviews to help DIYers of all skill levels tackle projects with confidence and the right tools.