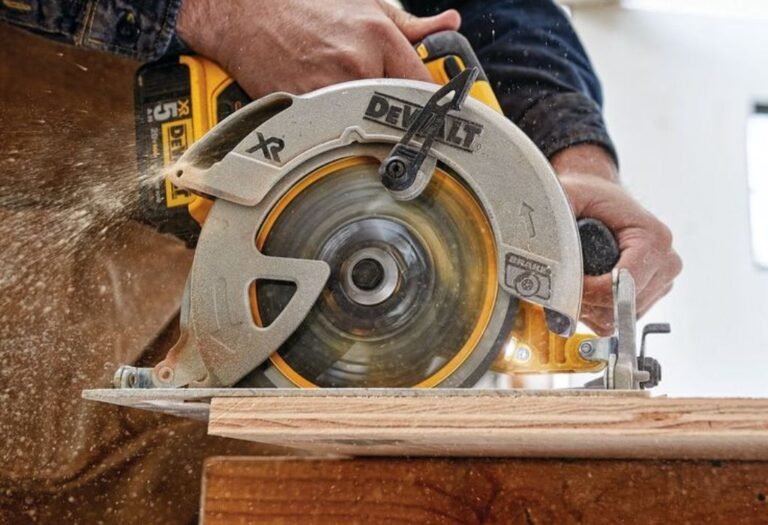
How to Cut Straight With a Circular Saw Like a Pro
Every DIYer remembers the frustration of cutting a perfect line that somehow ends up uneven. The sound of the blade, the smell of sawdust, and the disappointment of wasted wood are part of every beginner’s story.
It is easy to blame the saw when a cut veers off track. In reality, precision depends more on technique and preparation than on the tool itself.
Imagine building a shelf and watching one board sit unevenly against the other. A simple mistake in alignment can ruin the entire project’s symmetry.
According to tool safety data, over 60% of beginners struggle with straight cuts during their first few projects. The problem often lies in poor measuring and incorrect posture rather than blade quality.
This guide will show you how to cut straight with a circular saw confidently and accurately. From setup to technique, you will learn how to make every cut smooth, clean, and professional.
Now let’s start by understanding why straight cuts matter in every woodworking task.
Why Straight Cuts Matter in Every Project
A straight cut is the foundation of every precise woodworking project. When your cuts are clean and even, pieces fit together perfectly and create a professional finish.
Crooked cuts lead to uneven joints, unstable structures, and visible gaps that ruin appearance. Even small deviations can throw off the alignment of cabinets, frames, or shelves.
Straight cuts ensure stability and balance in furniture or framing work. They also make sanding, joining, and assembly faster because each piece aligns naturally.
Professionals know that a sharp, straight cut saves both material and time. Every inch of accuracy adds strength and consistency to the overall build.
For beginners, learning to cut straight builds confidence and reduces waste. Each precise cut becomes a step toward mastering circular saw control.
Understanding why straight cuts matter helps you appreciate the process instead of rushing it. The goal is not just to slice through wood but to shape accuracy into every project.
Tools and Setup You Need for Straight Cuts
The right setup makes straight cutting easier, safer, and more consistent. Before you even power up your circular saw, preparation determines most of your success.
Start with a sturdy workbench or sawhorse that supports your entire material. A stable surface prevents vibration and keeps the saw aligned throughout the cut.
Use a sharp, high-quality blade designed for the material you are cutting. A dull or wrong-type blade will pull the saw off track and cause rough, uneven edges.
A reliable straight edge or guide rail is essential for maintaining accuracy. These simple tools act as fences, keeping your saw perfectly aligned with your cutting mark.
Secure your workpiece using clamps so it cannot shift during the cut. Movement is the number one cause of wobbly or misaligned lines.
Finally, check that your circular saw is properly calibrated and all adjustments are tight. A balanced setup gives you full control, allowing you to cut straight with confidence every time.
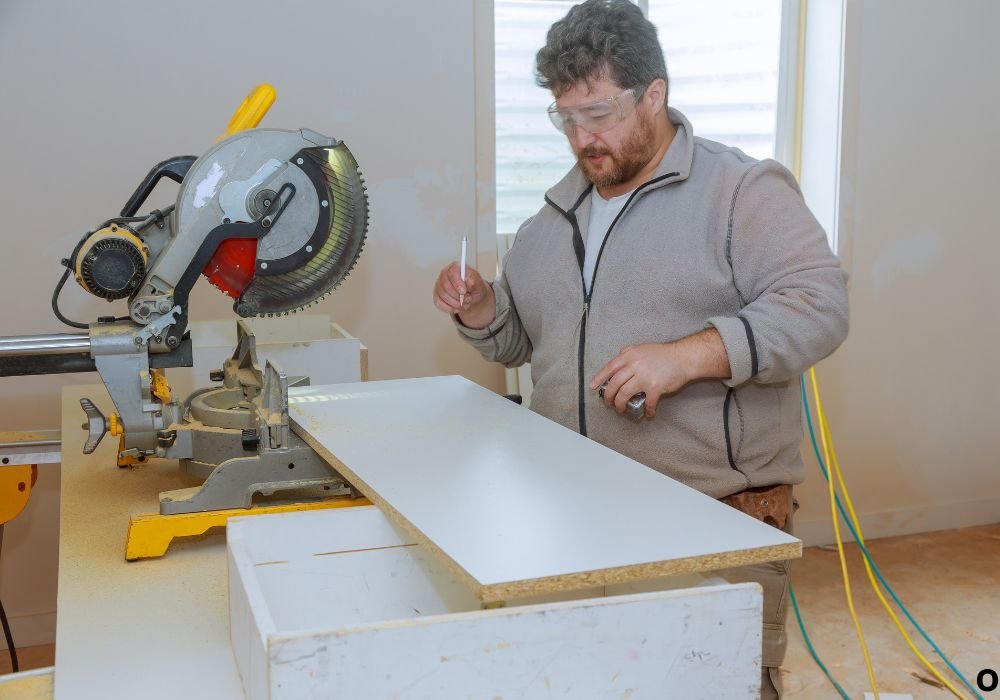
Marking and Measuring Your Cut Line Perfectly
A straight cut always begins with an accurate line. The more precise your markings, the easier it is to guide the saw without drifting.
Use a sharp carpenter’s pencil or fine-tip marker to draw your line. For long cuts, a chalk line or straight edge ensures perfect alignment from start to finish.
Always double-check your measurements before marking. As the saying goes, “measure twice, cut once,” because even a small error can ruin your project.
Make sure your measuring tape and square are clean and straight. Dirt, bends, or small dents can distort measurements and lead to misaligned cuts.
Good lighting also makes a big difference when marking your material. Shadows can hide your pencil lines and cause you to misjudge the position of the blade.
Take a few seconds to verify your marks before cutting. This careful preparation ensures your circular saw follows the right path with precision and confidence.
Using a Guide Rail or Straight Edge for Accuracy
A guide rail or straight edge is the secret weapon behind every perfect cut. It keeps your circular saw traveling in a steady line without drifting off course.
Place your guide along the cutting mark and clamp it securely on both ends. Make sure it stays completely flat and does not shift when the saw moves forward.
Use a framing square or measuring tape to confirm that the guide is parallel to your cutting line. Even a small angle can lead to a noticeable curve in your cut.
Position the saw’s base plate snugly against the guide before turning it on. This contact point helps you maintain accuracy from the start to the finish of the cut.
If you make repeated cuts of the same width, consider building a custom cutting jig. It saves time and guarantees consistent results across multiple boards.
Practicing with a guide rail trains your hands and eyes to work together. Once you master this technique, cutting straight with a circular saw becomes simple and satisfying.
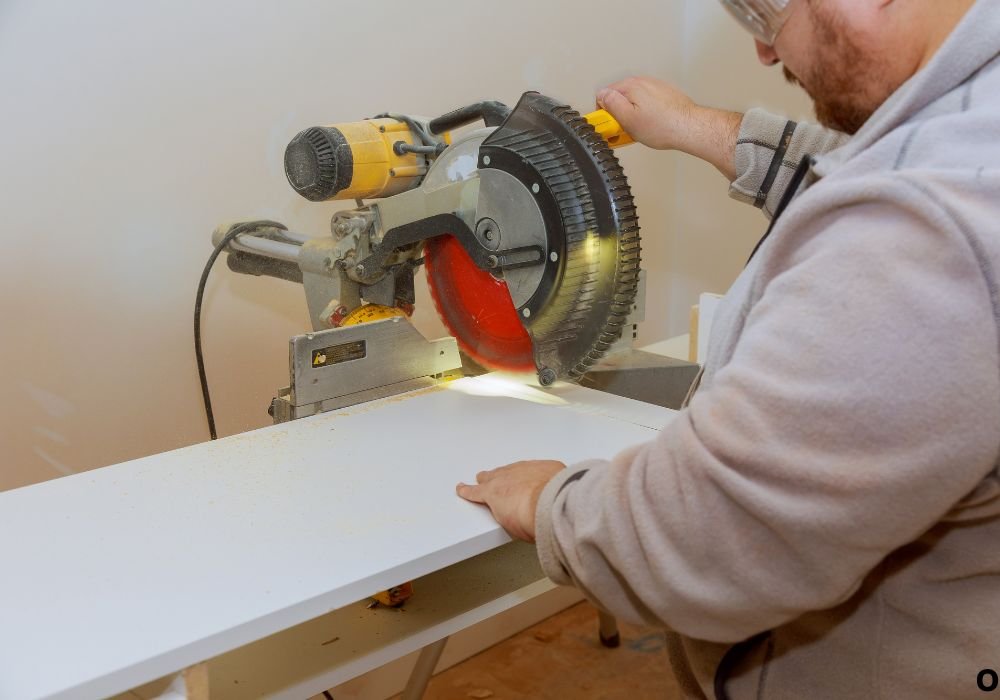
Step-by-Step Process for Making a Perfect Straight Cut
Cutting straight with a circular saw requires patience, focus, and rhythm. Once you understand the steps, every cut becomes smooth and predictable.
Start by securing your material on a flat, stable surface. Use clamps to hold it firmly so there is no vibration or unwanted movement during cutting.
Align the saw blade with your marked line before turning on the tool. Keep the base plate pressed against your guide rail or straight edge for consistent tracking.
Power on the saw and allow the blade to reach full speed before it touches the material. Pushing too early can cause splintering or a rough start to the cut.
Guide the saw forward slowly and steadily, letting the blade do the work. Avoid forcing the tool, as excessive pressure can bend the blade and cause crooked cuts.
When you reach the end, release the trigger and wait for the blade to stop spinning completely. Lifting the saw too early may damage the surface or throw off your next cut.
Common Mistakes That Lead to Crooked Cuts
Even with the right tools, small mistakes can ruin an otherwise perfect cut. Understanding these errors helps you correct them before they waste wood or time.
One of the most common mistakes is rushing the process. Moving too fast forces the blade off the line and causes the saw to drift.
Using a dull or wrong-type blade also affects precision. A worn edge burns the wood and pulls the saw unevenly through the material.
Failing to secure your workpiece properly allows vibration that changes the cut’s direction. Always clamp the board tightly and check stability before starting.
Poor body positioning and posture often cause drifting as well. Keep your stance balanced, shoulders square, and eyes aligned with the cut line.
Ignoring maintenance or skipping test cuts can also lead to problems. Taking a minute to inspect and calibrate your circular saw keeps every cut accurate and professional.
Pro Tips for Cleaner, Faster, and Straighter Cuts
Cutting straight is a skill that improves with technique, not just expensive tools. A few professional tricks can make your cuts smoother and more precise instantly.
Always keep your blade clean and sharp for consistent performance. Resin buildup and dull teeth create drag that pushes the saw off track.
Support both sides of your workpiece, especially when cutting long boards. This prevents the material from bending and pinching the blade as it nears the end.
Use masking tape over your cutting line to reduce splintering on plywood or laminated wood. Peel the tape away slowly after cutting to reveal a crisp, clean edge.
Follow the natural grain of the wood whenever possible. Cutting against the grain can cause tearing and make your straight line appear jagged.
Maintain a steady, relaxed grip and let the saw’s speed do the work. Smooth control and patience always lead to straighter, more professional results.
Safety Rules to Follow Every Time You Cut
Safety is the foundation of every successful cut. When you feel secure, you focus better and maintain a steady hand for precise results.
Always wear protective gear, including goggles, gloves, and ear protection. Wood chips and noise can cause long-term harm if ignored.
Inspect your circular saw before each use to ensure all parts are tight and functioning correctly. Never operate the tool with a loose guard or damaged cord.
Keep the cutting area clean and free from clutter. A messy workspace increases the risk of tripping or accidentally bumping into the material mid-cut.
Never cross your arms or lean over the blade path. Maintain a natural stance beside the saw with both feet balanced and stable.
Unplug or remove the battery before changing the blade or adjusting depth. Following these safety habits keeps your cuts straight and your hands protected at all times.
Maintenance and Practice to Perfect Straight Cutting
A well-maintained circular saw performs better and cuts straighter every time. Routine care prevents wear and ensures consistent precision.
After each project, unplug your saw and wipe away sawdust or debris. Use a small brush or compressed air to clean around vents and blade guards.
Inspect your blade for dull edges, resin buildup, or missing teeth. Replacing or sharpening it when needed keeps the saw cutting effortlessly through wood.
Lubricate moving parts such as the depth and bevel adjustments occasionally. Smooth operation helps you maintain full control during long or angled cuts.
Store your circular saw in a dry, dust-free place with its blade covered. Moisture and rust can quickly reduce both performance and accuracy.
Consistent practice is just as important as maintenance. The more you use your saw carefully, the straighter and cleaner your cuts will become over time.
Frequently Asked Questions About Cutting Straight With a Circular Saw
1. Why is it so hard to cut straight with a circular saw?
Most beginners struggle because of poor setup, uneven pressure, or dull blades. Once you fix these, maintaining a straight line becomes much easier.
2. What is the best way to keep my circular saw straight?
Use a guide rail or clamped straight edge along your cutting line. Keeping the saw’s base plate pressed against it ensures consistent direction.
3. Should I cut fast or slow with a circular saw?
Cut at a steady, moderate pace. Moving too quickly causes drifting, while moving too slowly can burn the wood and dull the blade.
4. Can I make straight cuts without a guide rail?
Yes, but it takes more control and practice. Mark your line clearly and focus on guiding the front edge of the base plate along it.
5. Why does my saw keep veering off the line?
This often happens from uneven grip or pushing too hard. Keep both hands steady and let the blade do the work.
6. How do I prevent splintering on plywood edges?
Apply masking tape along the cut line and use a fine-tooth blade. Cut with the finished surface facing down for a cleaner edge.
7. What blade is best for straight cuts in wood?
A 24-tooth carbide-tipped blade works great for general cuts. For smoother finishes, use a 40-tooth or higher fine-cutting blade.
8. Can I use a circular saw to cut metal or plastic straight?
Yes, but you must use the correct specialty blade. Metal-cutting and plastic-cutting blades are designed for slower, cleaner cuts.
9. How do I line up the saw correctly before cutting?
Align the blade’s edge with your mark, not the guard. Make sure the base plate is flush against your guide before powering on.
10. Why does my blade bind or smoke while cutting?
This happens when the blade is dull, dirty, or pinched by the material. Replace or clean it and support your workpiece properly.
11. What’s the ideal depth setting for straight cuts?
Set the blade about one-quarter inch deeper than the wood’s thickness. This reduces friction and keeps the saw steady through the cut.
12. Can a beginner achieve perfectly straight cuts?
Absolutely. With proper setup, sharp blades, and a clamped guide, even beginners can cut like professionals.
13. How do I keep long cuts perfectly aligned?
Reposition your guide as you progress, ensuring each section lines up with the same mark. Consistency is key for large boards or sheets.
14. Should I support both sides of the board while cutting?
Yes, always support both sides evenly. Unsupported ends can cause sagging that leads to blade binding and crooked cuts.
15. How can I practice cutting straighter?
Start by making shallow cuts on scrap wood using a guide. Over time, your hand control and alignment will naturally improve.
Conclusion: Precision Comes With Patience
Learning how to cut straight with a circular saw takes time, focus, and consistent practice. Every mistake you make becomes a lesson in control and precision.
Straight cuts are not just about blade speed or guide rails. They reflect your understanding of balance, pressure, and the rhythm of the tool.
The more attention you give to setup and posture, the more natural cutting will feel. Eventually, your hands will follow the line without hesitation or correction.
Even professionals still test their cuts on scrap wood before starting major projects. This simple habit ensures accuracy and keeps results consistent every time.
Patience is what transforms beginners into skilled craftsmen. By slowing down, checking your setup, and letting the saw work naturally, you master accuracy over time.
Every clean, straight cut you make builds confidence in your craftsmanship. With enough practice, cutting perfectly straight will feel as easy as drawing a line.

I’m Michael R. Turner, the founder, lead writer, and passionate DIY enthusiast behind 101diytools.com. With years of hands-on experience in home improvement and power tools, I built this platform to share practical tips, in-depth guides, and honest reviews to help DIYers of all skill levels tackle projects with confidence and the right tools.